TF Beechcraft Bonanza F33A Build
 12-07-2019, 02:19 AM
#526

Thread Starter
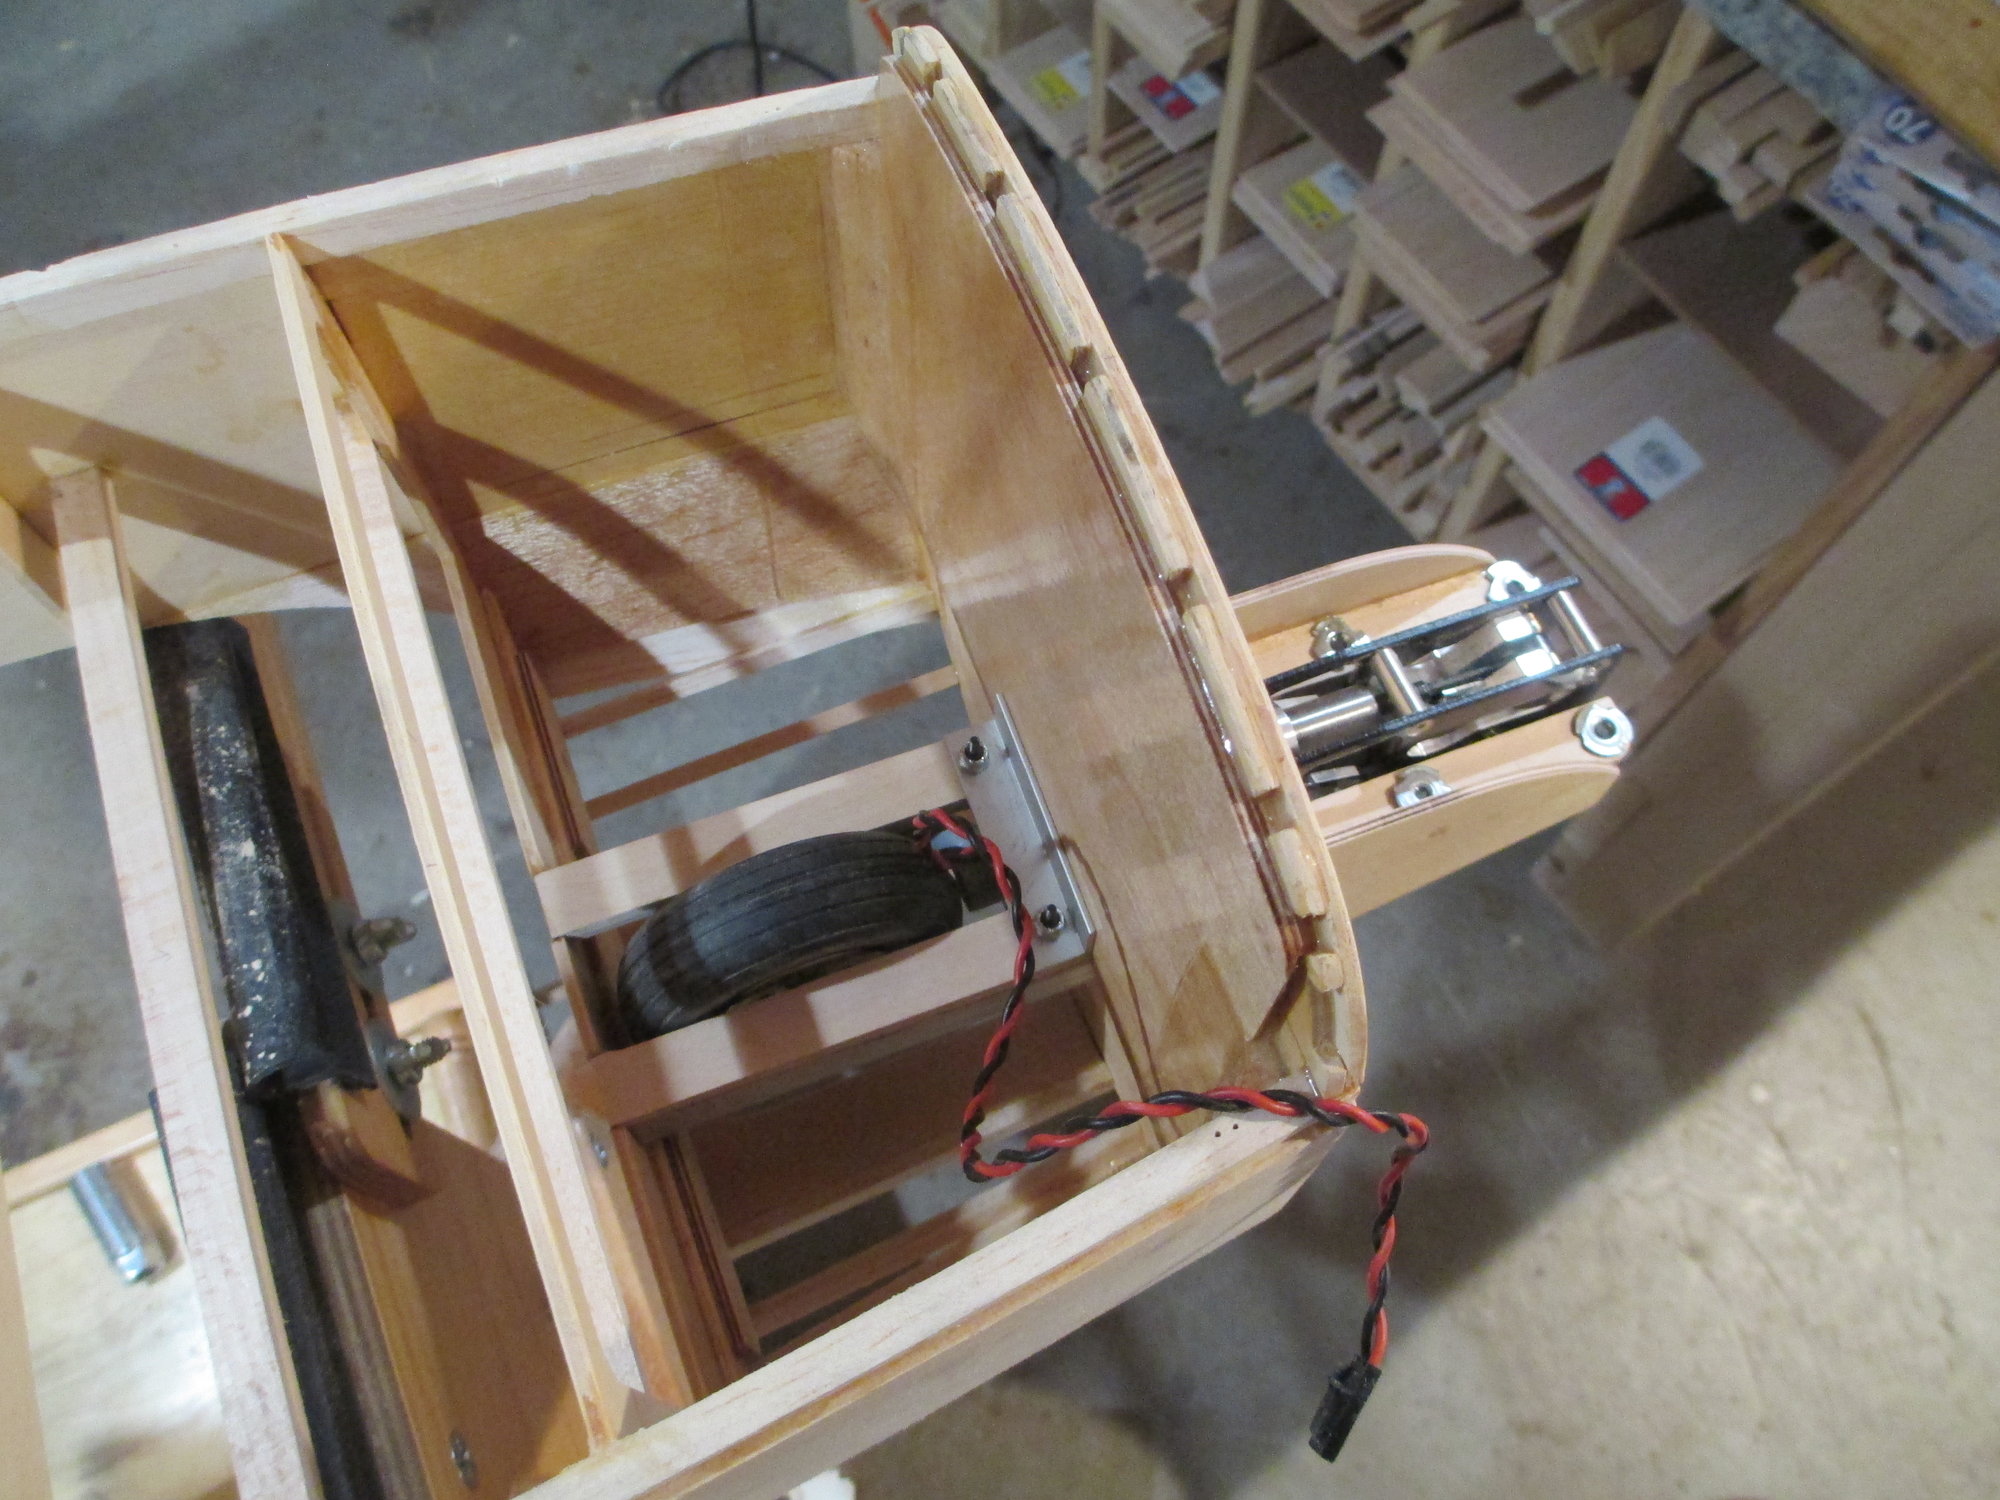
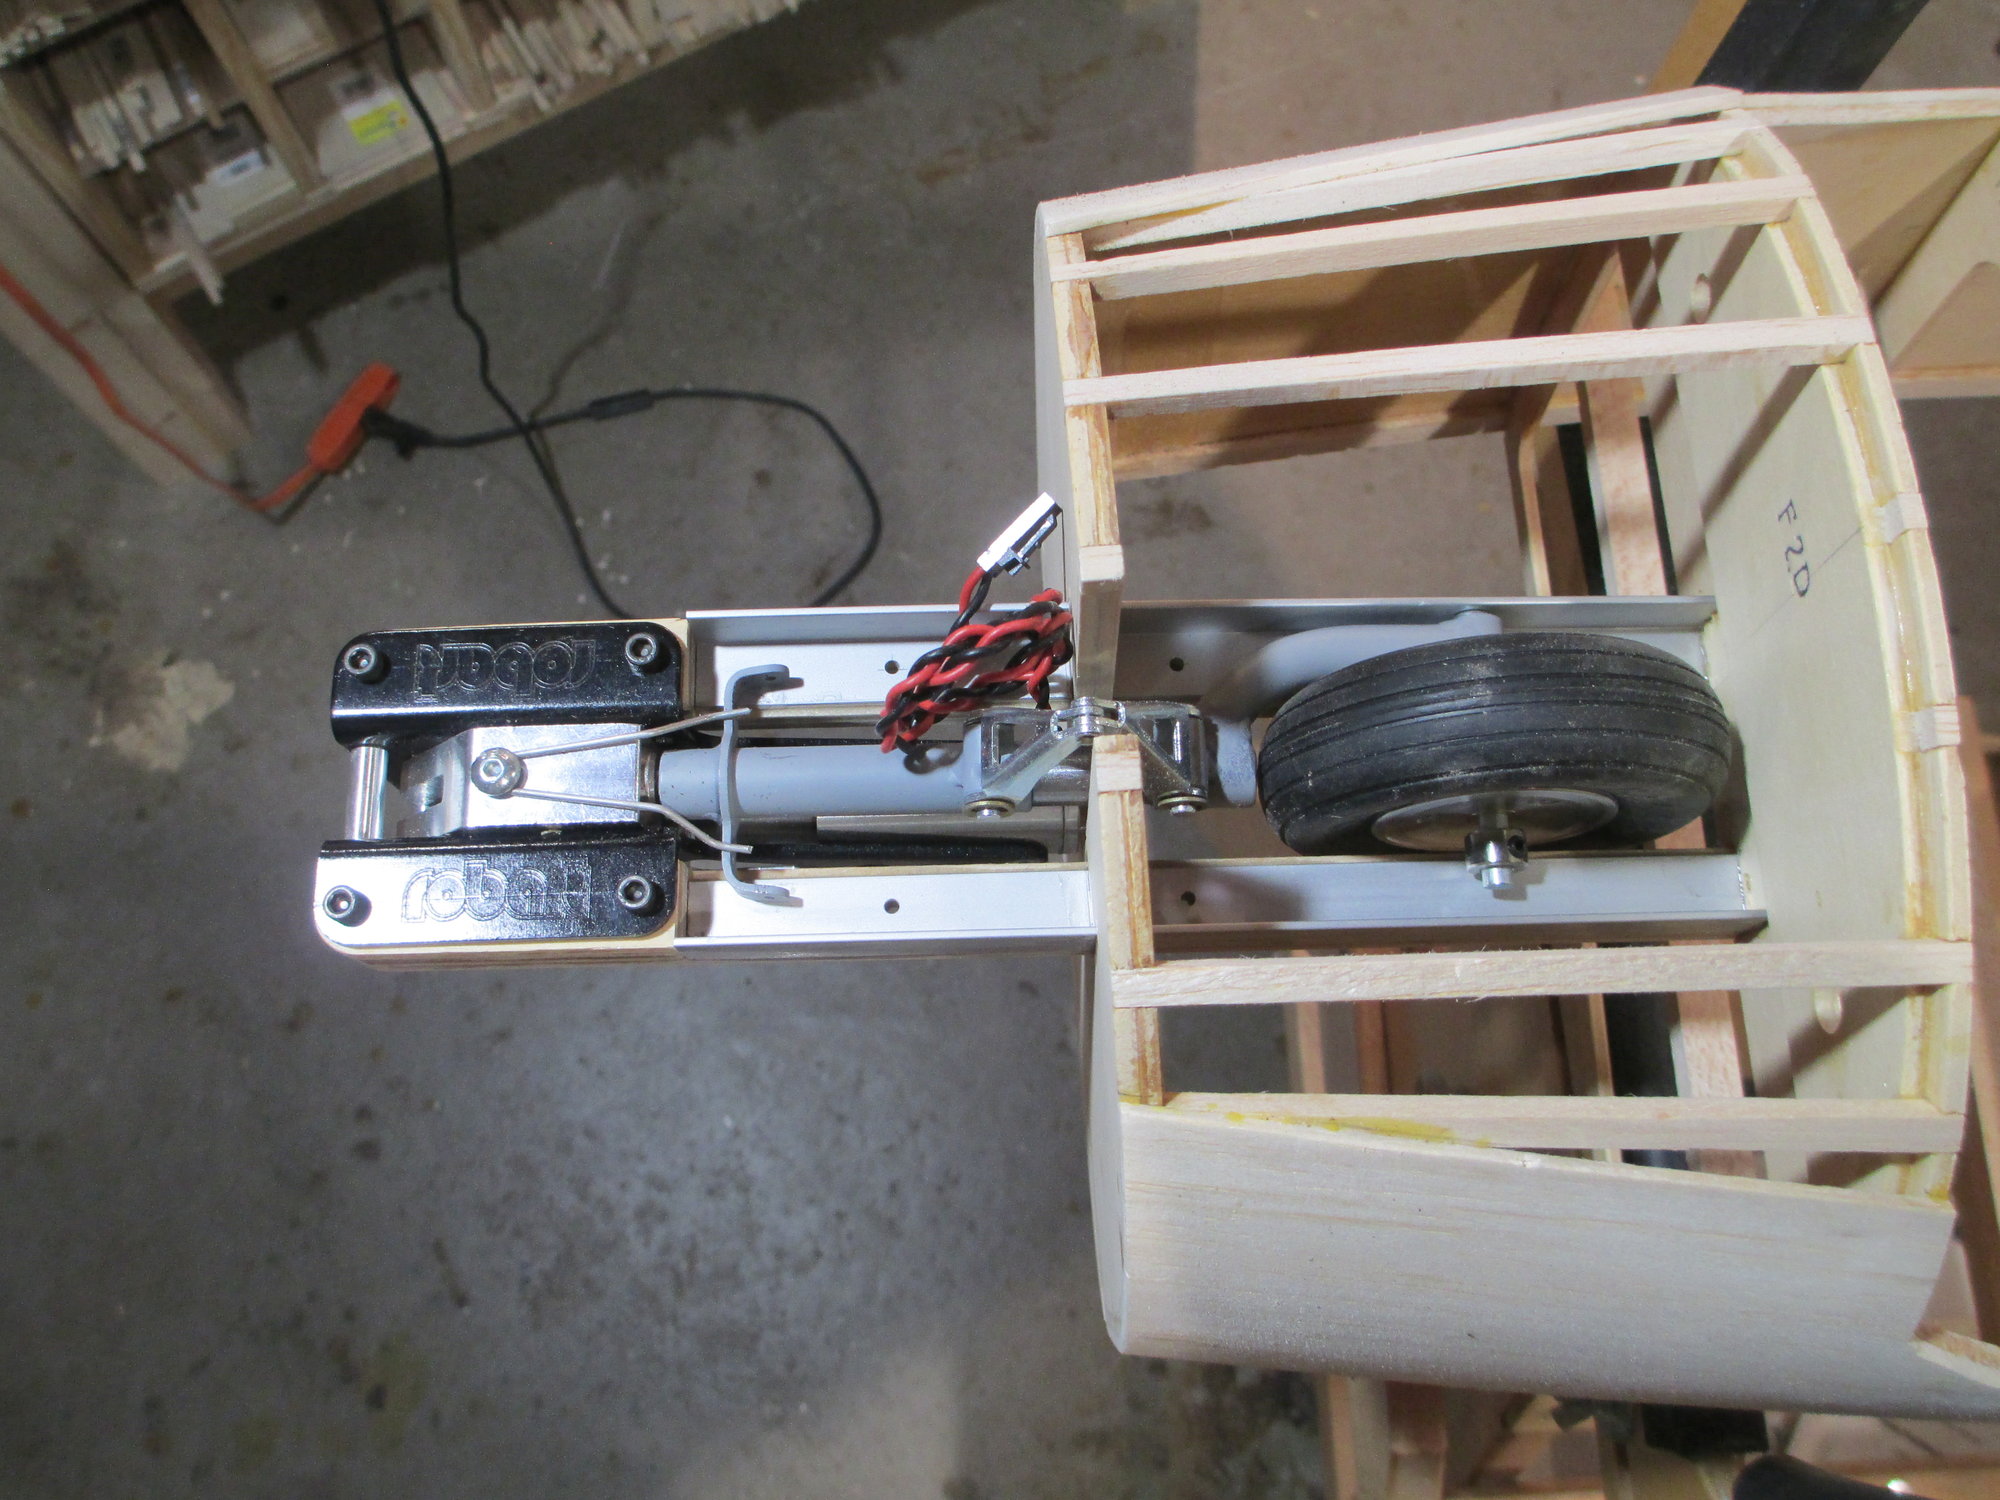
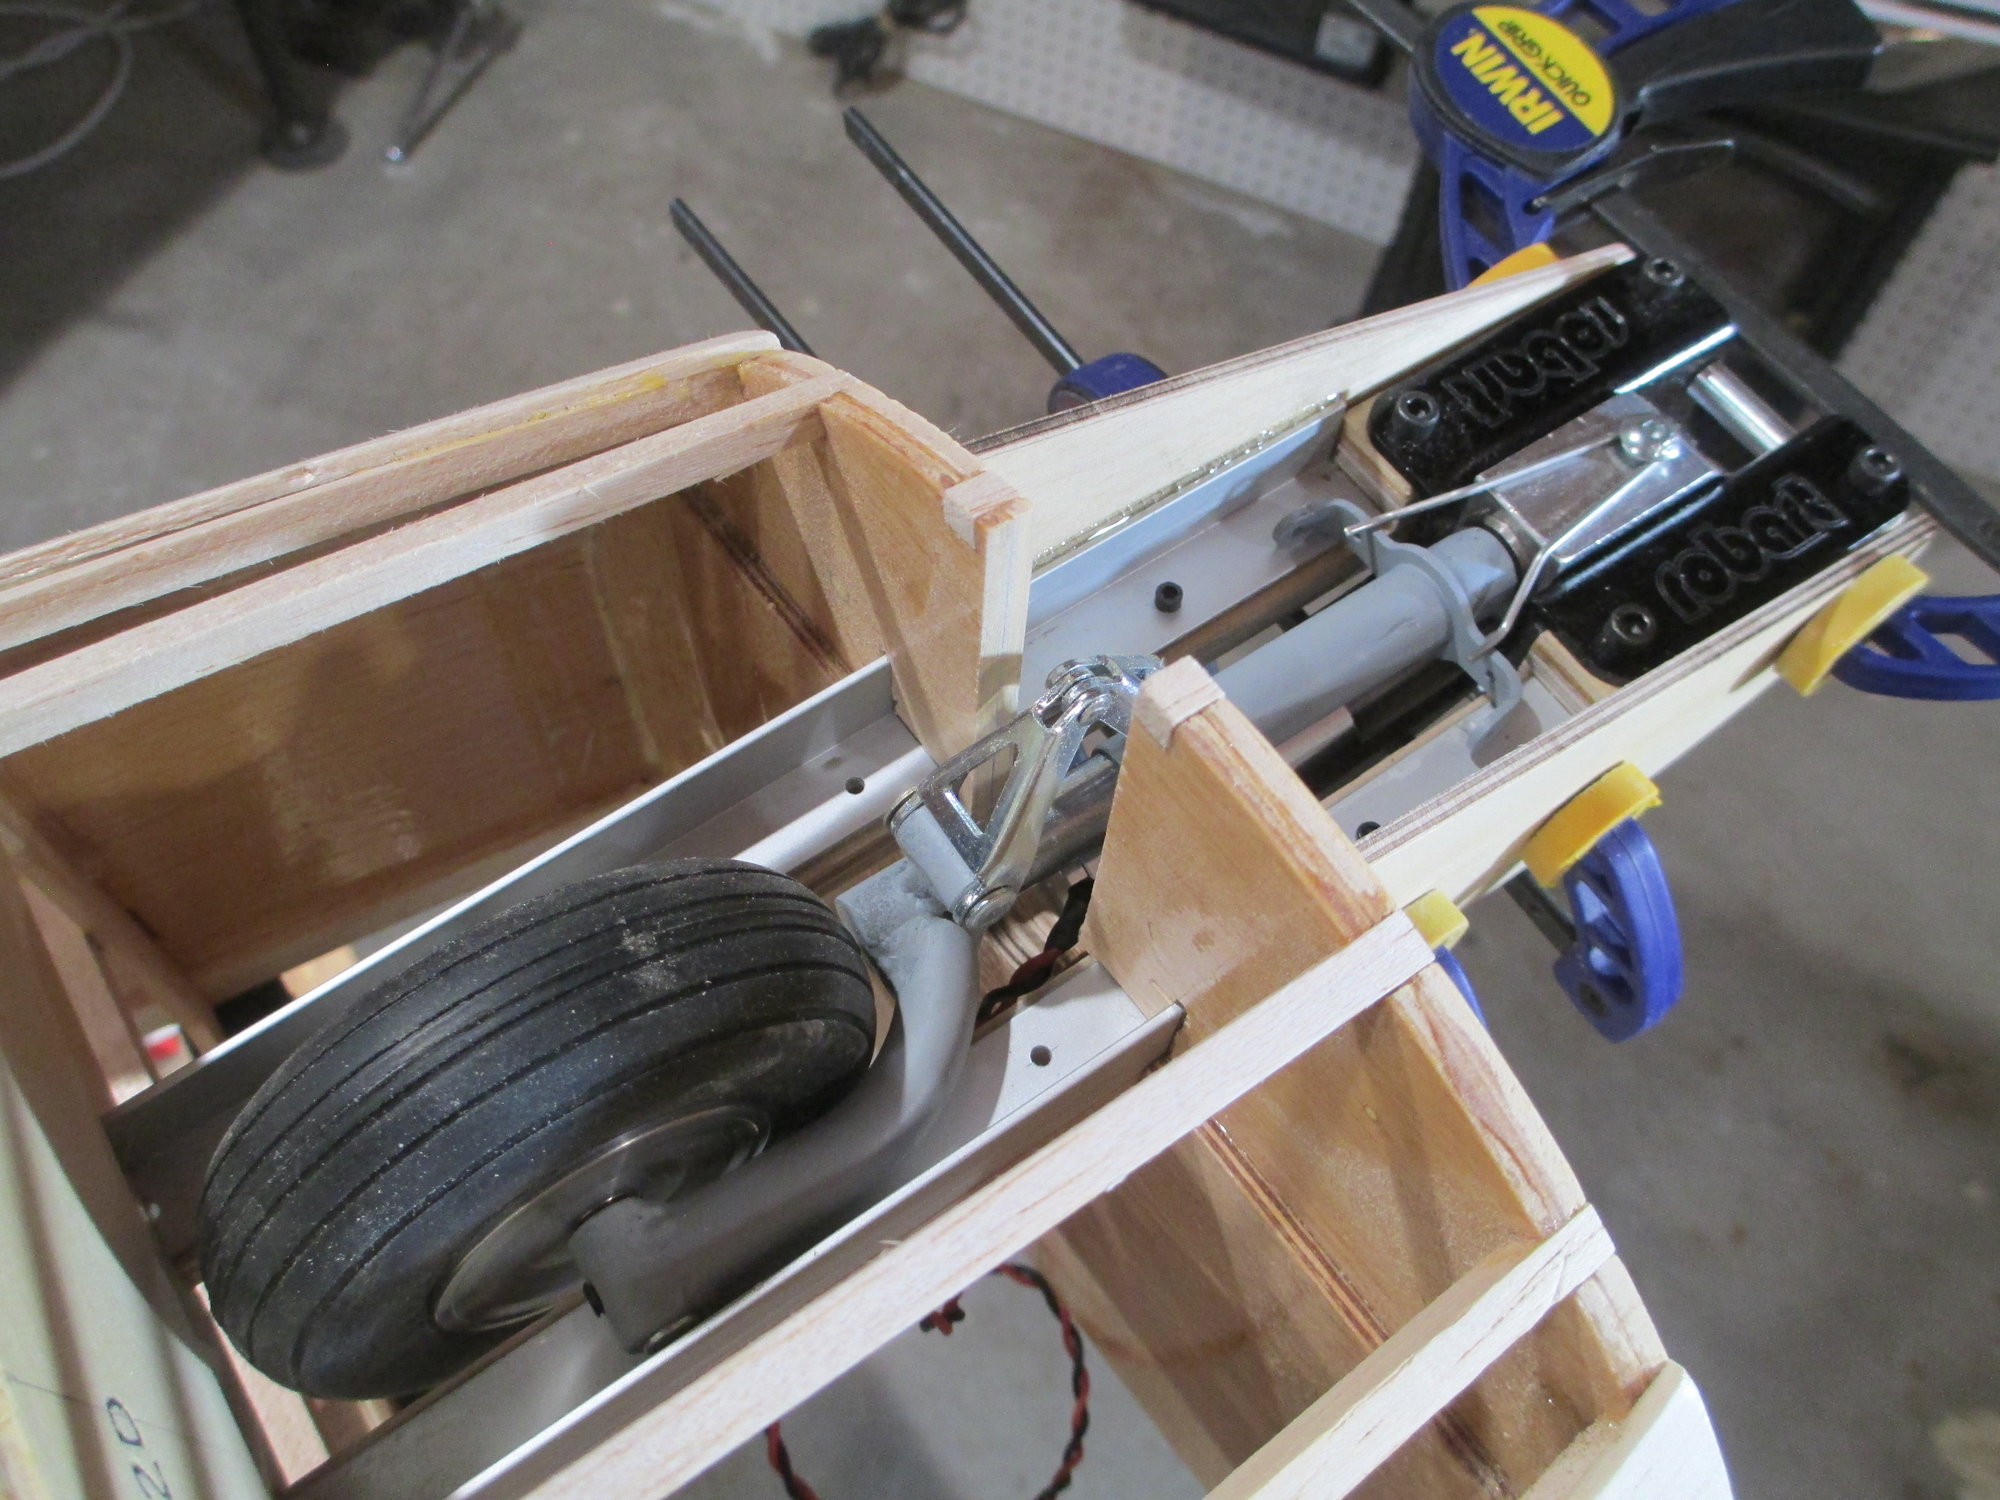
I would carry the aluminum angle right up to the front edge of the plywood rail (sandwiched between the plywood rail and mounting block and gear unit), otherwise you’ll have a stress concentration between the current end of the aluminum angle and the gear mount.
Also, maybe add some kind of gusset between rail and firewall?
Also, maybe add some kind of gusset between rail and firewall?
Last edited by VincentJ; 12-07-2019 at 04:26 AM.


 12-07-2019, 09:43 AM
#529
Thread Starter
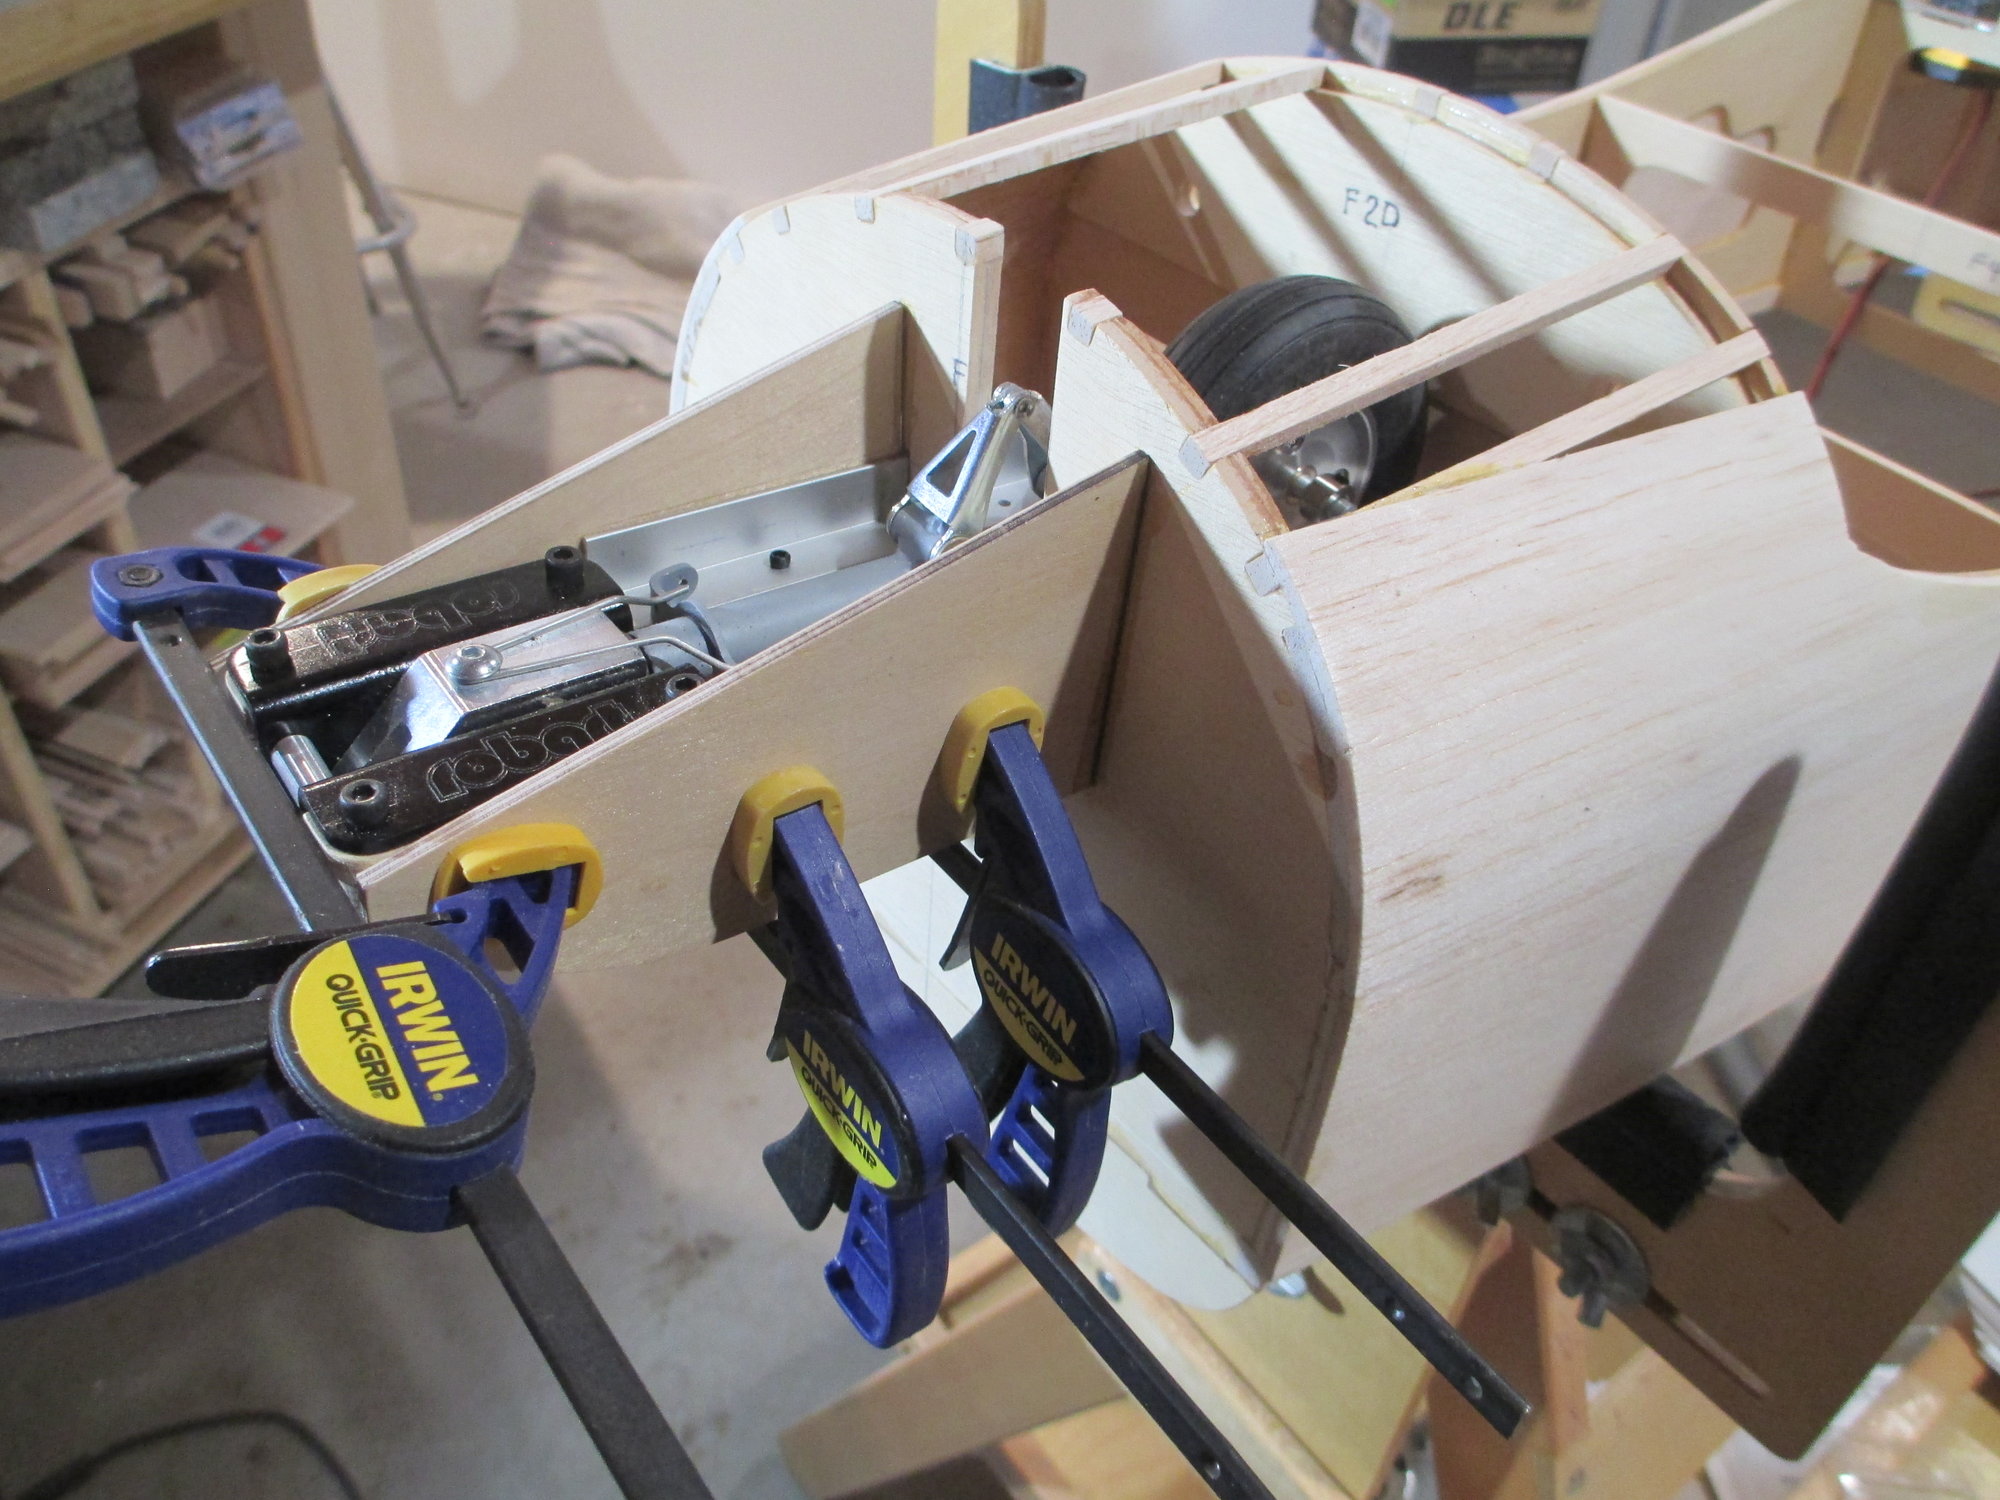
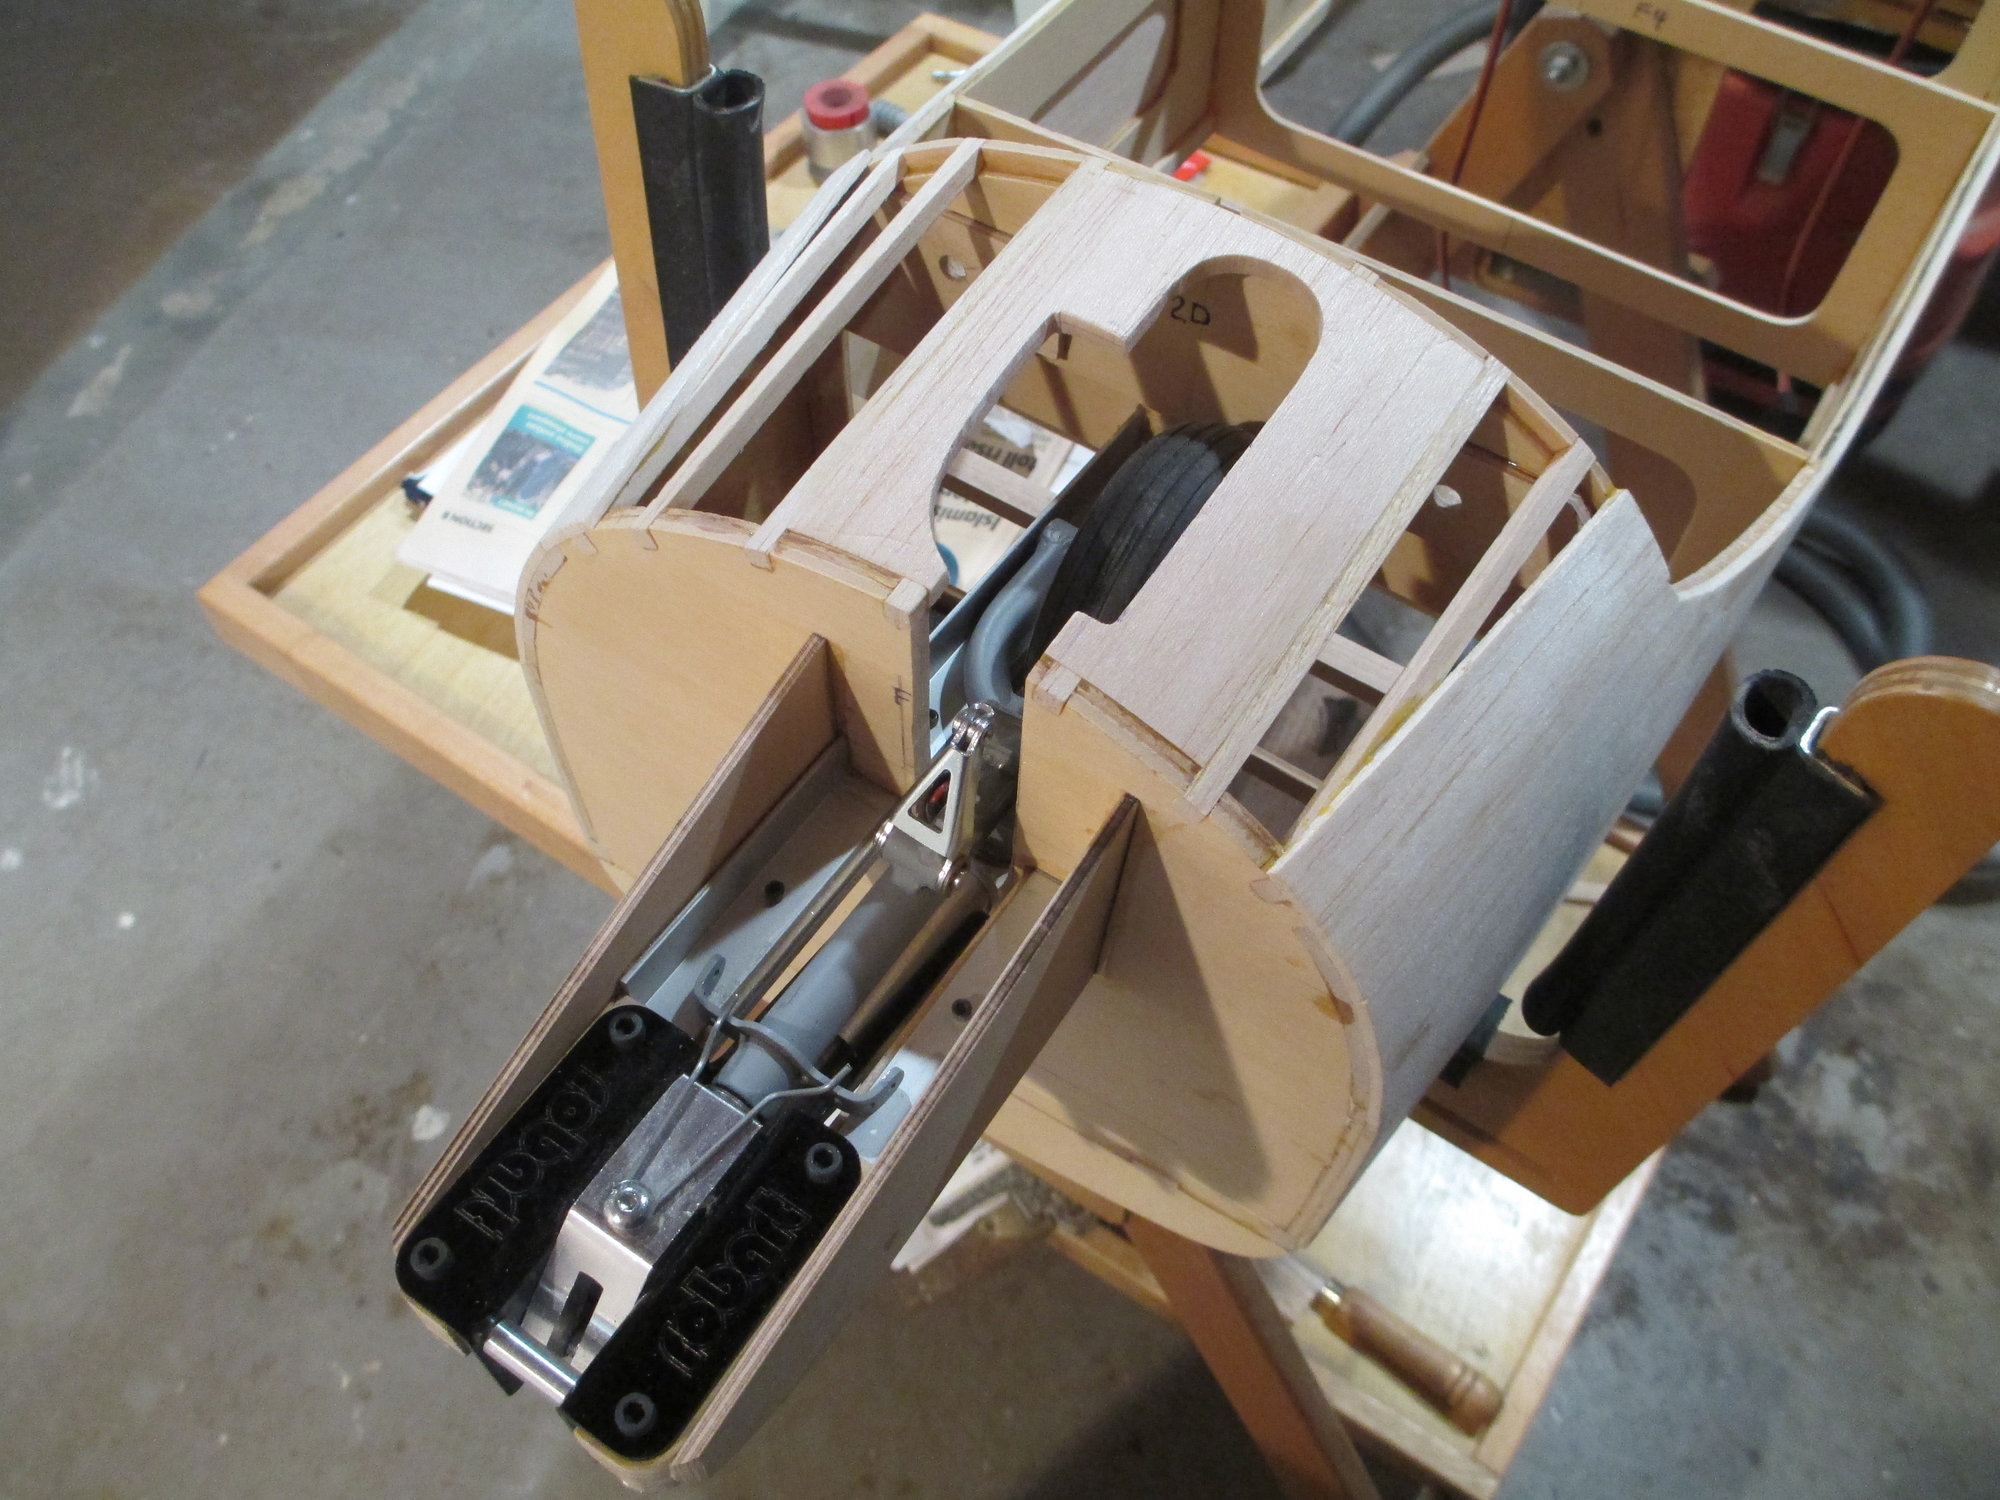
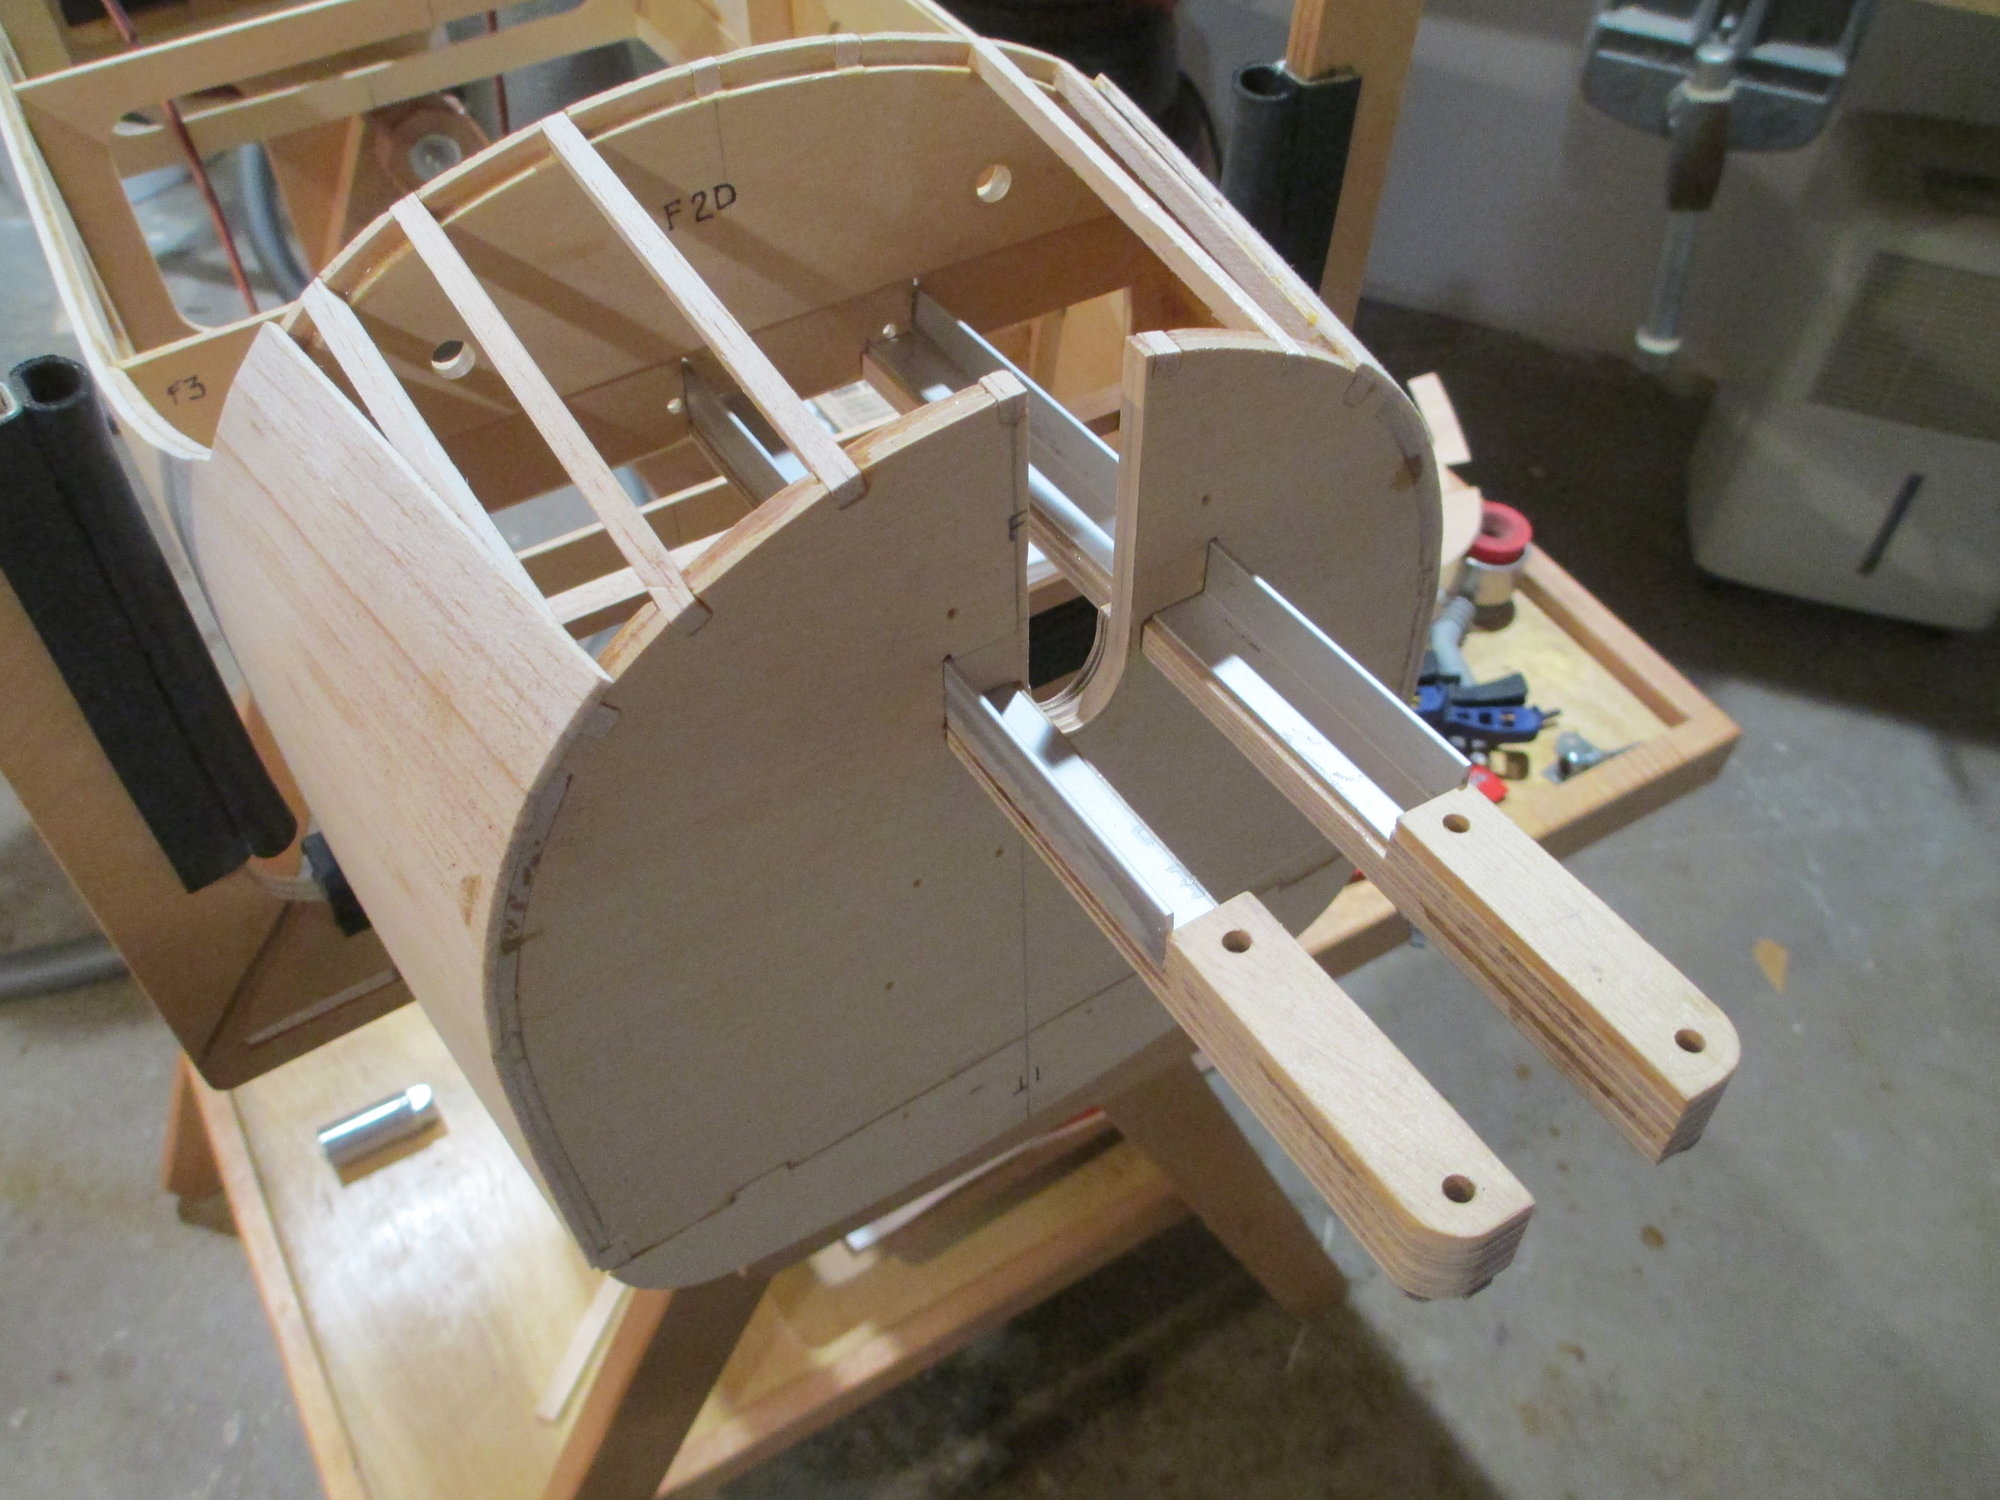
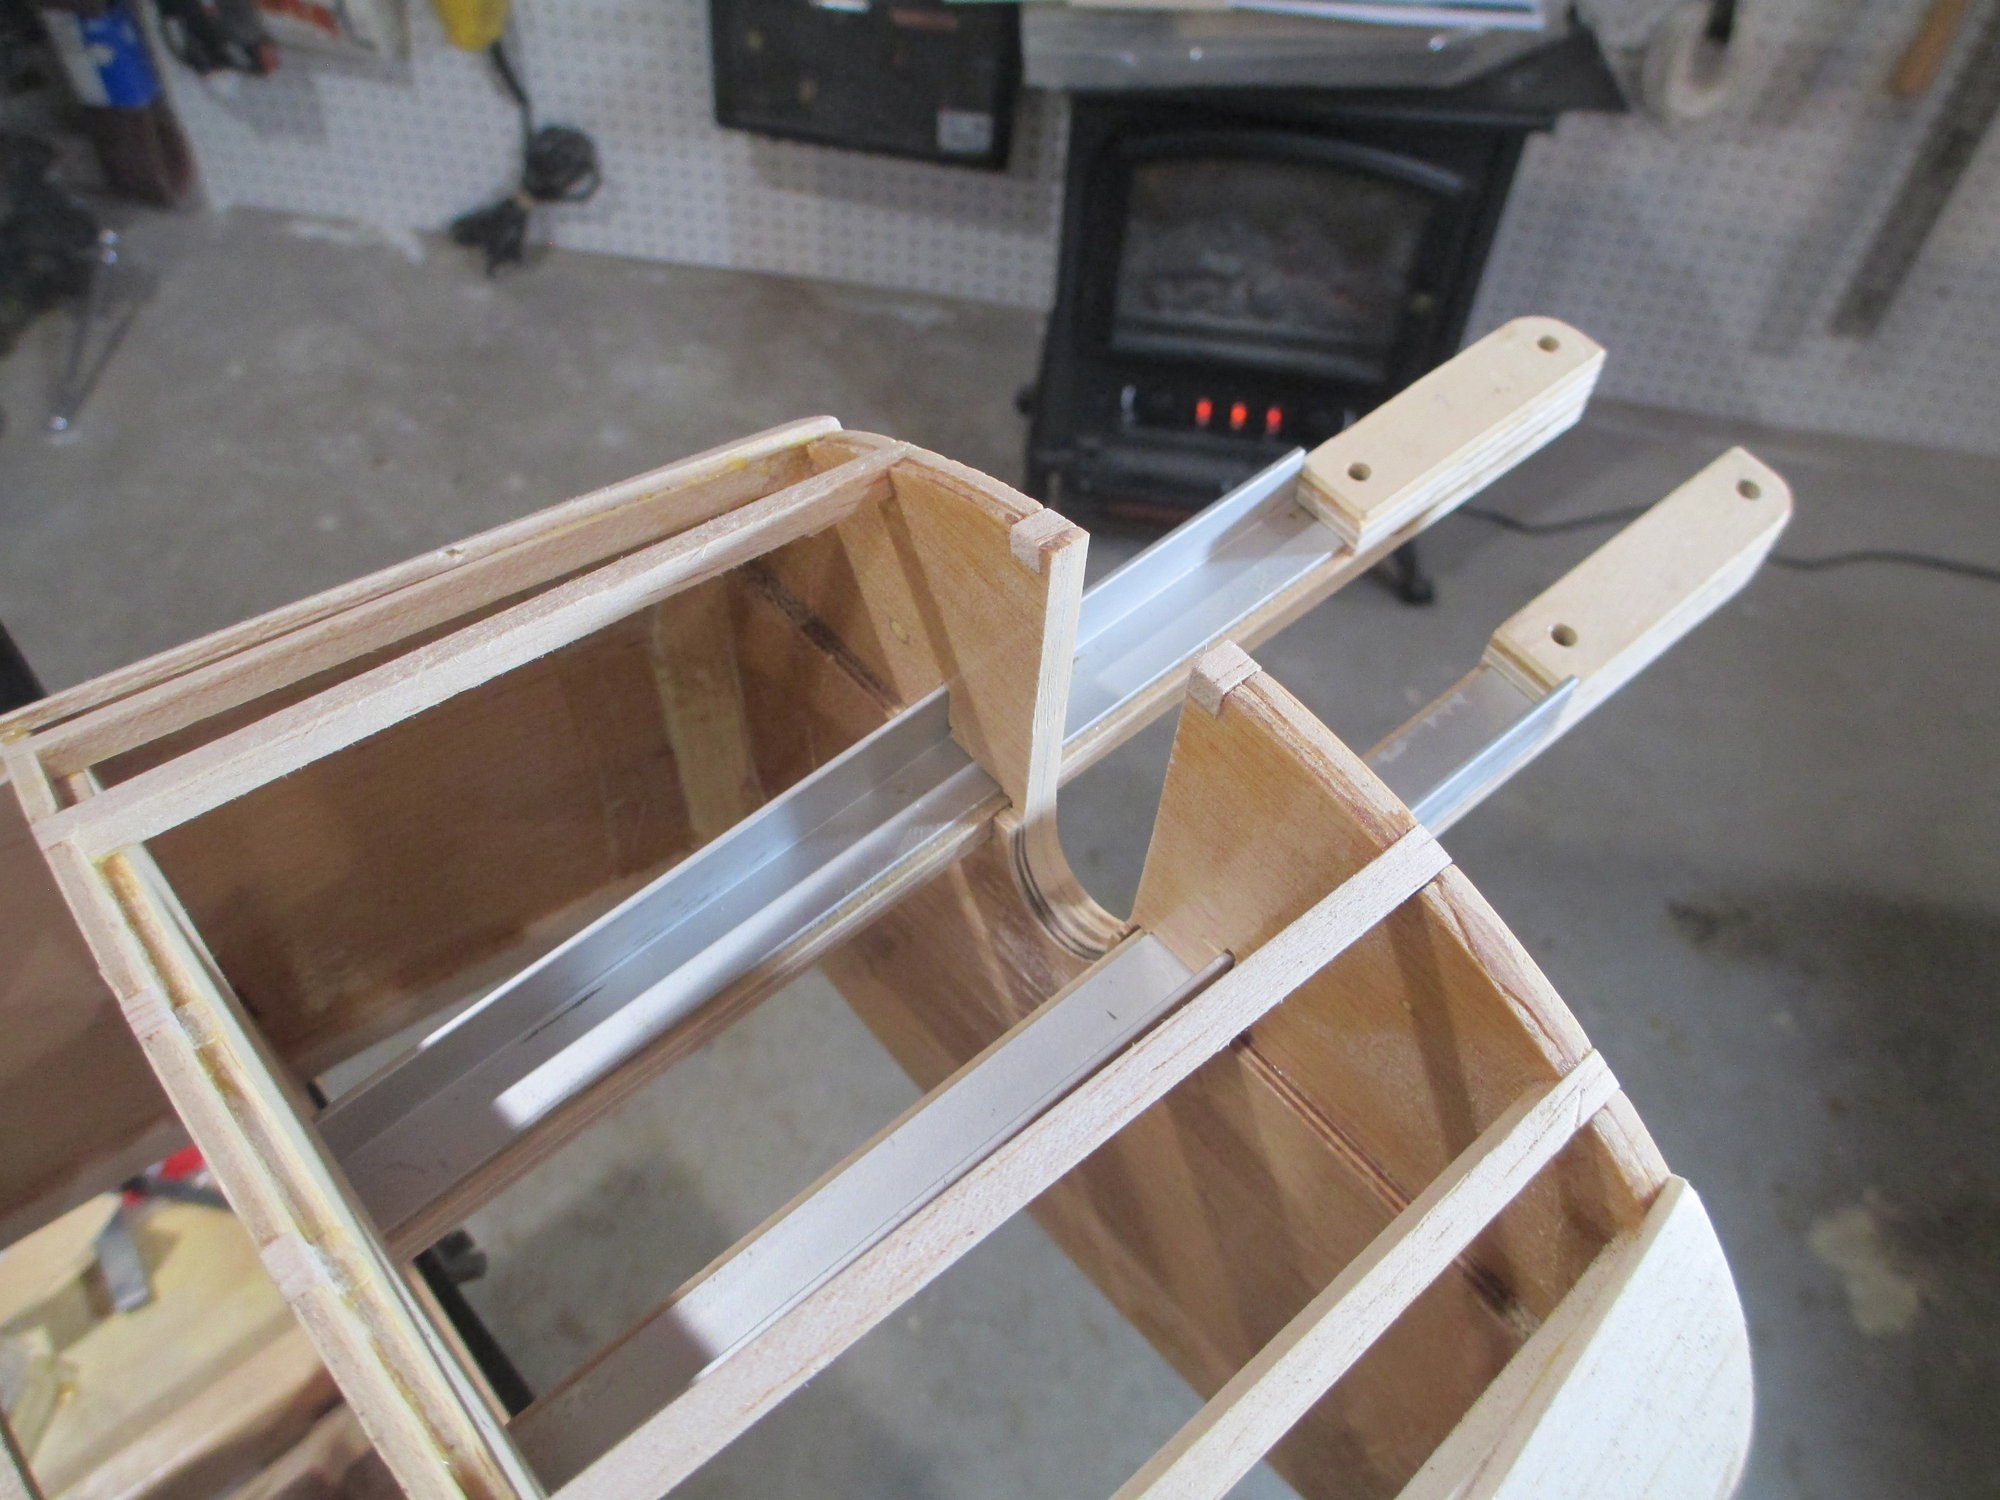
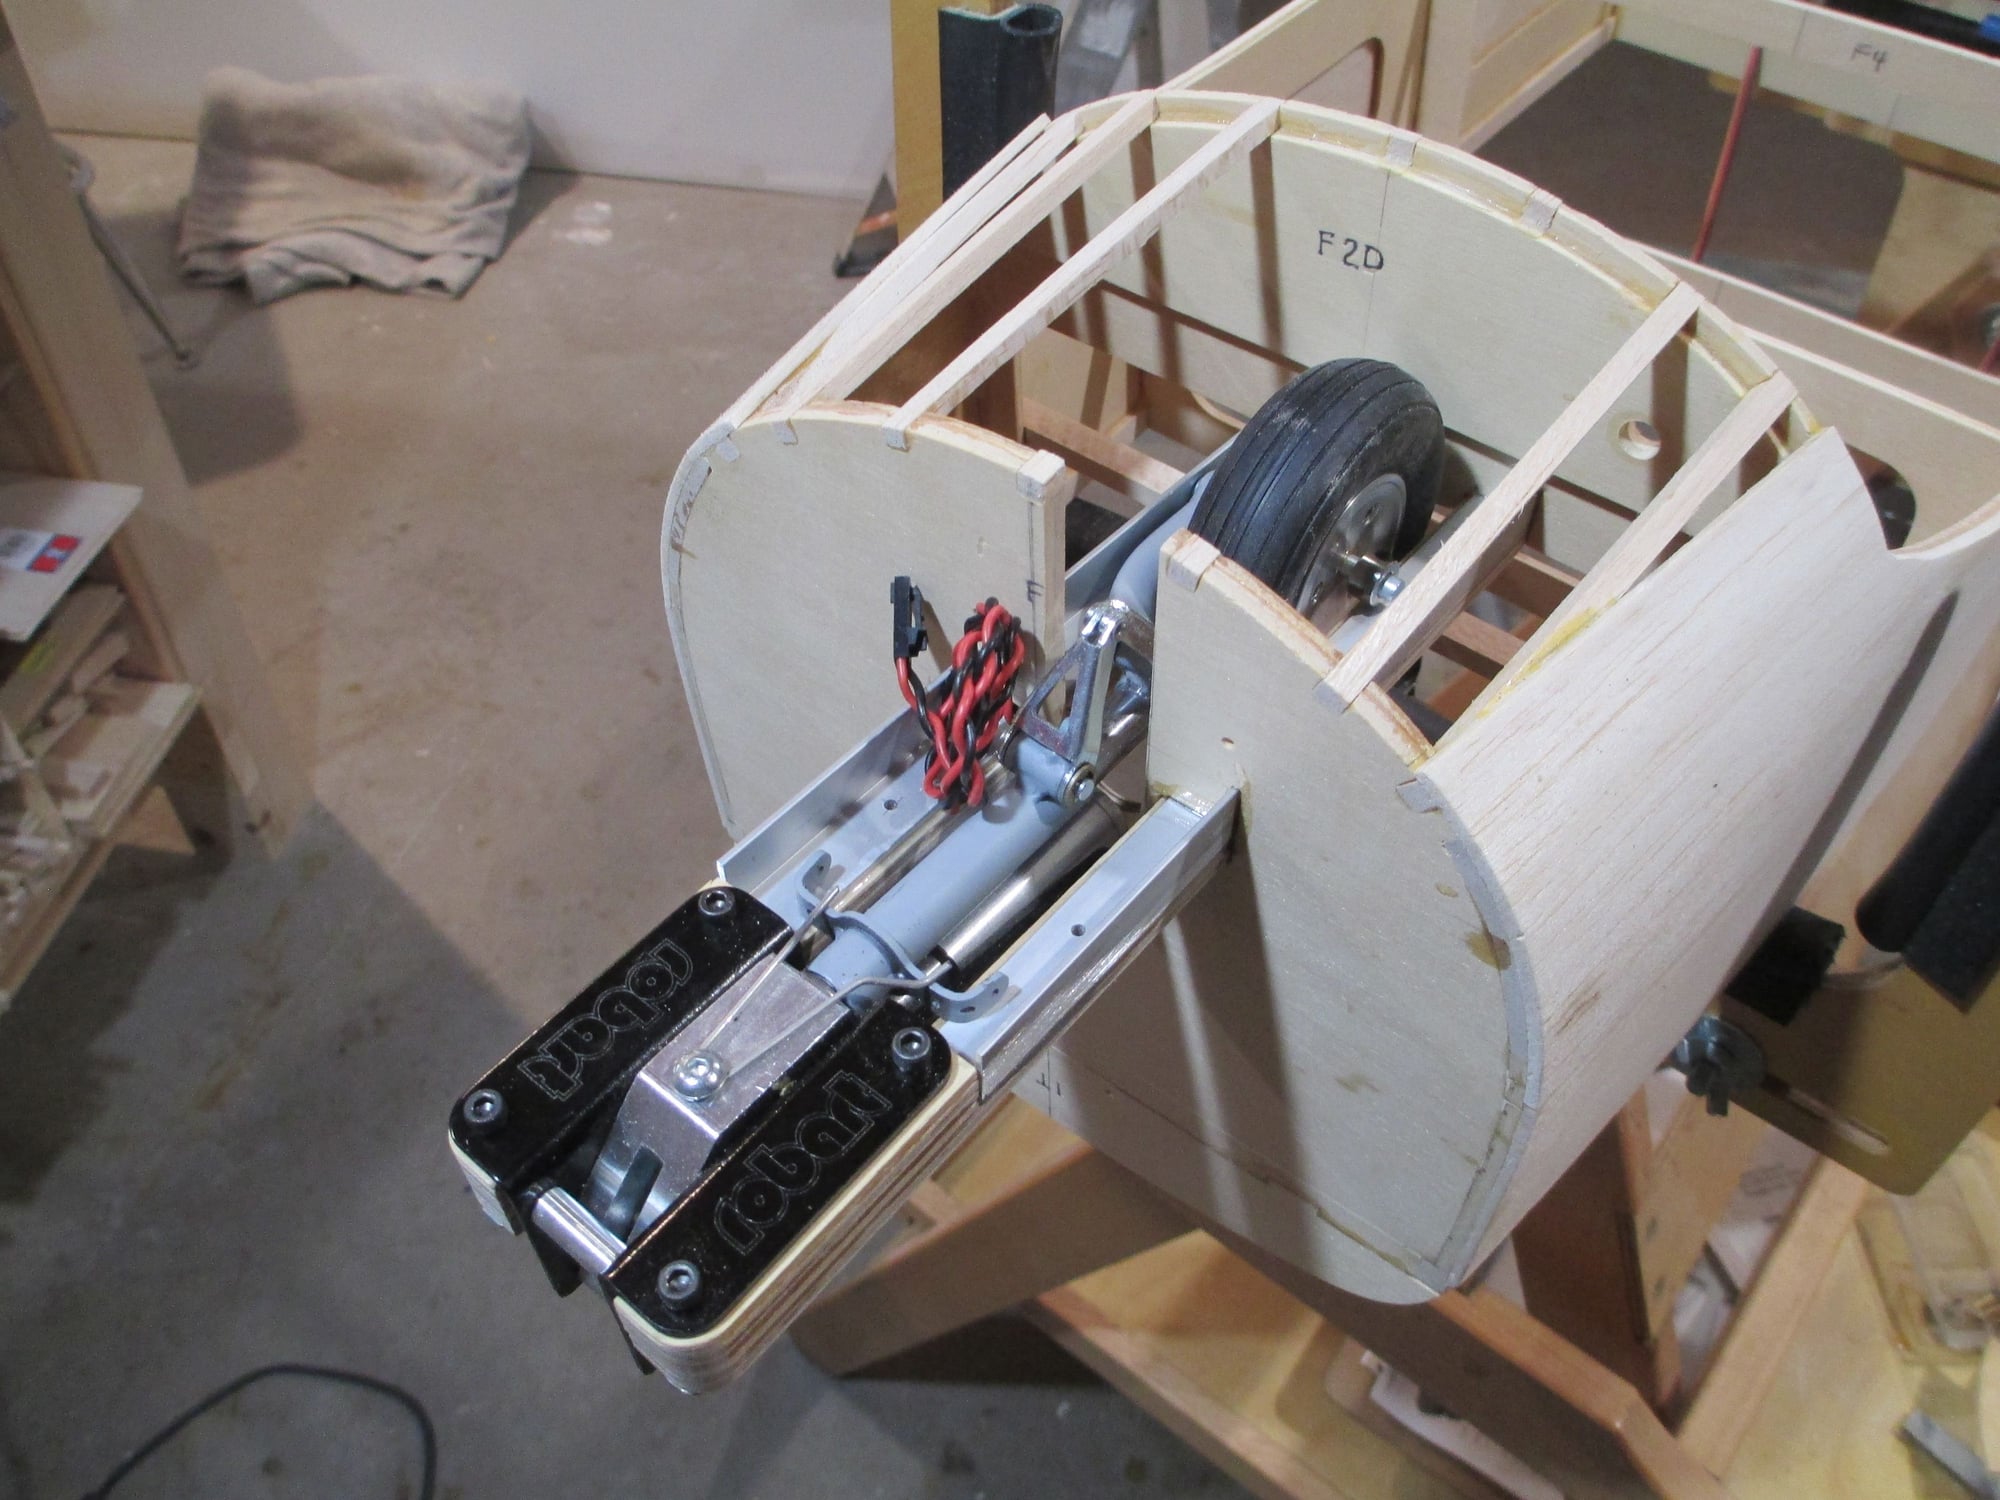
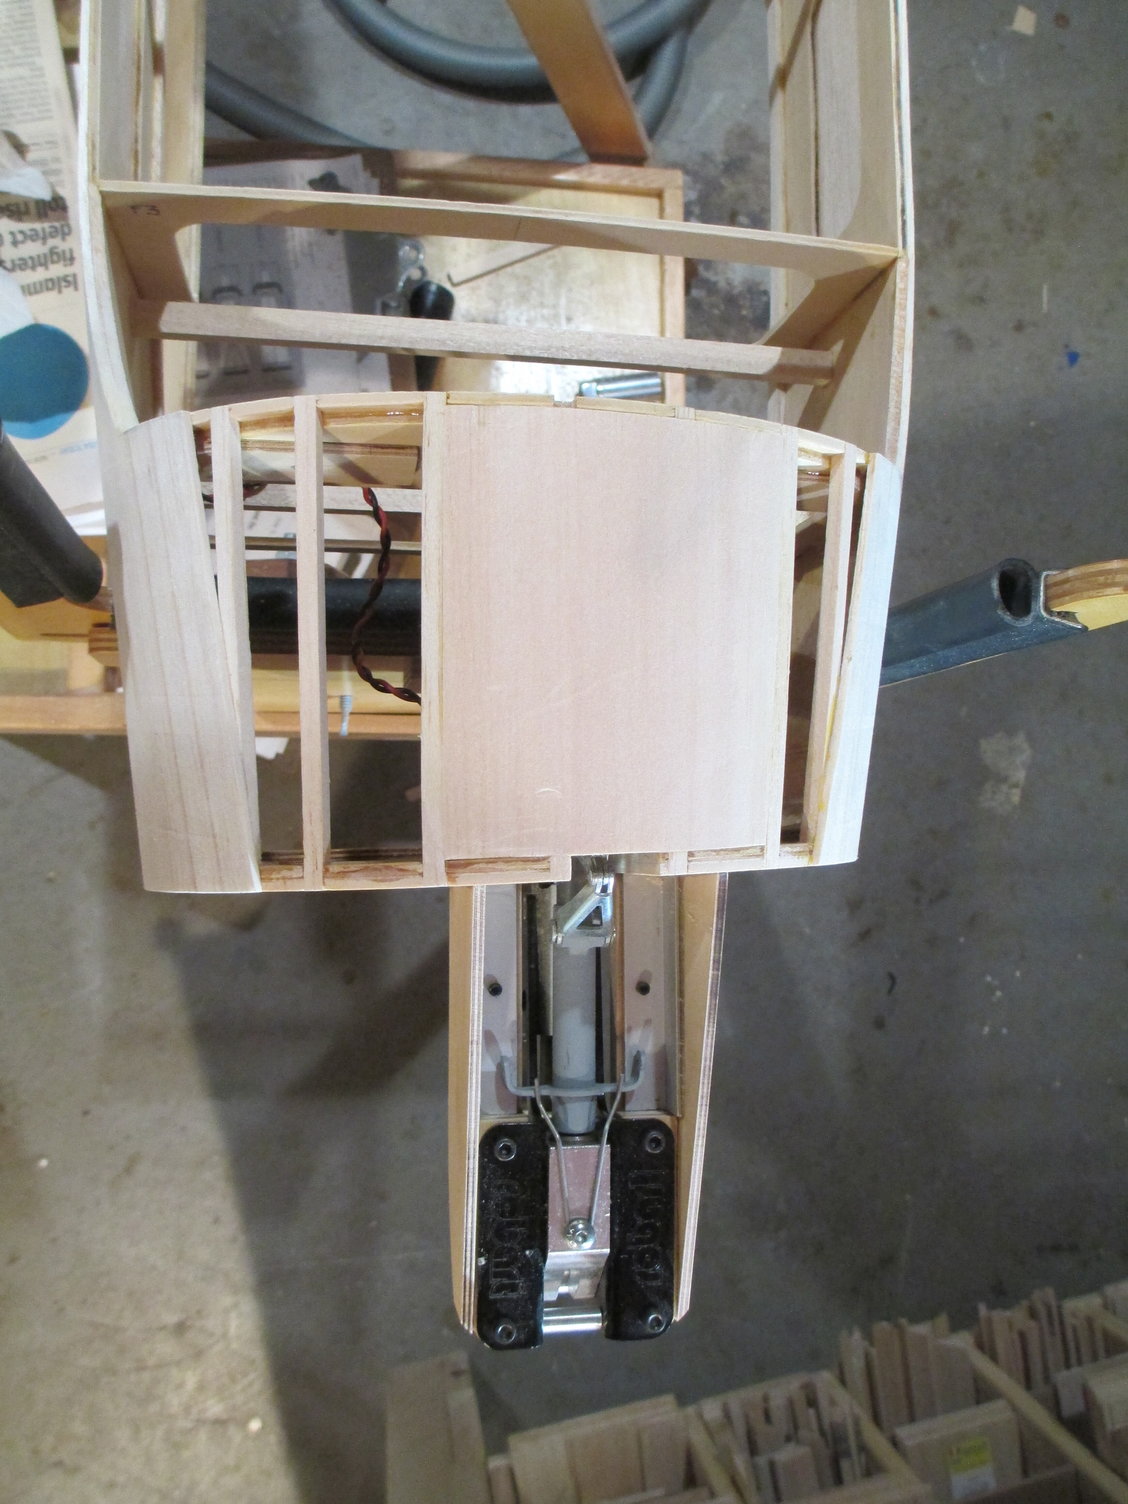
Gussets flank each side of the landing gear rail and are epoxied into position.
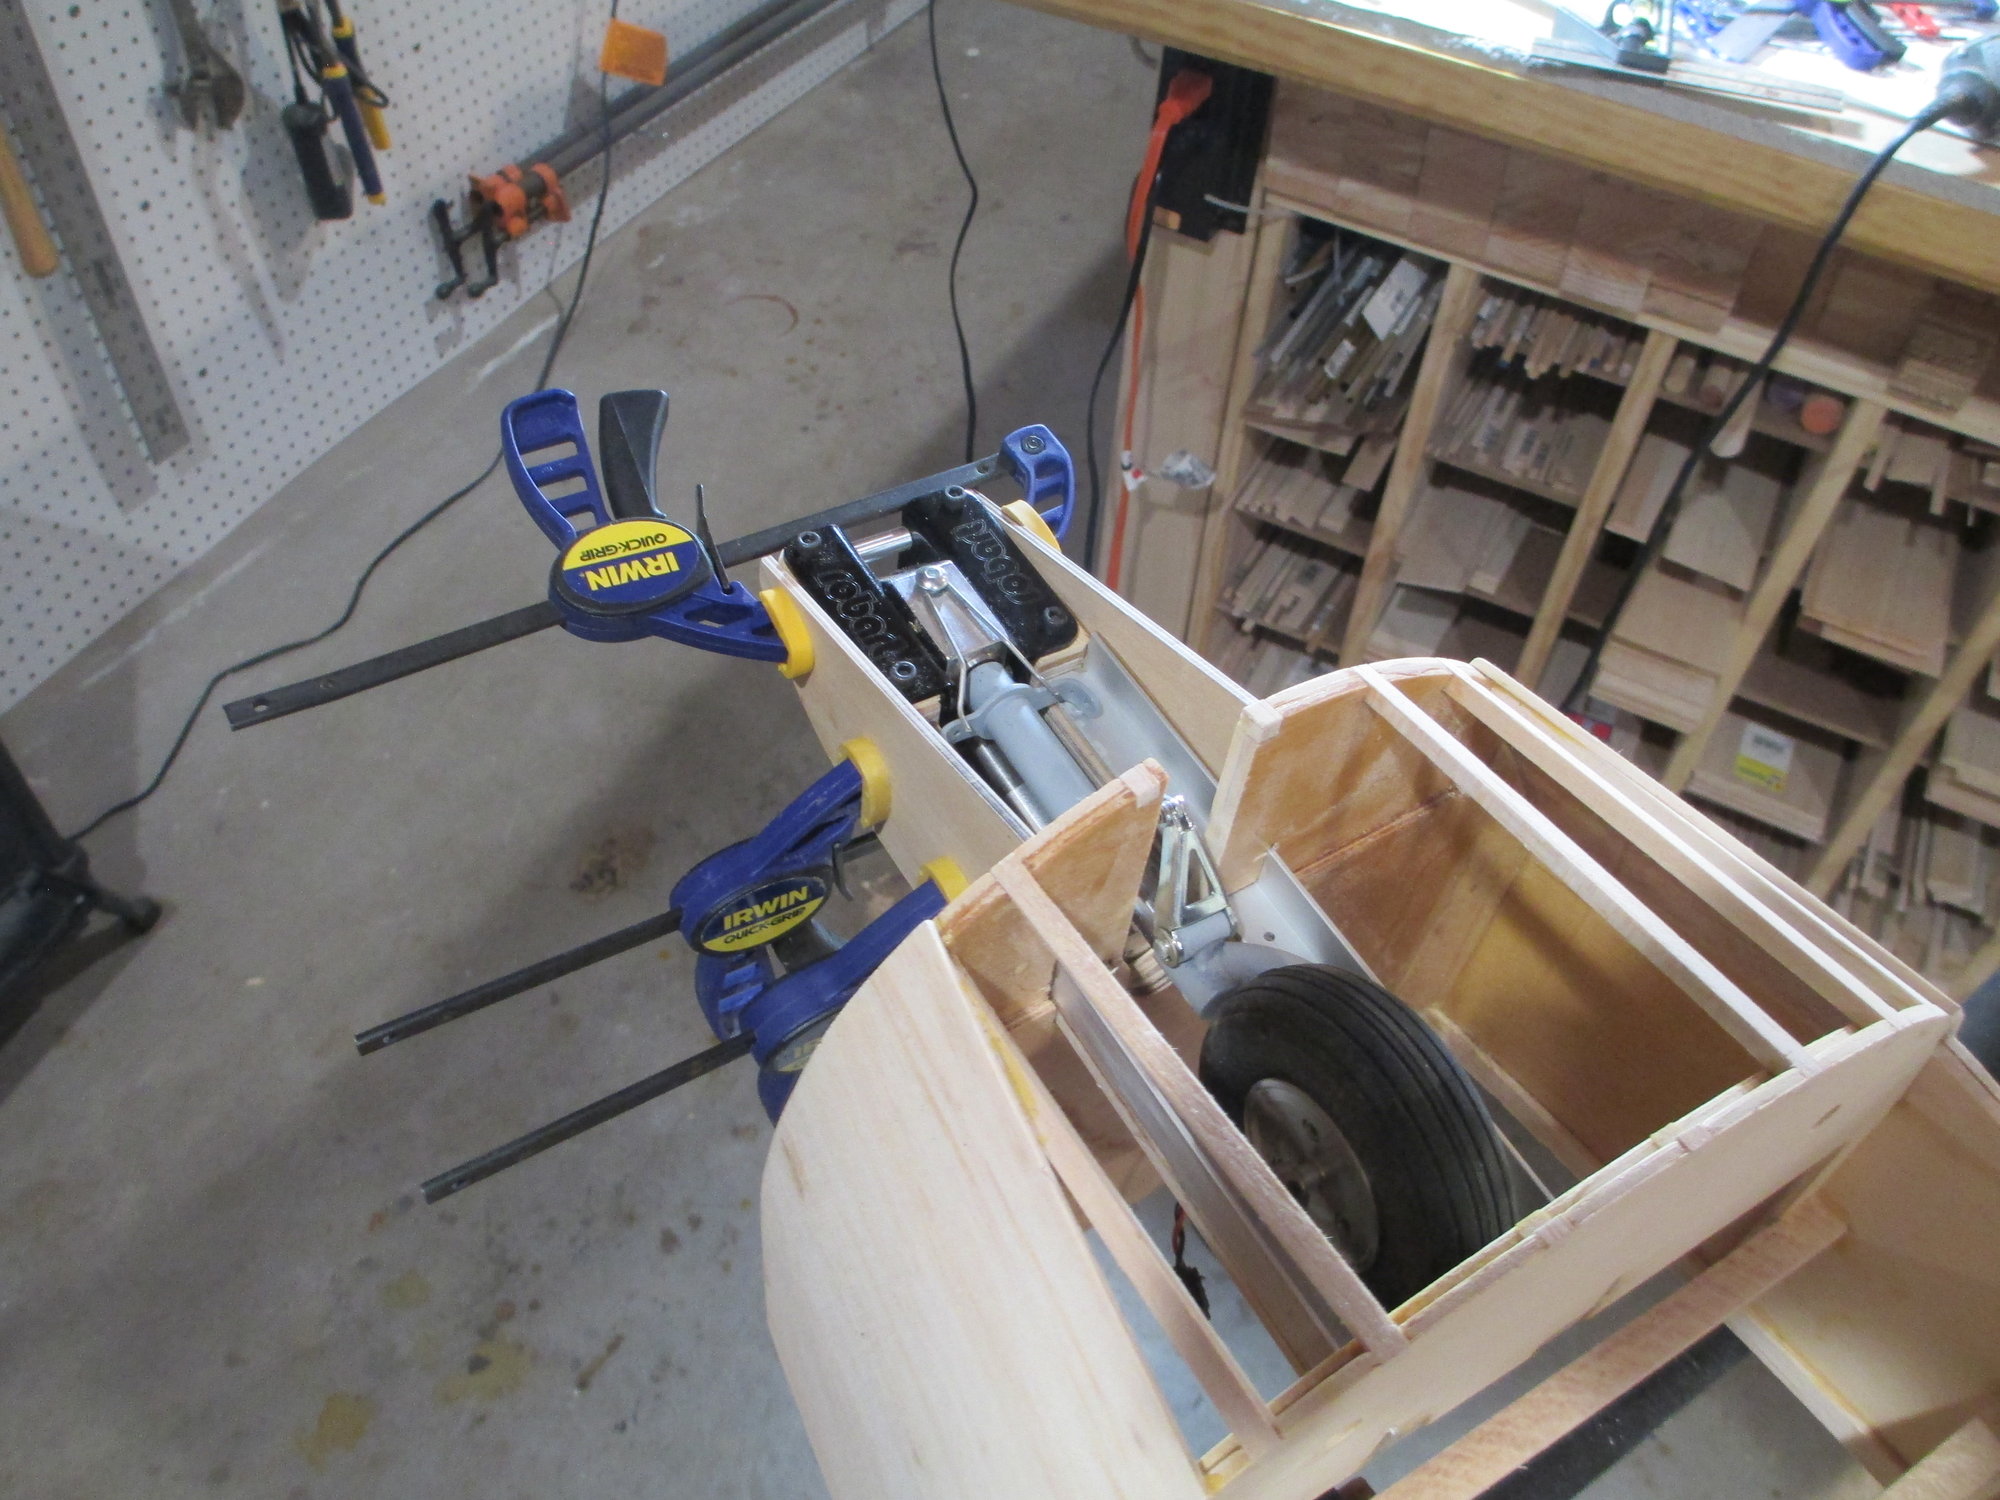
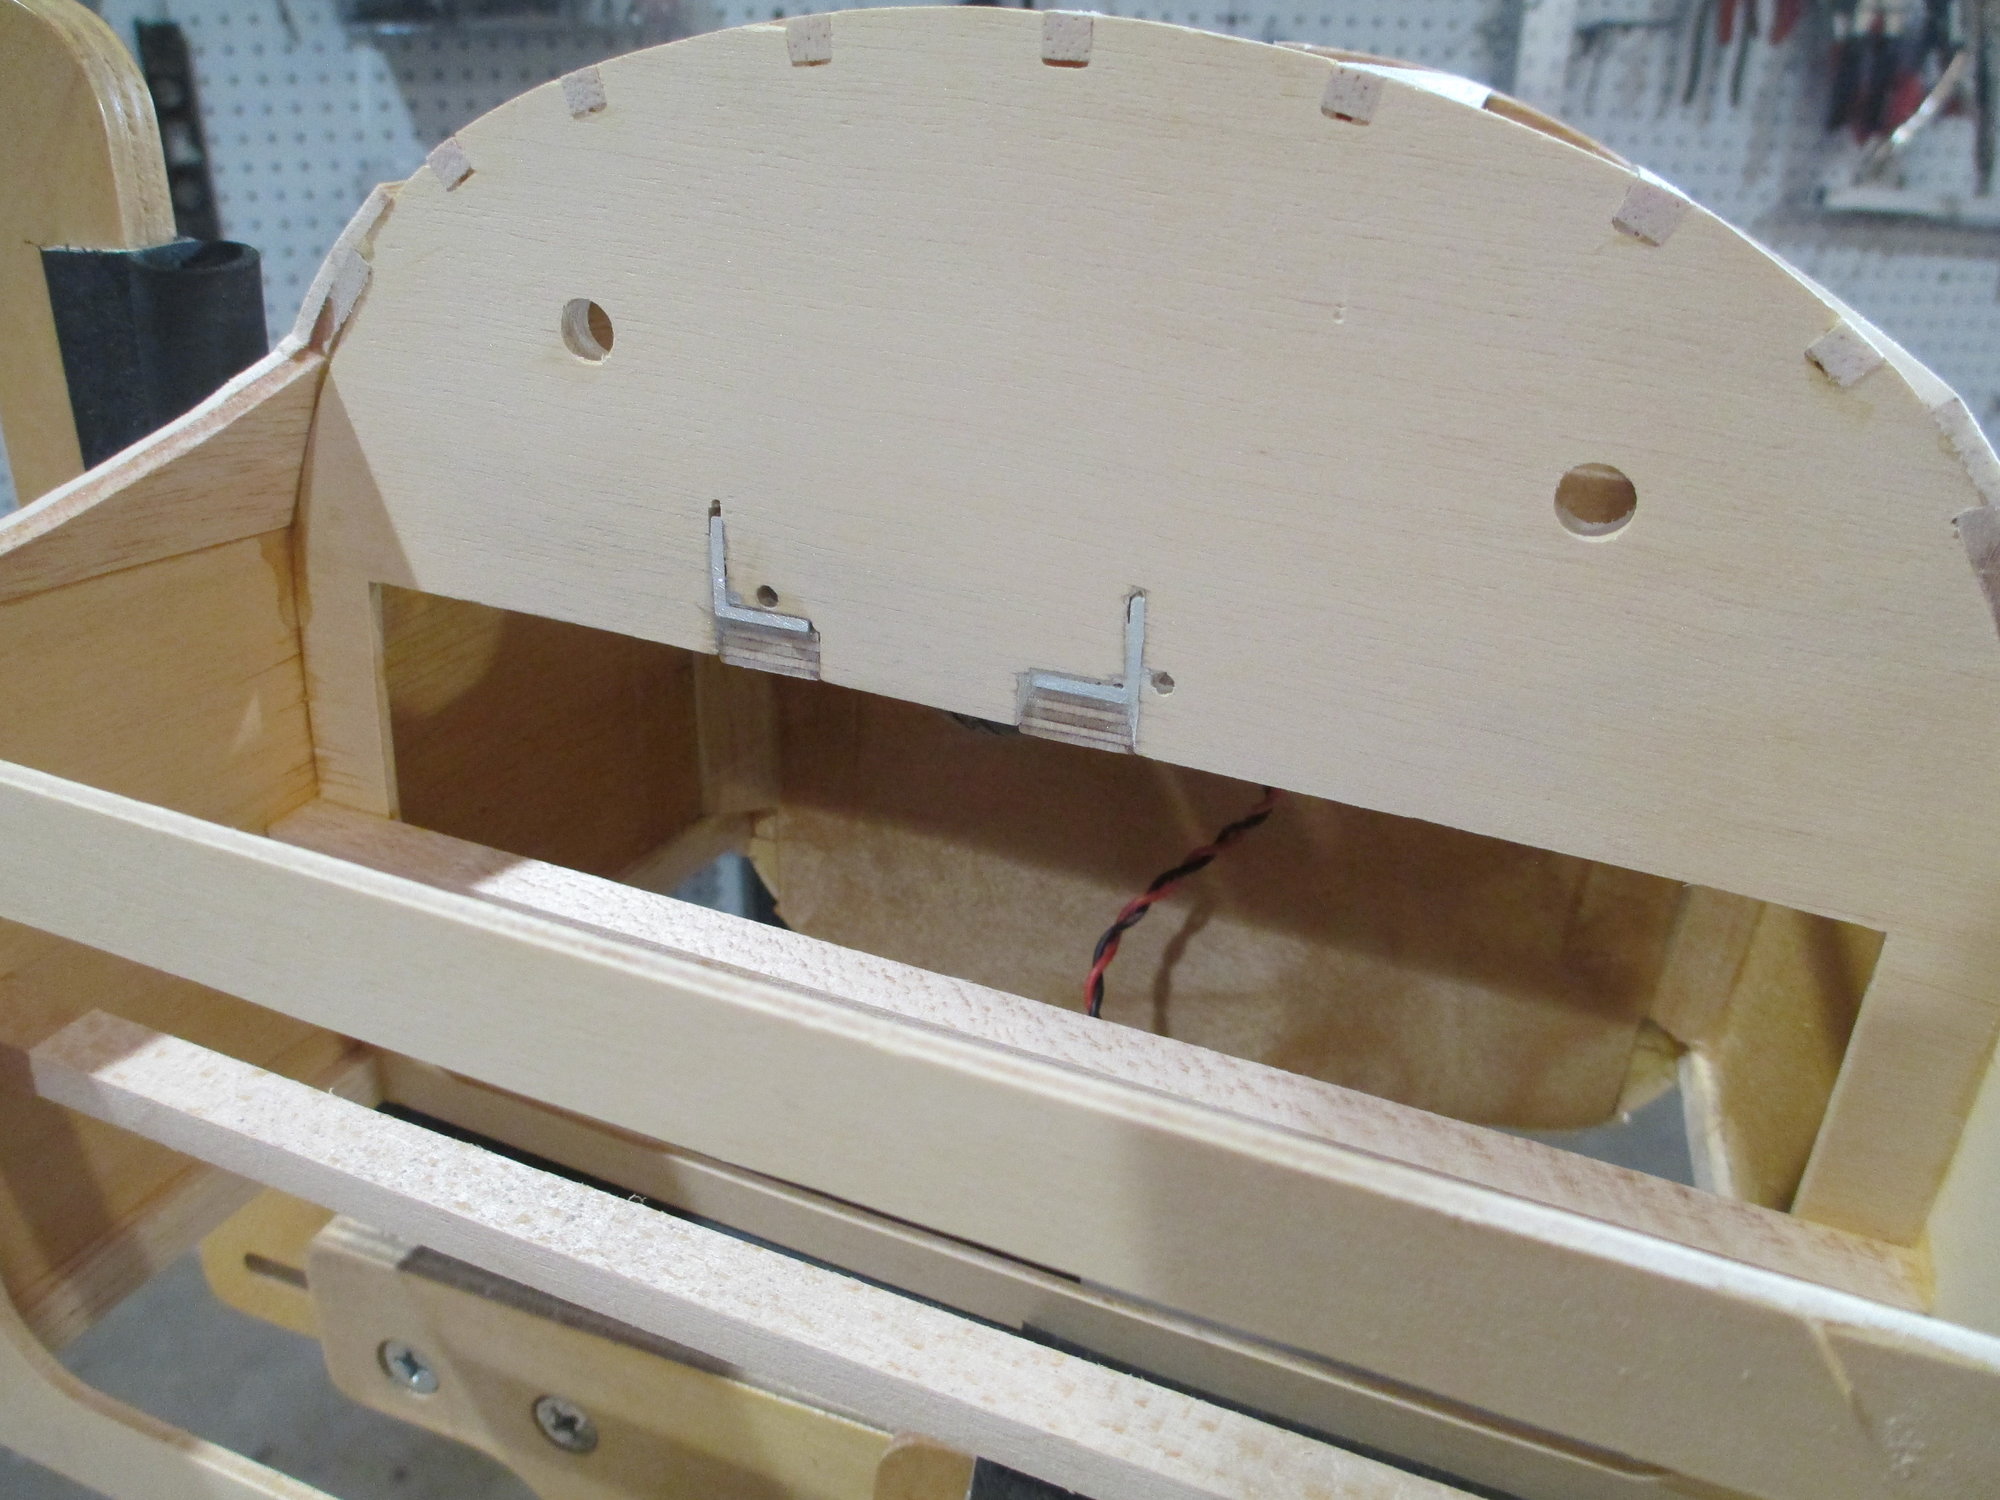
Aluminum angle stock is tied into the structure.
Light and definitely much stronger than the stock configuration.
12-07-2019, 10:14 AM
#532
My thought exactly, see my earlier comment, continuing it under the unit would have provided a superior anchoring point for it.
12-07-2019, 10:57 AM
#533
Thread Starter
Yes it would have even better than what I have now. I had already epoxied the spacers in place before I had decided to beef up the rail system. Trust me though, what I have now is plenty strong...The gussets shown are thicker than what was supplied as well. For others deciding to build a Bonanza they will have a leg up!
Last edited by VincentJ; 12-07-2019 at 11:01 AM.
 12-08-2019, 05:12 AM
#535
Thread Starter
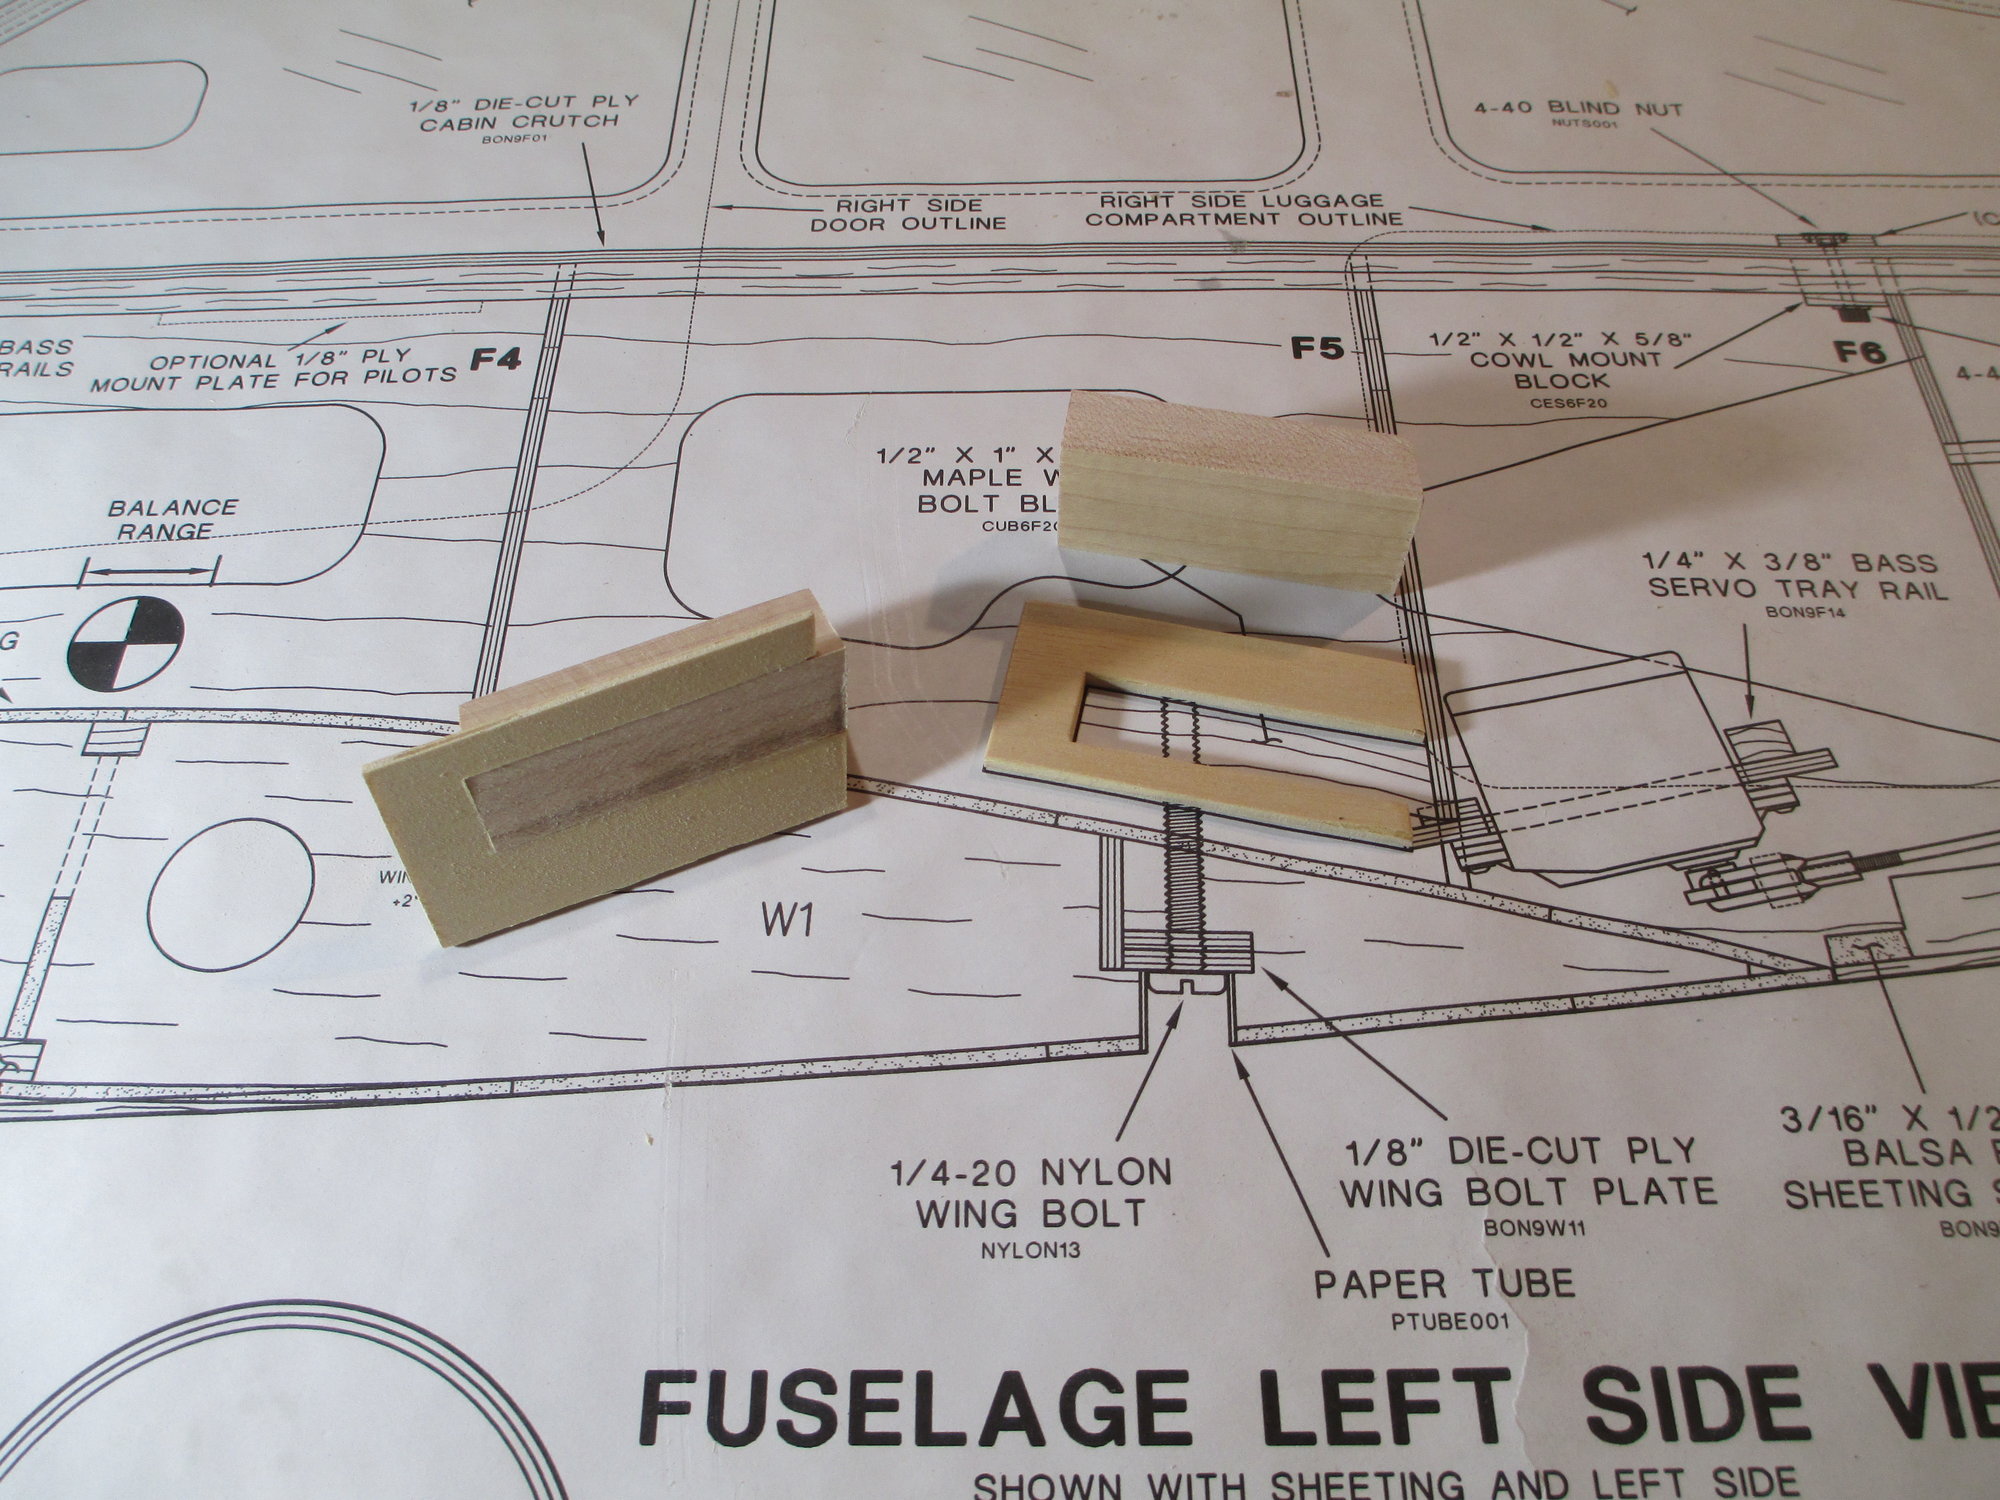
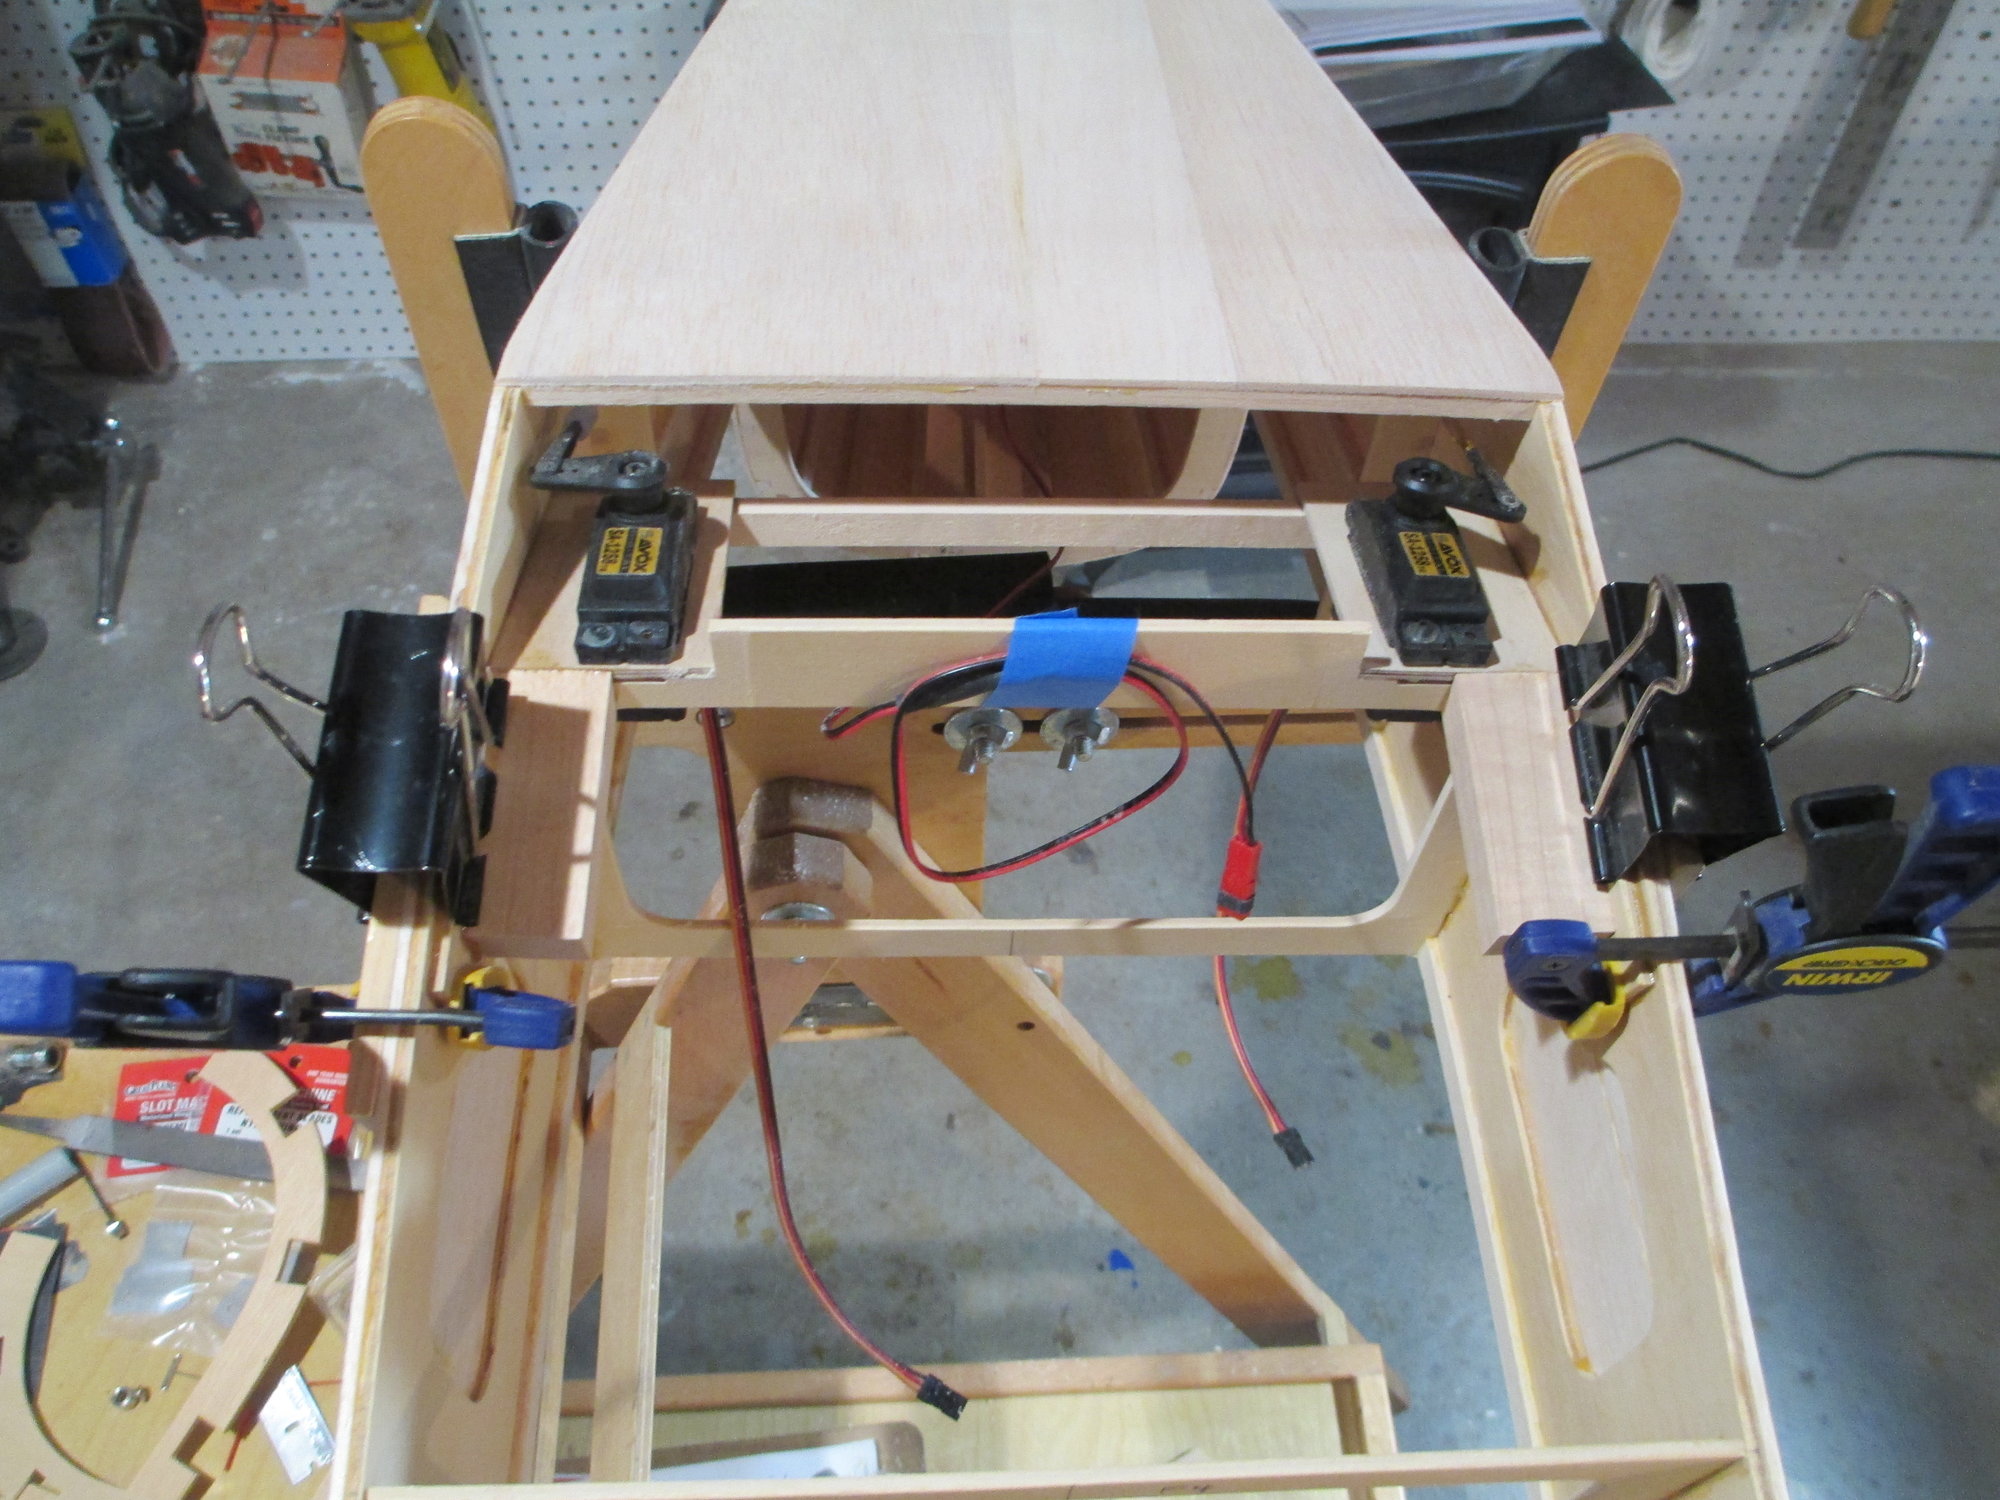
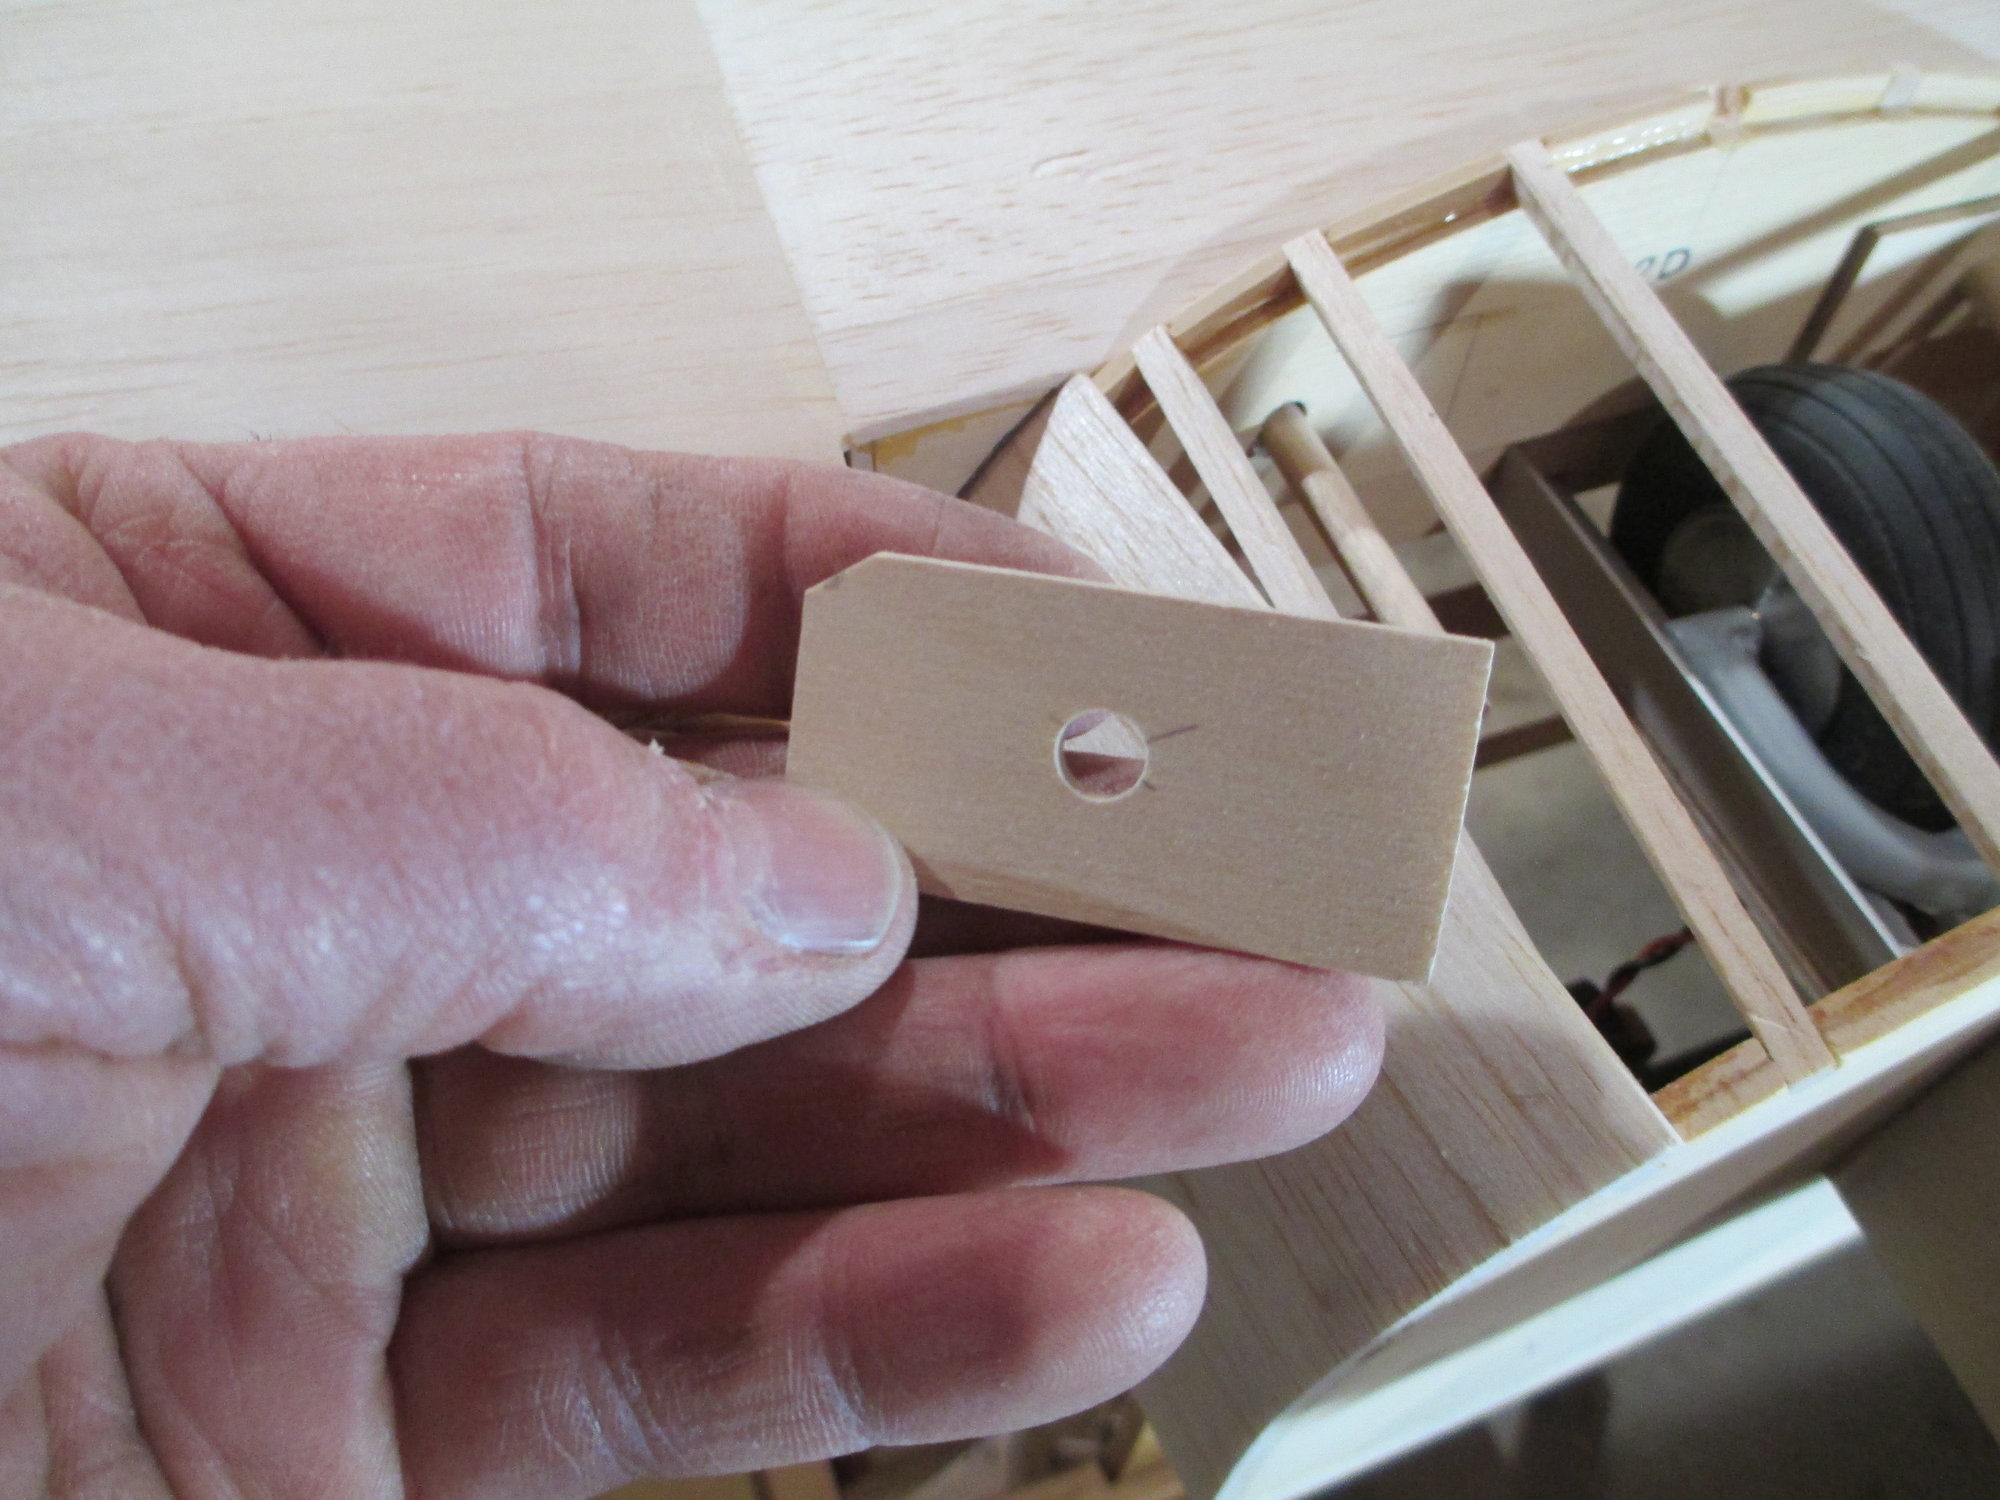
Shown are the 1/2" x 1" x 2-1/4" maple wing bolt blocks and 1/8" plywood wing bolt block holders. These blocks once secured to each side of the fuselage will be drilled and tapped to hold the wing in place.
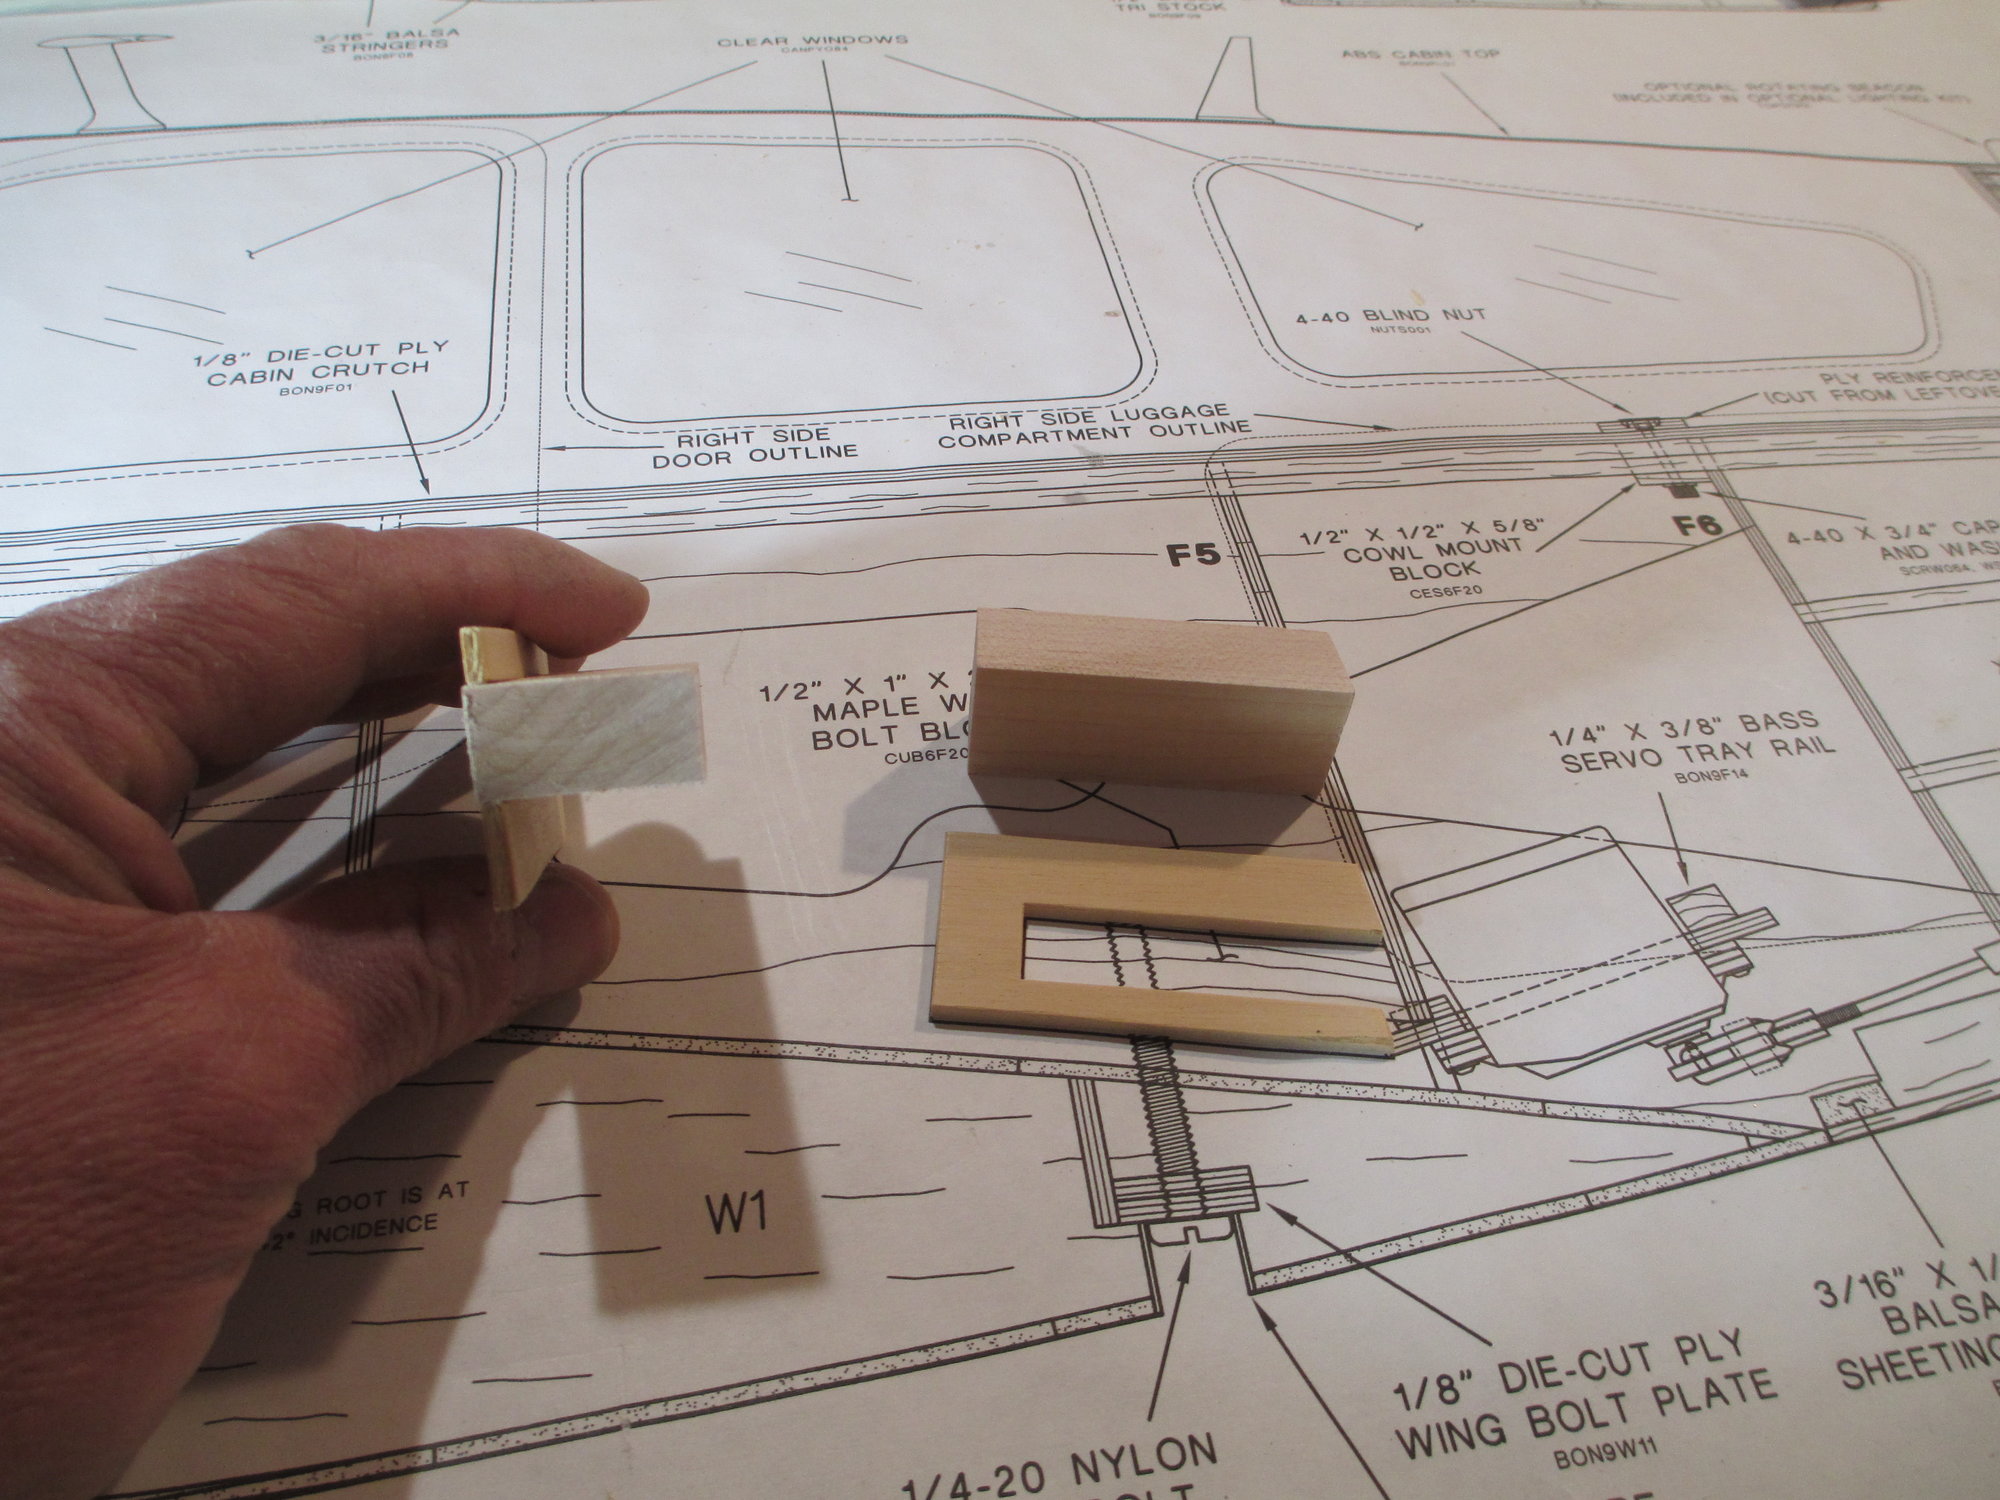
I beveled one end of each wing bolt blocks to match the angle of the wing bolt block holders.

Once satisfied with the fit, each of the blocks and holders were epoxied in place.
Last edited by VincentJ; 12-08-2019 at 06:52 AM.
12-08-2019, 01:33 PM
#537
Thread Starter

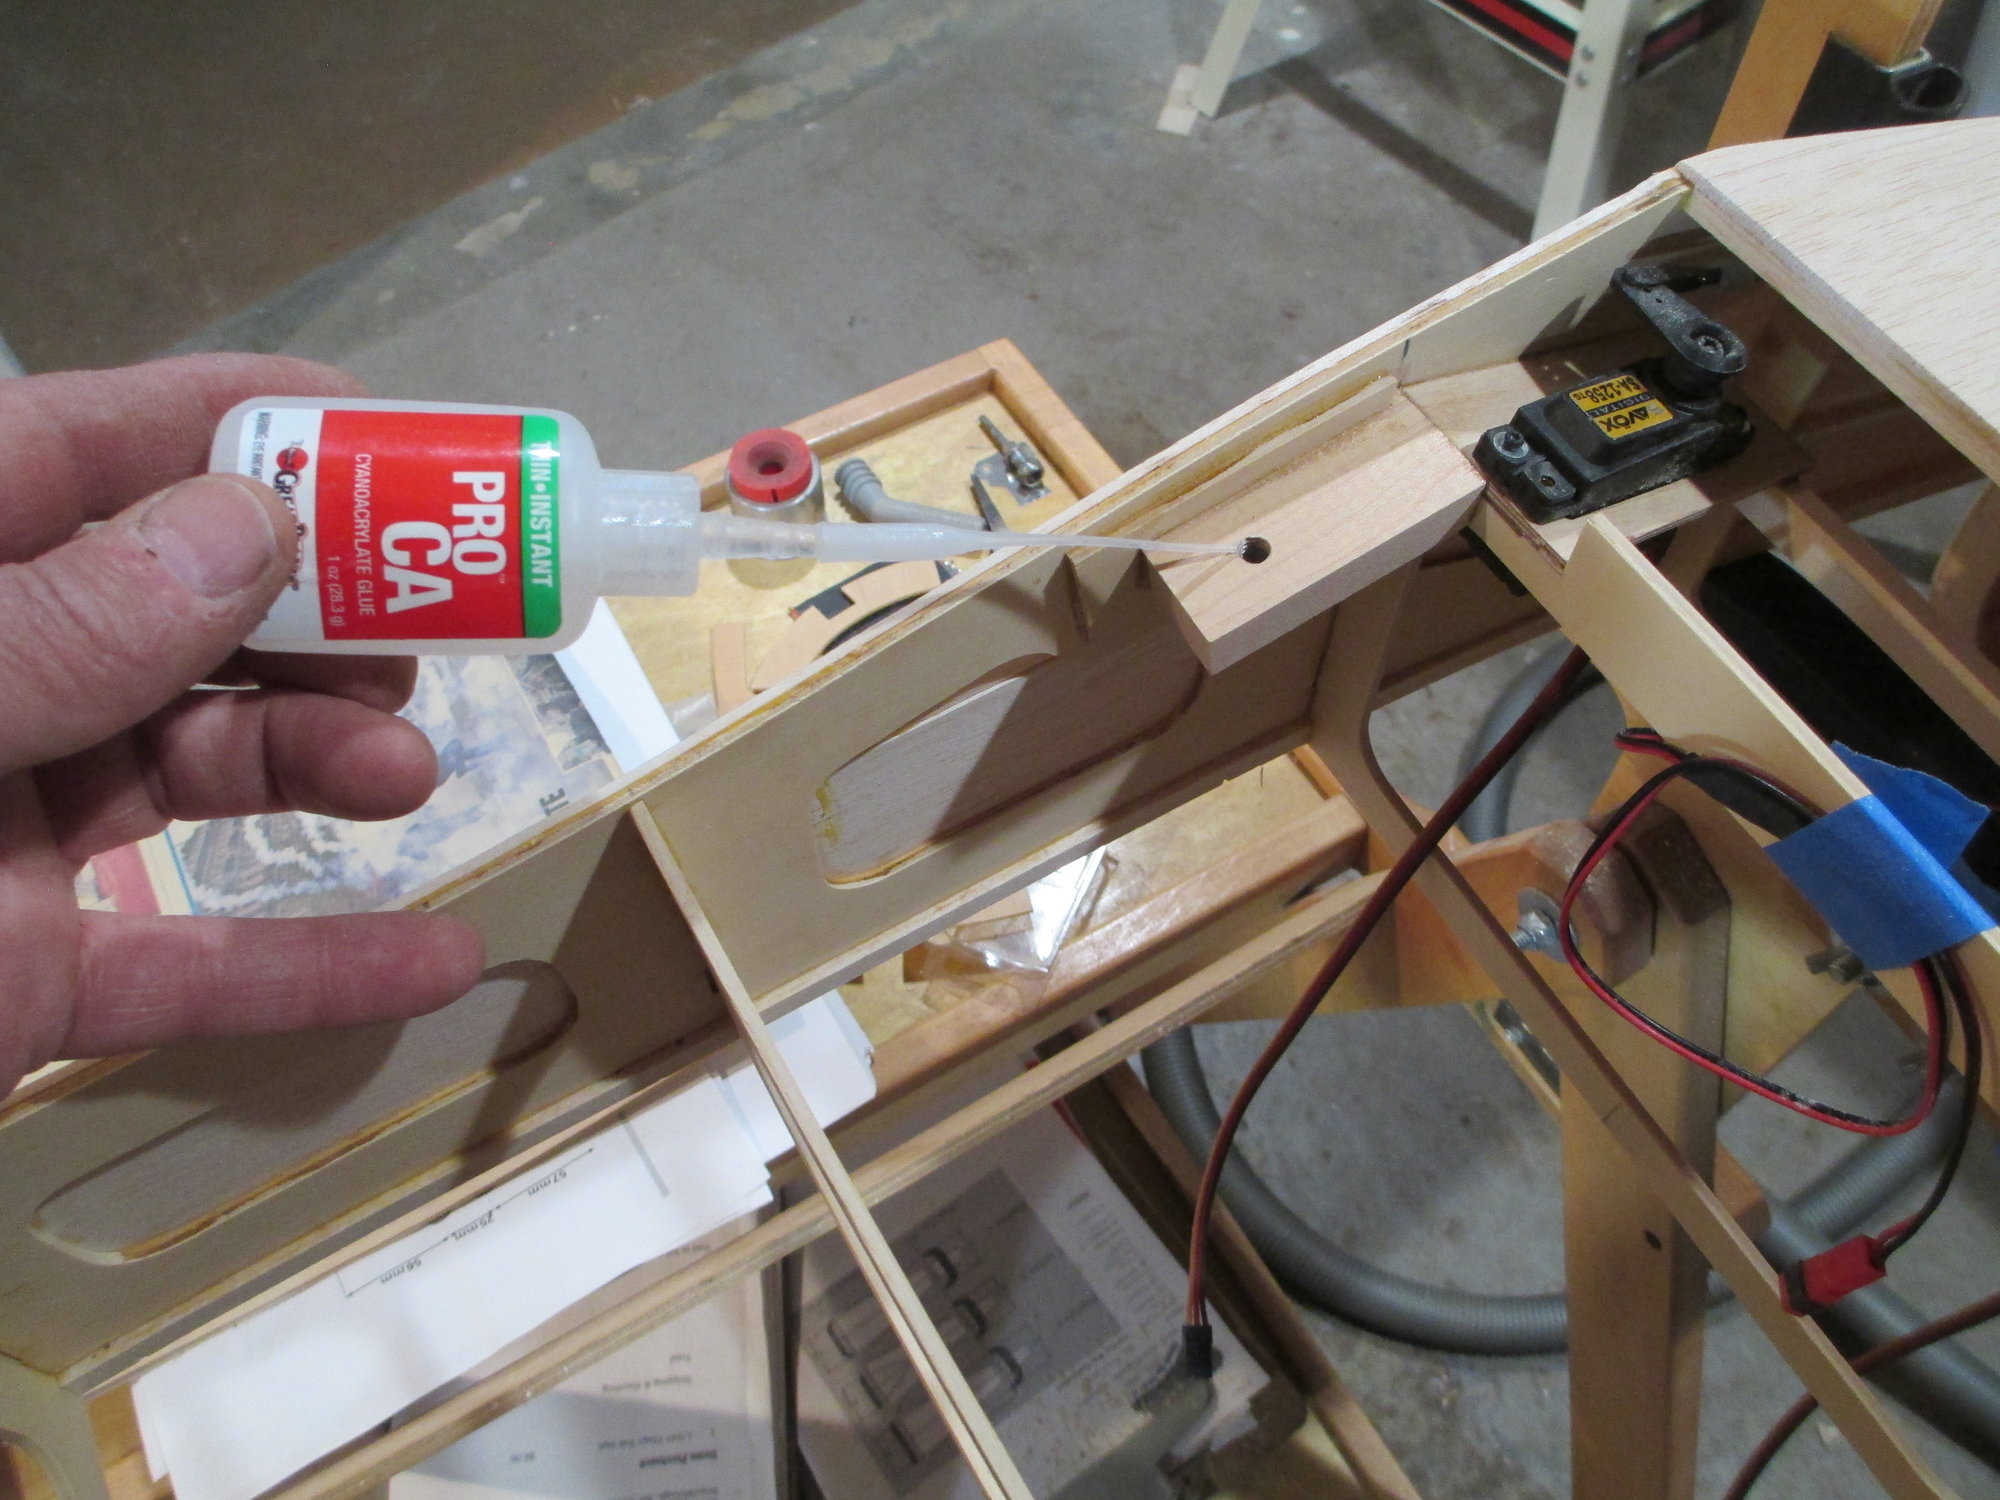
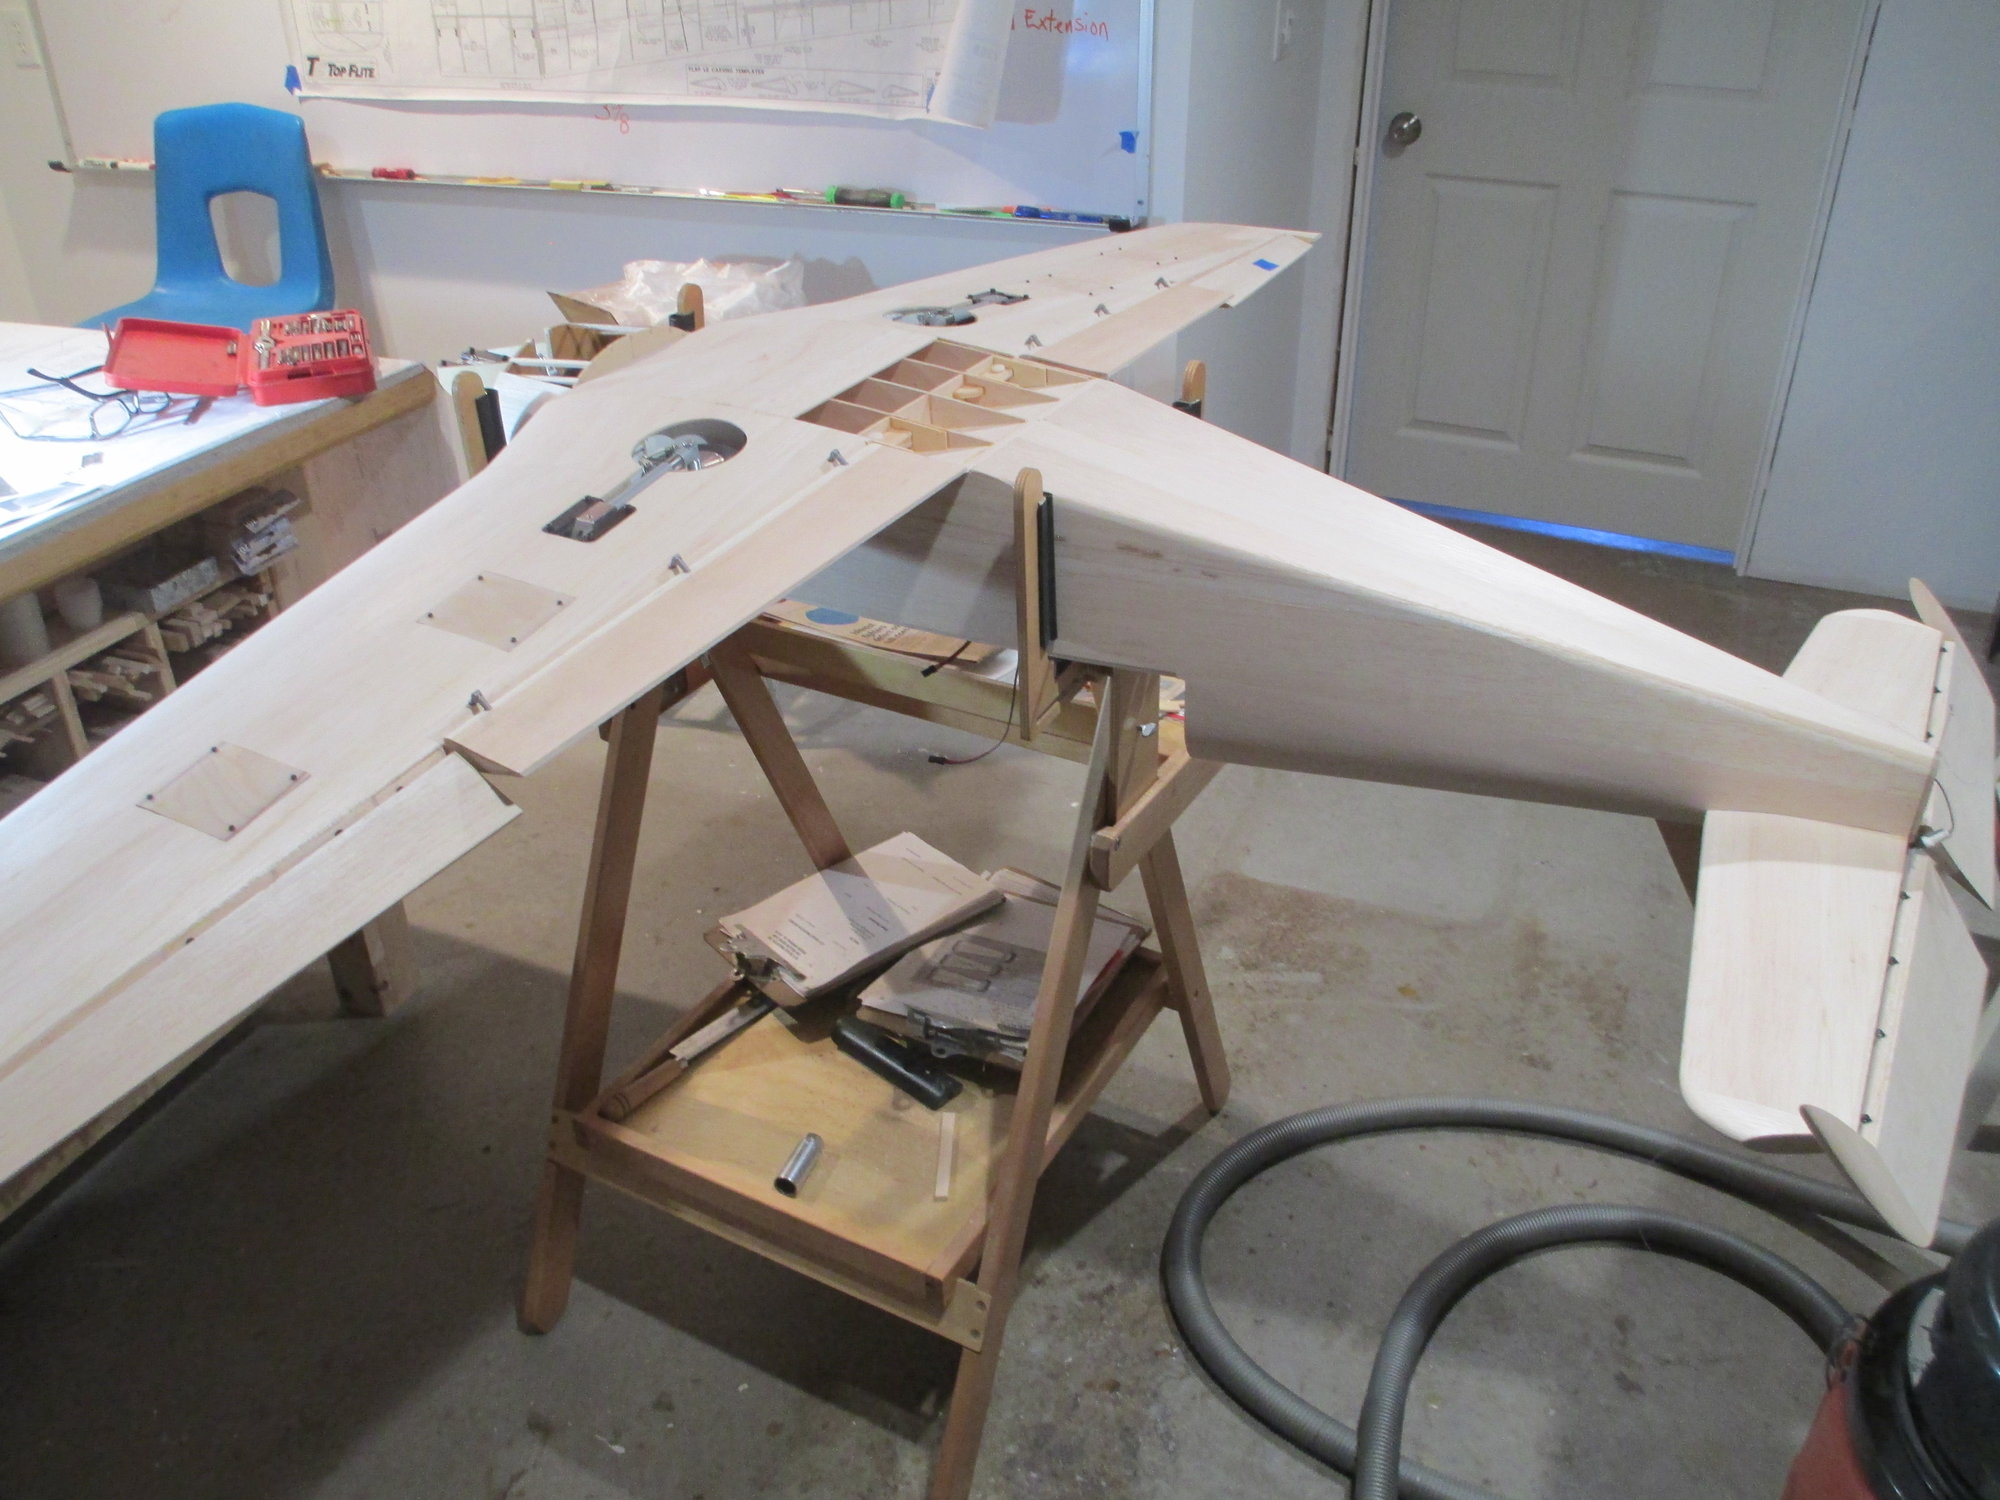
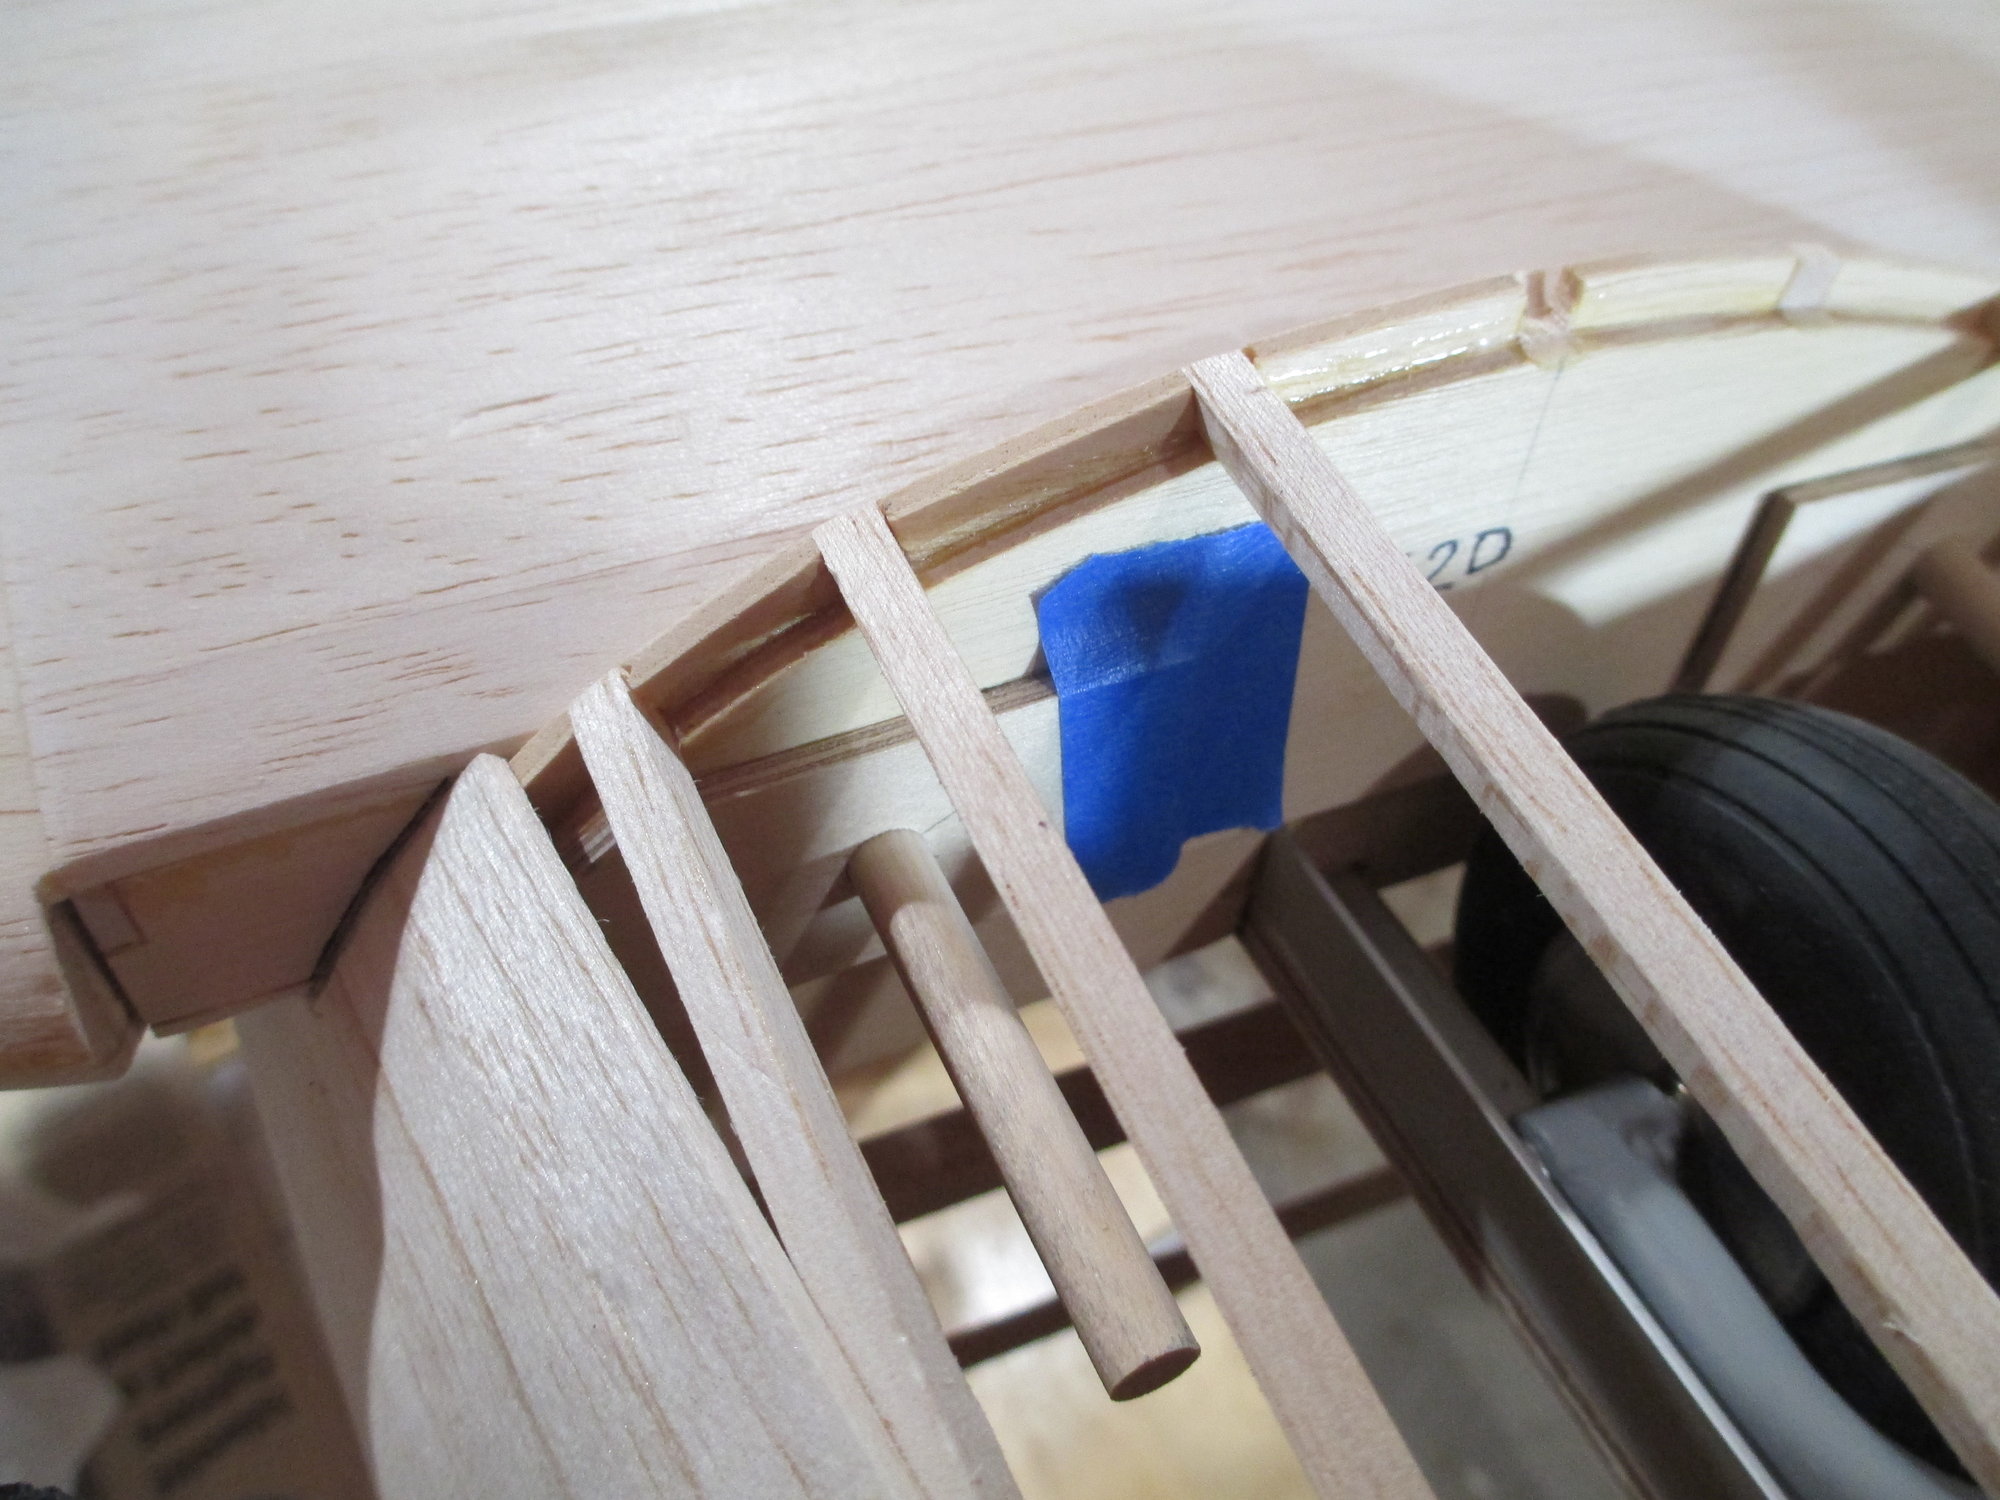
Time to mount the wing to the fuse. With the wing positioned (centered) on the fuse, I use blue painters tape to ensure that the wing does not move during the drilling operation.

I've got to drill a hole through the wing bolt plate, the top sheeting and the wing bolt block. All the while trying to keep the drill bit perpendicular to the wing bolt plate so the head of the nylon wing bolt will rest flat on the plate. I know better than to try to hand drill with that type of accuracy without the aide of a drill jig.

This jig that I made will help me accomplish all those tasks that I previously mentioned. I'm using a #7 drill bit.
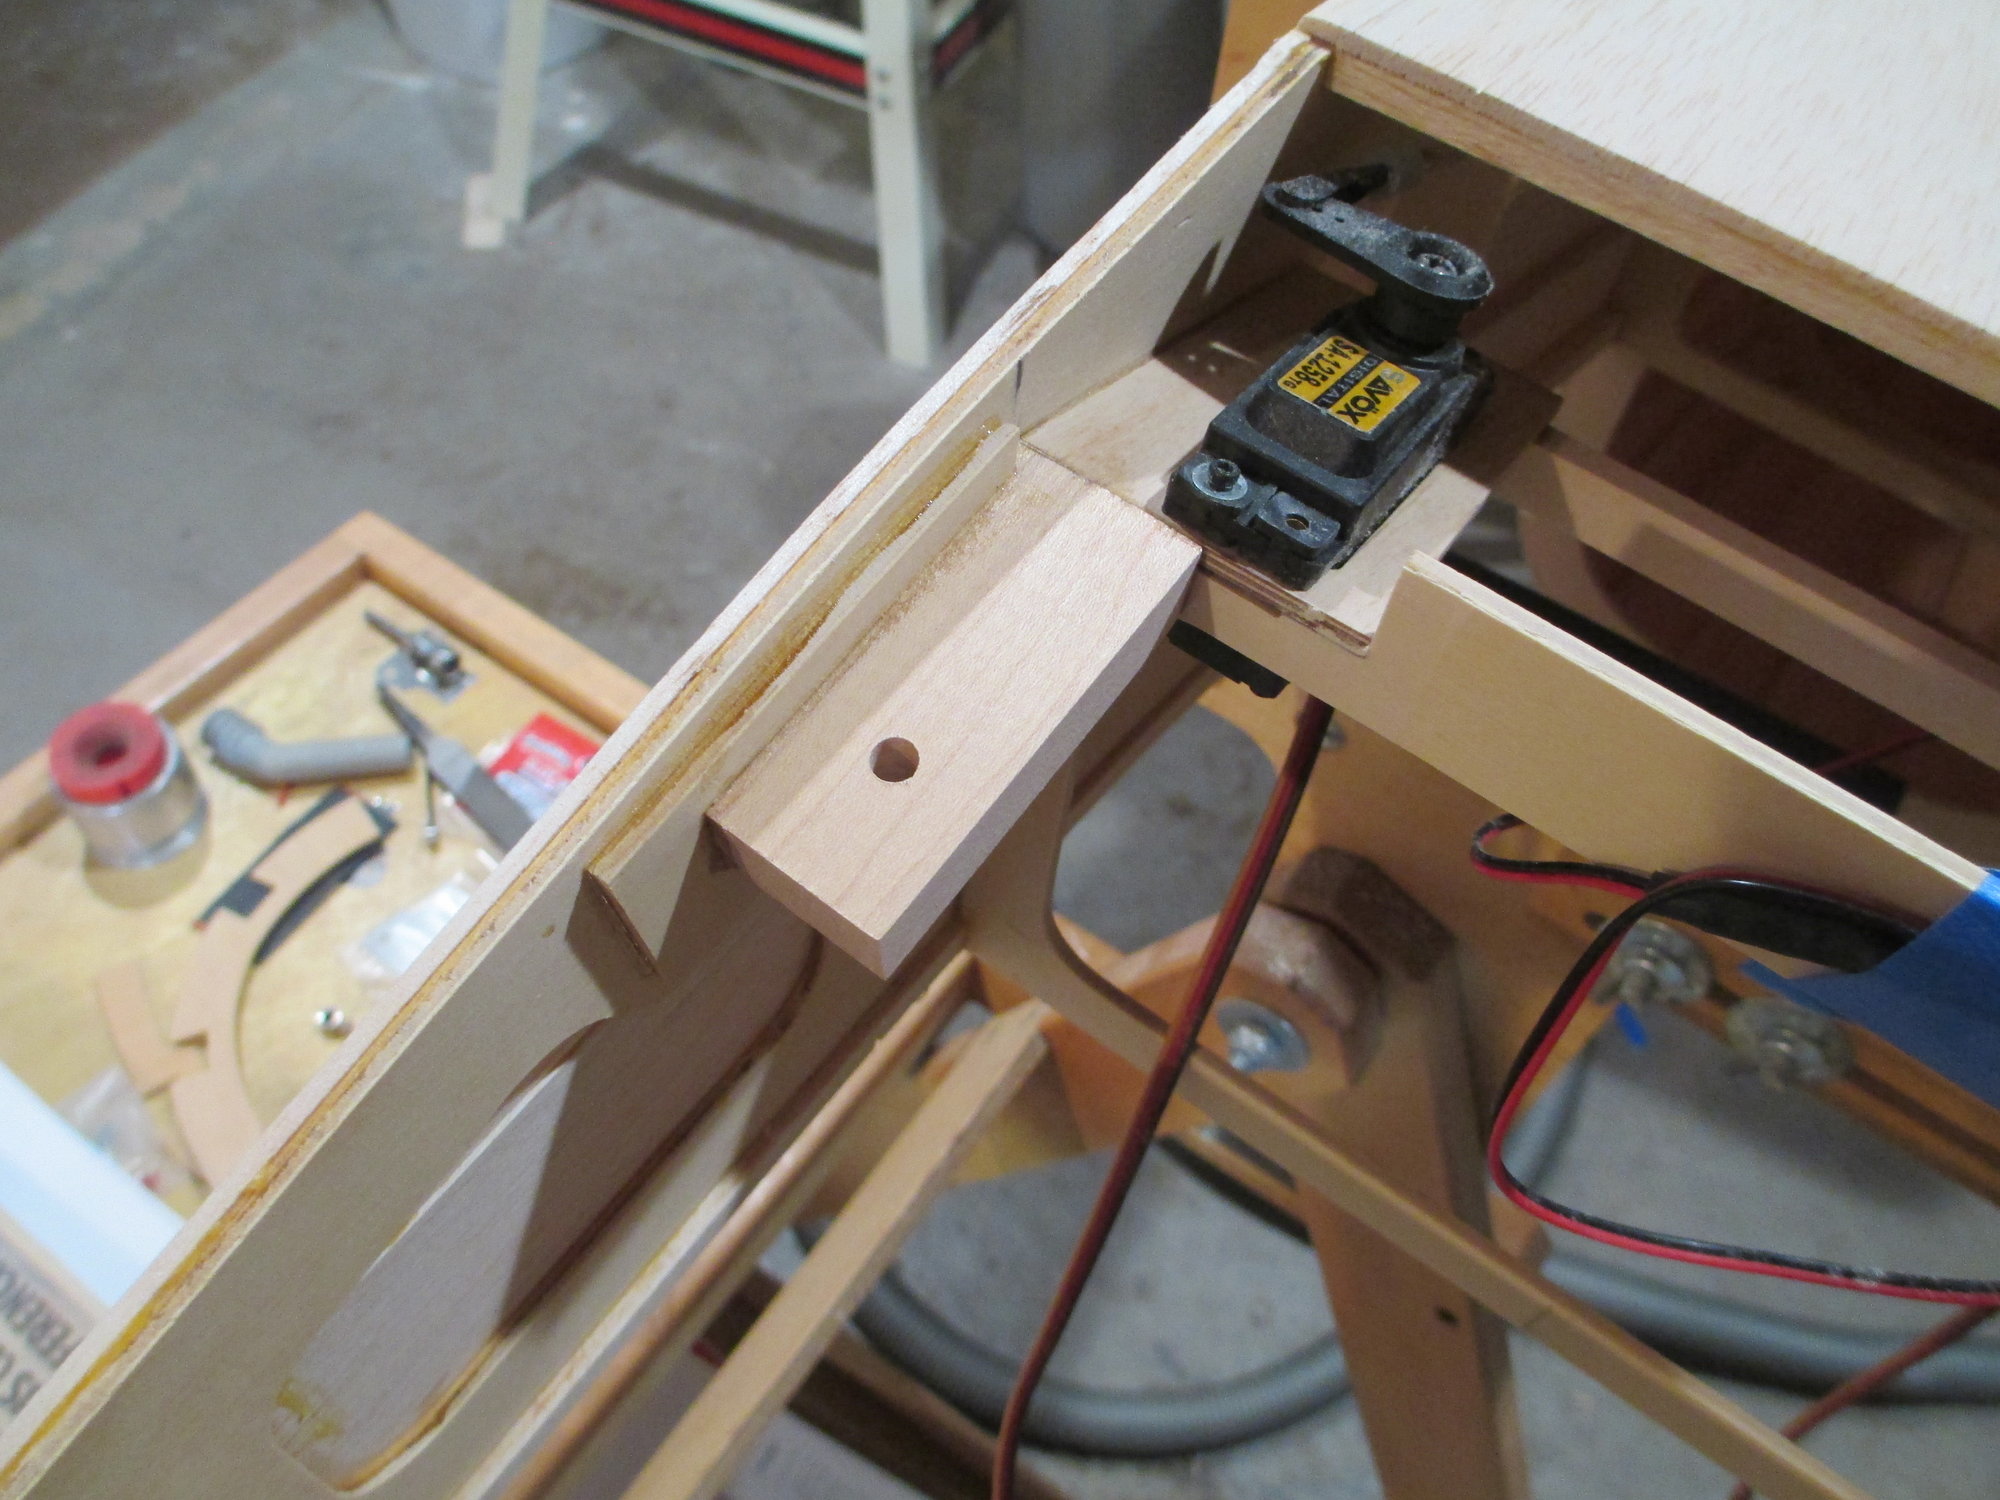
The jig worked flawlessly...
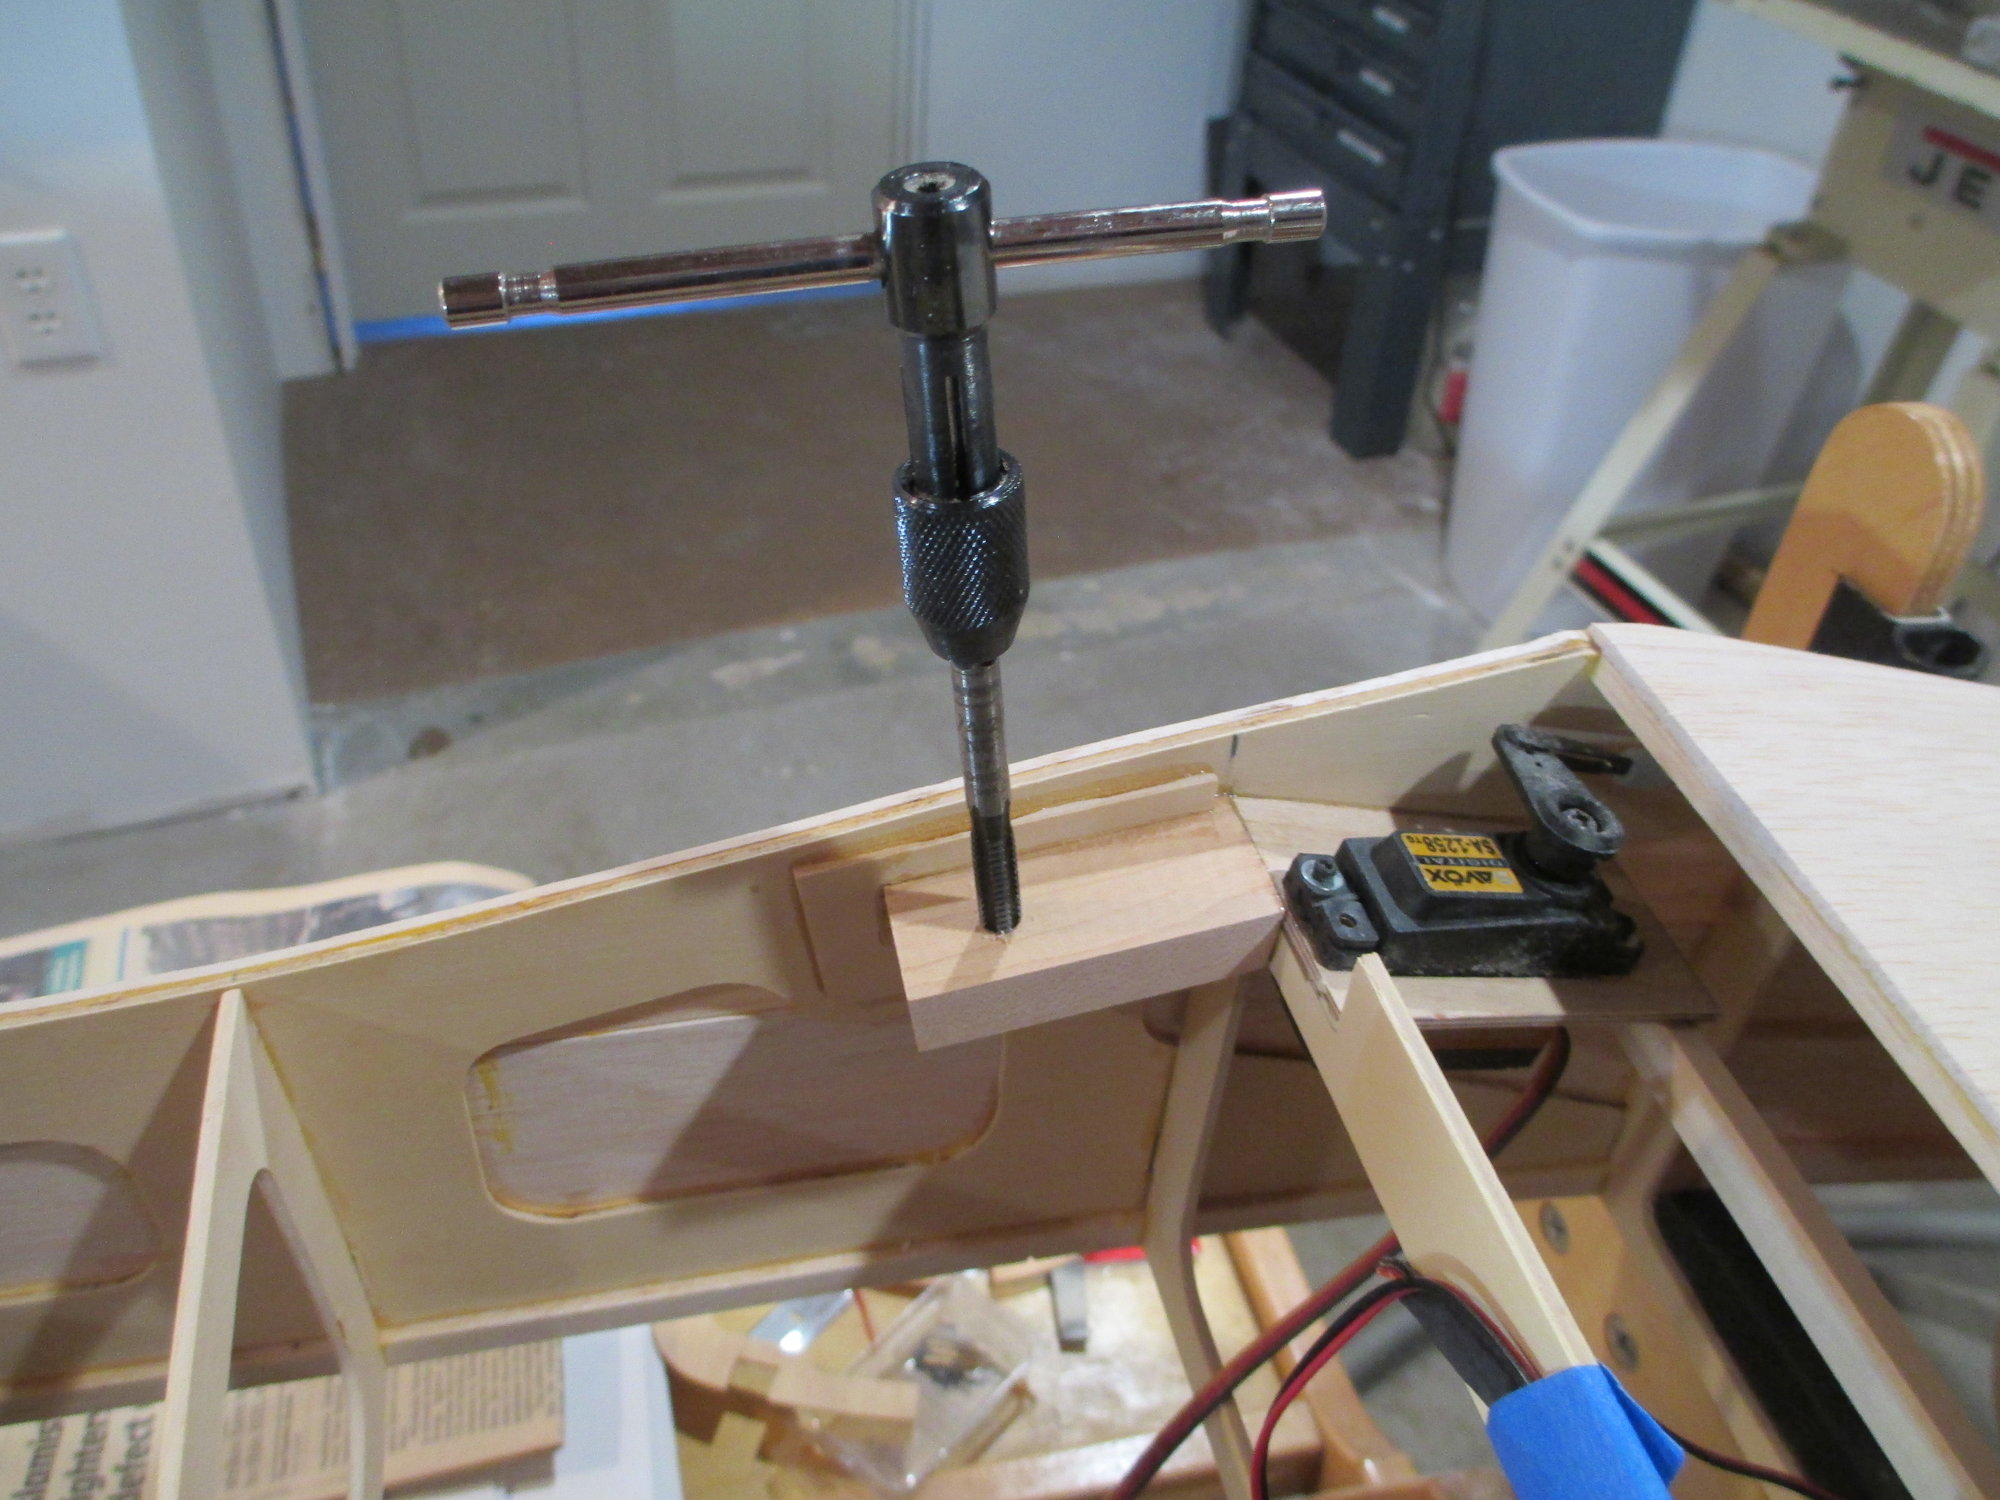
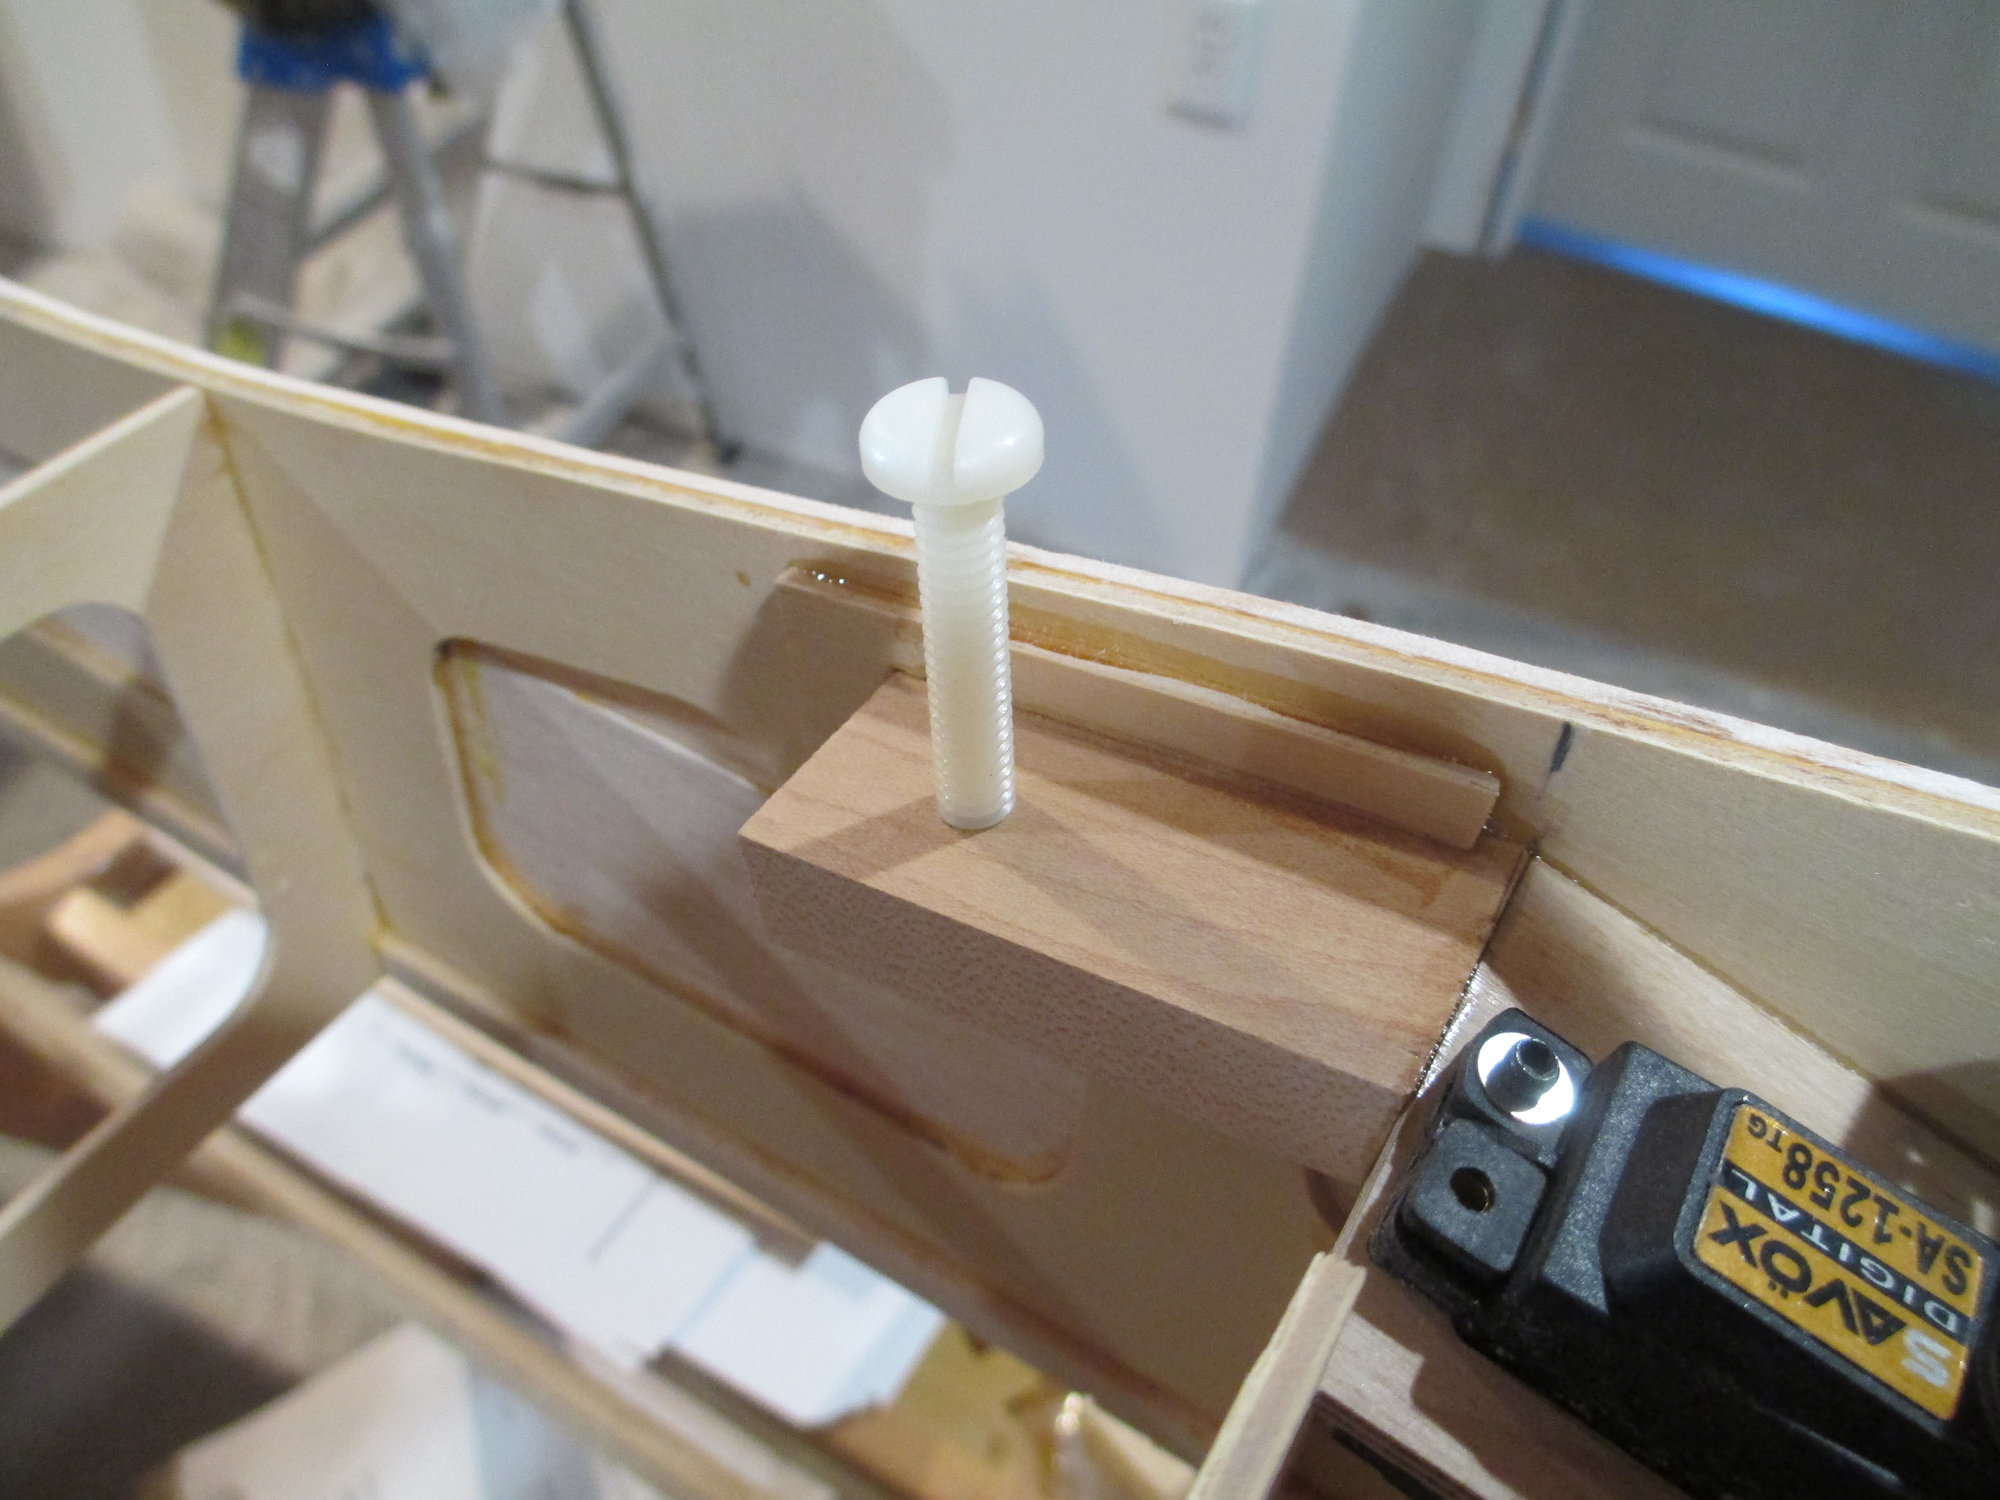
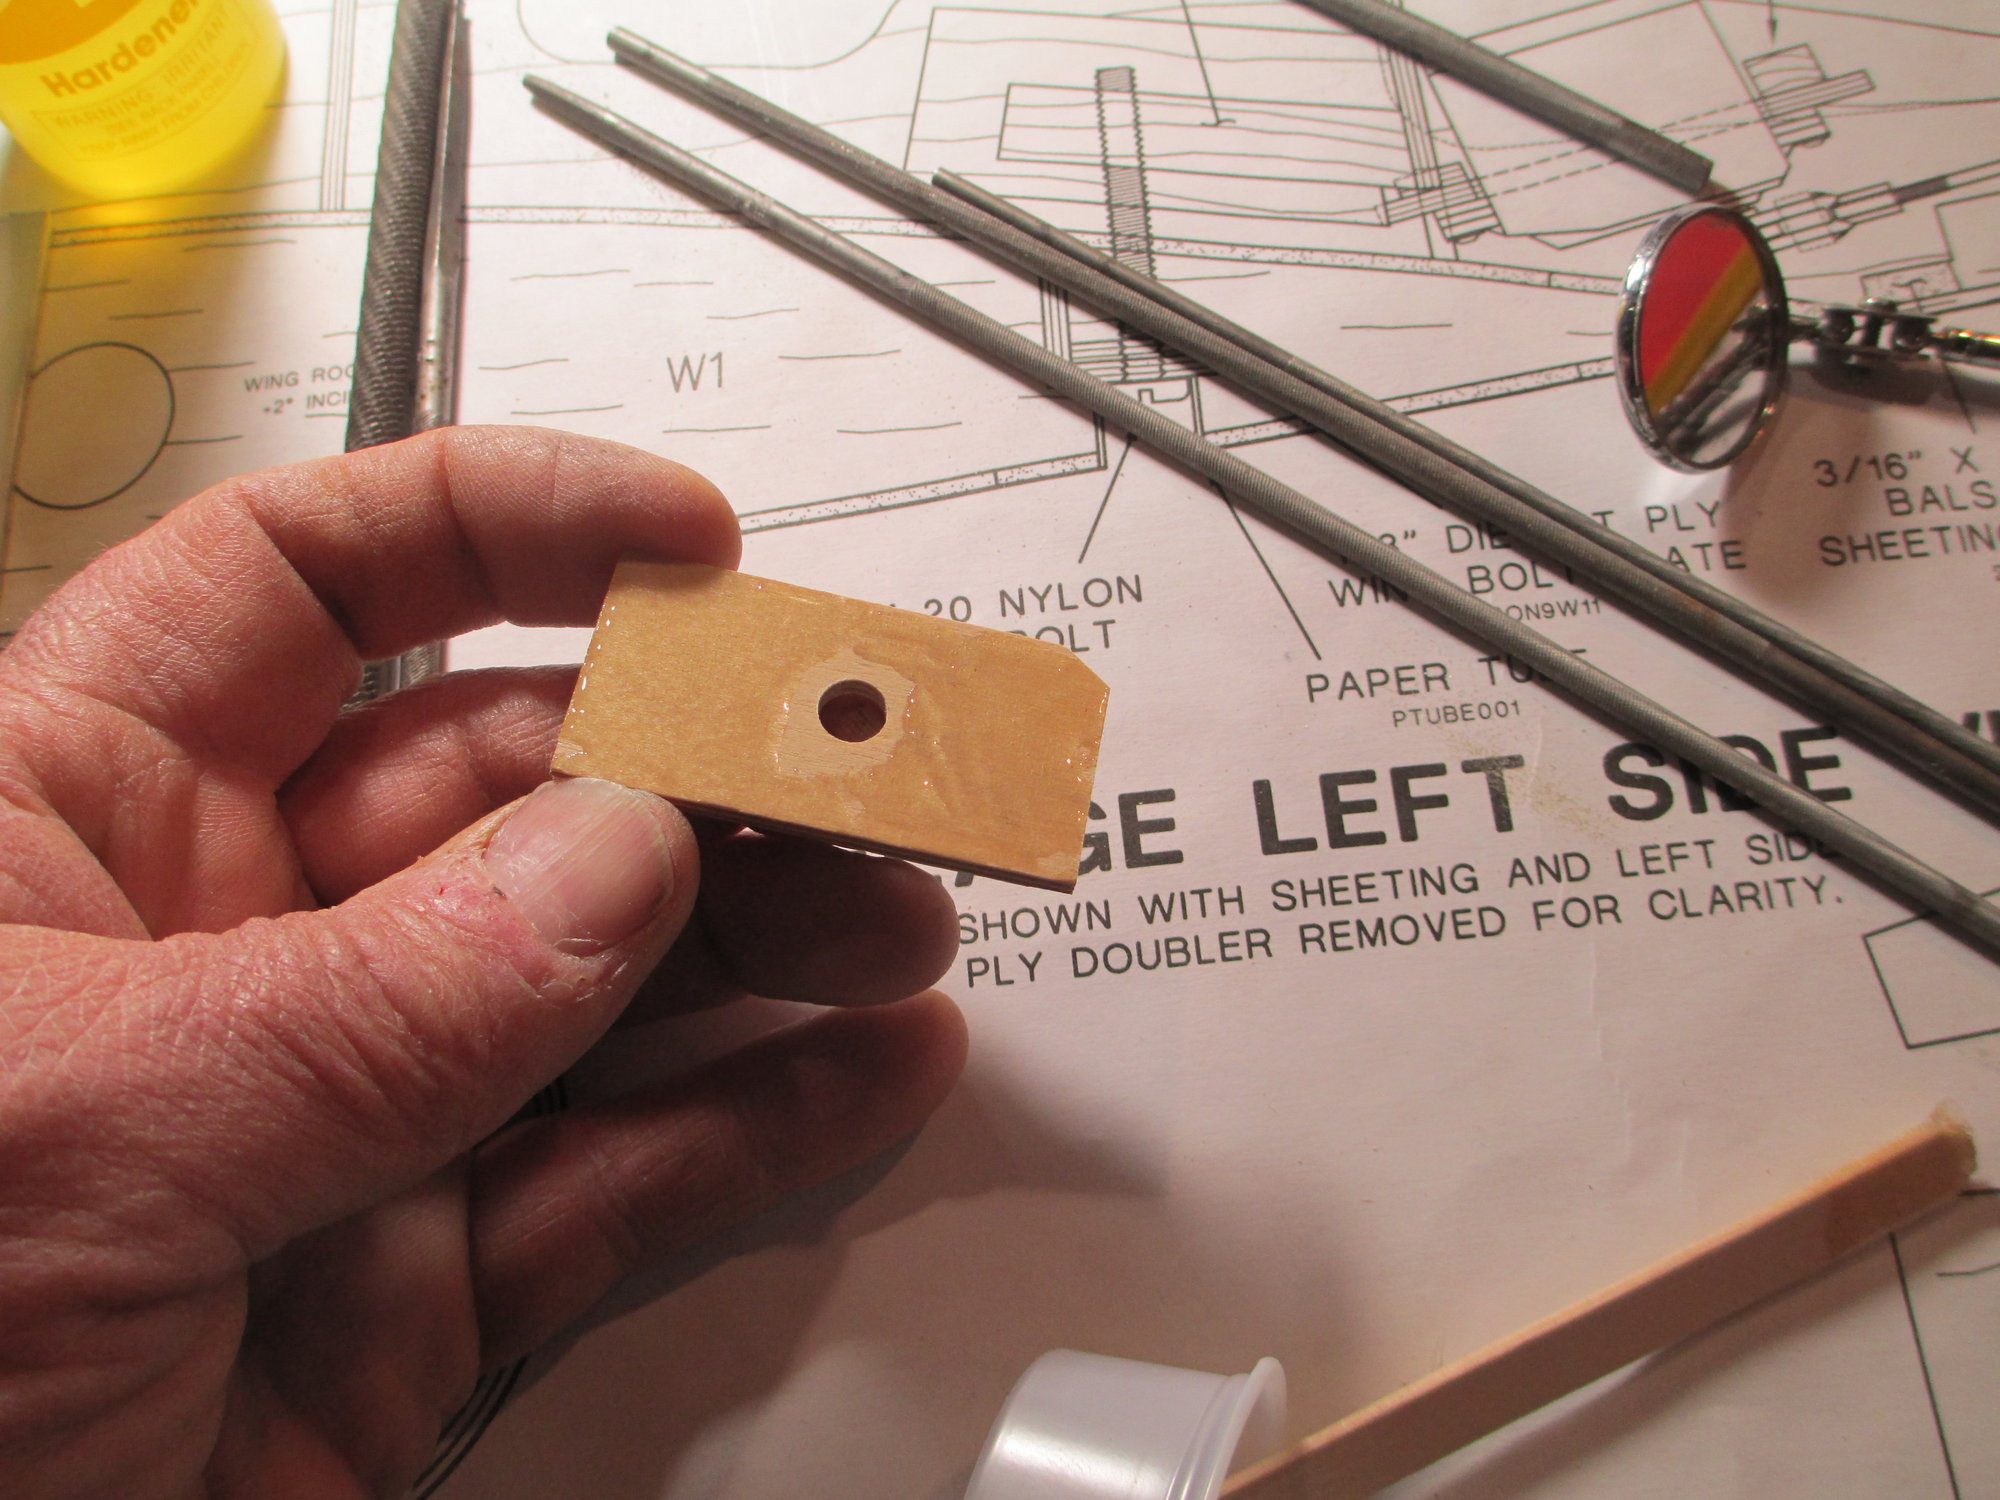
I'm threading the hole using a 1/4-20 tap.
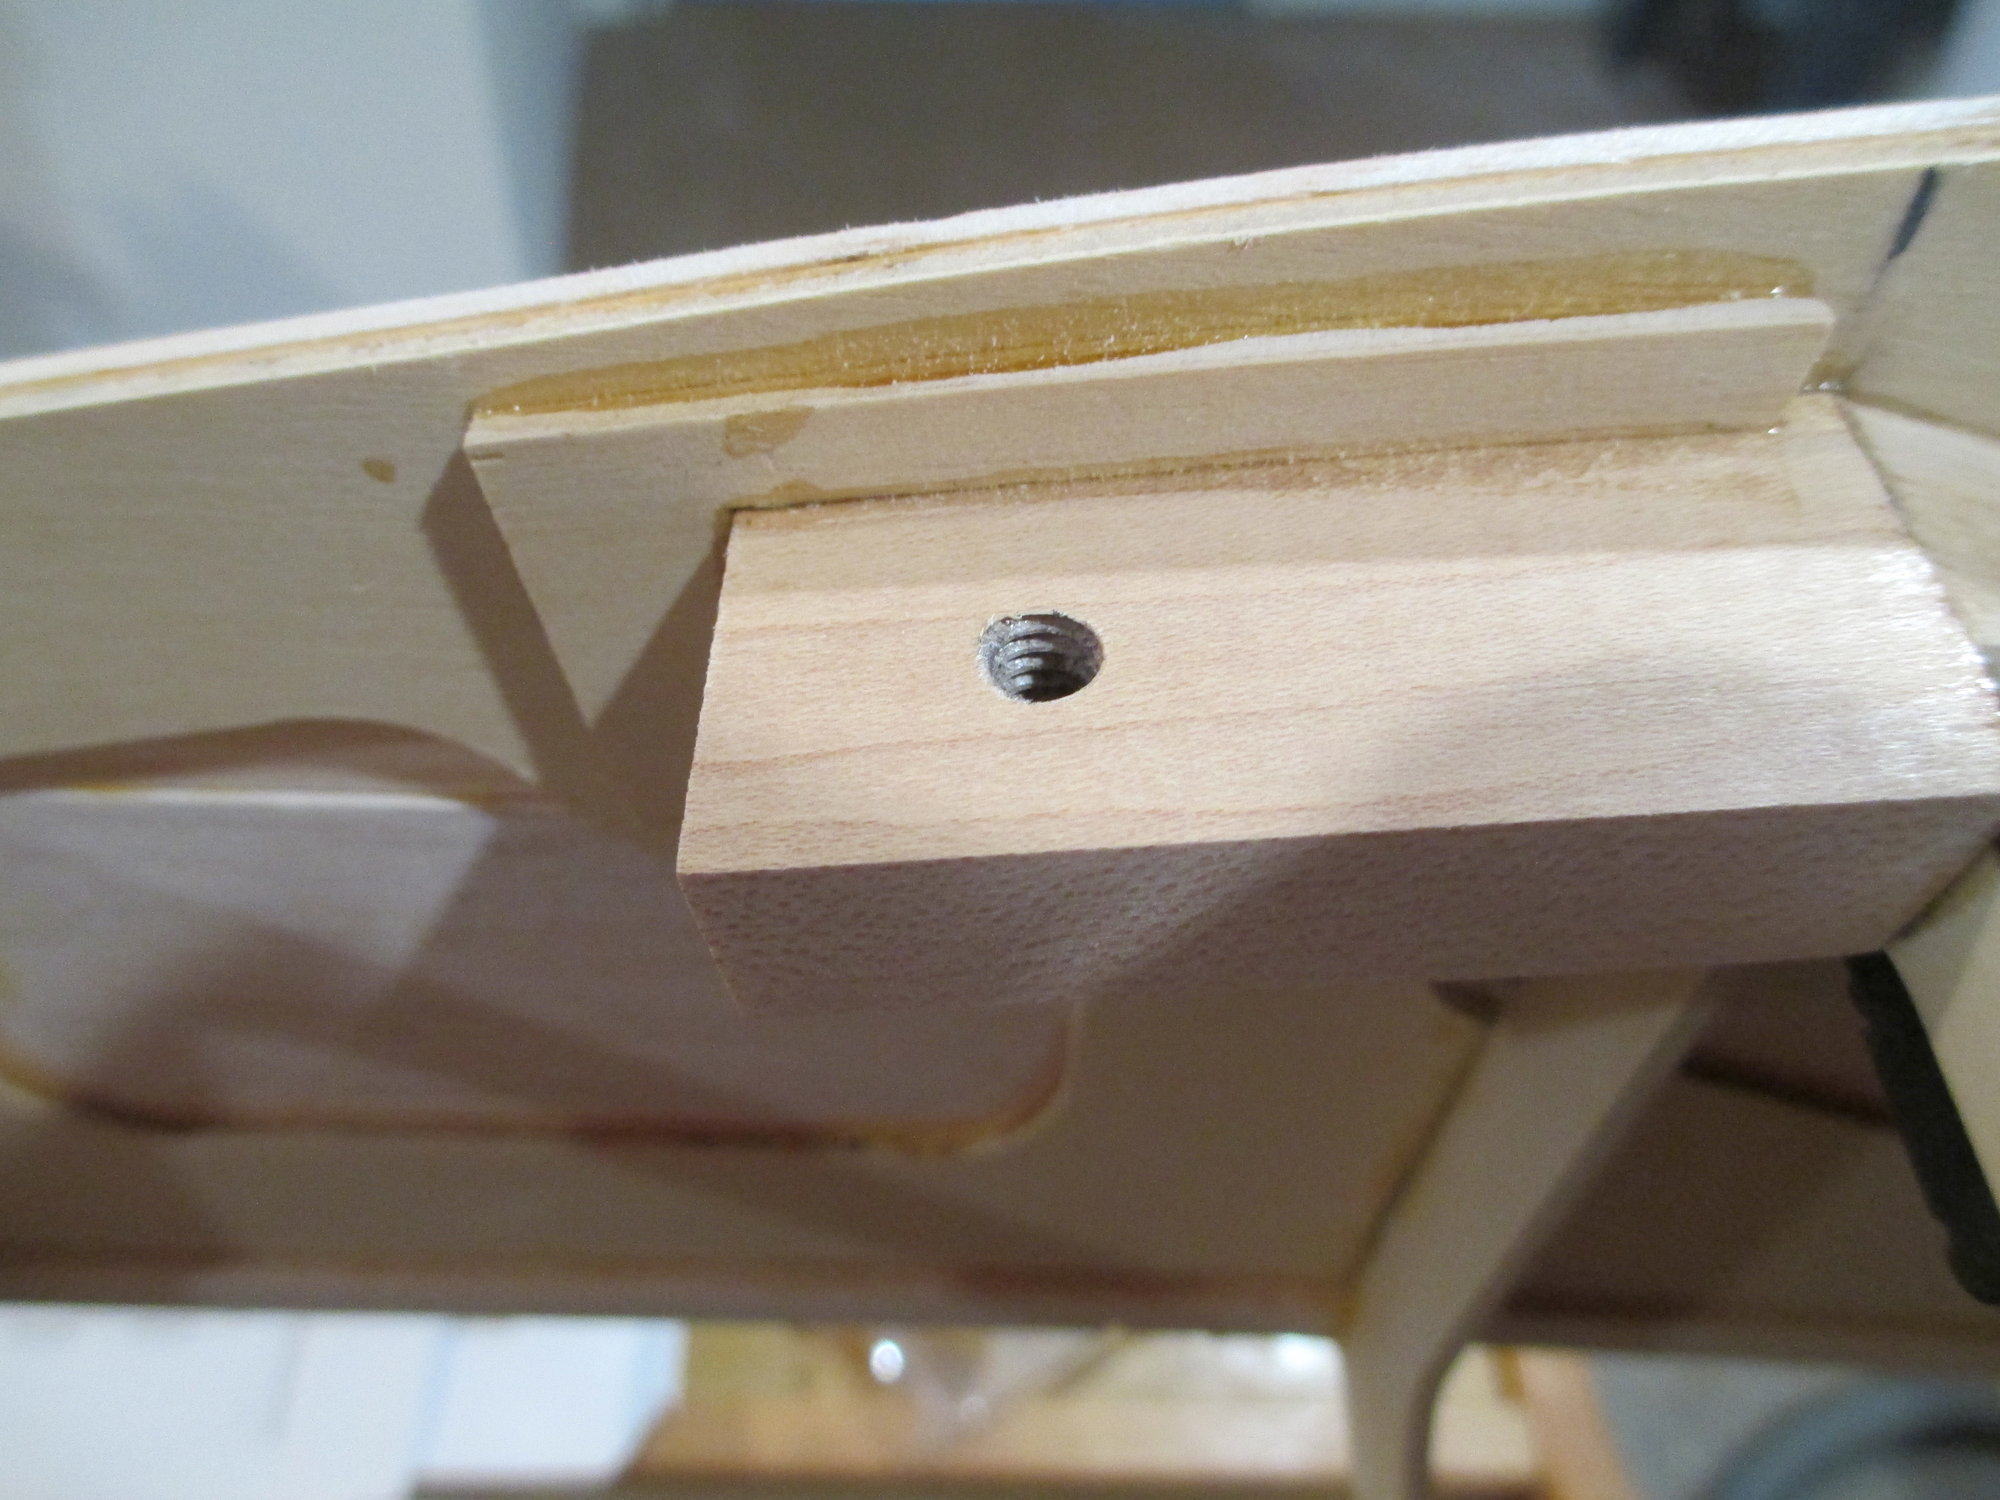
Close-up of the wood threads after tapping.
I flood the newly cut threads with thin CA to harden the threads. Once dried, I will re-tap the hole again using the same 1/4-20 tap.
Last edited by VincentJ; 12-08-2019 at 03:51 PM.
12-08-2019, 03:33 PM
#538
Thread Starter
Fitting of the wing dowel plates are installed next. The existing holes that were drilled in FD-2 for the wing dowels were less than accurate. So here's the solution to fix the problem. With the wing installed I slipped the 1/4" wing dowel through FD-2 and into the wing.
The wing dowel plates are then slipped over the wing dowels. I used a pencil to trace the outline of the plate to FD-2.
The wing dowel plates were then removed and epoxy was spread. Note that I kept the epoxy away from the hole.
The dowel plates were re-installed and taped into place so they wouldn't move when the wing dowels are removed.
With the dowels and wing removed, the plates are clamped. This will ensure that both wing dowels will be in perfect alignment allowing the wing to be installed/removed easily at the field...
Last edited by VincentJ; 12-09-2019 at 05:42 AM.
 12-09-2019, 08:11 AM
#542
Thread Starter
Thanks Tim, I always hold my breath when I'm joining the wing to the fuse for the first time. This one fit like a glove right from the get go...I really didn't have to adjust anything! I still need to check the wing incidence.
Last edited by VincentJ; 12-09-2019 at 08:13 AM.
12-12-2019, 02:04 AM
#543
Thread Starter
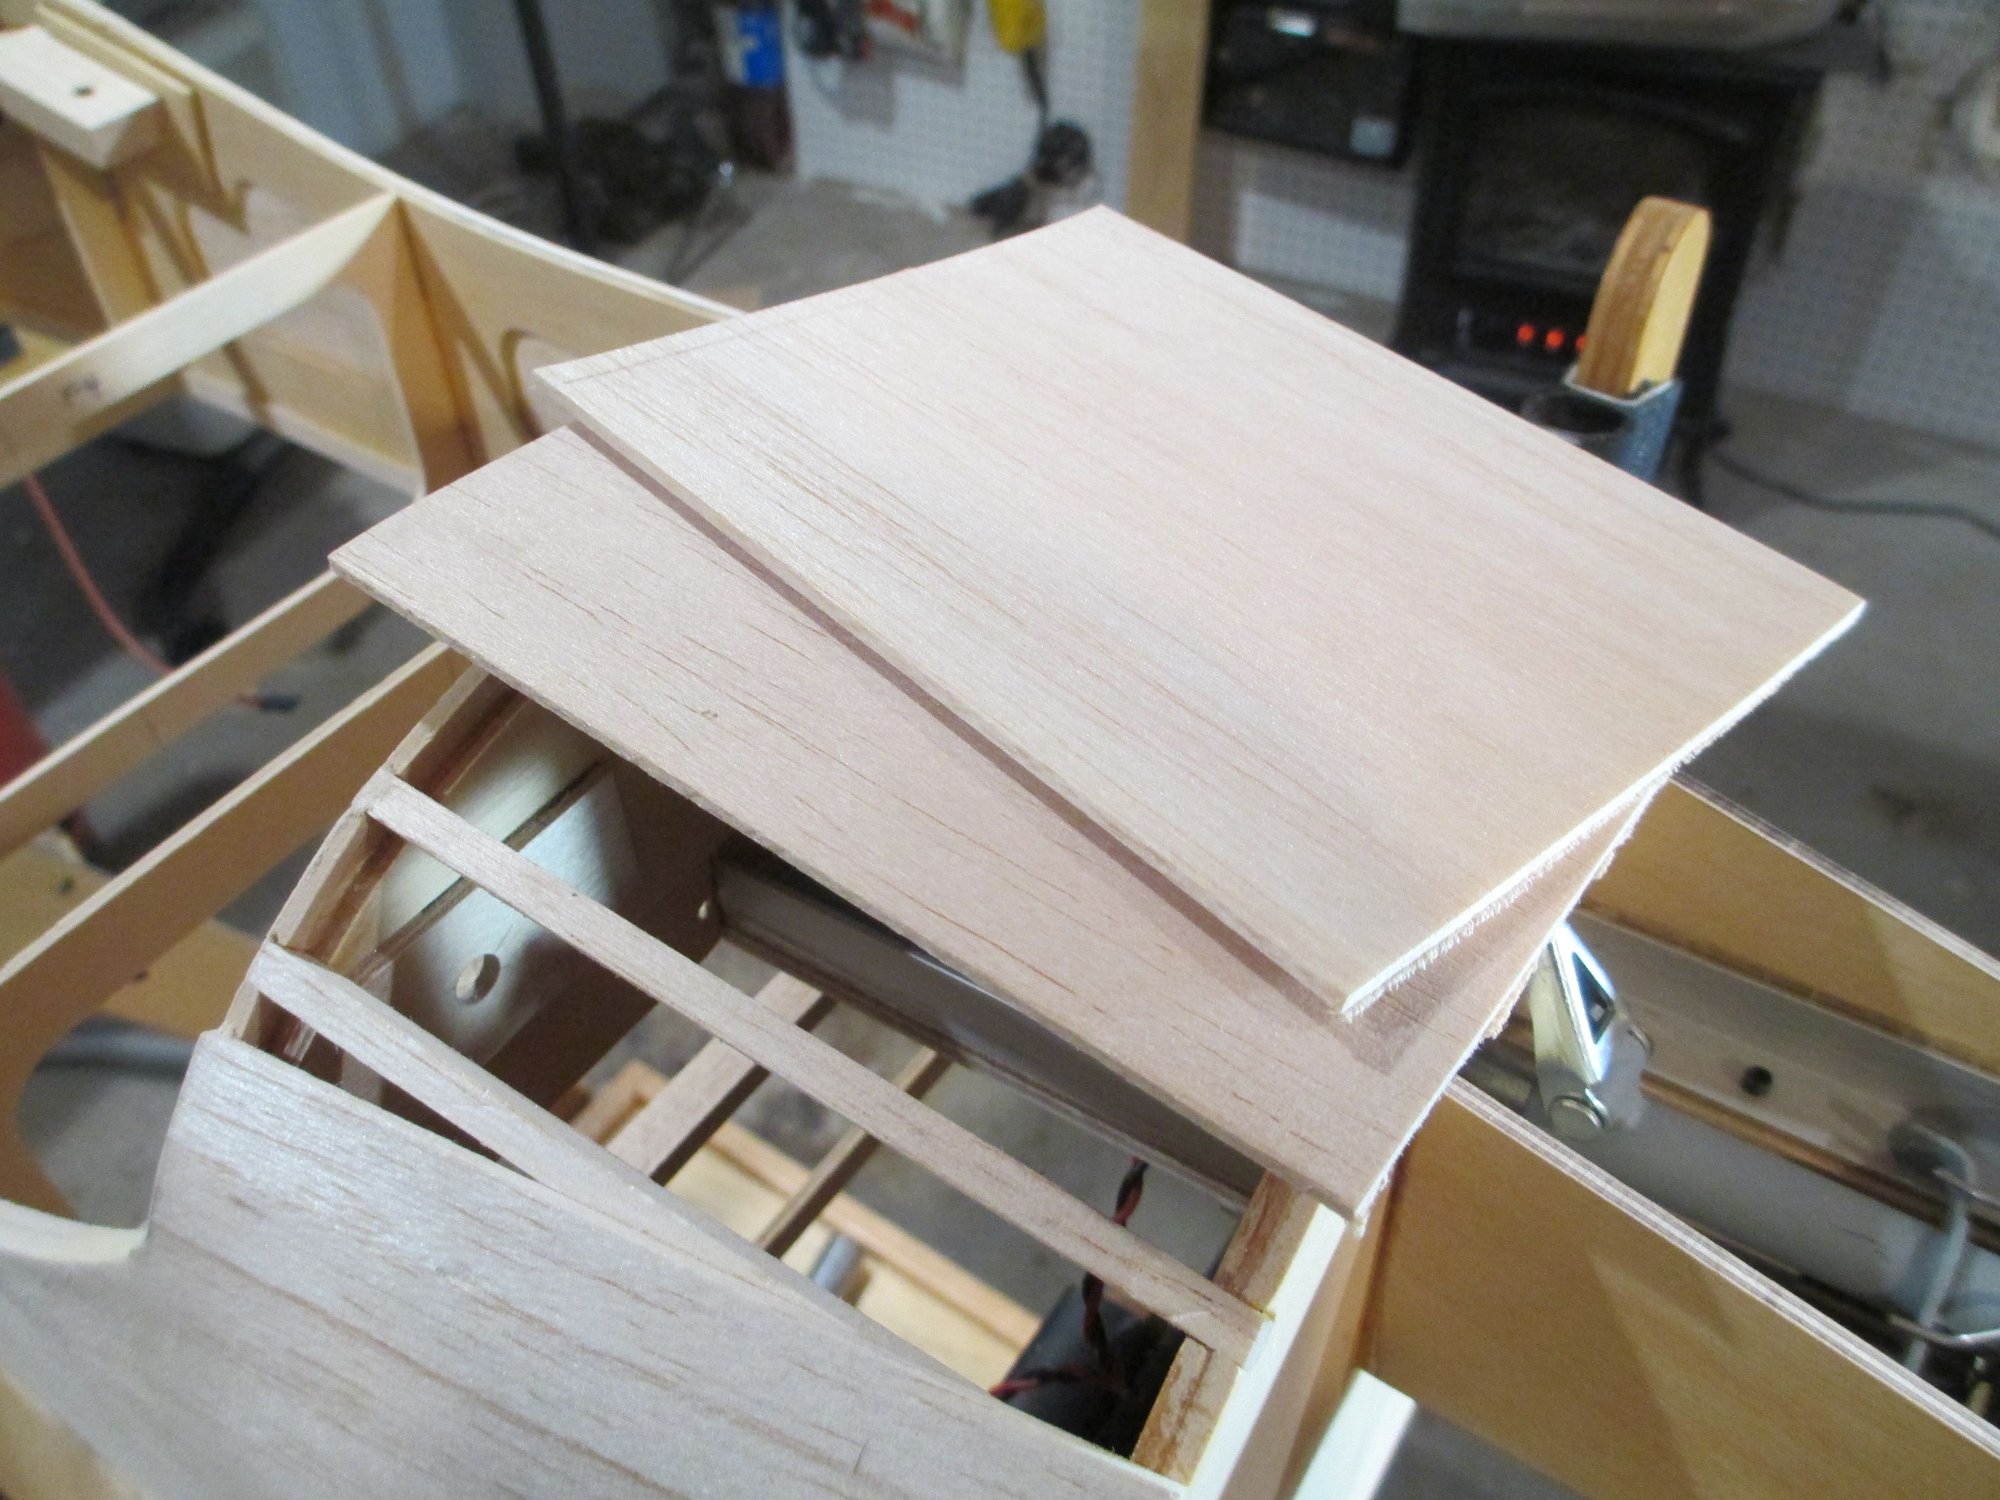
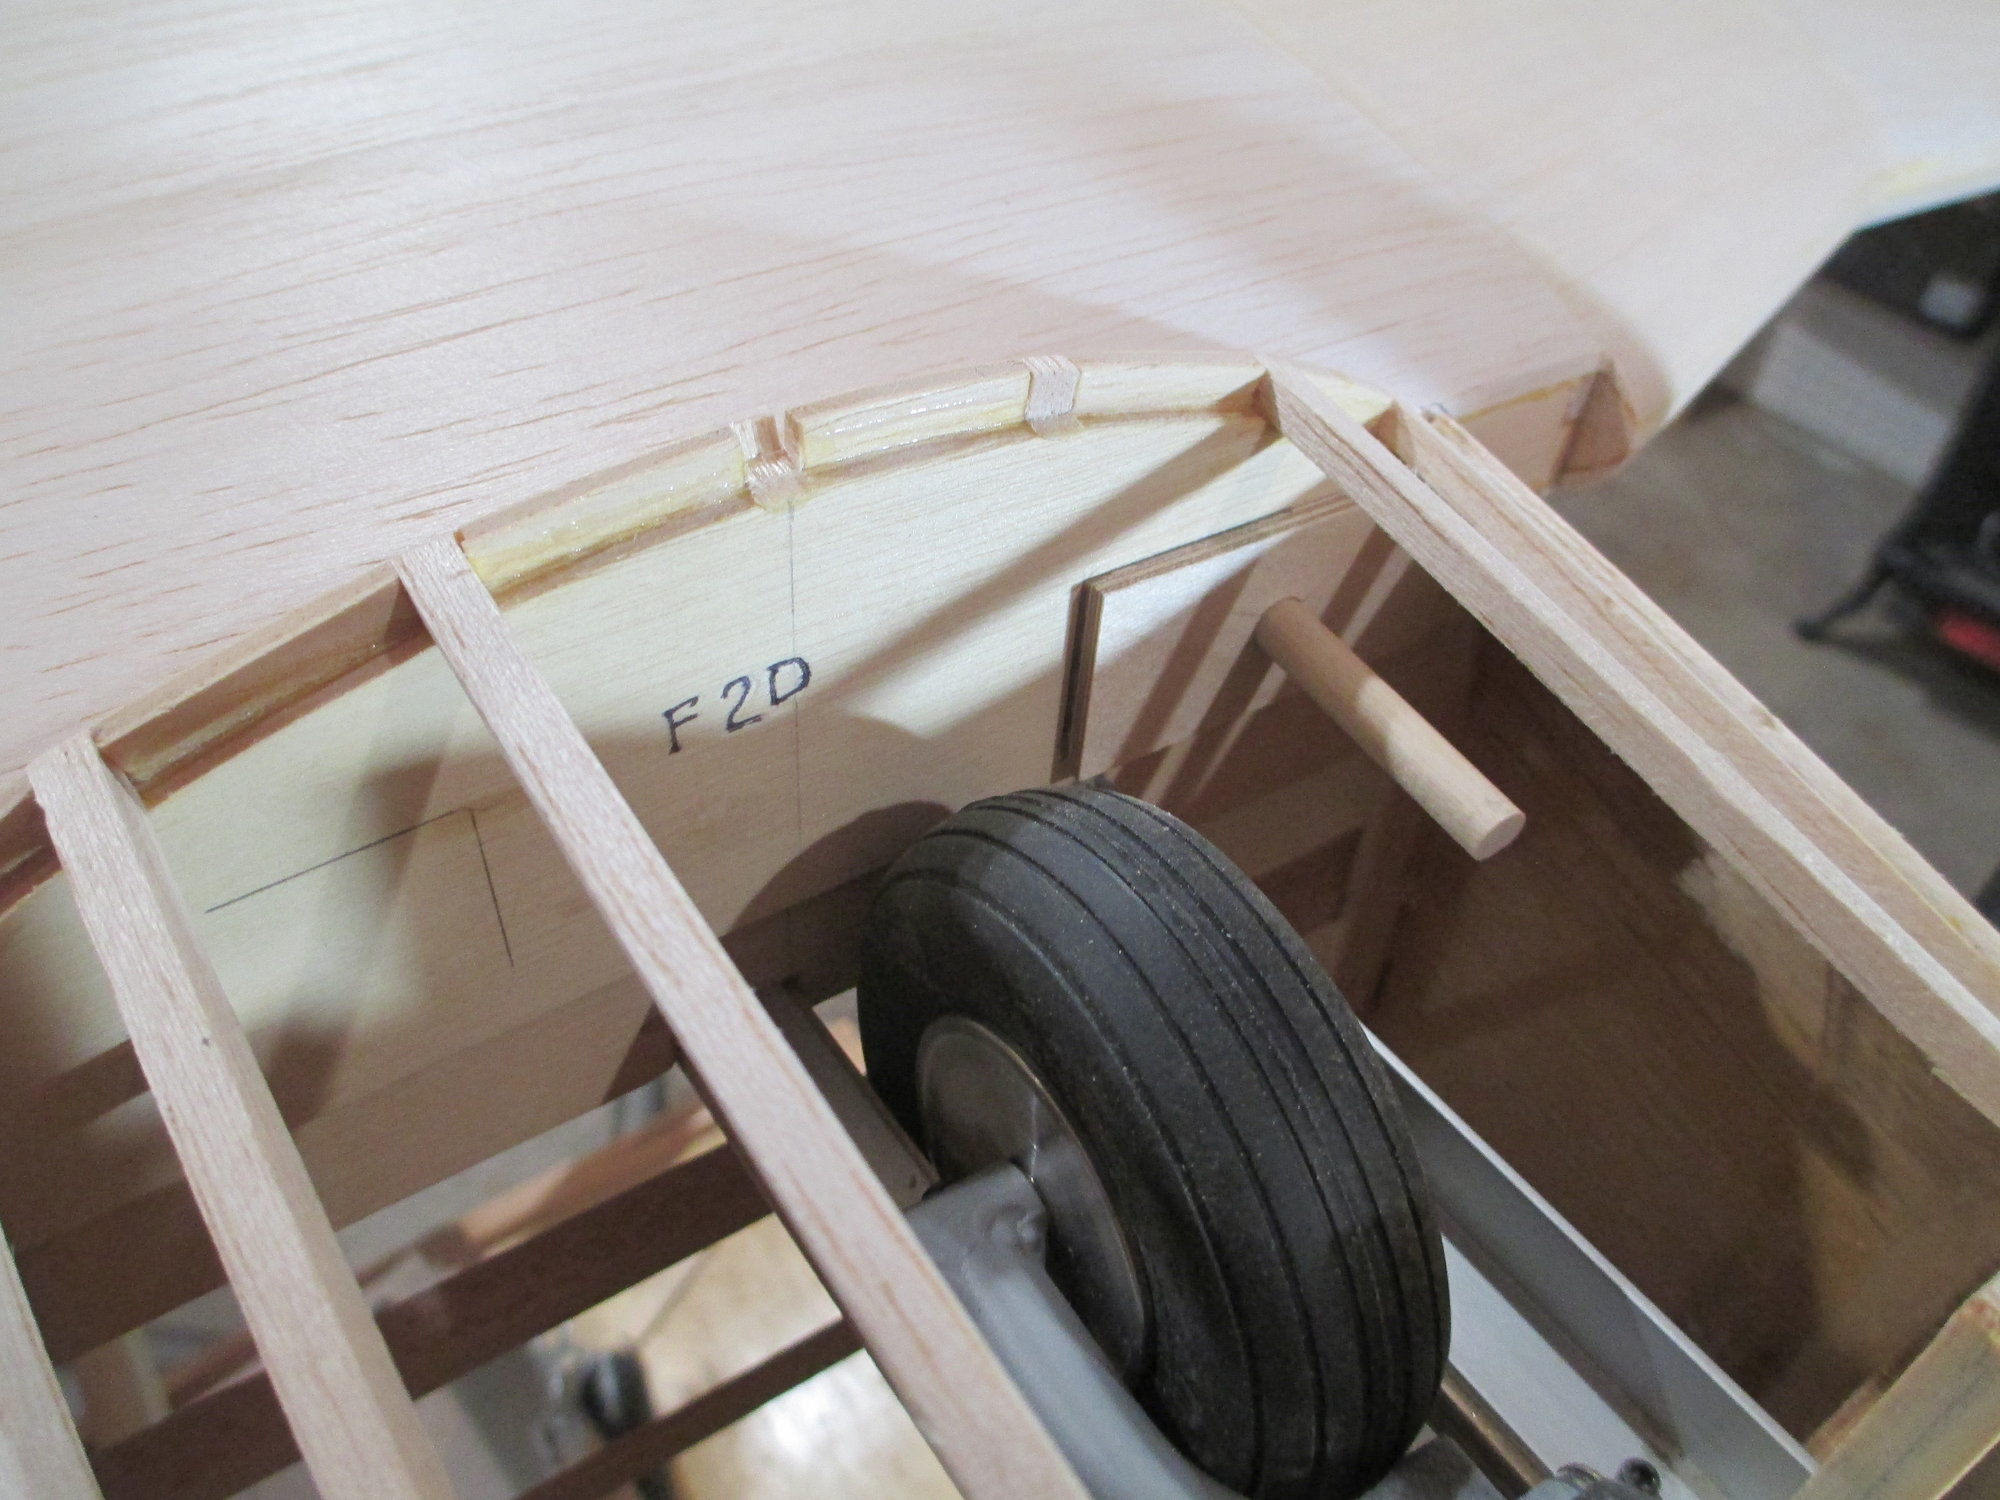
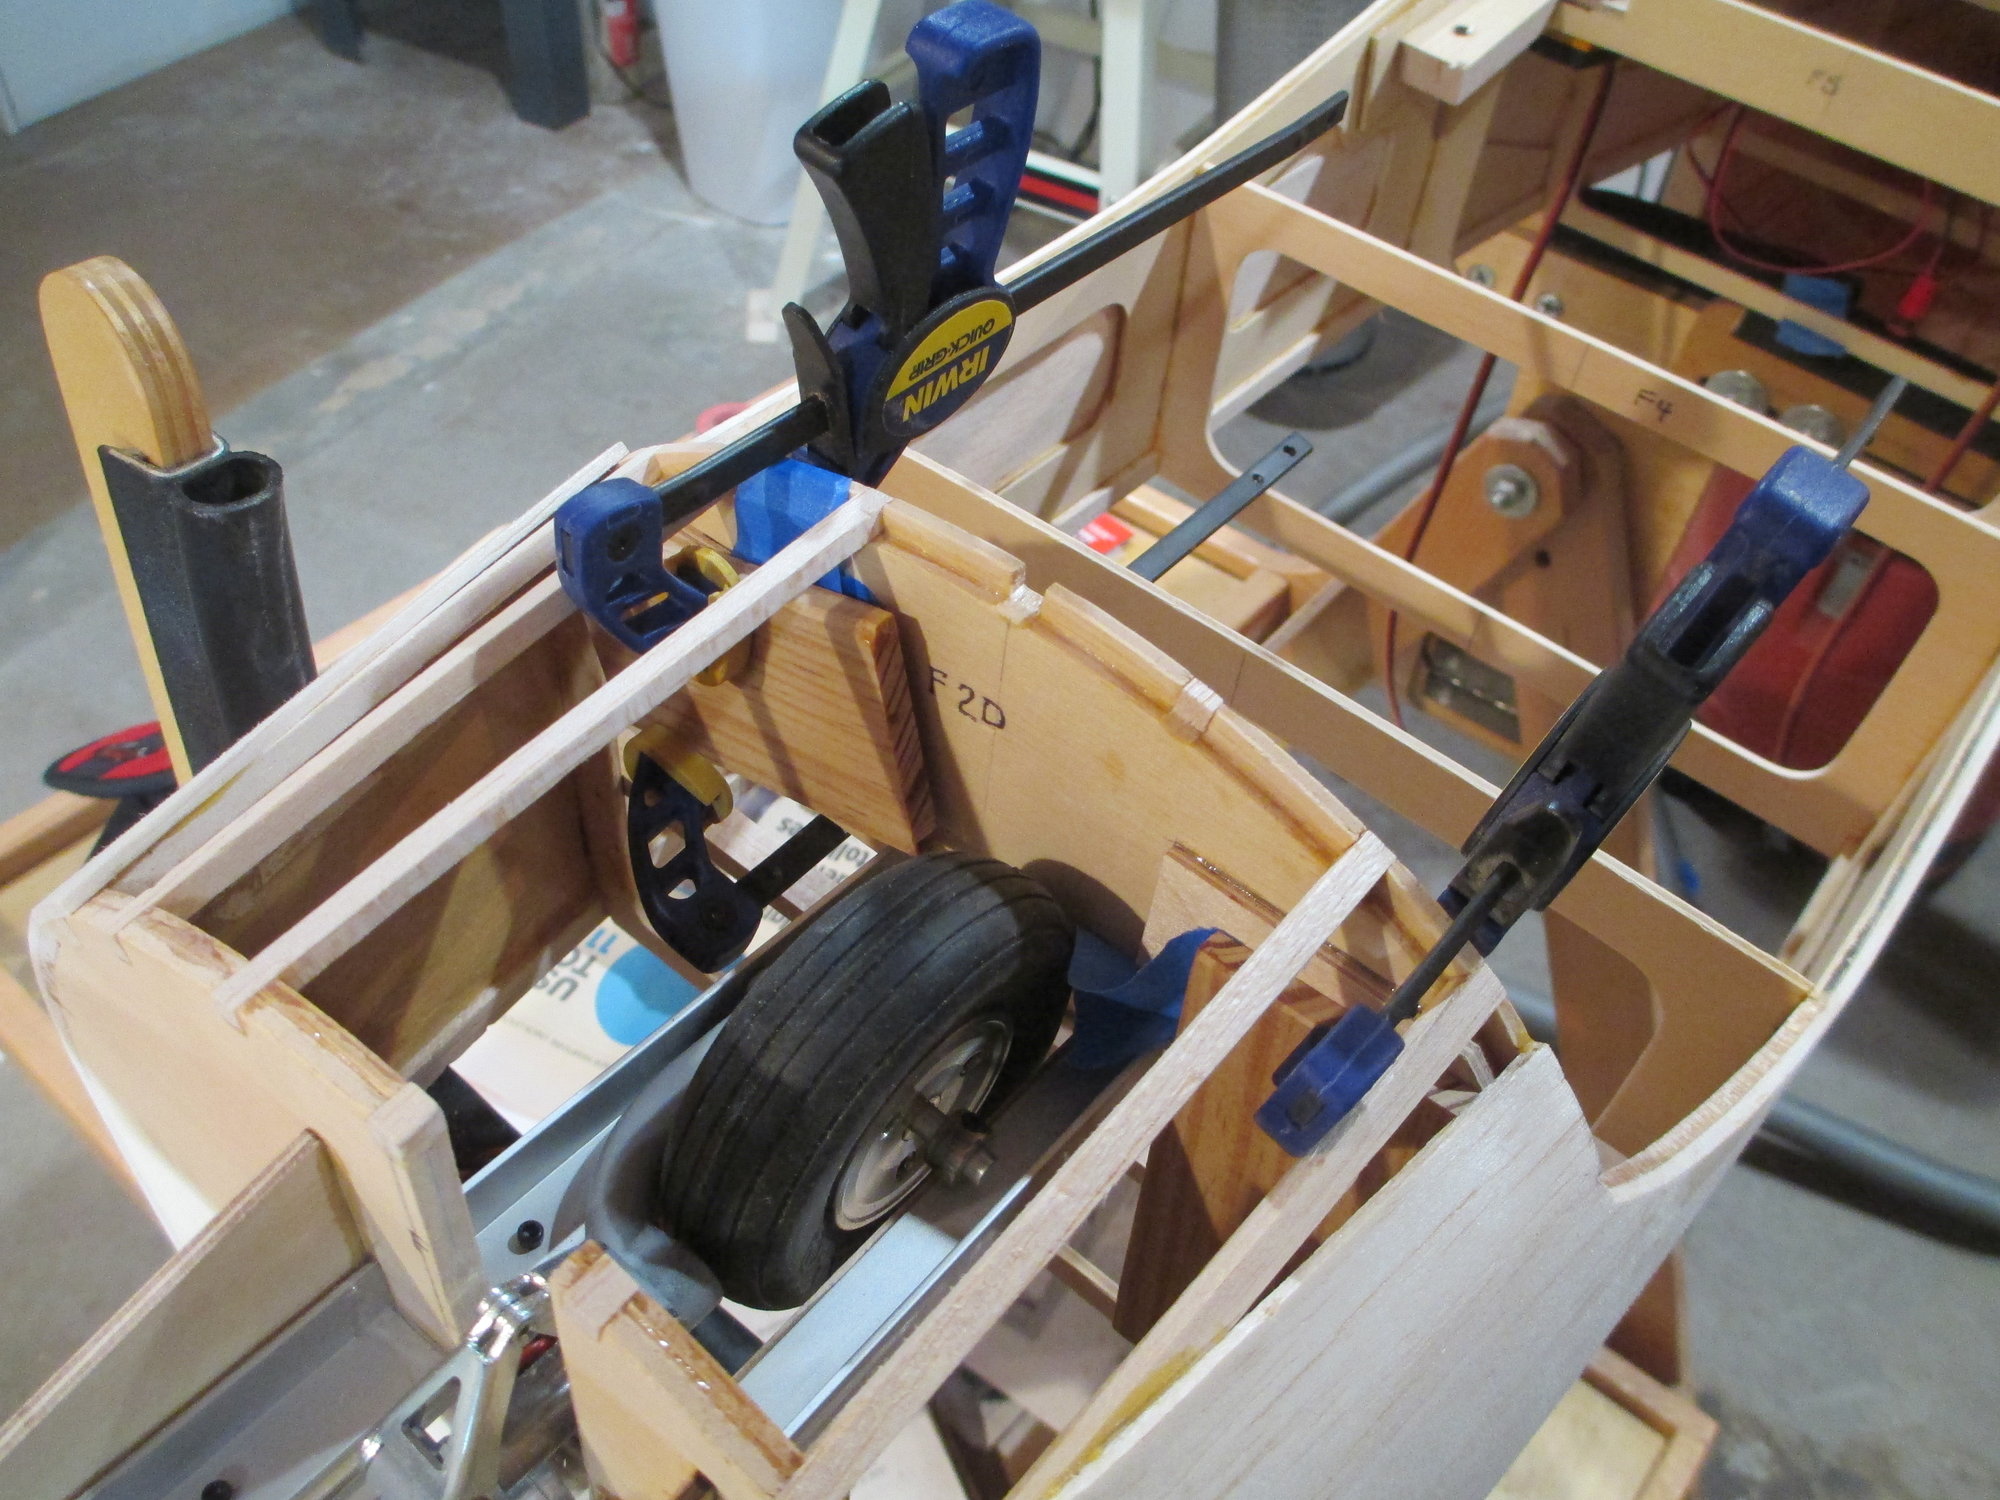
The plans indicated the area around the nose retract be built up with a series of small frameworks from leftover balsa that would support the sheeting around the nose wheel cutout. I however wanted to make it stronger and out of one piece...
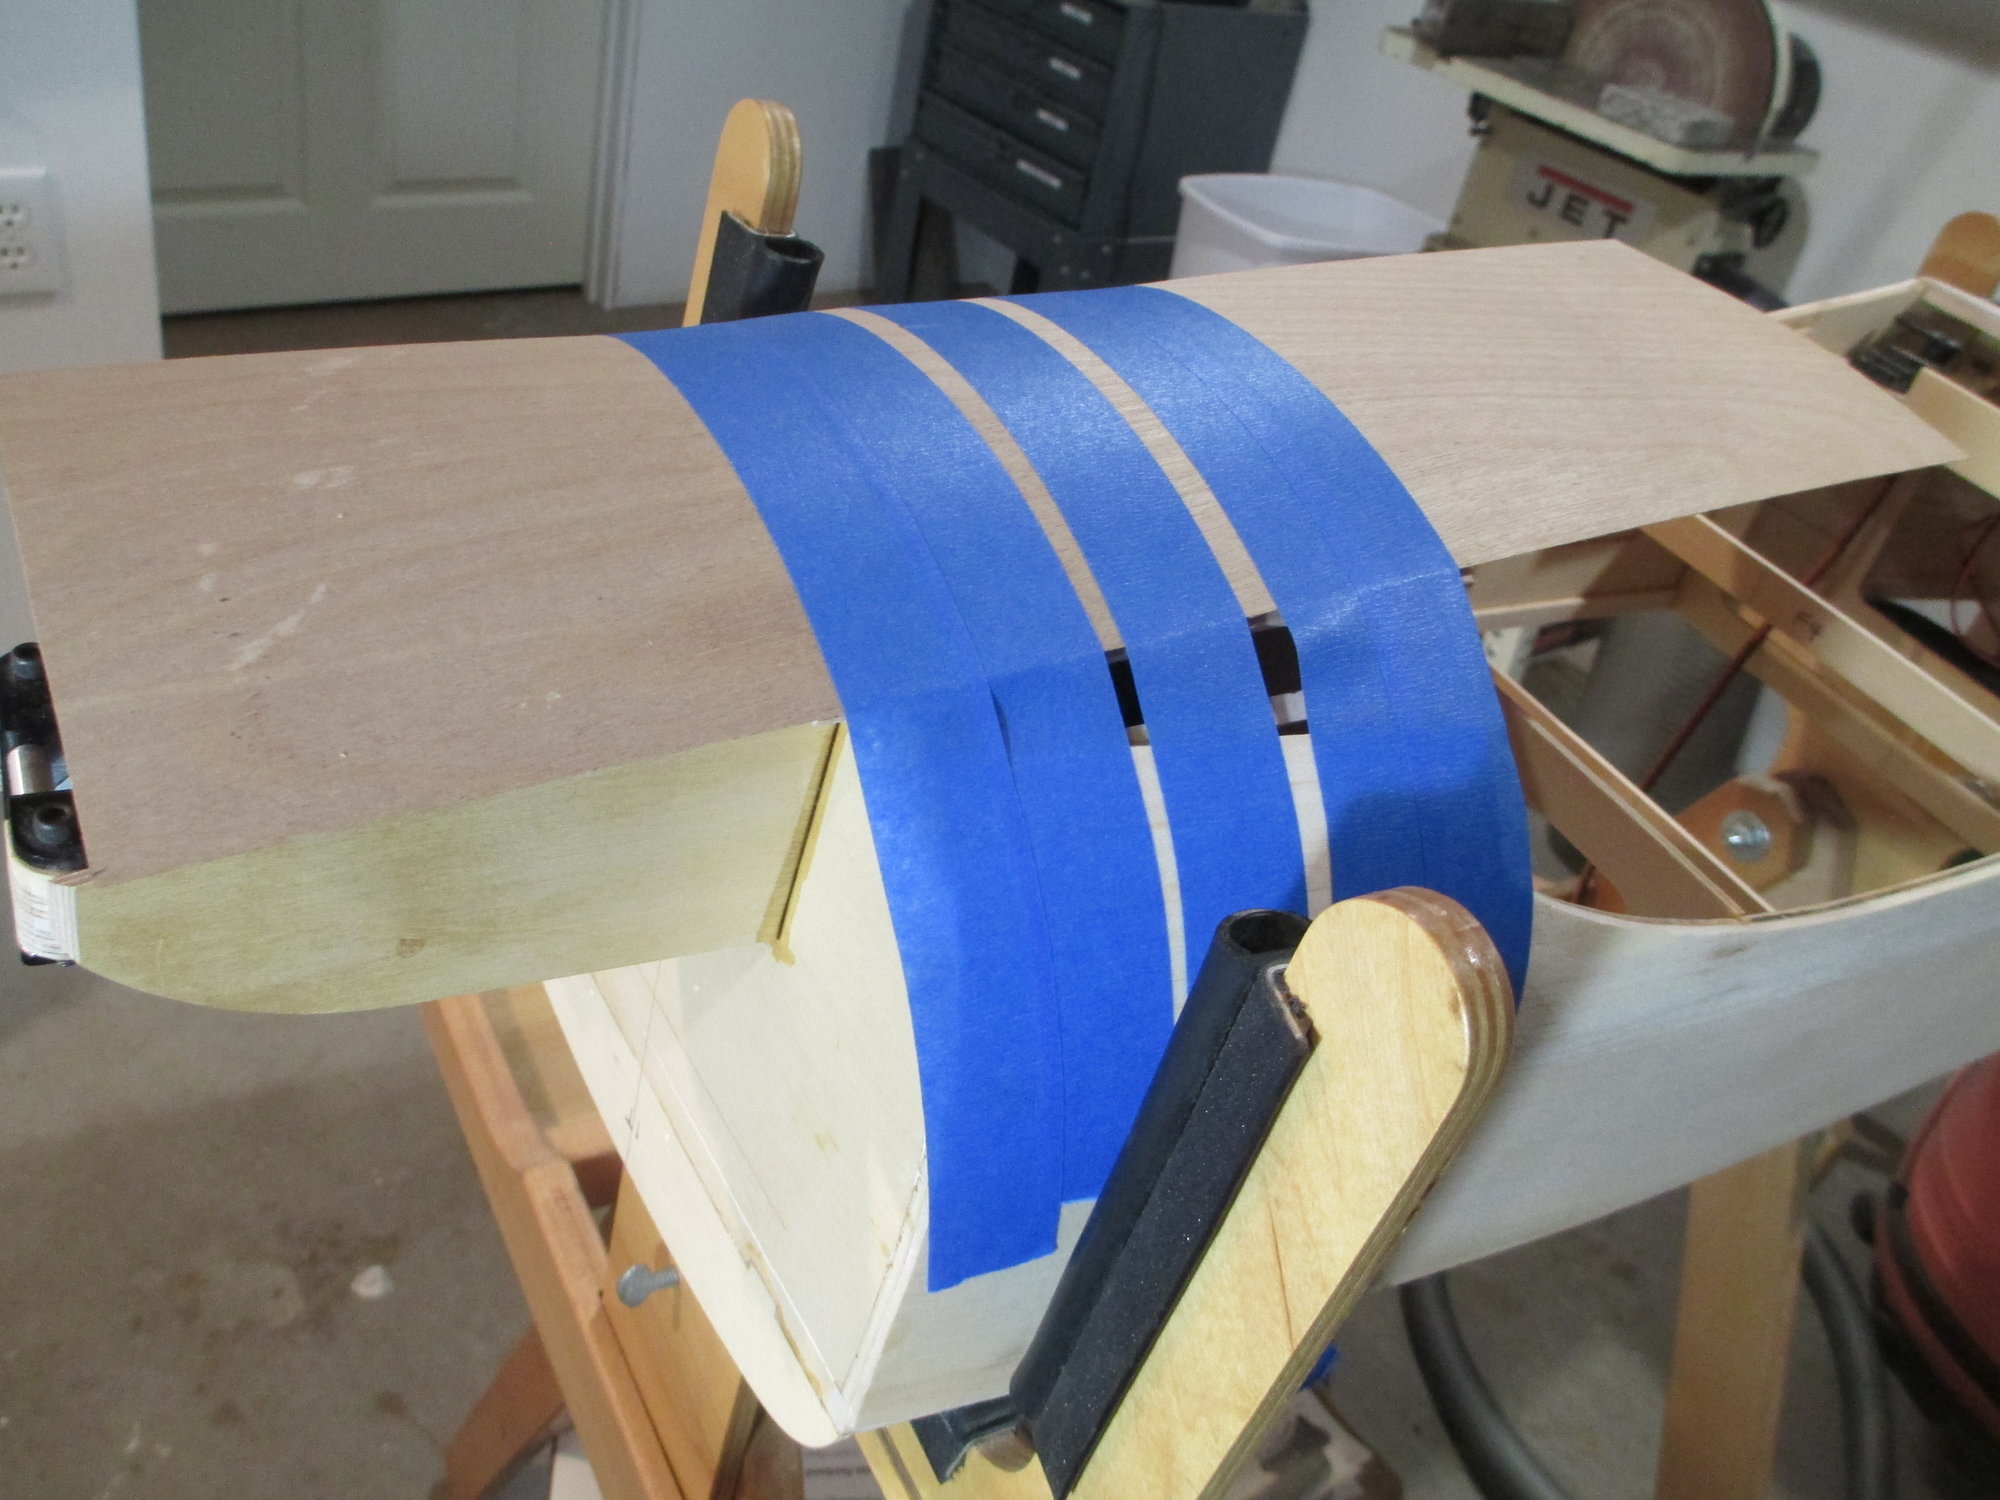
Using left over balsa sheets, I decided to make a lamination. Laminated lumber is always stronger than one solid piece. I used the fuselage's framework as the form to clamp to, duplicating the exact curve of the fuse.
I used epoxy instead of glue for the laminations. I'm not afraid of the slight additional weight from the epoxy. The weight is where I want it...
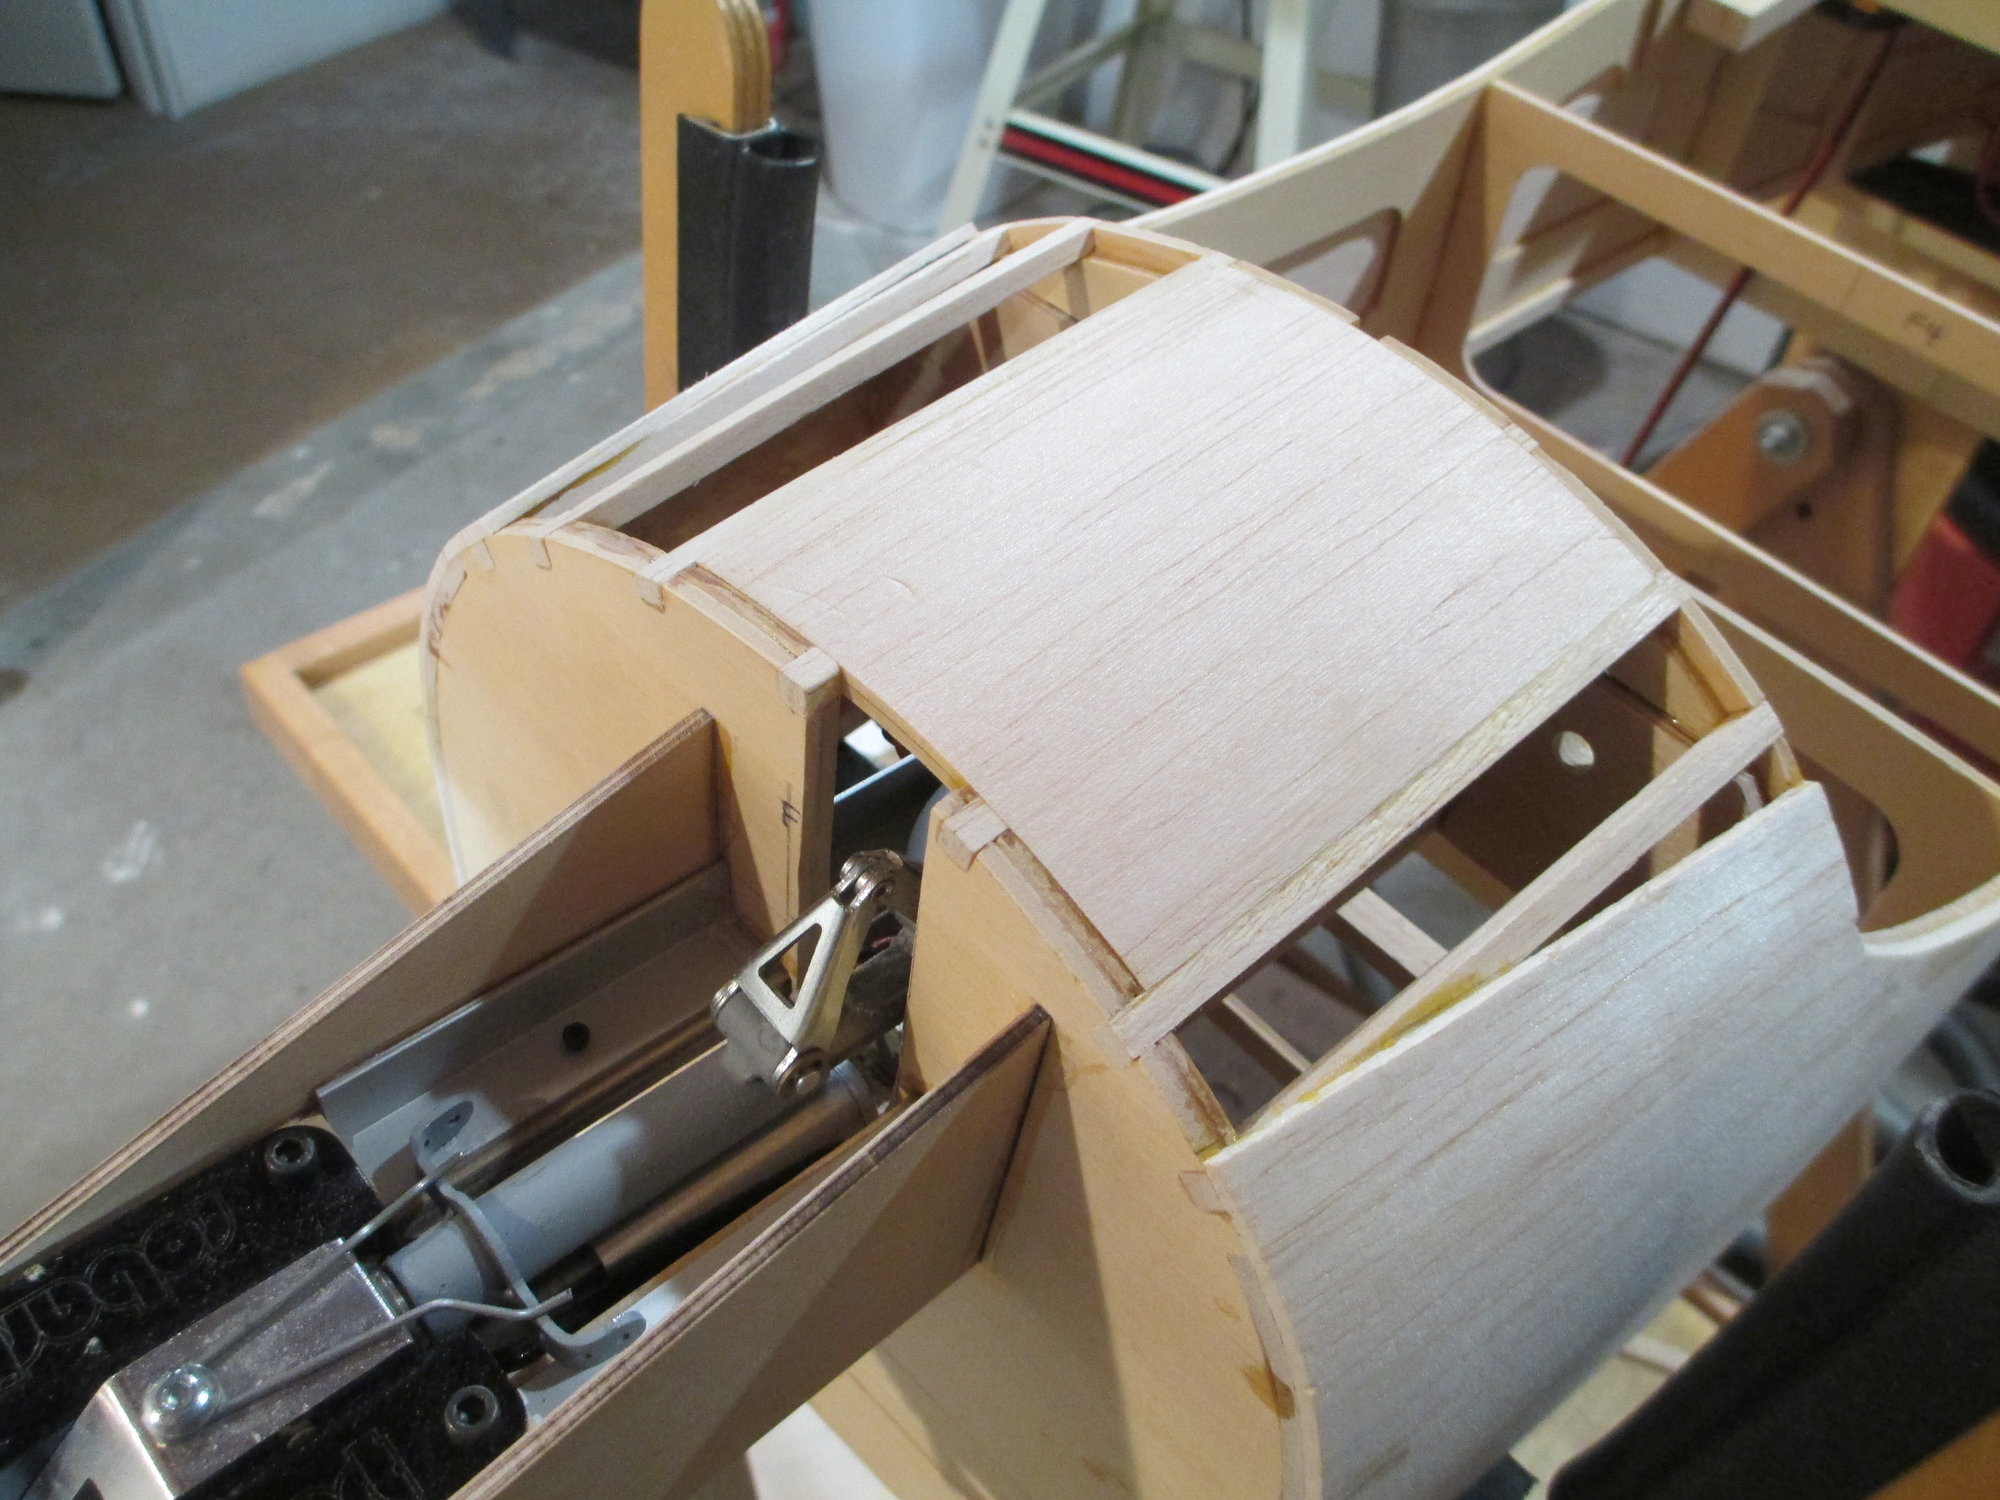
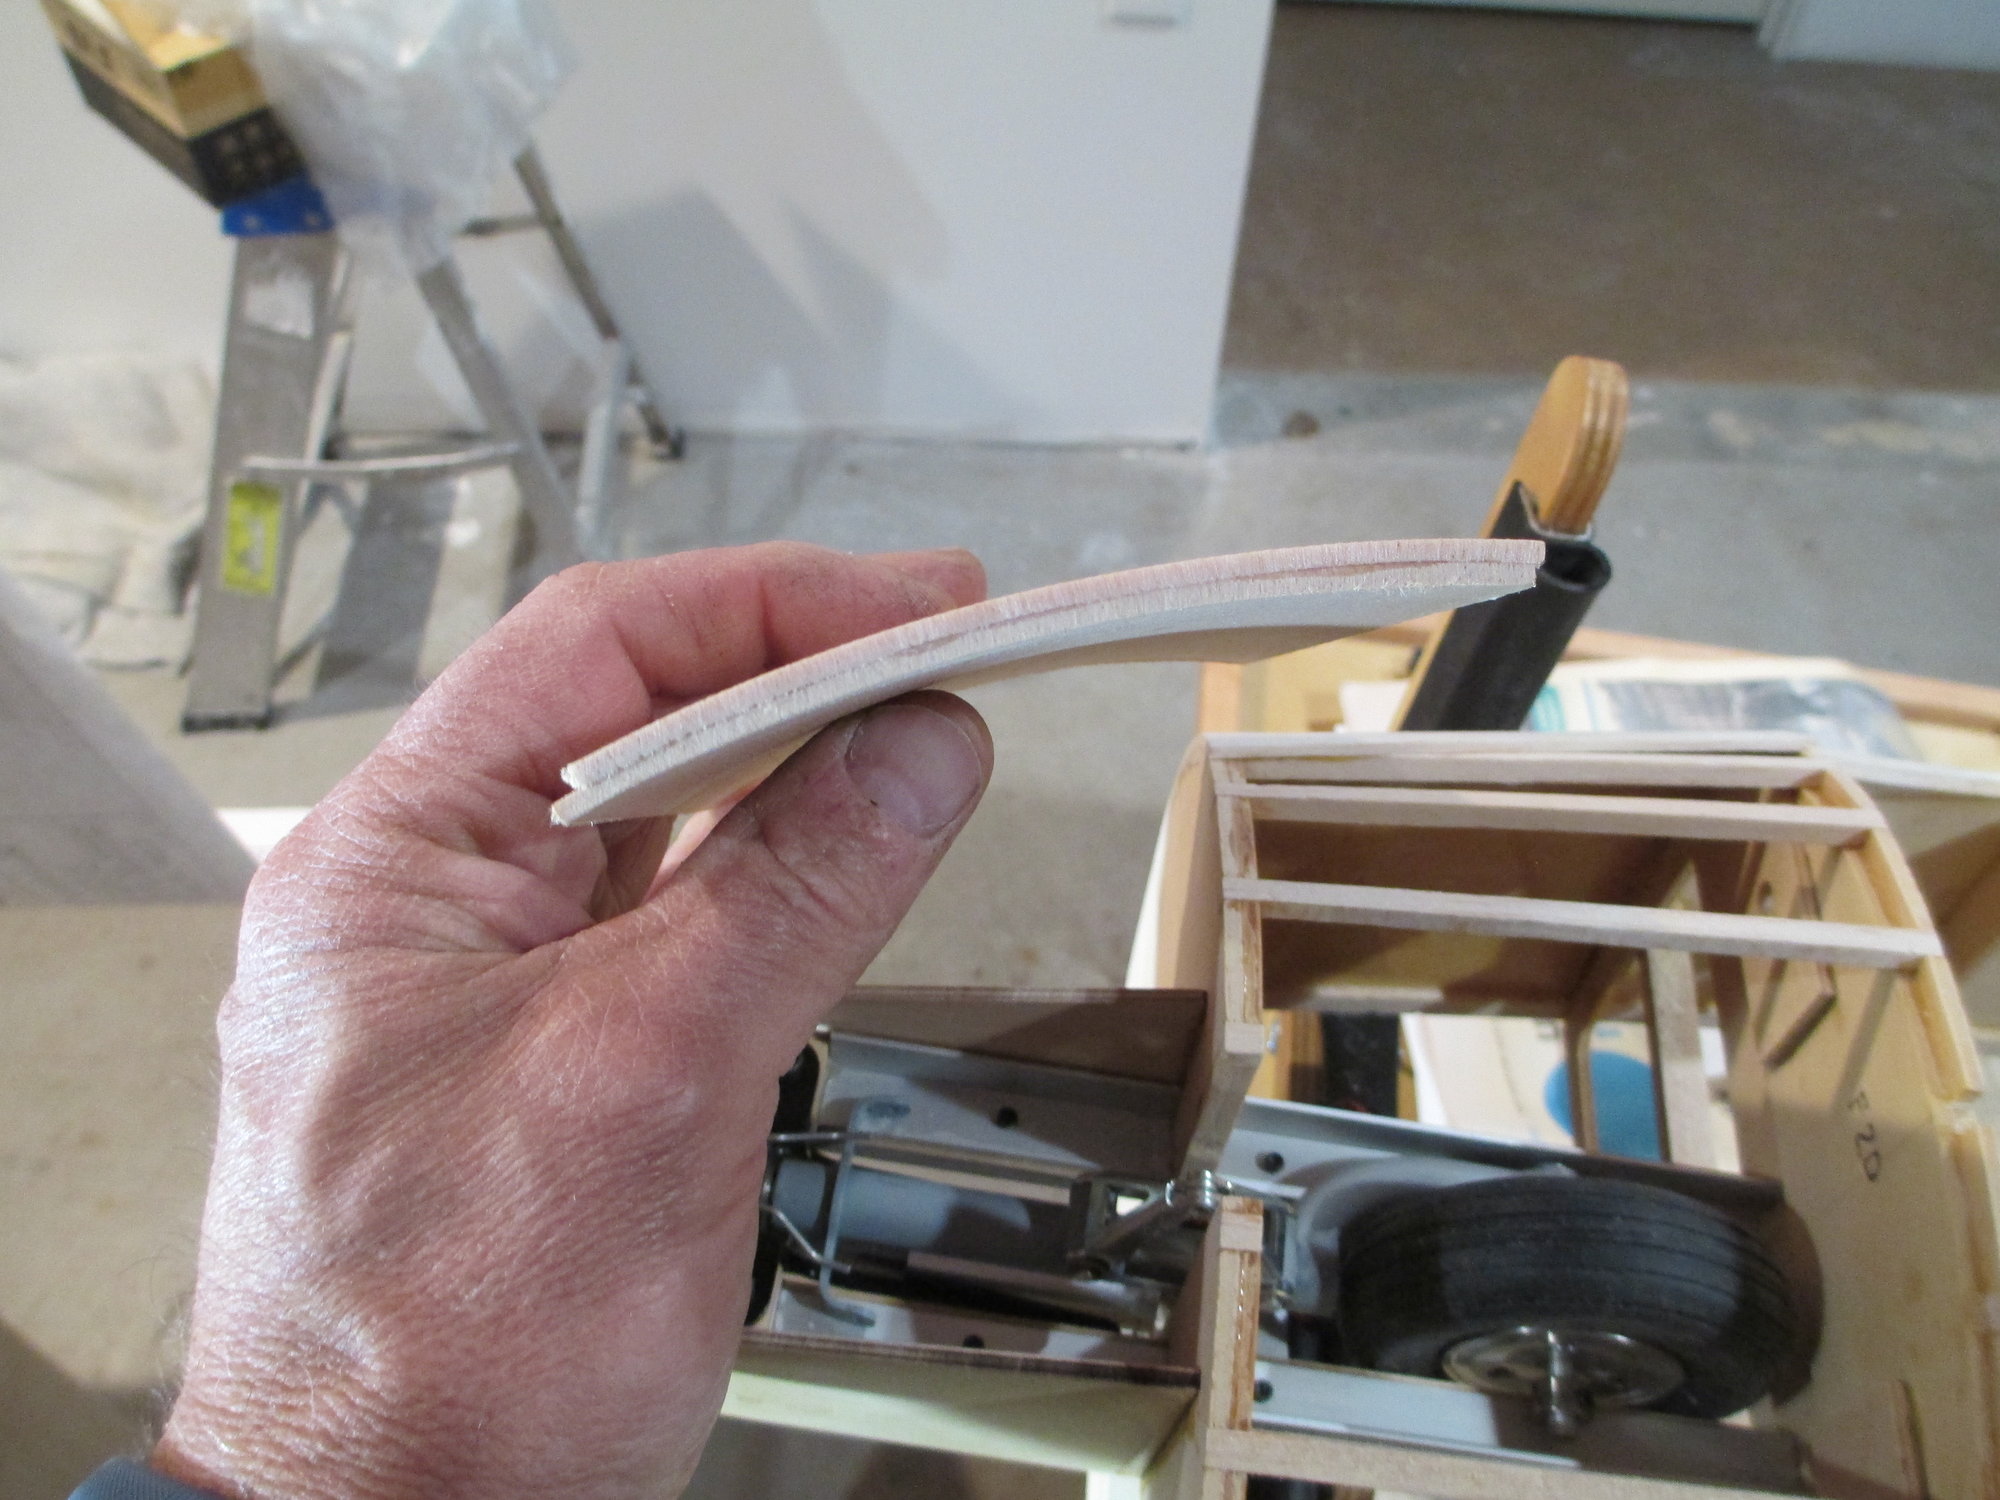
End result, one solid 3/16" thick piece. Now it's time to cutout the wheel well for the nose wheel and strut.
Last edited by VincentJ; 12-12-2019 at 07:36 AM.
12-12-2019, 09:43 AM
#545


Hola Vincent. I am following this build entertained with each post.
My reactions. I smile and nod my head watching how complex this one is compared to the 4Star. Knowing my patience limits, I could never handle this kind of building. It requires the skills of a violin maker. Good to see each advancement of the Bonanza. Glad you did not choose the V-tail.
Keep your hands warm. It's cold outside.
12-12-2019, 10:33 AM
#546
Thread Starter
Hola Vincent. I am following this build entertained with each post.
My reactions. I smile and nod my head watching how complex this one is compared to the 4Star. Knowing my patience limits, I could never handle this kind of building. It requires the skills of a violin maker. Good to see each advancement of the Bonanza. Glad you did not choose the V-tail.
Keep your hands warm. It's cold outside.
My reactions. I smile and nod my head watching how complex this one is compared to the 4Star. Knowing my patience limits, I could never handle this kind of building. It requires the skills of a violin maker. Good to see each advancement of the Bonanza. Glad you did not choose the V-tail.
Keep your hands warm. It's cold outside.
 While this isn't a kit that should be attempted by any novice builder, if one has several kits under their belt, along with fairly decent building skills it is doable. Since there isn't a lot of good information out there that helps understand the scope and sequence of this build, the pictures and narratives added in this thread along with the instructions in the manual, should help the builder better understand the process. Now, to start on that Stradivarius...
  lol
lol
Last edited by VincentJ; 12-13-2019 at 10:09 AM.
12-12-2019, 10:53 AM
#547
Vince, watching this build I am gleaming a lot of good ideas for mods, such as the nose gear mounting, that I can apply to both the Caddell A36 Bonaza and the RCM Navion projects.
I agree with your comment about this Top Flite kit being doable if you have a few kits under your belt. The TF Gold Editions have excellent instructions and plans and your thread is the frosting on the cake.
Mike
I agree with your comment about this Top Flite kit being doable if you have a few kits under your belt. The TF Gold Editions have excellent instructions and plans and your thread is the frosting on the cake.
Mike