


Armortek M26 Pershing Build
 04-16-2023, 08:58 AM
#1

Thread Starter
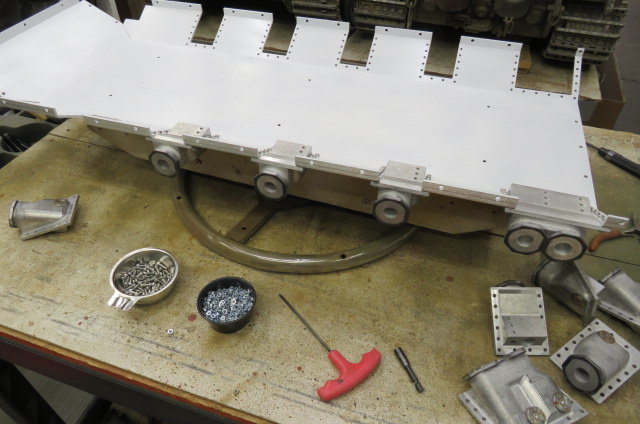
I mentioned a while ago I would post pictures of the Armortek Pershing build but I've been really slow at getting started. The kit was delivered about a month ago and, since it was still COLD in the garage, all I did was open the one box to get the build instructions out. It's started warming up so a few days ago I opened all the boxes and got the lower hull panels out, washed any machining oil off of'em, then painted the inner walls Krylon Semi Gloss White. I do that with my other builds (cause it makes seeing dropped nuts/bolts, motors, electronics, tools, beer cans, etc. easier to see.)
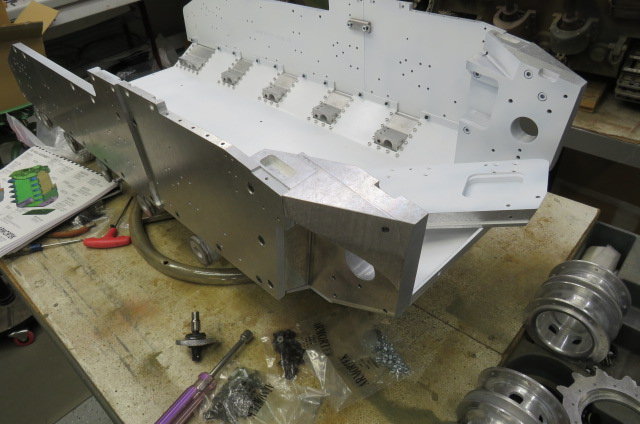
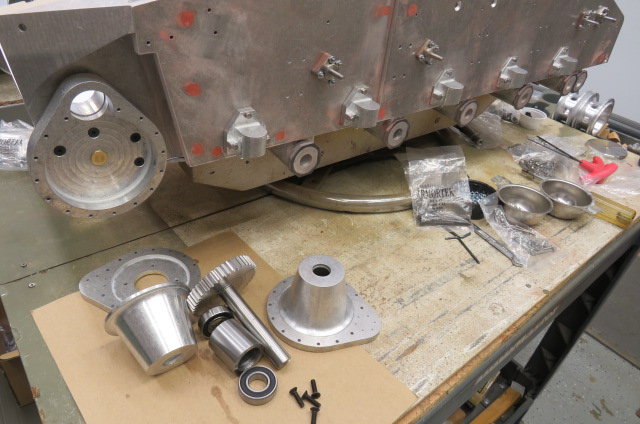
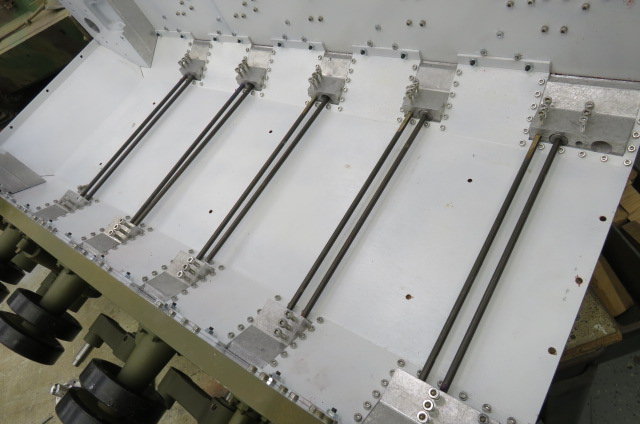
Three days ago I started bolting the suspension housings on and there's a LOT of M3 bolts! About wore me out!! Then today I felt like bolting the sides on. They're still loose until I get the front & rear lined up. I'm not going to put any top hull panels on until I get the drive motors in (coming in May).
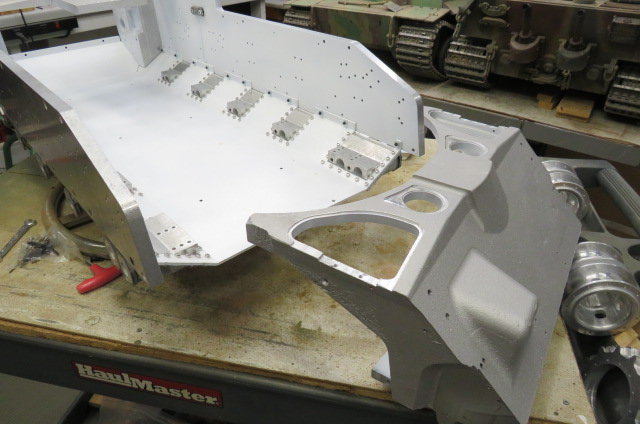
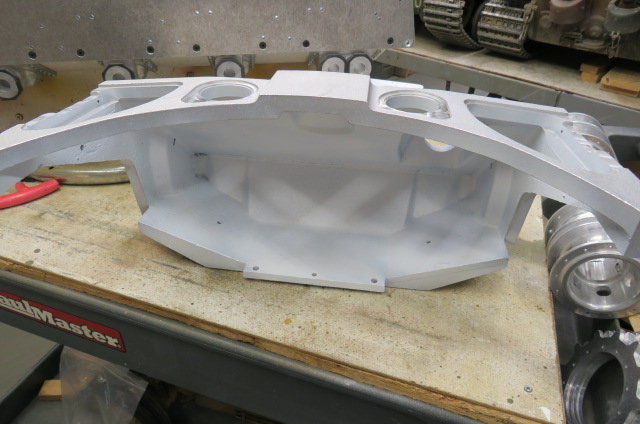
Also today I almost bolted on the cast front glacis but it weighs 12 pounds and that'll just add to the weight when I go to turn it over. I'm debating if I should until after I paint the bottom with the swingarms on... this'll get heavy QUICK!
In a few days I'll start assembling the swingarms, put the torsion bars on, and get them installed and there's all those side hull things that go on (shock mounts, return roller posts, rear sprocket drive housings, etc.). With each thing that goes on it gets heavier & heavier so I don't want to get too far in to it because I want to be able to turn the hull over to prime & paint the bottom.
IF I don't get a hernia, throw my back out, and weather permits I'll post more pics later. Just wanted to show the JOB I've got ahead of me and I'll keep ya posted when I get something worth it done. I may be done by September... (HOPEFULLY!!)
Mike

Three days ago I started bolting the suspension housings on and there's a LOT of M3 bolts! About wore me out!! Then today I felt like bolting the sides on. They're still loose until I get the front & rear lined up. I'm not going to put any top hull panels on until I get the drive motors in (coming in May).
Also today I almost bolted on the cast front glacis but it weighs 12 pounds and that'll just add to the weight when I go to turn it over. I'm debating if I should until after I paint the bottom with the swingarms on... this'll get heavy QUICK!
In a few days I'll start assembling the swingarms, put the torsion bars on, and get them installed and there's all those side hull things that go on (shock mounts, return roller posts, rear sprocket drive housings, etc.). With each thing that goes on it gets heavier & heavier so I don't want to get too far in to it because I want to be able to turn the hull over to prime & paint the bottom.
IF I don't get a hernia, throw my back out, and weather permits I'll post more pics later. Just wanted to show the JOB I've got ahead of me and I'll keep ya posted when I get something worth it done. I may be done by September... (HOPEFULLY!!)
Mike

The following users liked this post:
tankme (04-16-2023)
04-16-2023, 12:42 PM
#2
I'm jealous. I have been sitting here for months pondering buying one of these, but I don't know if I can justify the expense. I would absolutely love it, but since I'm also finishing my college degree I fear it would sit in my garage for years before building it. Armortek will do payments so it would be the same wait before building it...I'm torn and I know they don't release the same vehicle very often. With the economy as it is, it probably won't sell as well as other kits IMO.
Good luck with the build.
Good luck with the build.
04-16-2023, 12:43 PM
#3
Mike, if your beer cans are so small you have to have the white background to see them, you're drinking the wrong beer, Old Boy. Something a little easier to spot once the old beer goggles start to fog up, maybe? Maybe one of those florescent jobs with the rainbow colored flag and a picture of someone famous on tik tok? NOT!! 
I'm gonna enjoy this one. Living vicariously, if you will. Please do lots of photos and videos. Someday I really want to build the armortek PzIII, but I'm on the hillbilly finance plan for that one, lottery tickets.")
PS, I do have an ez pick for the next powerball, the mega millions and the classic 47. Who knows?
I'm gonna enjoy this one. Living vicariously, if you will. Please do lots of photos and videos. Someday I really want to build the armortek PzIII, but I'm on the hillbilly finance plan for that one, lottery tickets.
PS, I do have an ez pick for the next powerball, the mega millions and the classic 47. Who knows?
04-17-2023, 12:04 PM
#4
Thread Starter
Gary, you said you wanted pictures as this build went on so here's a couple.
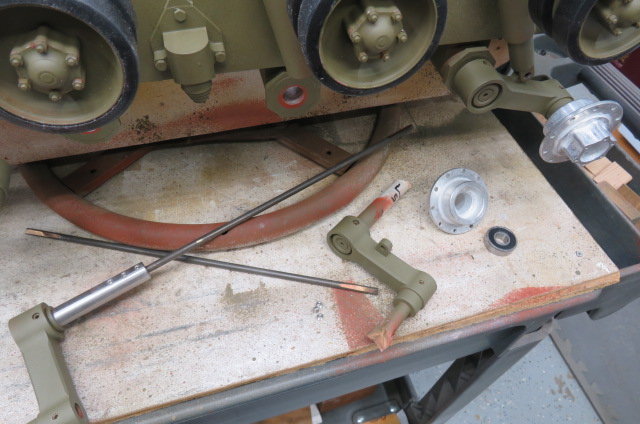
This morning I figured I'd do a swingarm or two but that kept going. The suspension shaft (long one) tightly goes in the swingarm, it's threaded thru, and two M5 grub screws hold it in and the shaft end is threaded for a M5 screw and washer. The wheel axle is threaded in and an M4 grub screw bites in to the threads (and I tried to unscrew it but the Locktite had already set up...).
Once I had'em all done and had all that Locktite on my fingers I remembered I should have taken pictures SO I took the last one back apart (just of YOU Gary! ).
).
The suspension shafts (A or B) have the holes for the flats on the torsion bars (5.40mm diameter) at slightly different angles for each side. All the torsion bars already have the flats ground on'em (THANK GOODNESS cause I've had to calculate the angle and ground them in the past!)
I'm not putting the torsion bars on until the final installation. I'm going to tape the suspension shaft and wheel asle and paint the swingarms first thing. Then I can see how the paint looks.
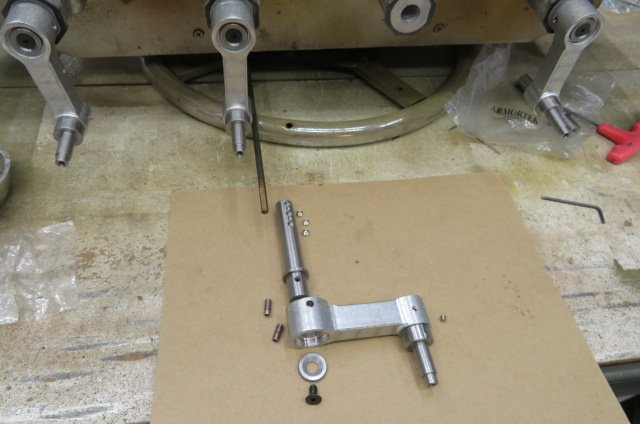
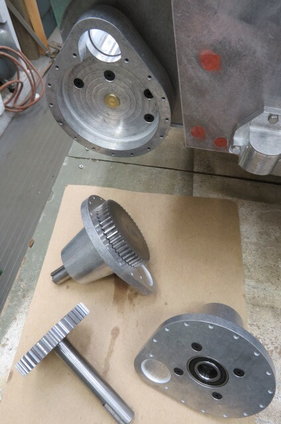
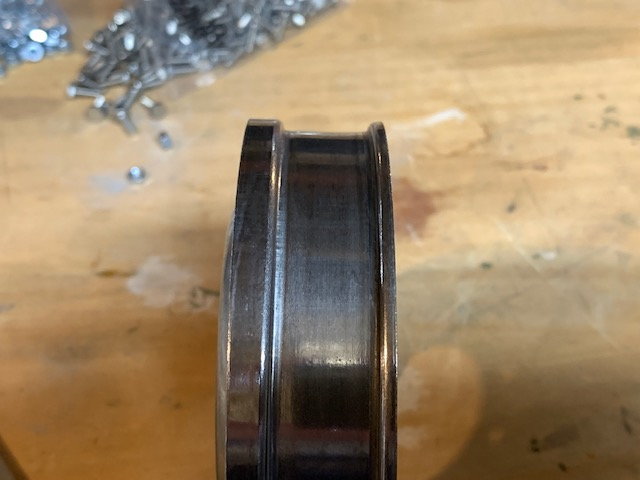
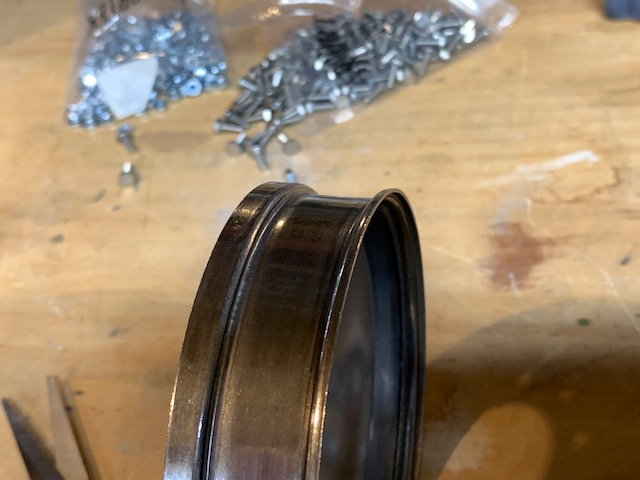
And here's a picture of that front idlers hinge. I'll figure that out later when I put it on the front casting.
Yeah Tankme, having an Armortek kit WOULD be heavy to have to haul around while you get your degree. You'll run on to one later!
Just wanted to post some pics as I'm building it. Mike
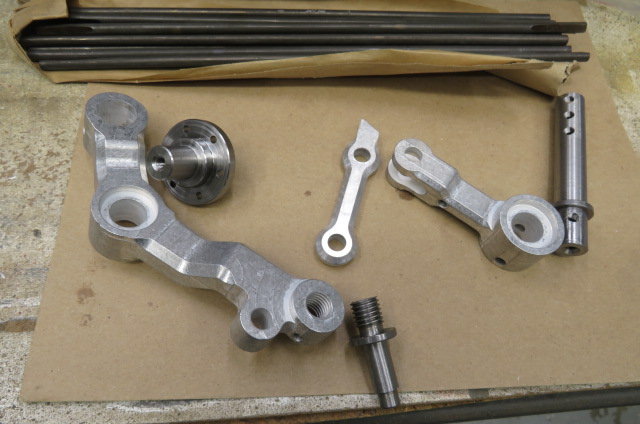
This morning I figured I'd do a swingarm or two but that kept going. The suspension shaft (long one) tightly goes in the swingarm, it's threaded thru, and two M5 grub screws hold it in and the shaft end is threaded for a M5 screw and washer. The wheel axle is threaded in and an M4 grub screw bites in to the threads (and I tried to unscrew it but the Locktite had already set up...).
Once I had'em all done and had all that Locktite on my fingers I remembered I should have taken pictures SO I took the last one back apart (just of YOU Gary!
).The suspension shafts (A or B) have the holes for the flats on the torsion bars (5.40mm diameter) at slightly different angles for each side. All the torsion bars already have the flats ground on'em (THANK GOODNESS cause I've had to calculate the angle and ground them in the past!)
I'm not putting the torsion bars on until the final installation. I'm going to tape the suspension shaft and wheel asle and paint the swingarms first thing. Then I can see how the paint looks.
And here's a picture of that front idlers hinge. I'll figure that out later when I put it on the front casting.
Yeah Tankme, having an Armortek kit WOULD be heavy to have to haul around while you get your degree. You'll run on to one later!
Just wanted to post some pics as I'm building it. Mike
Last edited by Old MSgt; 04-17-2023 at 12:54 PM.
The following users liked this post:
tankme (04-17-2023)
04-18-2023, 02:13 PM
#5
Wow, is all I can say Mike!!!I need a 2nd job or win the lottery!!! Want me one of the R/C Armory Stug III G's. He has kicked off finishing the kit for production soon!!!
04-18-2023, 03:28 PM
#6
Wow...haven't heard anything from RC Armory in a long time.
04-19-2023, 02:55 PM
#7

Gary, you said you wanted pictures as this build went on so here's a couple.
This morning I figured I'd do a swingarm or two but that kept going. The suspension shaft (long one) tightly goes in the swingarm, it's threaded thru, and two M5 grub screws hold it in and the shaft end is threaded for a M5 screw and washer. The wheel axle is threaded in and an M4 grub screw bites in to the threads (and I tried to unscrew it but the Locktite had already set up...).
Once I had'em all done and had all that Locktite on my fingers I remembered I should have taken pictures SO I took the last one back apart (just of YOU Gary!).
The suspension shafts (A or B) have the holes for the flats on the torsion bars (5.40mm diameter) at slightly different angles for each side. All the torsion bars already have the flats ground on'em (THANK GOODNESS cause I've had to calculate the angle and ground them in the past!)
I'm not putting the torsion bars on until the final installation. I'm going to tape the suspension shaft and wheel asle and paint the swingarms first thing. Then I can see how the paint looks.
And here's a picture of that front idlers hinge. I'll figure that out later when I put it on the front casting.
Yeah Tankme, having an Armortek kit WOULD be heavy to have to haul around while you get your degree. You'll run on to one later!
Just wanted to post some pics as I'm building it. Mike
This morning I figured I'd do a swingarm or two but that kept going. The suspension shaft (long one) tightly goes in the swingarm, it's threaded thru, and two M5 grub screws hold it in and the shaft end is threaded for a M5 screw and washer. The wheel axle is threaded in and an M4 grub screw bites in to the threads (and I tried to unscrew it but the Locktite had already set up...).
Once I had'em all done and had all that Locktite on my fingers I remembered I should have taken pictures SO I took the last one back apart (just of YOU Gary!
).The suspension shafts (A or B) have the holes for the flats on the torsion bars (5.40mm diameter) at slightly different angles for each side. All the torsion bars already have the flats ground on'em (THANK GOODNESS cause I've had to calculate the angle and ground them in the past!)
I'm not putting the torsion bars on until the final installation. I'm going to tape the suspension shaft and wheel asle and paint the swingarms first thing. Then I can see how the paint looks.
And here's a picture of that front idlers hinge. I'll figure that out later when I put it on the front casting.
Yeah Tankme, having an Armortek kit WOULD be heavy to have to haul around while you get your degree. You'll run on to one later!
Just wanted to post some pics as I'm building it. Mike
Hope fully you haven't gone that far yet but I had an issue with the front suspension arm pivot (EVO213?). It was a tight fit and I got it on and it was stuck, couldn't move it or get it off. I had a lot of trouble to the point where I had to bang it out with brass rod and hammer! I ended up putting it on the lathe, sanding with 100 grit for a few seconds then a few finer grades to slowly reduce the diameter to get a tight fit that would easily pivot.

Nick C.
04-21-2023, 08:39 AM
#8
Thread Starter
Thanks for the heads up Nick! After you mentioned that I went out and checked it. I did like you, putting it in the lathe and sandpaper did the trick!
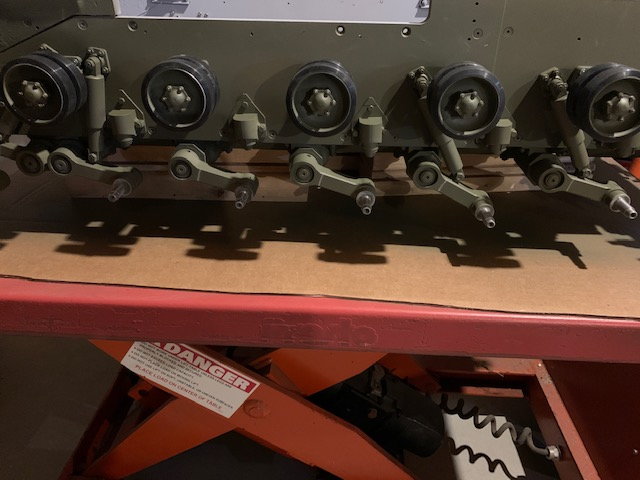
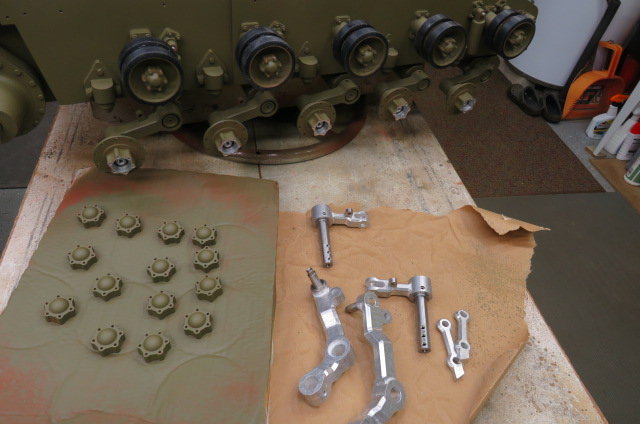
Yesterday I helped my brother vaccinate some of his 'moo cows' (I run the head gate) then here helped my wife mow the grass. It was a busy day but I've did a little on this Pershing. I bondoed the hull screw heads and got the coil bumper housings and the upper shock mounts on. Painted the swingarms too (OD 34087) so they're ready to go in later.
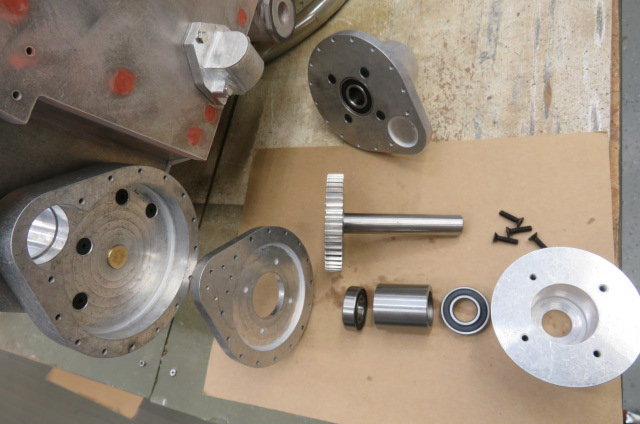
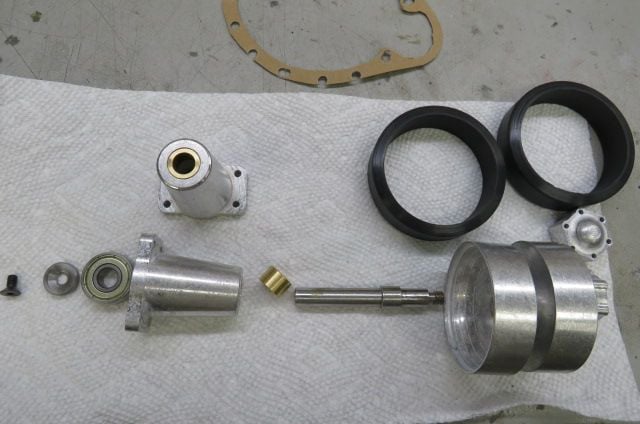
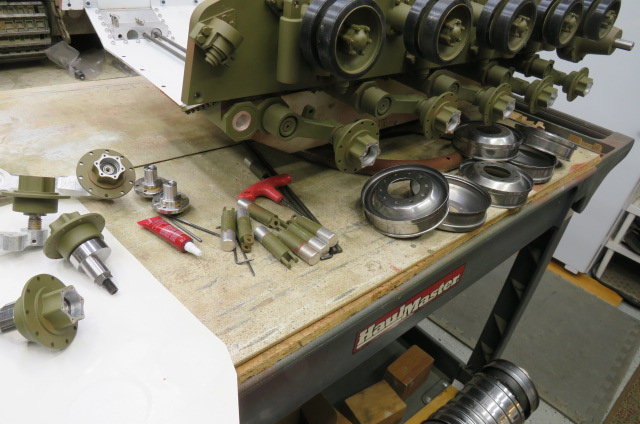
Today I put the rear gear housings together. After I screwed on the inner housings (and those copper bumpers needed a touch of sand paper too!) THEN I remembered to take a couple pictures. I want to turn the hull over so I can paint it but there's still 'little things' I want to put on before that like the return roller posts...
.
Yesterday I helped my brother vaccinate some of his 'moo cows' (I run the head gate) then here helped my wife mow the grass. It was a busy day but I've did a little on this Pershing. I bondoed the hull screw heads and got the coil bumper housings and the upper shock mounts on. Painted the swingarms too (OD 34087) so they're ready to go in later.
Today I put the rear gear housings together. After I screwed on the inner housings (and those copper bumpers needed a touch of sand paper too!) THEN I remembered to take a couple pictures. I want to turn the hull over so I can paint it but there's still 'little things' I want to put on before that like the return roller posts...
.
04-21-2023, 11:25 AM
#10
Thread Starter
Thanks Bob!
Nick & me will put up more pics on here when there's something worth showing. Luckily there ain't that many 'welds' on this Pershing as other tanks but there's contours I want to do. I still have a stock of Milliput, Bondo, JB Weld, & Locktite left over from the past so I'm set.
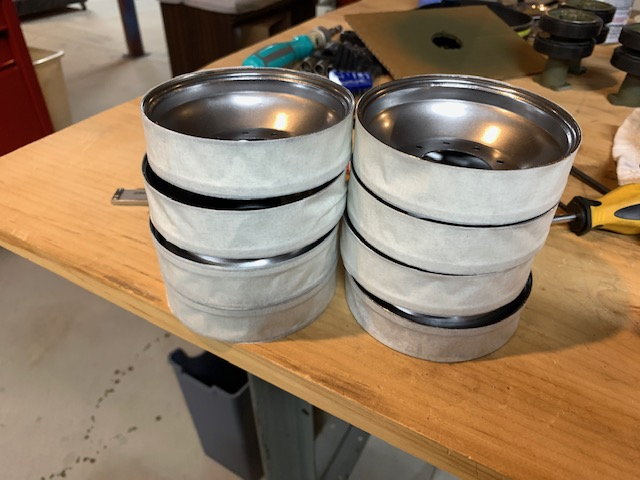
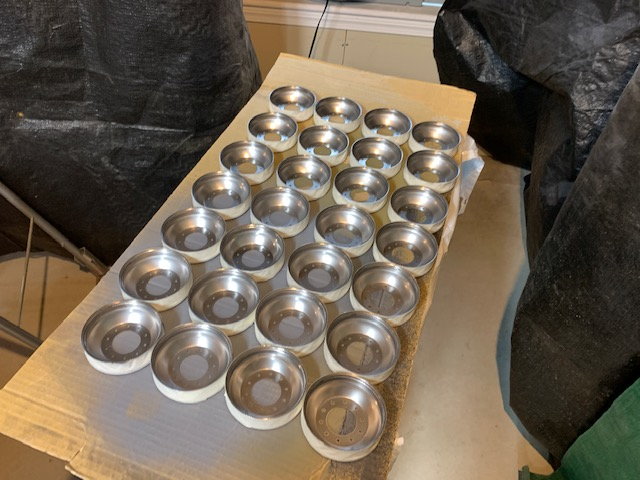
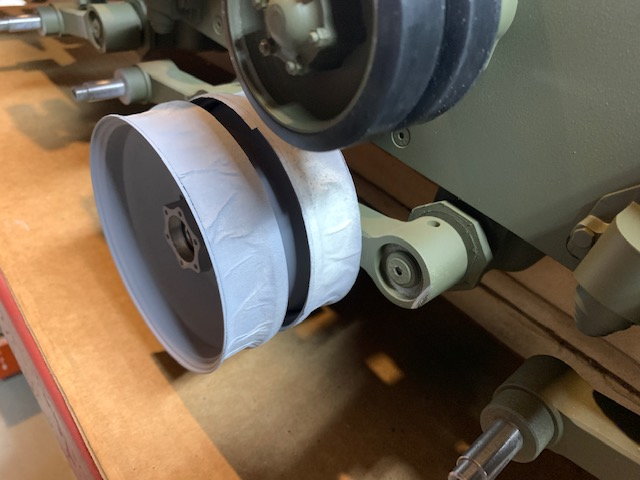
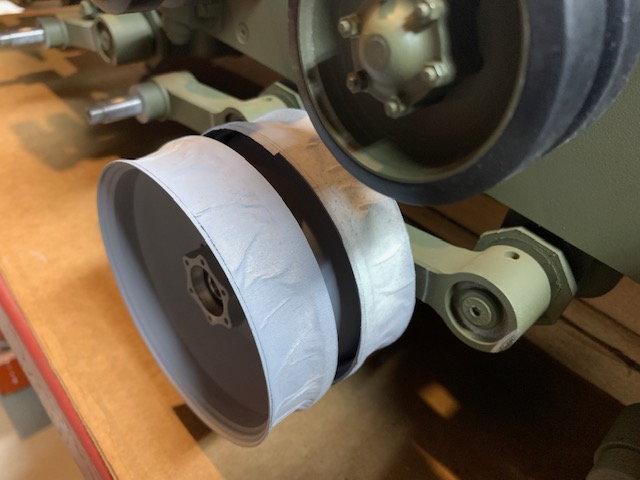
I was just looking at ALL THOSE rims & tires!! This tank has 48 wheels!! That's a LOT of tire mounting... I have JB Weld Super Glue that I've used in the past but these STEEL rims are shiney as chrome. I'm debating on bead blasting inside the rims so glue can hold on the tires but that'd be a JOB
I'm trying to figure out the best way to put the tires on the rims and dreading it also cause that'll be an all day job (and that's AFTER the rims are taped, primed, & painted). Luckily we still have a 'new' fridge in the garage!
Nick & me will put up more pics on here when there's something worth showing. Luckily there ain't that many 'welds' on this Pershing as other tanks but there's contours I want to do. I still have a stock of Milliput, Bondo, JB Weld, & Locktite left over from the past so I'm set.
I was just looking at ALL THOSE rims & tires!! This tank has 48 wheels!! That's a LOT of tire mounting... I have JB Weld Super Glue that I've used in the past but these STEEL rims are shiney as chrome. I'm debating on bead blasting inside the rims so glue can hold on the tires but that'd be a JOB
I'm trying to figure out the best way to put the tires on the rims and dreading it also cause that'll be an all day job (and that's AFTER the rims are taped, primed, & painted). Luckily we still have a 'new' fridge in the garage!
04-21-2023, 12:45 PM
#11
I was just looking at ALL THOSE rims & tires!! This tank has 48 wheels!! That's a LOT of tire mounting... I have JB Weld Super Glue that I've used in the past but these STEEL rims are shiney as chrome. I'm debating on bead blasting inside the rims so glue can hold on the tires but that'd be a JOB
I'm trying to figure out the best way to put the tires on the rims and dreading it also cause that'll be an all day job (and that's AFTER the rims are taped, primed, & painted). Luckily we still have a 'new' fridge in the garage!
I put the tires on the return rollers, carefully lifted or stretched a section off and applied a small amount of Loctite 480 on the rim and let the tire slowly rest back. I let that dry and did it on another other spot, let that dry and did it once more. So basically applied the 480 every 120 degrees or three equidistant spots on the rim. They seem to be pretty well attached. I learned about the 480 being very hard to manage from earlier posts so was warned about its use. I still ended up with the black stuff on my fingers but the return rollers look good.
04-21-2023, 01:33 PM
#12
Thread Starter
Thanks for another Great tip Nick!
I have 3.5 bottles of JBW Super Glue so I don't want to let it go to waste. I'm seriously thinking about glass bead blasting the inside rim surfaces just to give the rubber/glue something to hold on to, I know on the steel rims I need to put the tires on quickly before the steel starts to rust. That'll be a sunny day with low humidity. I'll tape off the outside rims, paint the insides the glue then tires on.
I used to use that two-part epoxy iinstalling tires but it has so short working time. On the Sherman I used JBW Super Glue and they ain't come off yet (cross my fingers!).
After a 'couple' beeers', I was in my easy chair to watch TV but we had a couple shows my wife likes SO I went out to the garage to Locktite the bushing in the return roller posts. Figured I take a picture on the order assembly.
Also this evening I marked and cut out a couple'a cardboard gaskets (beer flat spacers!) for the final drive housings. I ALWAYS put grease on the drive gear teeth (those that didn't had BAD results). On my other tanks, without the gaskets, the grease starts to travel thru the housing seams and creep around on the housings. It's a good idea so the final drive bells don't start 'bleeding' grease around the corners).
AND it takes me so long to build one because I like to do the detail work as I build it. I want to show ya how this one goes together.
.
Last edited by Old MSgt; 04-21-2023 at 02:15 PM.
04-21-2023, 02:23 PM
#13
Hi Mike,
Do you fill the gear case with grease or just apply it to the teeth? What type of grease? I didn't even think of that when assembling. I guess I can still get grease on the gear through the drive gear opening inside the tank.
Do you fill the gear case with grease or just apply it to the teeth? What type of grease? I didn't even think of that when assembling. I guess I can still get grease on the gear through the drive gear opening inside the tank.
04-22-2023, 06:00 AM
#14
Thread Starter
Good Morning! In the past Armortek didn't really specify but now they're recommending 'dry lubricant'. I remember a couple of builders didn't put any lube on but had galling on the teeth. I've always put GP grease on the final drive gears and on the motor gear.
Heck, when I've had to pull the swingarm shafts out to regrease'em cause they dry out and get sticky (stiff) so while I have the tracks off anyway, I take off the final drive bell housings and wipe'em off and grease'em too.
The track pin cotter pins are WAY thick & stiff so I ordered some 1/32" ones but they're too small. So I ordered some 3/64" x 1/4" so I'll let you know what they're like when they get here. All the other Armortek cotters were excellent for the other tanks were perfect size (and bendable!)
Last edited by Old MSgt; 04-22-2023 at 11:03 AM.
04-24-2023, 01:43 AM
#16
Mike, when I did the tires for the Hetzer I sprung for the Loctite 410. A little pricey at around $25 a bottle, but it works great and it's black so if you get a little bit on the tires it doesn't show.
04-24-2023, 04:48 PM
#17
Well I remembered to mask off the wheels before priming. I will assemble the parts primed and before attaching to the tank I will paint then glue on the rubber tires.
Taped the part where the tires will be glued.
Not much surface area to glue.
The recess area doesn't touch the rubber.
Ready for priming!

Primed!
Covered the bearings with tape so as to not get paint on them.
Taped the part where the tires will be glued.
Not much surface area to glue.
The recess area doesn't touch the rubber.
Ready for priming!
Primed!
Covered the bearings with tape so as to not get paint on them.
The following users liked this post:
tankme (04-24-2023)
04-25-2023, 03:33 PM
#18
Hi Mike,
Did you try and install any of the bogies (wheels)? I test fitted one today and the rim scratches the swing arm. I don't think I assembled anything wrong but it does it on all 10 swing arms. The idler and first bogie are OK. I'm curious as to whether you have the same issue?
See the scratches on the swing arms.

Here is the wheel in place.
I pulled it out a bit to show where the scratch is.
It happened on the four right swing arms (also on the other side, all five).
Did you try and install any of the bogies (wheels)? I test fitted one today and the rim scratches the swing arm. I don't think I assembled anything wrong but it does it on all 10 swing arms. The idler and first bogie are OK. I'm curious as to whether you have the same issue?
See the scratches on the swing arms.
Here is the wheel in place.
I pulled it out a bit to show where the scratch is.
It happened on the four right swing arms (also on the other side, all five).
The following users liked this post:
Panther F (04-26-2023)
04-26-2023, 01:48 AM
#19
Have you checked to see how well the road wheels line up with The Idler and sprocket? If you have any play there at all you might be able to put a very small spacer behind the road wheel, like .010 to .020 thick, and if it doesn't screw up your alignment too badly that just might fix your problem. The only other thing I could suggest would be to cut a small groove in each swing arm but I don't think I would want to do that as even a small groove may have a detrimental effect on the strength of the swing arm.
I'm watching both these builds with great interest and it's still a dream to someday own an armortek, but I think I would want to start with a Panzer 3, my very favorite tank. But if I ever have the money I think my first Allied tank from armortek would either be the Pershing or the E8. Maybe someday, I'll keep buyin' those lottery tickets. Up here we call that "The Hillbilly Retirement Plan".
I'm watching both these builds with great interest and it's still a dream to someday own an armortek, but I think I would want to start with a Panzer 3, my very favorite tank. But if I ever have the money I think my first Allied tank from armortek would either be the Pershing or the E8. Maybe someday, I'll keep buyin' those lottery tickets. Up here we call that "The Hillbilly Retirement Plan".
04-26-2023, 08:12 AM
#20
Thread Starter
Thanks for the advice on strong glue Gary! I'll probably run out of good glue on these 48 tires so I'll check out that glue (but it IS a 'little' pricey...)
Naw Nick, I'm 'old & slow' and haven't gotten that far along on this build to put the wheels on. But the rims/tires rubbing the swingarms don't surprise me The earlier M4A3 Shermans and M3 Lee rub the insides of the swingarms some until they wear a groove. I've put small washers on each sides of the hubs to push the swingarms wider but can't tighen the axle nuts or the washers will pinch the hubs. (one thang or 'nother.)
IF we space out the roadwheels from the swingarms we'll just have to space the sprockets & idlers out the to get'em aligned. Sprocket spacing is easy but as Gary said we'll just get some idler shaft spacers.
Mike
Last edited by Old MSgt; 04-26-2023 at 01:57 PM.
04-26-2023, 02:19 PM
#21
I had the wheel assembled wrong because I misread the CAD drawing. The drawing is a bit misleading but the hub attaches to the inside of the inner wheel. I had it between the two wheels so that pushed the inner wheel closer to the tank. I reassembled in the proper way and it fits fine without rubbing. I probably should have figured that out last night but it was a rough day at work and I was a little slow. LOL
The following users liked this post:
Old MSgt (04-26-2023)
04-26-2023, 02:31 PM
#22
I'm watching both these builds with great interest and it's still a dream to someday own an armortek, but I think I would want to start with a Panzer 3, my very favorite tank. But if I ever have the money I think my first Allied tank from armortek would either be the Pershing or the E8. Maybe someday, I'll keep buyin' those lottery tickets. Up here we call that "The Hillbilly Retirement Plan".
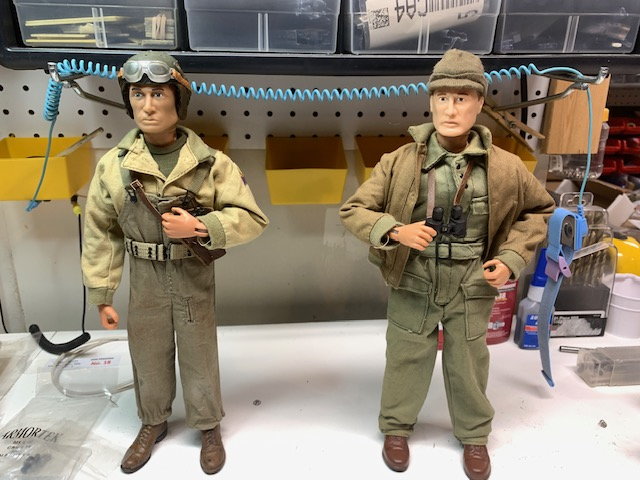
To keep on the subject of the Pershing build I'm almost done with the crew. Just need some first aide pouches and maybe 1911 clip pouches for the belt.
 05-05-2023, 01:47 PM
#23
Thread Starter
Hey! Sorry I haven't posted pics for a while but we had some things going on with our 'old' F150 and we traded it in for a new(er) F150. SO we've been running around changing insurance, ordering running boards, bed cover, etc. That's why I've been remiss on posting pics (AND remember I'm 'old and slow)..
I built and installed the return roller housings then tried to put the roller wheels on later.. That was a bad idea because it's easier to fully build the roller housing together with the wheels on BEFORE you bolt it to the hull. Cause it's hard ot tighten the outside wheel end caps without holding an allen wrench in the inside of the shaft by the bearing. (cause then you have to unbolt all the housings and tighten THEN!).
I put the torsion bars on the suspension shafts, got some of that red grease on the shafts and installed'em.
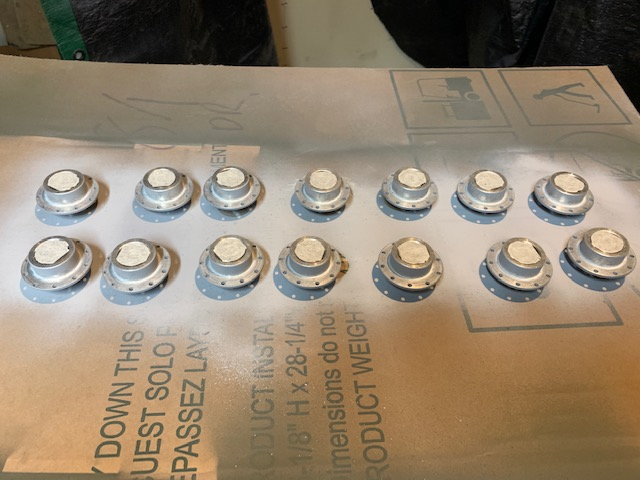
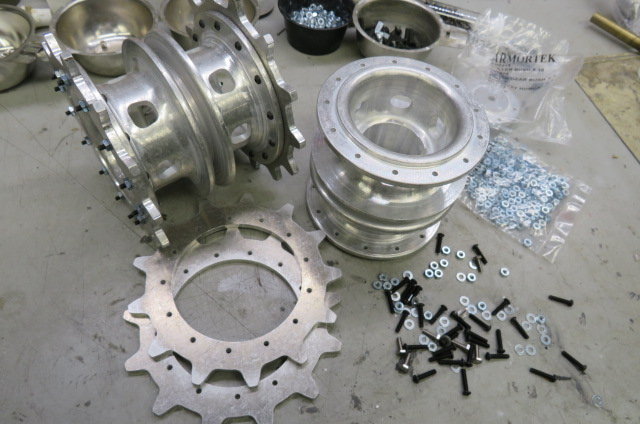
Today I washed all the wheels with Sinple Green then painted'em and that was a JOB because there's so many. Thankfully Nick has already showed that. I started putting the sprockets on the hubs (after I found the M2.5x12 bolt package!) and am going to glass bead blast'em before I paint'em
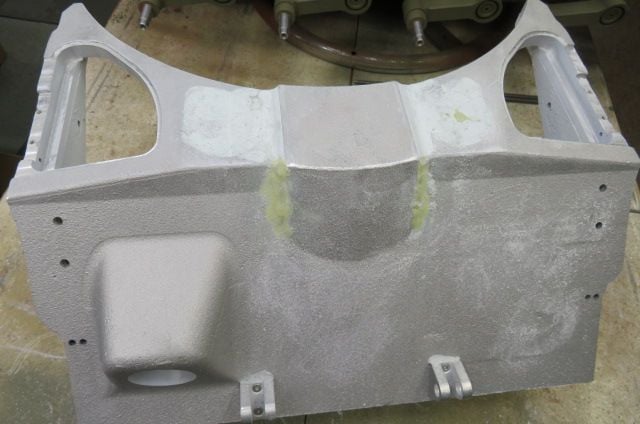
AND, I've never liked the early FOUR lower hull periscopes so decided to build this in to a later production M26. I've been filling the two inside periscope holes and sanding to make the center blower boss with more rounded edges. They'll be a LOT of Armortek four periscope Pershings around but mine will have the later TWO scopes! (I like to be different from the 'herd'!)
I got some Excellent upgrade parts from ECA so I'll start putting'em on soon. The motors should be here soon then I can get'em in and start working on the upper deck. I'll post more soon as I get something done worth seeing (cause it's mostly just painting and bolting together...)
I built and installed the return roller housings then tried to put the roller wheels on later.. That was a bad idea because it's easier to fully build the roller housing together with the wheels on BEFORE you bolt it to the hull. Cause it's hard ot tighten the outside wheel end caps without holding an allen wrench in the inside of the shaft by the bearing. (cause then you have to unbolt all the housings and tighten THEN!).
I put the torsion bars on the suspension shafts, got some of that red grease on the shafts and installed'em.
Today I washed all the wheels with Sinple Green then painted'em and that was a JOB because there's so many. Thankfully Nick has already showed that. I started putting the sprockets on the hubs (after I found the M2.5x12 bolt package!) and am going to glass bead blast'em before I paint'em
AND, I've never liked the early FOUR lower hull periscopes so decided to build this in to a later production M26. I've been filling the two inside periscope holes and sanding to make the center blower boss with more rounded edges. They'll be a LOT of Armortek four periscope Pershings around but mine will have the later TWO scopes! (I like to be different from the 'herd'!)
I got some Excellent upgrade parts from ECA so I'll start putting'em on soon. The motors should be here soon then I can get'em in and start working on the upper deck. I'll post more soon as I get something done worth seeing (cause it's mostly just painting and bolting together...)
Last edited by Old MSgt; 05-05-2023 at 01:53 PM.
The following users liked this post:
Tankhobby (05-05-2023)
05-06-2023, 04:24 PM
#24
That front casting looks good with the periscope holes filled in. Nice your changing it up a bit.
I just got the Legend of Warfare book by David Doyle. On page 19, "The new blower necessitated a redesign of the front hull casting which resulted in a much-flatter but broader hump in the glacis plate." I can PM the picture if you like. I would post it her but the publishers would most likely sue me for copyright infringement. LOL
I'm hoping to get the wheels done in the next few days, I've been traveling so no progress lately.
05-07-2023, 04:06 AM
#25
Thread Starter
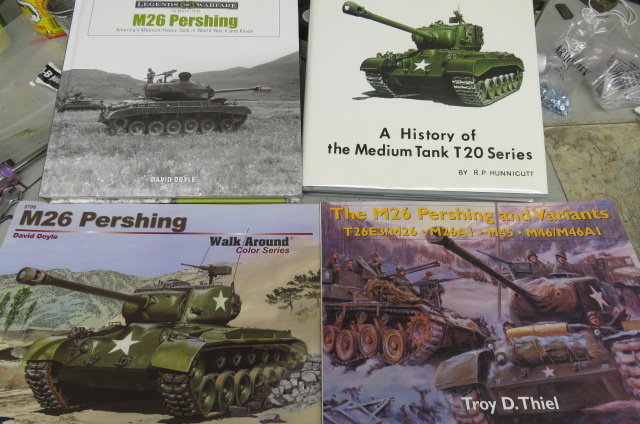
Thanks again for the info Nick! I'll check out that page! Another GREAT book for color detail is Mr. Doyle's 'M26 Pershing Walk Around'. Lots of pictures of the differences in M26 production mods. And I really appreciate you letting me know of any build snags you've discovered so I can take care of'em early.
It's going to rain (i.e.: POUR!!) in a couple hours so I legged it out to the shed and bead blasted the sprockets & hub covers. It still hadn't started so I primed and painted'em and now they're in the garage in front of the fan drying.
Later today (unless I find a good movie and a 'few ICE COLD beverages') I'll either do more sanding of the Milliput on the front or start putting some of the tires on the wheels... which I dread.
THANKS AGAIN NICK! Mike
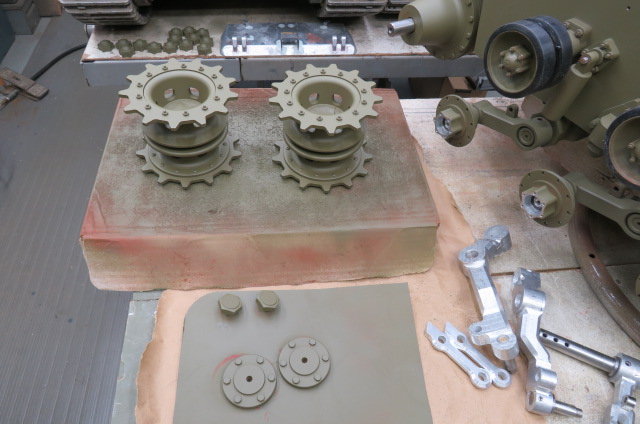
Last edited by Old MSgt; 05-07-2023 at 05:03 AM.