


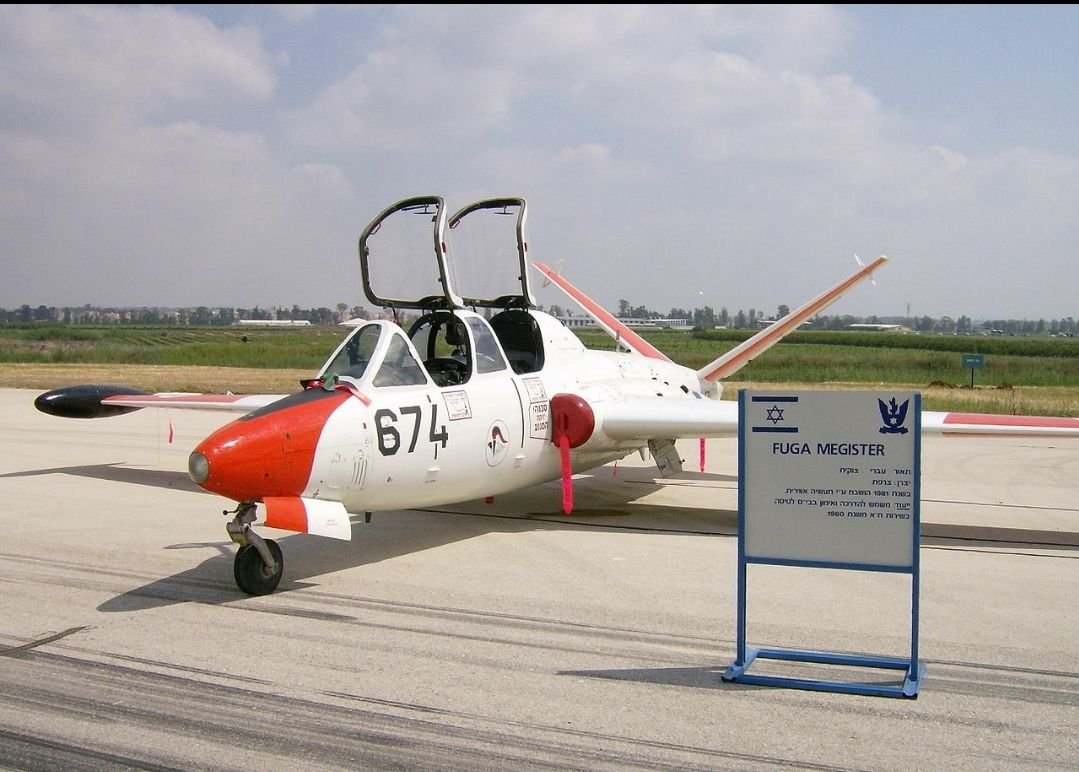
IAF-Zukit-Fouga Magister (RCJC)
 03-29-2020, 03:23 AM
#51

Thread Starter
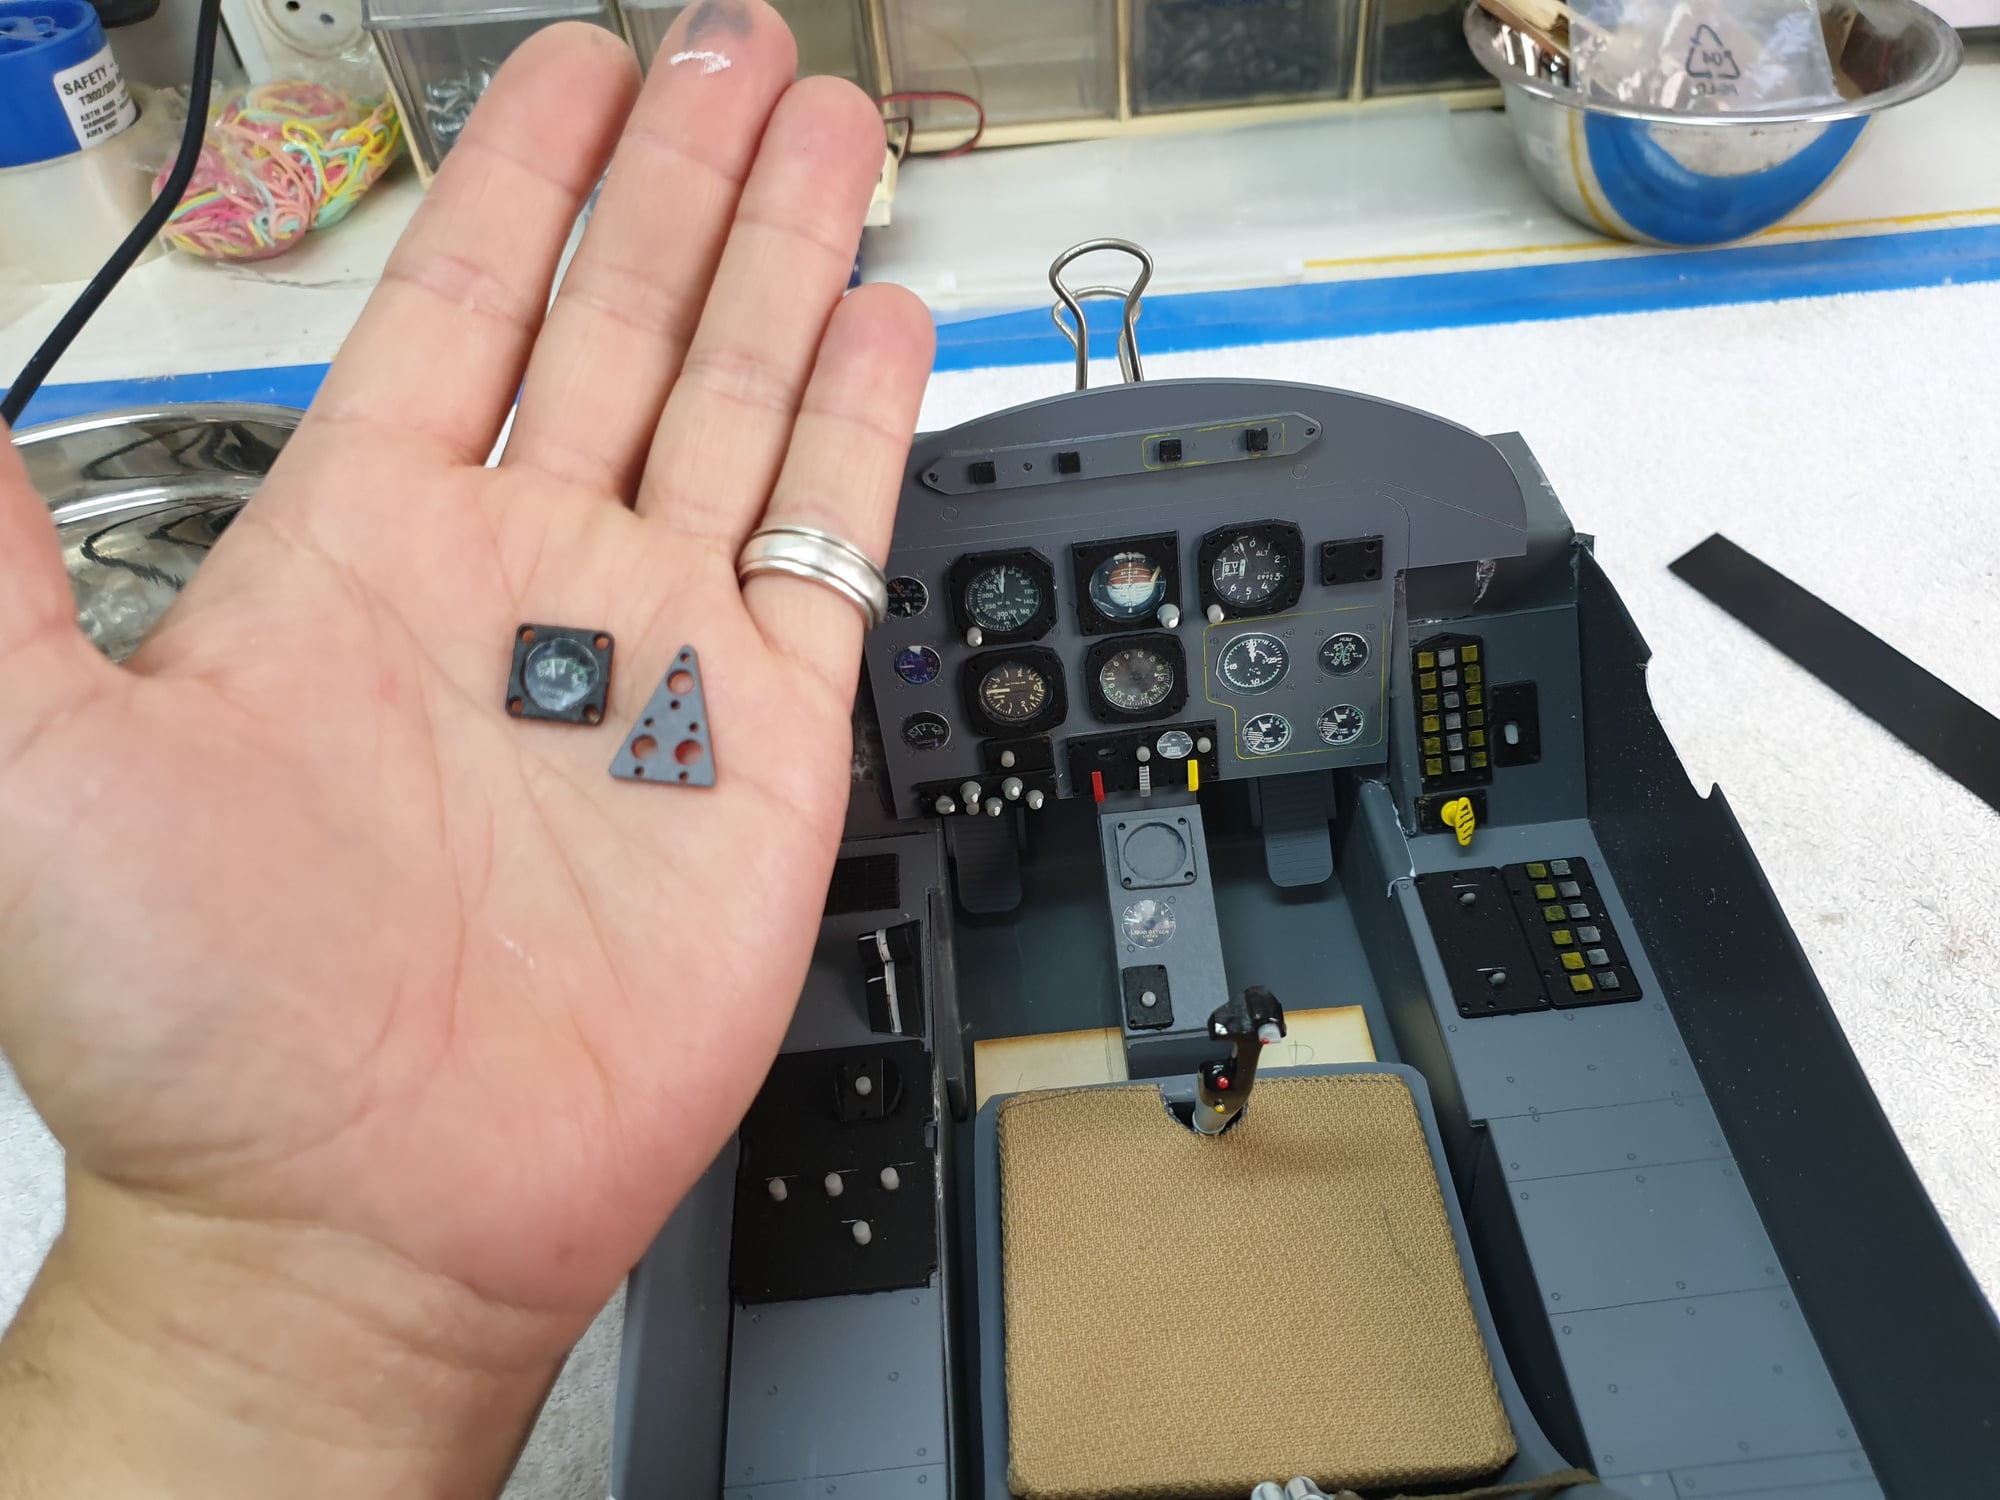
Some features in the front instrument panels had to be removed for trimming and adjustments and then glued in their new location so not to eliminate them.
Here are the gear indicator and one of the instruments.
Last edited by avi sirota; 03-29-2020 at 10:50 PM.
 03-29-2020, 04:26 AM
#52
Thread Starter
The cockpits are full size and almost full depth. There is enough space beneath them to accommodate all systems. Not to say it is roomy but enough. The challenge is for people with large hands. As myself...
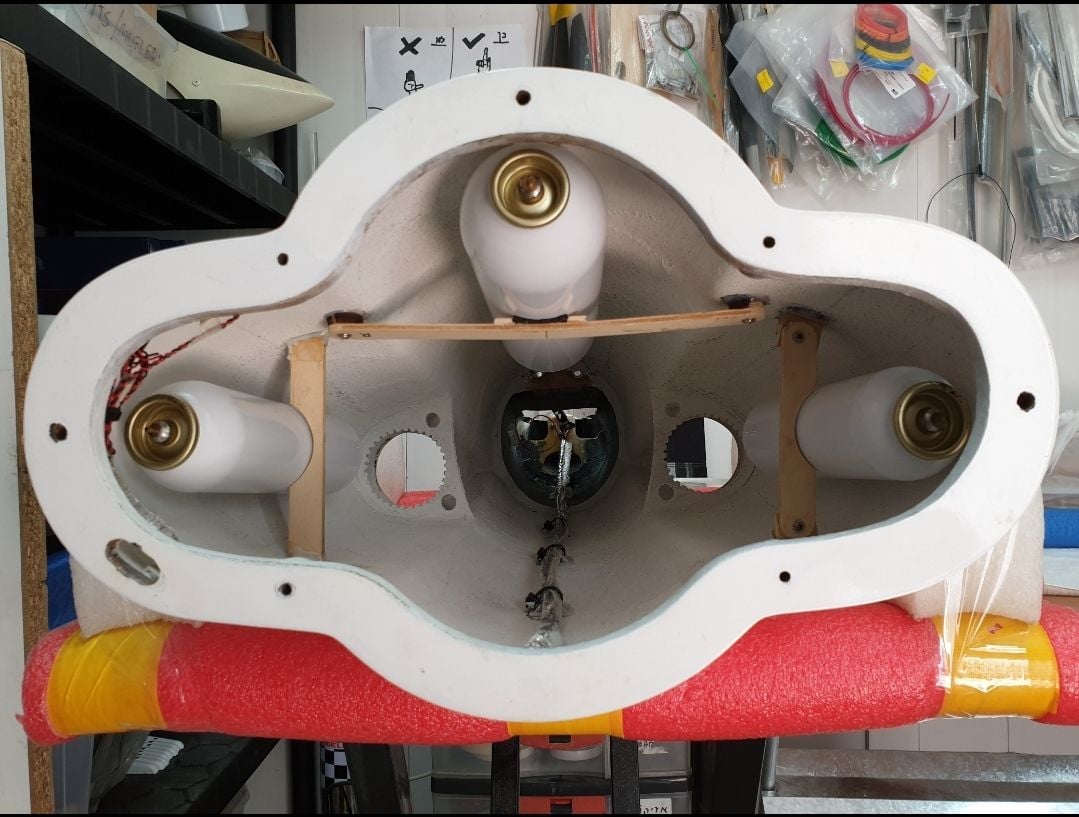
As mentioned before I wanted to be able to remove the cockpits in the field for service and inspection if needed. I made 3 crossmembers to hold the cockpits in place. The rear one is glued in place and the other 2 can be removed for installing the systems and equipment trays.
BTW- the "ball"-artificial horizon- came out of the box in inverted flight mode in both instruments main panels..
I decided to leave it this way. After all it is a jet fighter trainer/Aerobatic plane.
Last edited by avi sirota; 03-29-2020 at 11:03 PM.
03-29-2020, 04:32 AM
#53
Thread Starter
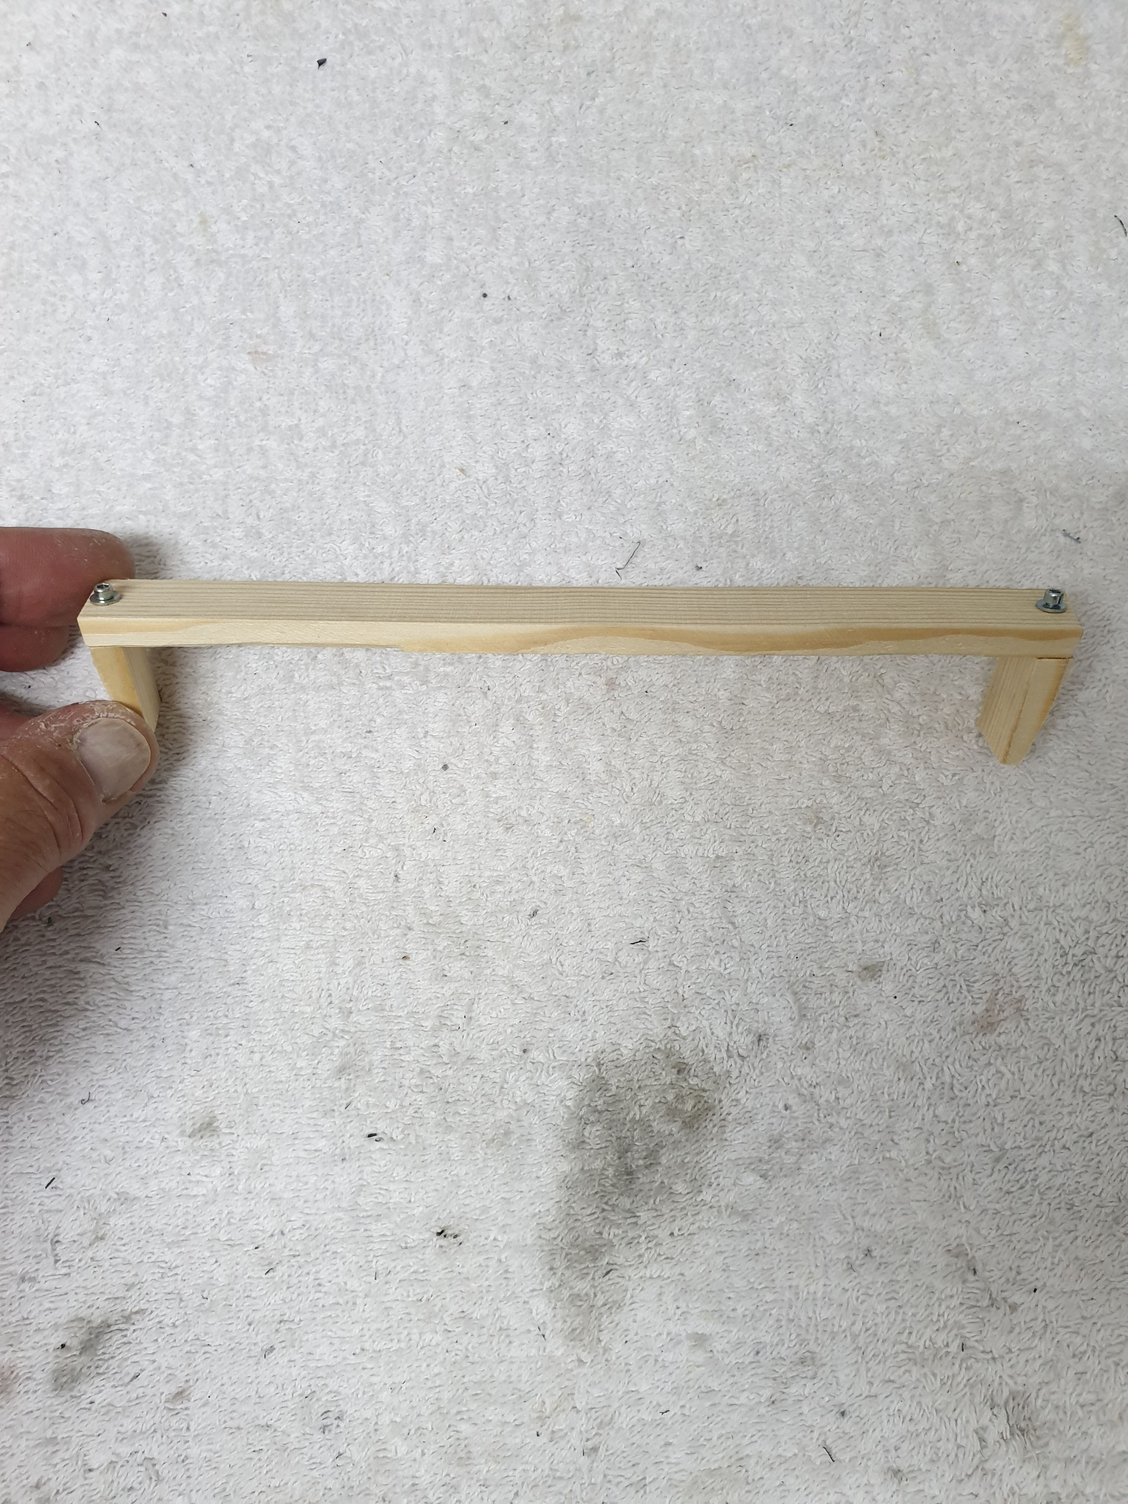
One of two removable crossmembers. Each has two supports glued to the fuselage.
Each crossmember has 2 screws securing it to place. One in each side.
Last edited by avi sirota; 03-29-2020 at 11:04 PM.
03-29-2020, 11:19 PM
#54
Thread Starter
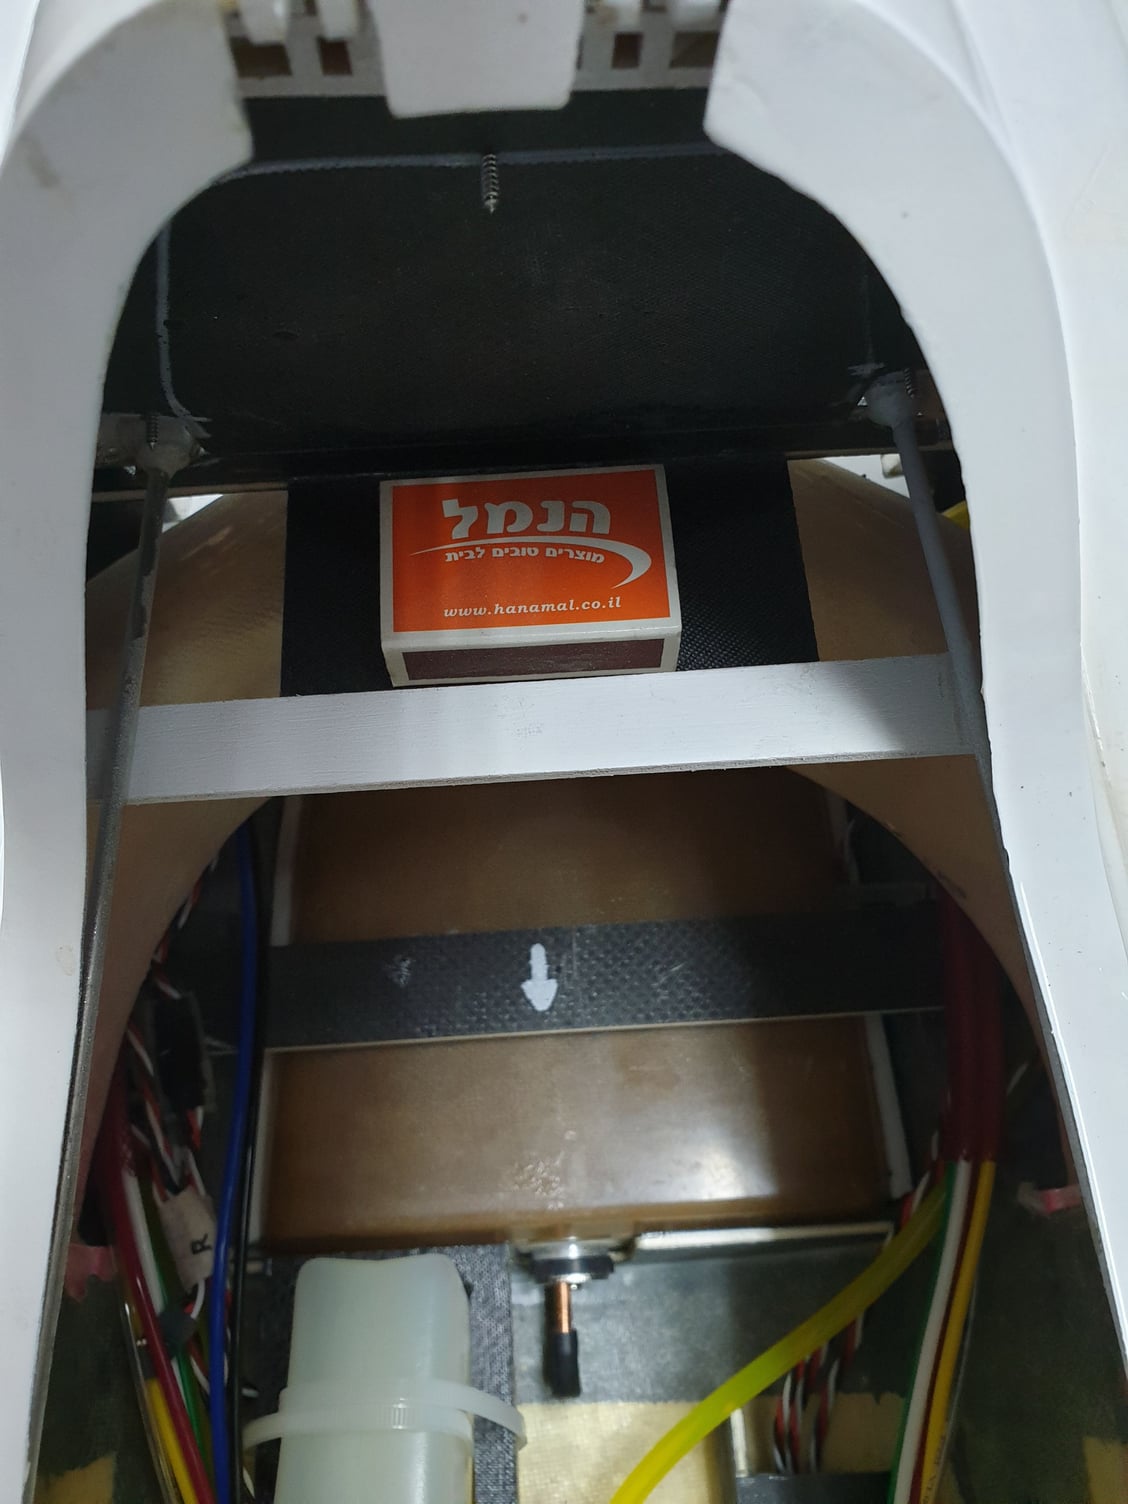
Rear fixed crossmember. The match box is there to represent the turbine ECU.
Center removable crossmember. One of the holes for the cockpit floor screws can be seen with a round mark. The front crossmember is similar.
Last edited by avi sirota; 03-29-2020 at 11:25 PM.
03-30-2020, 09:58 AM
#55
Thread Starter
Next step - the equipment/systems trays. I spent some time playing and designing the layout for the equipment and systems based on what I'm using. Even though they are covered with the cockpits I wanted all to be nicely mounted and routed. All equipment was installed, verified for proper operation and then removed to paint the trays before final assembly.
I spent hours to get the air system working correctly with the Xicoy sequencer/failsafe. I also used the info here in RCU and got great service from Xicoy support but couldn't get it to work with the time delay I wanted for the gear/doors. Eventually it results with a combination of Xicoy as failsafe and Jetronics for sequencer.
After all it works as I needed it.
03-30-2020, 10:02 AM
#56
Thread Starter
Center crossmember.
Rear equipment tray final adjustments.
Almost ready. Final configuration involved with changing the retracts air lines and other minor things. As my wife frequently tells me "you are the only one how see this things..."
I just sleep better knowing they are like this 😄
In this picture you can also see the use of carbon to reinforce the fuselage in the formers areas.
The entire structure is of high quality.
One of the reasons of the high quality design is Mr. Peter Weiss. Peter was one of the original members of the team involved with the design of this model jet and I had the opportunity to have Peter's information and background along the build.
Peter is a highly skilled modeler with years of experience in aerodynamics and composite.
Last edited by avi sirota; 03-31-2020 at 12:36 AM.

 03-30-2020, 10:42 AM
#58
Thread Starter
The main hatch for accessing the turbine also uses to reach fuel port, air and brakes filling ports and gauges, main switch and turbine battery connector.
Initially I made it from playwood covered with carbon but had to replace it for eliminate any radio interference with so much carbon around the receiver antennas.
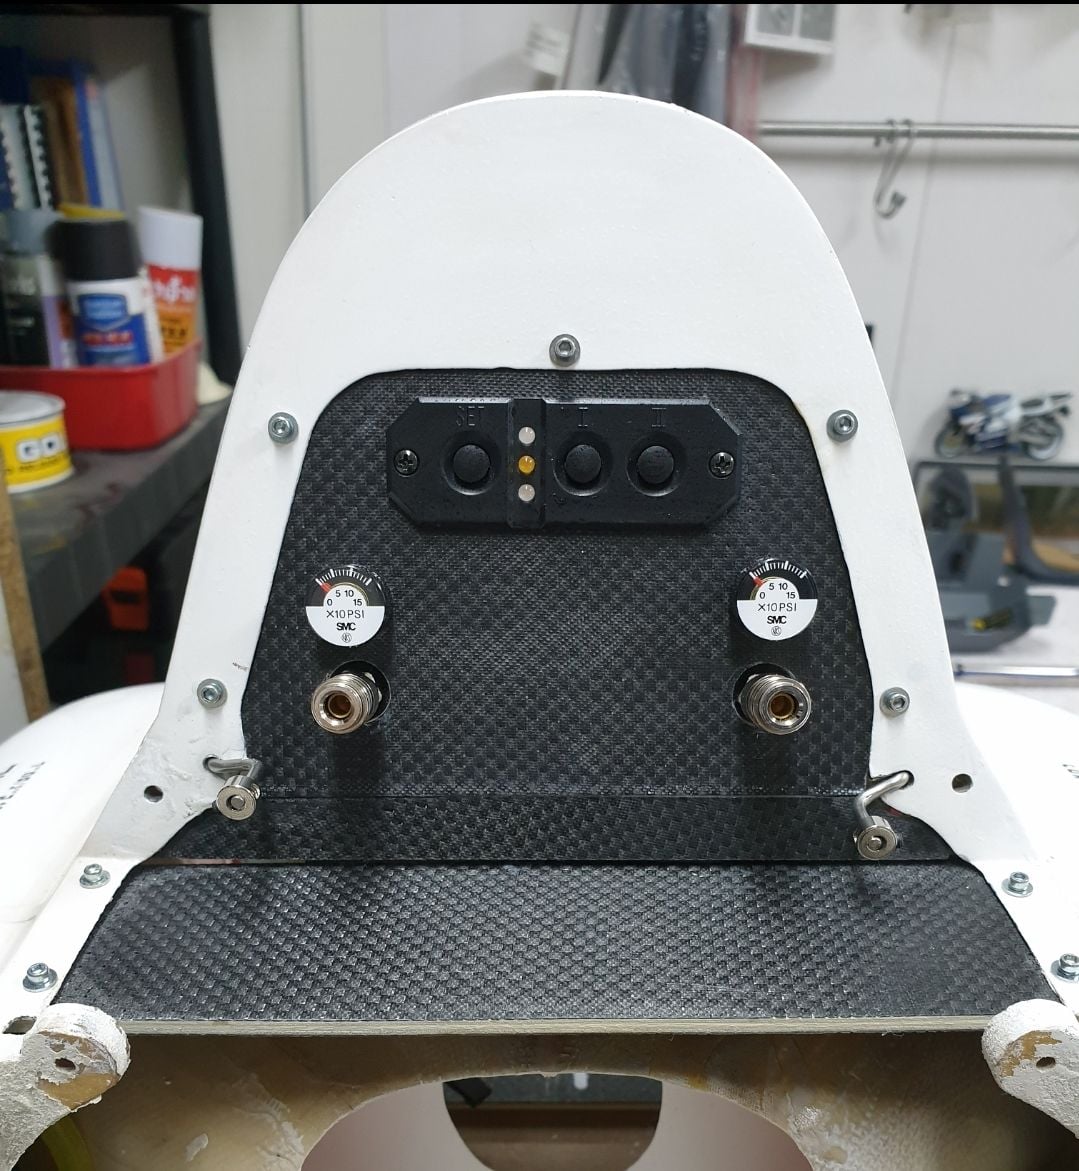
First version. Cool but I was bothered from radio interferance. Note that the horizontal surface goes further and uses as the tray/bracket for the turbine ECU.
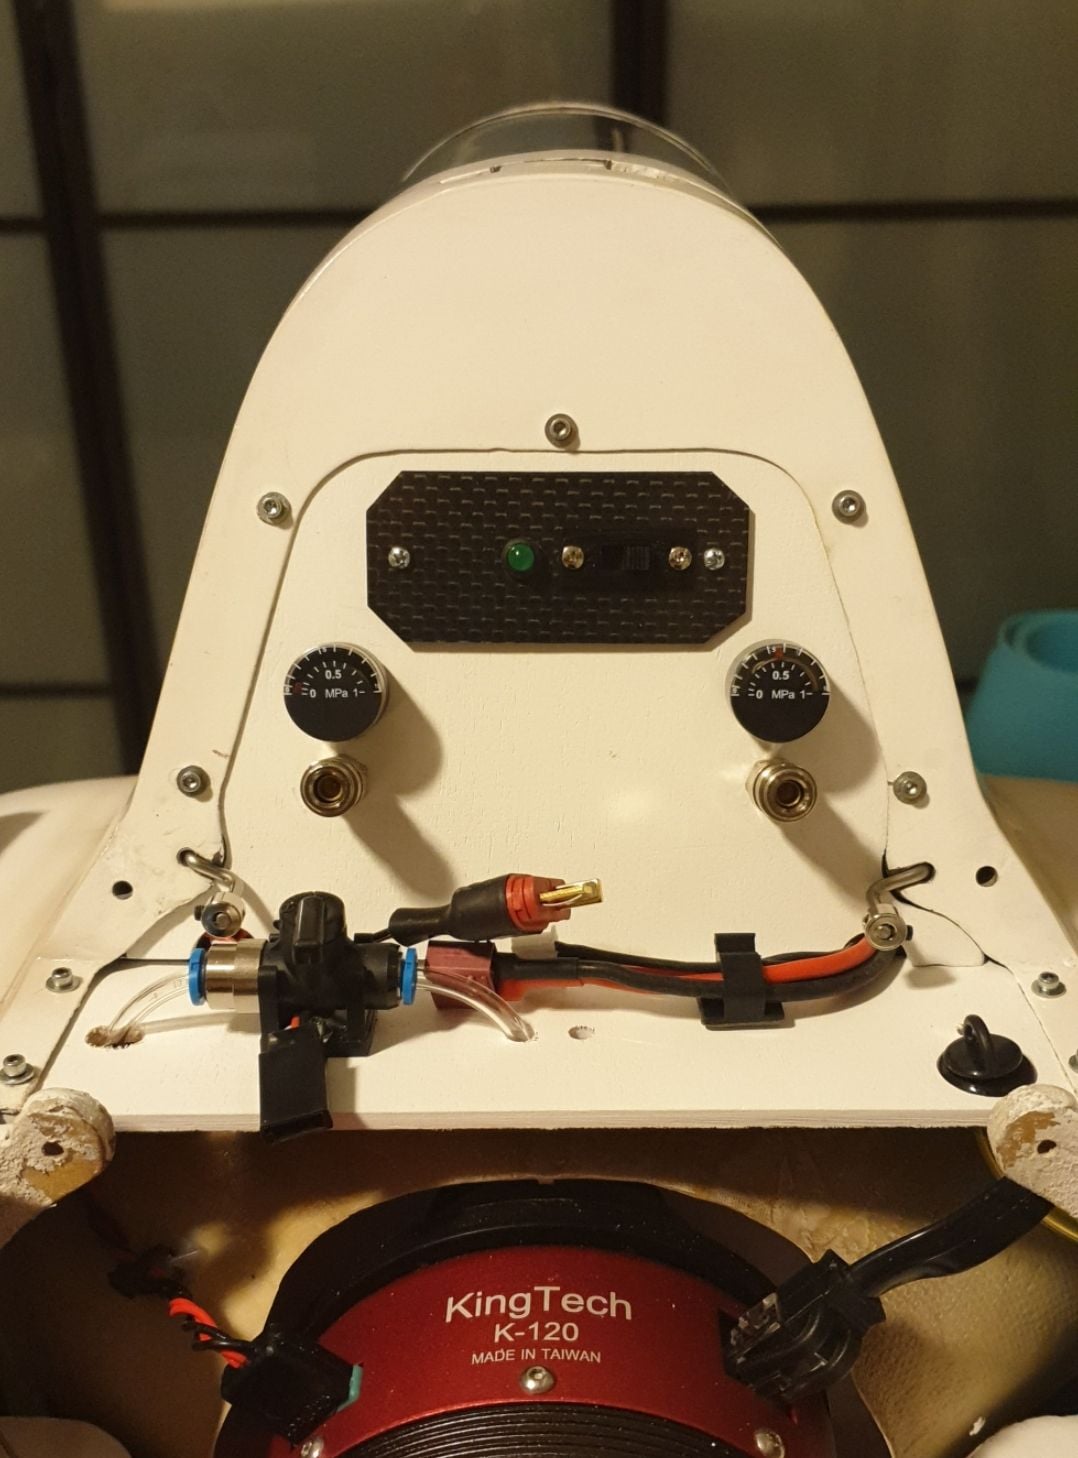
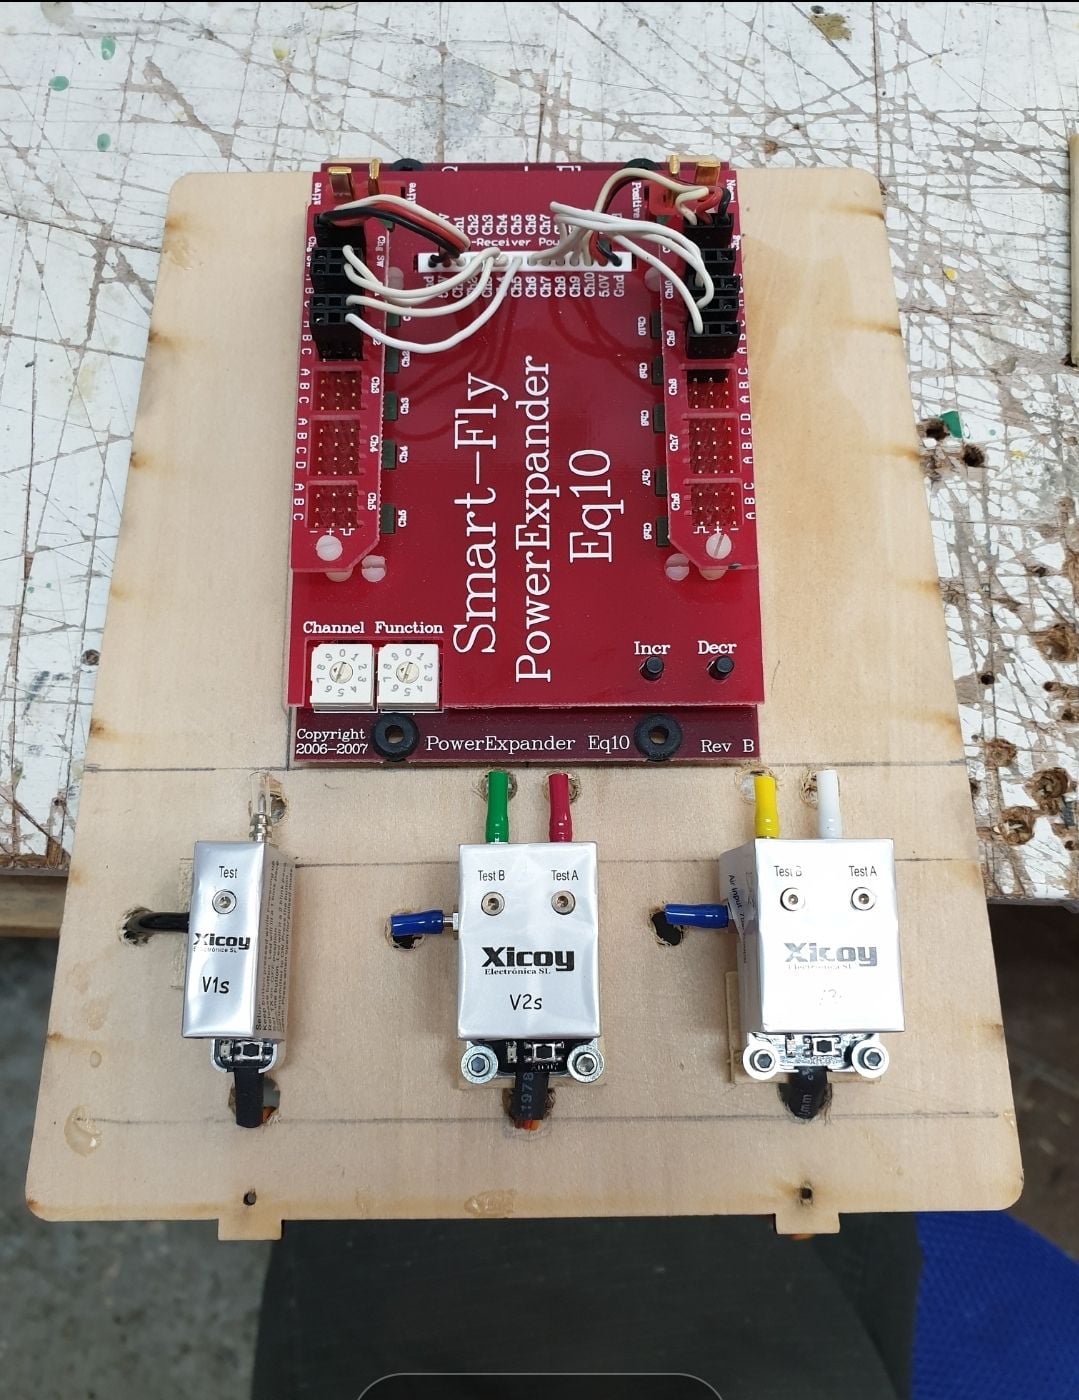
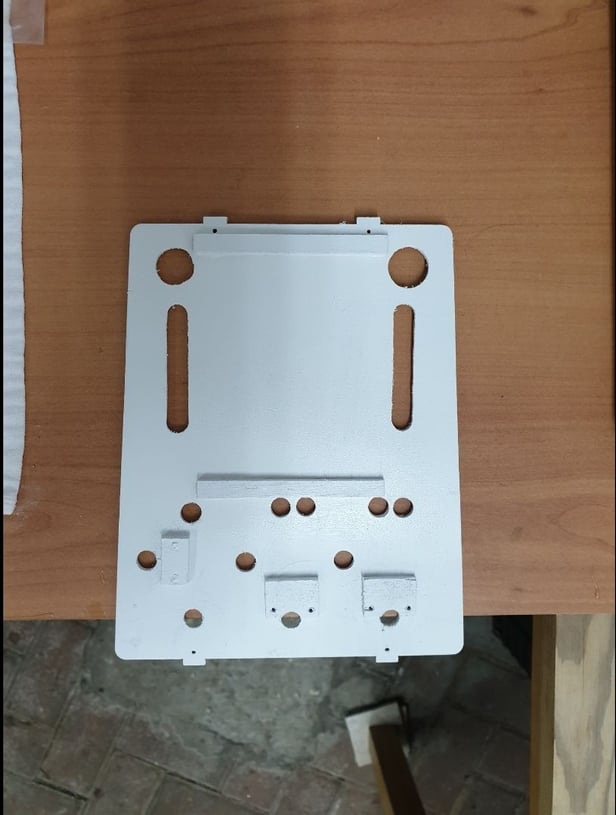
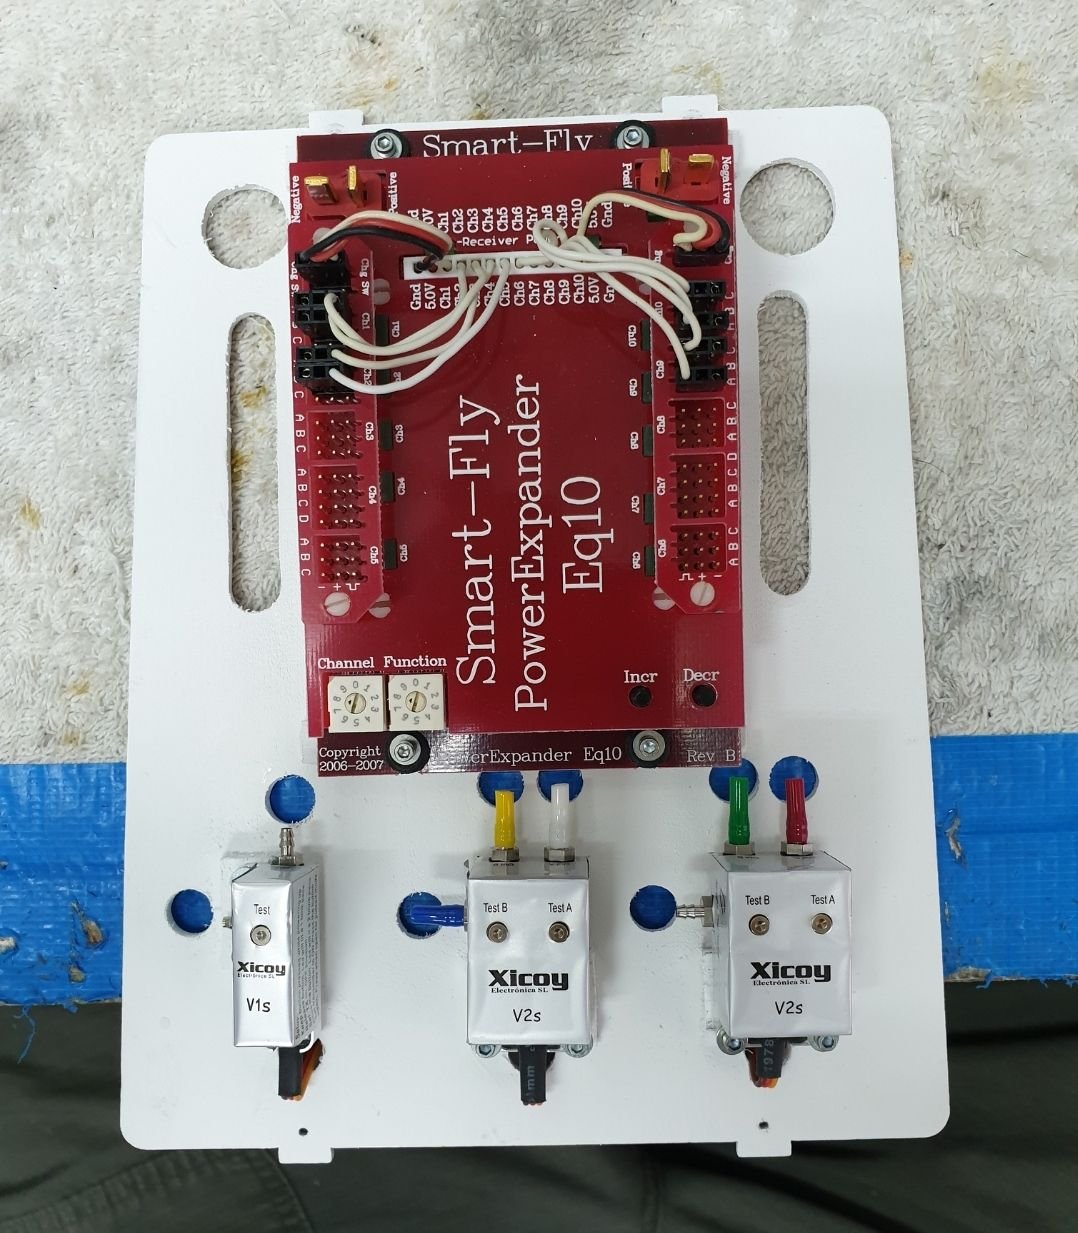
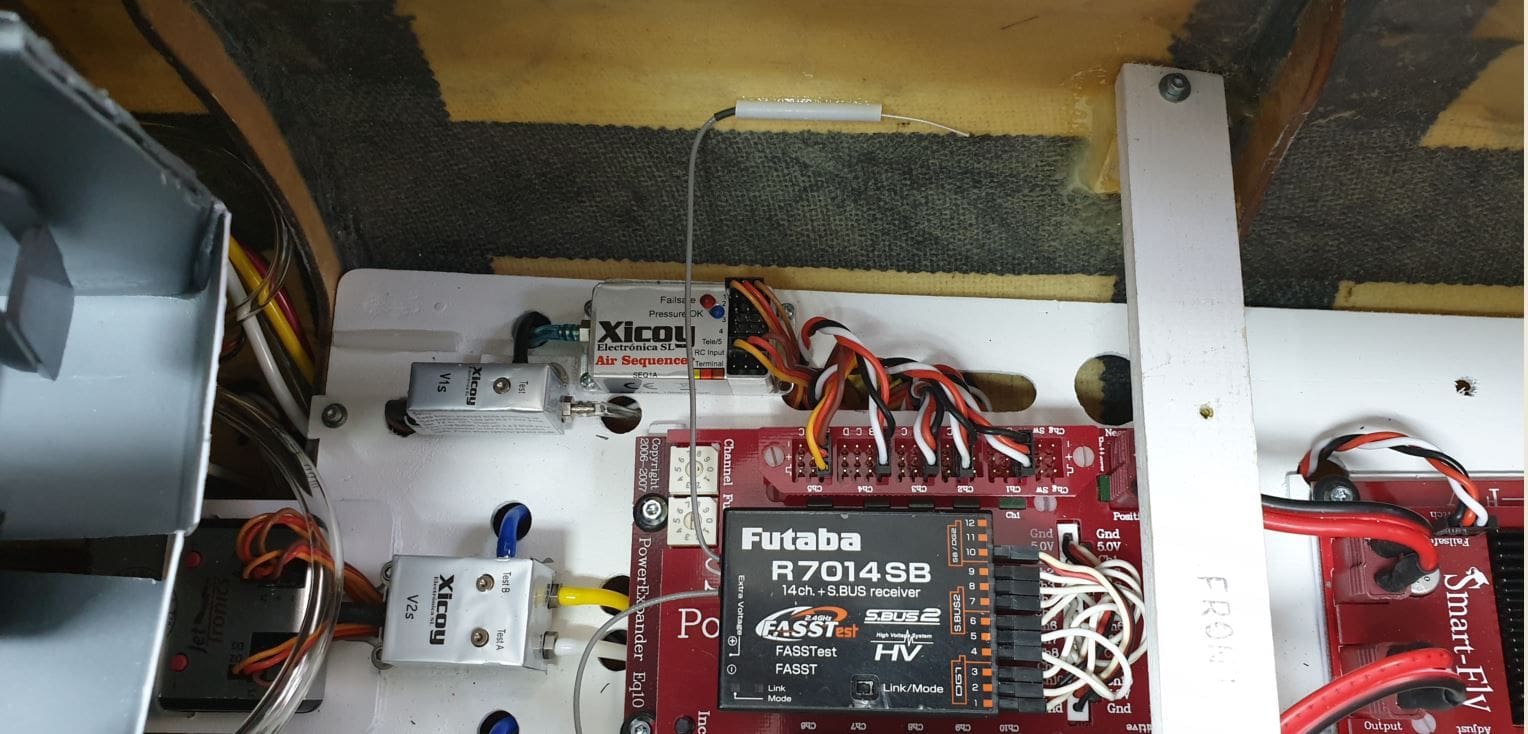
Second version made from 3 mm playwood painted white. I still want to add batteries volt meters. I decided to skip the well proven powerbox digiswitch that provides peek of 4 amps and used the HD Smartfly switch to go together with the excellent Smartfly eq 10. This setup provides more than enough power at peek amps for the 9 digital servos.
This is the horizontal tray for both fuel manual valve, turbine connector and ECU. It was later replaced with non carbon material.
Initially I made it from playwood covered with carbon but had to replace it for eliminate any radio interference with so much carbon around the receiver antennas.
First version. Cool but I was bothered from radio interferance. Note that the horizontal surface goes further and uses as the tray/bracket for the turbine ECU.
Second version made from 3 mm playwood painted white. I still want to add batteries volt meters. I decided to skip the well proven powerbox digiswitch that provides peek of 4 amps and used the HD Smartfly switch to go together with the excellent Smartfly eq 10. This setup provides more than enough power at peek amps for the 9 digital servos.
This is the horizontal tray for both fuel manual valve, turbine connector and ECU. It was later replaced with non carbon material.
Last edited by avi sirota; 03-31-2020 at 03:06 AM.
 03-30-2020, 11:36 AM
#60
Thread Starter
03-30-2020, 11:49 AM
#61
Thread Starter
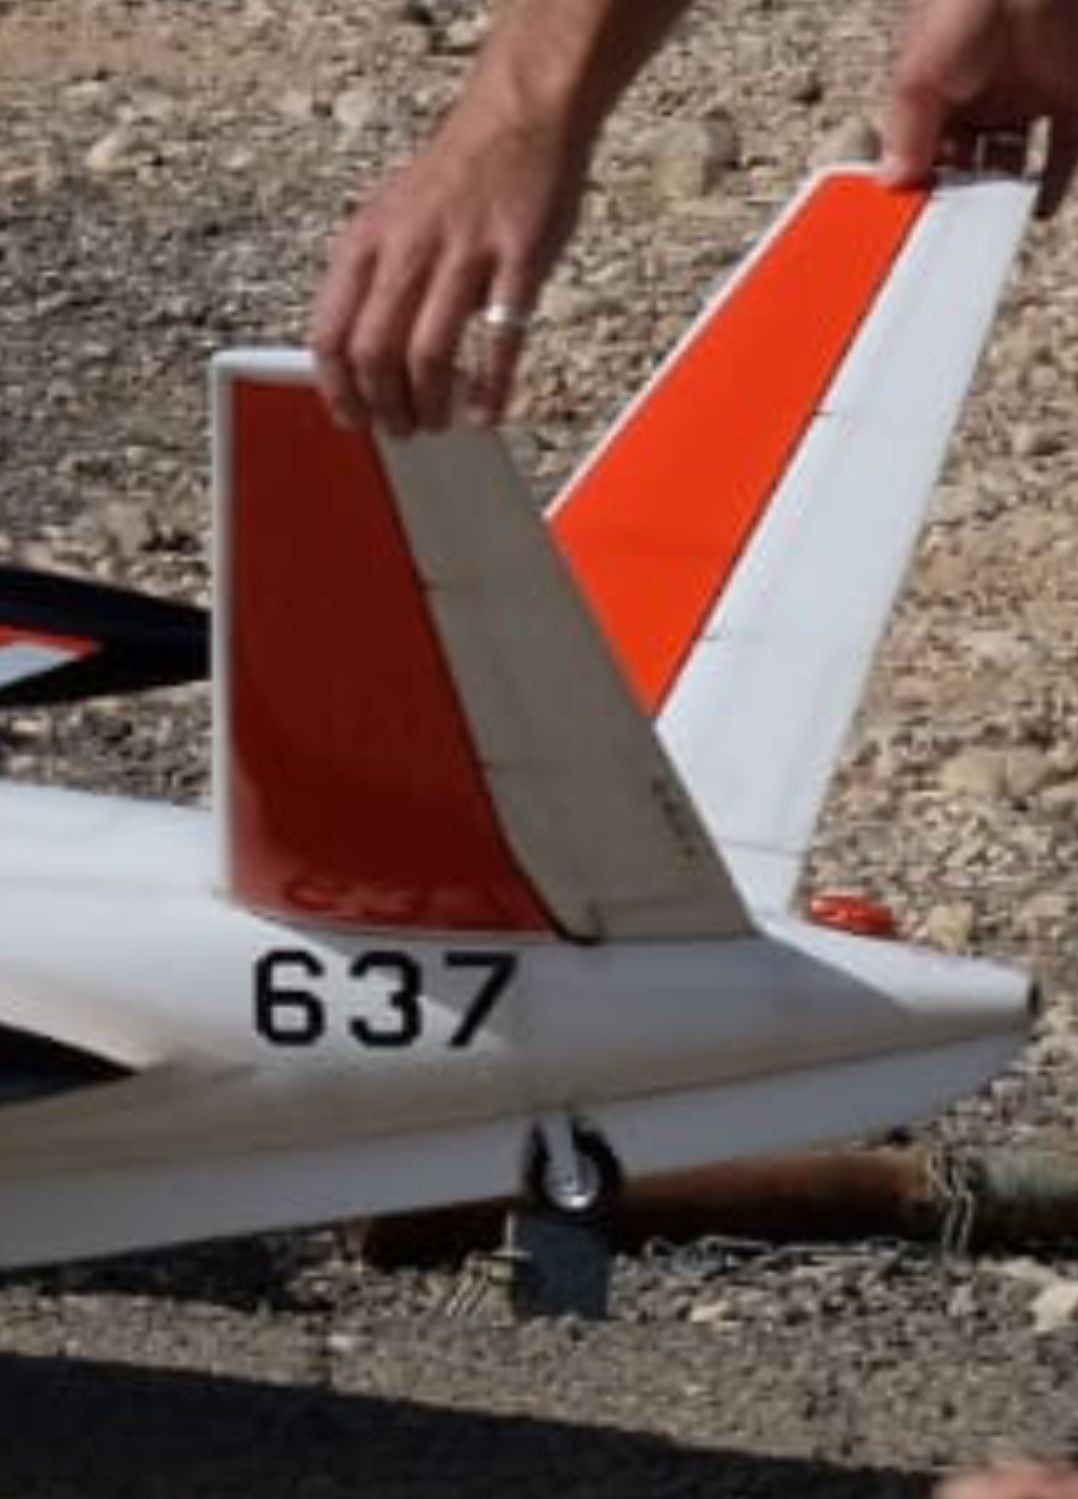
After a break for other project I resume working on my Zukit and had a fun evening playing with the rear fourth wheel and lower fin.
As it somtimes happen the kit had no rear wheel. I contacted RCJC and they imidiatly offered me a new one. Time passed by and I skipped getting it. No problem of RCJC only me to blame.
So I made one. Used carbon leftovers and a reasonable size wheel I had at home and there she has a forth wheel.
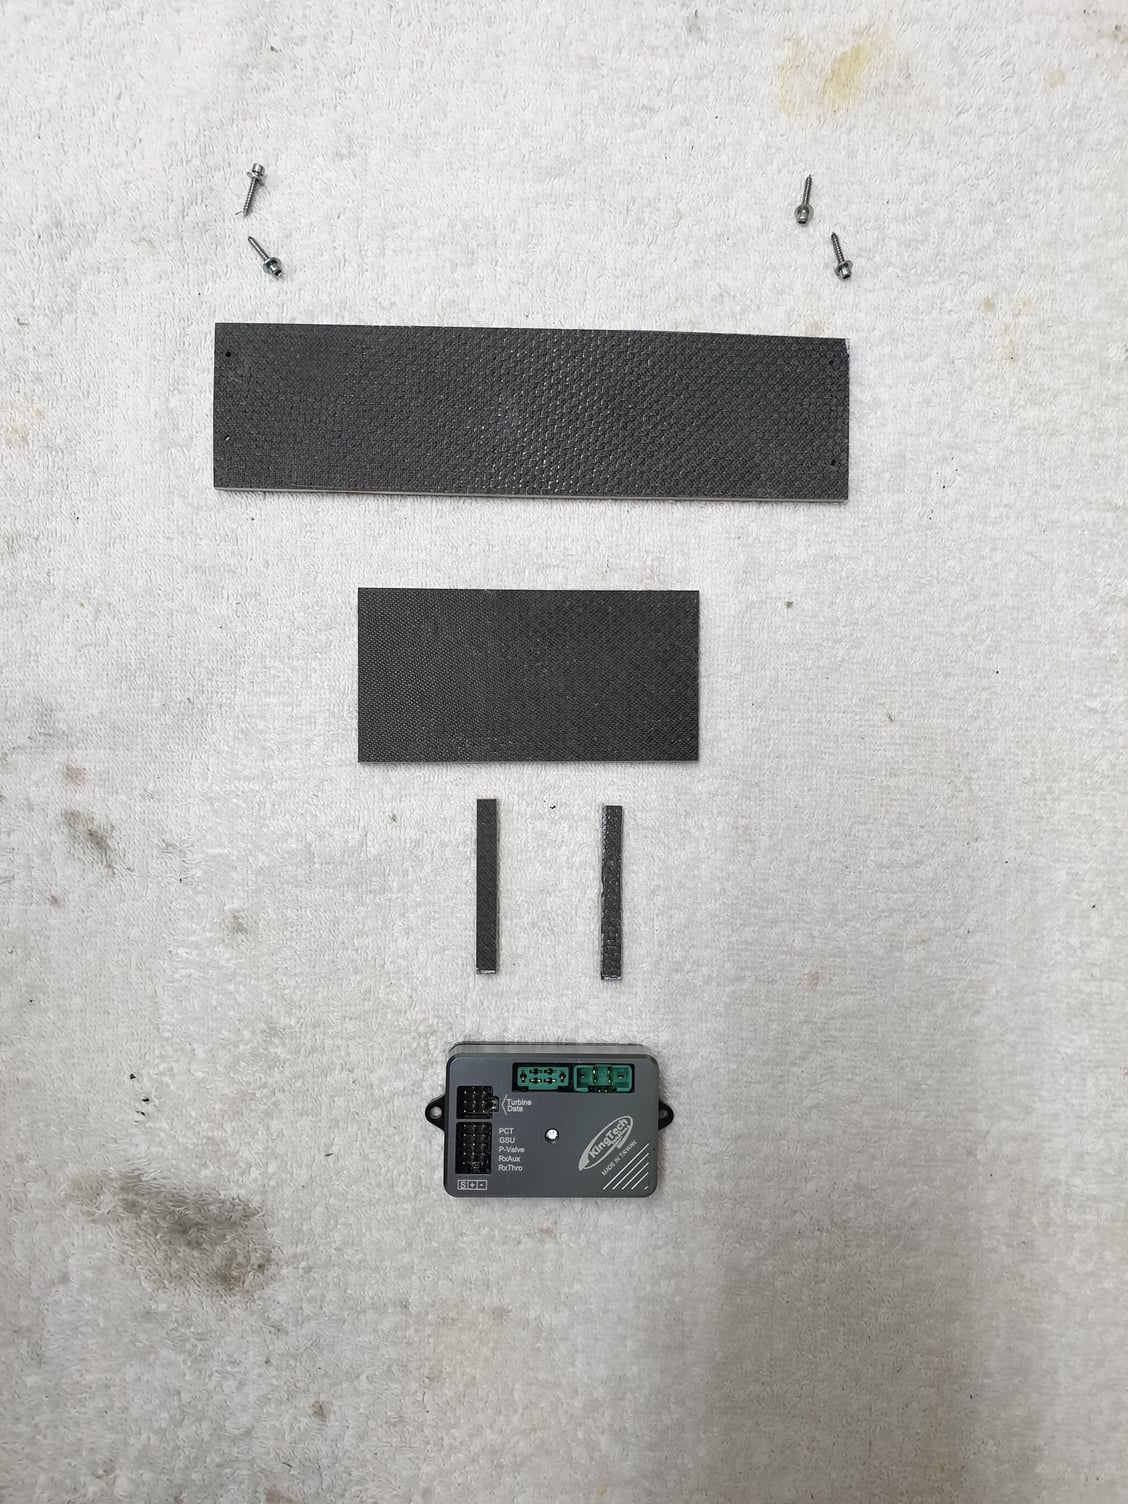
The rear lower fin is made from two parts. I added 3 mm carbon tubes cut to length to stiffen the assembly.
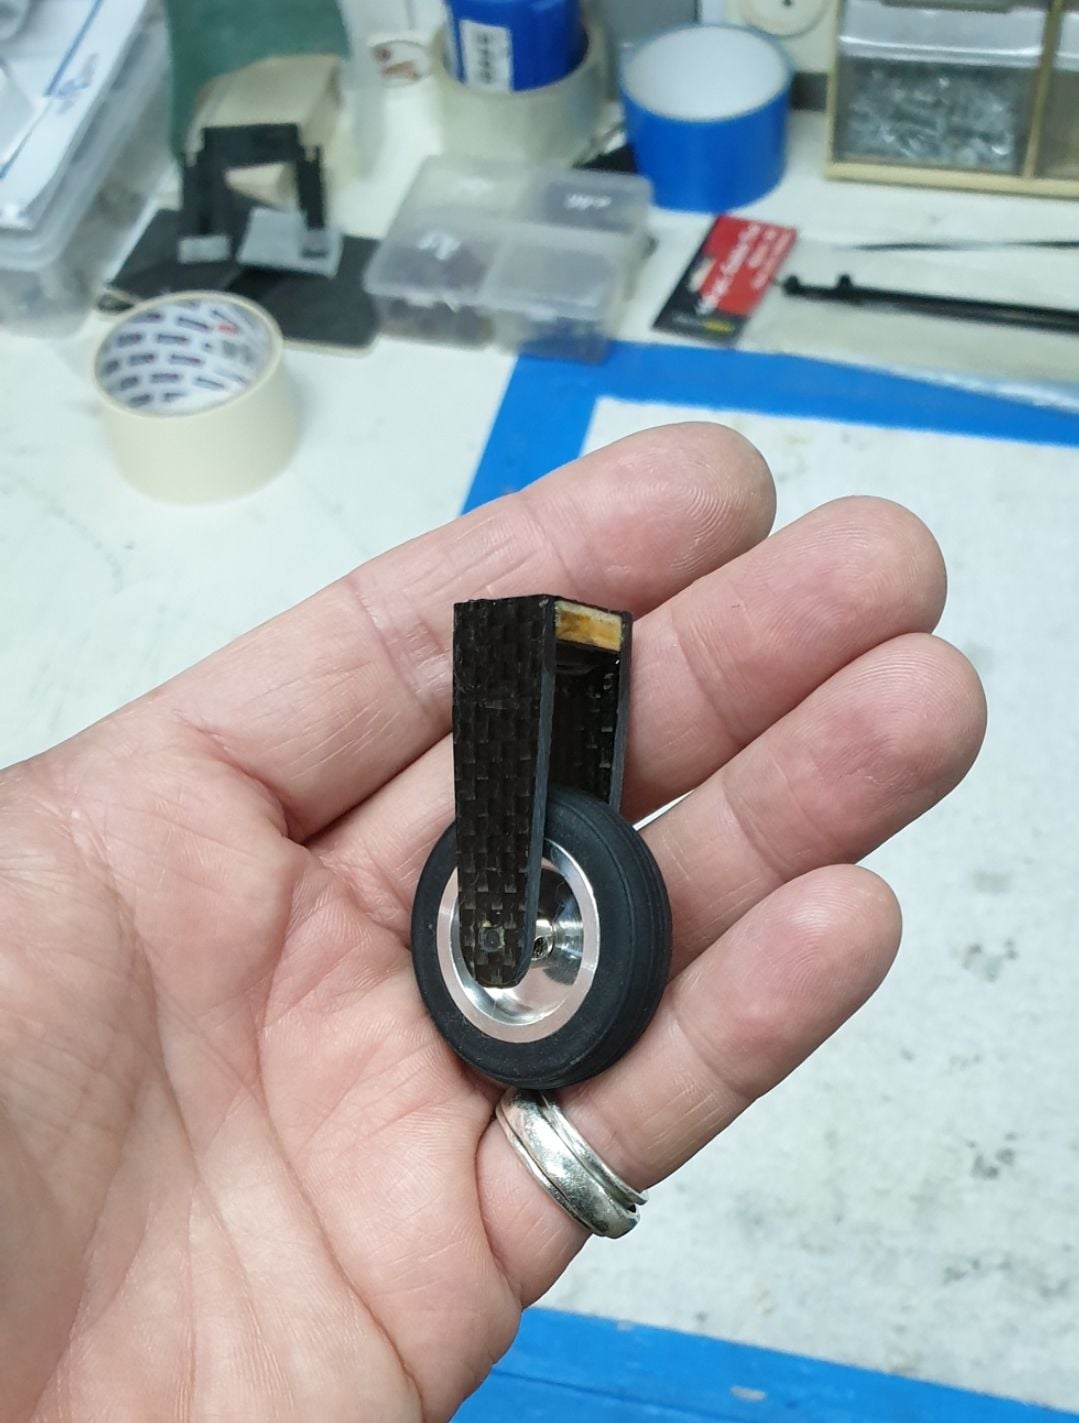
Home made 4th wheel. Later painted in white.
Size dose matters! 😄
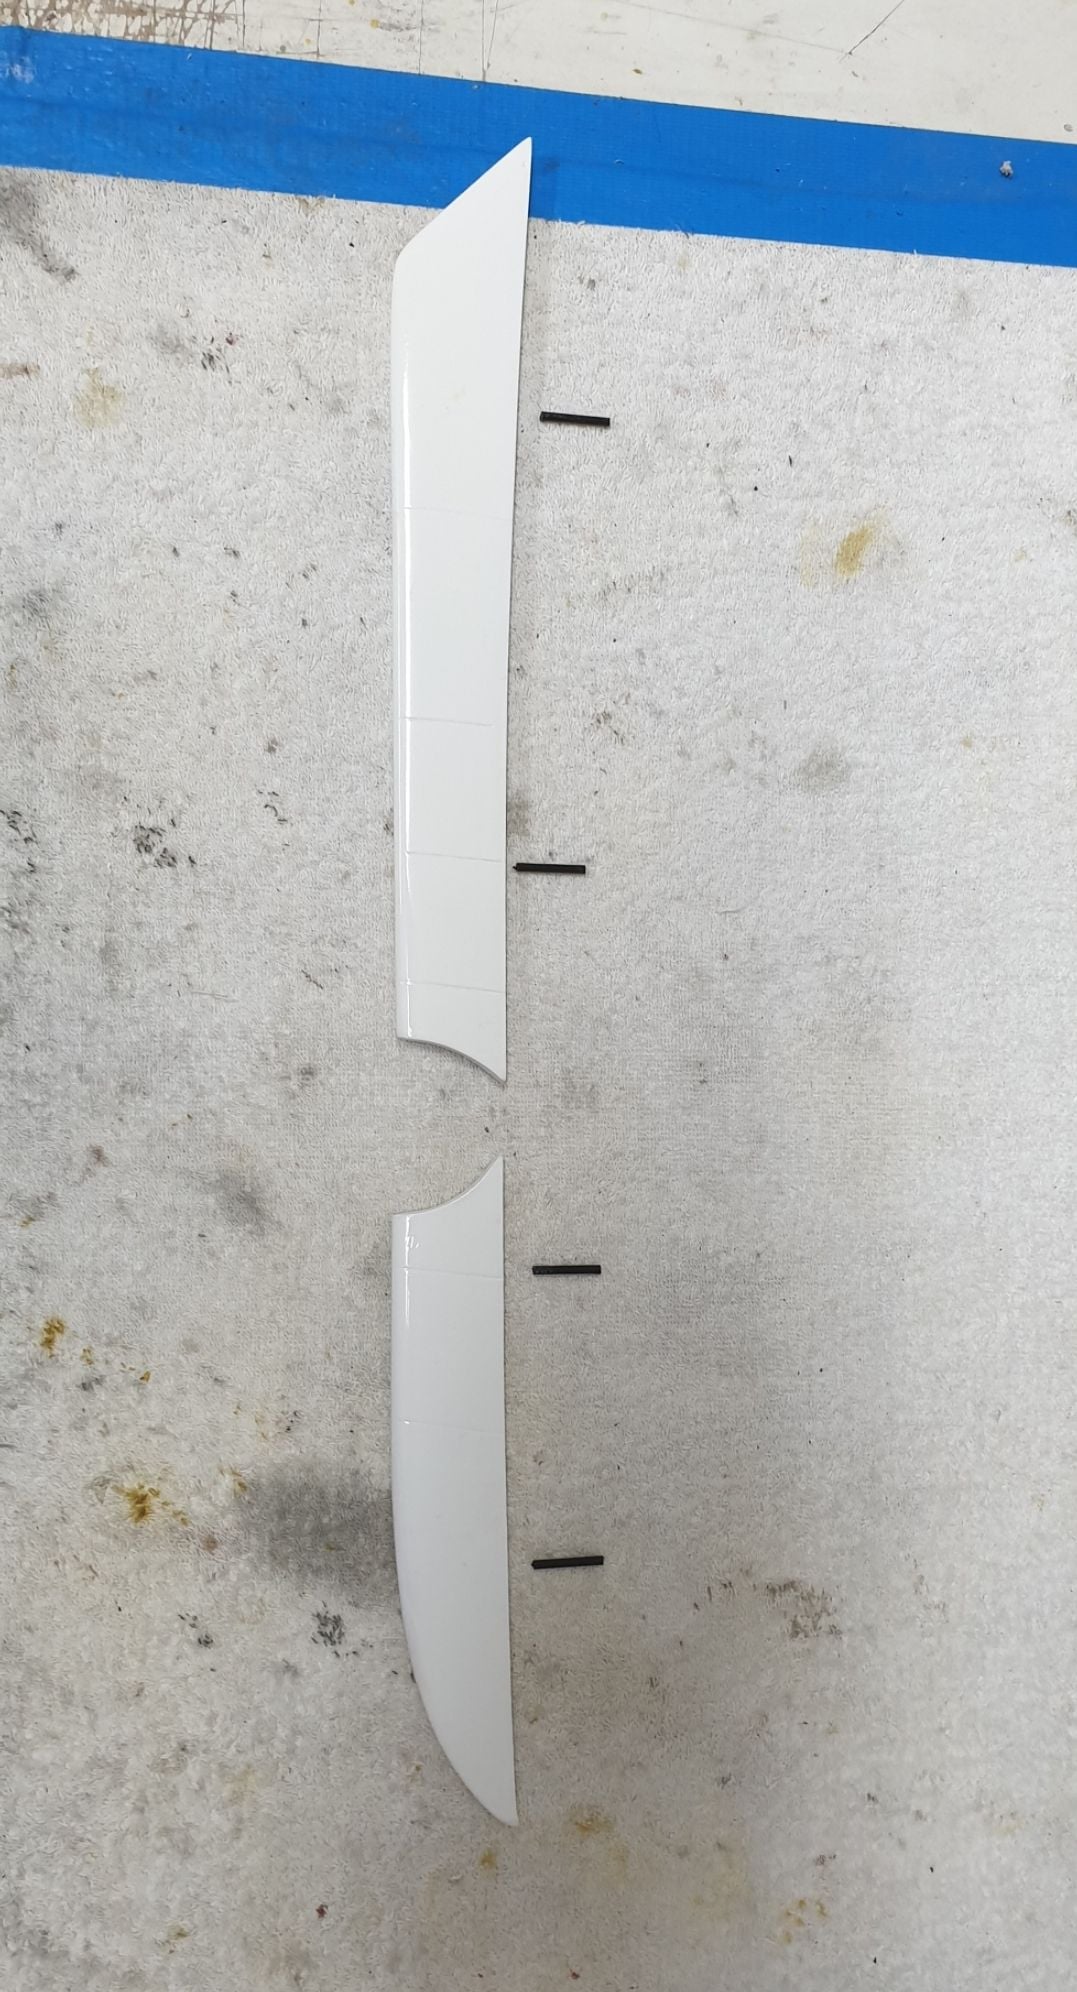
Rear lower fin assembly with the reinforcement pins.
Not mandatory but better.
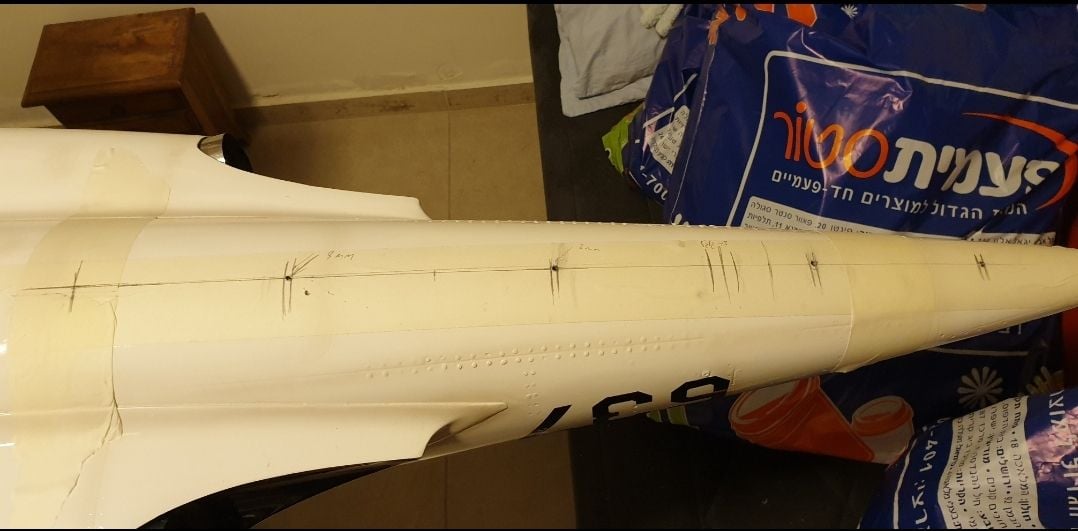
Marking the rear fin parts location.
As it somtimes happen the kit had no rear wheel. I contacted RCJC and they imidiatly offered me a new one. Time passed by and I skipped getting it. No problem of RCJC only me to blame.
So I made one. Used carbon leftovers and a reasonable size wheel I had at home and there she has a forth wheel.
The rear lower fin is made from two parts. I added 3 mm carbon tubes cut to length to stiffen the assembly.
Home made 4th wheel. Later painted in white.
Size dose matters! 😄
Rear lower fin assembly with the reinforcement pins.
Not mandatory but better.
Marking the rear fin parts location.
Last edited by avi sirota; 03-30-2020 at 12:37 PM.
03-30-2020, 12:13 PM
#62
Thread Starter
One small but important tip. The canopies in the real Fouga open to a high angle allowing the crew to get in/out relatively easy. The model had this angle limited because of the canopy to fuselage clearance. Other than the looks it bothered geting the cockpits in and out without having to totaly remove the canopies to do so. I trimmed each canopy and problem solved.
Each canopy is positioned to place by 2 "L" shaped metal hinges. They can be removed easily but also can fall easily.
I secured them with a small plywood block.
Note the angle of canopies opening.
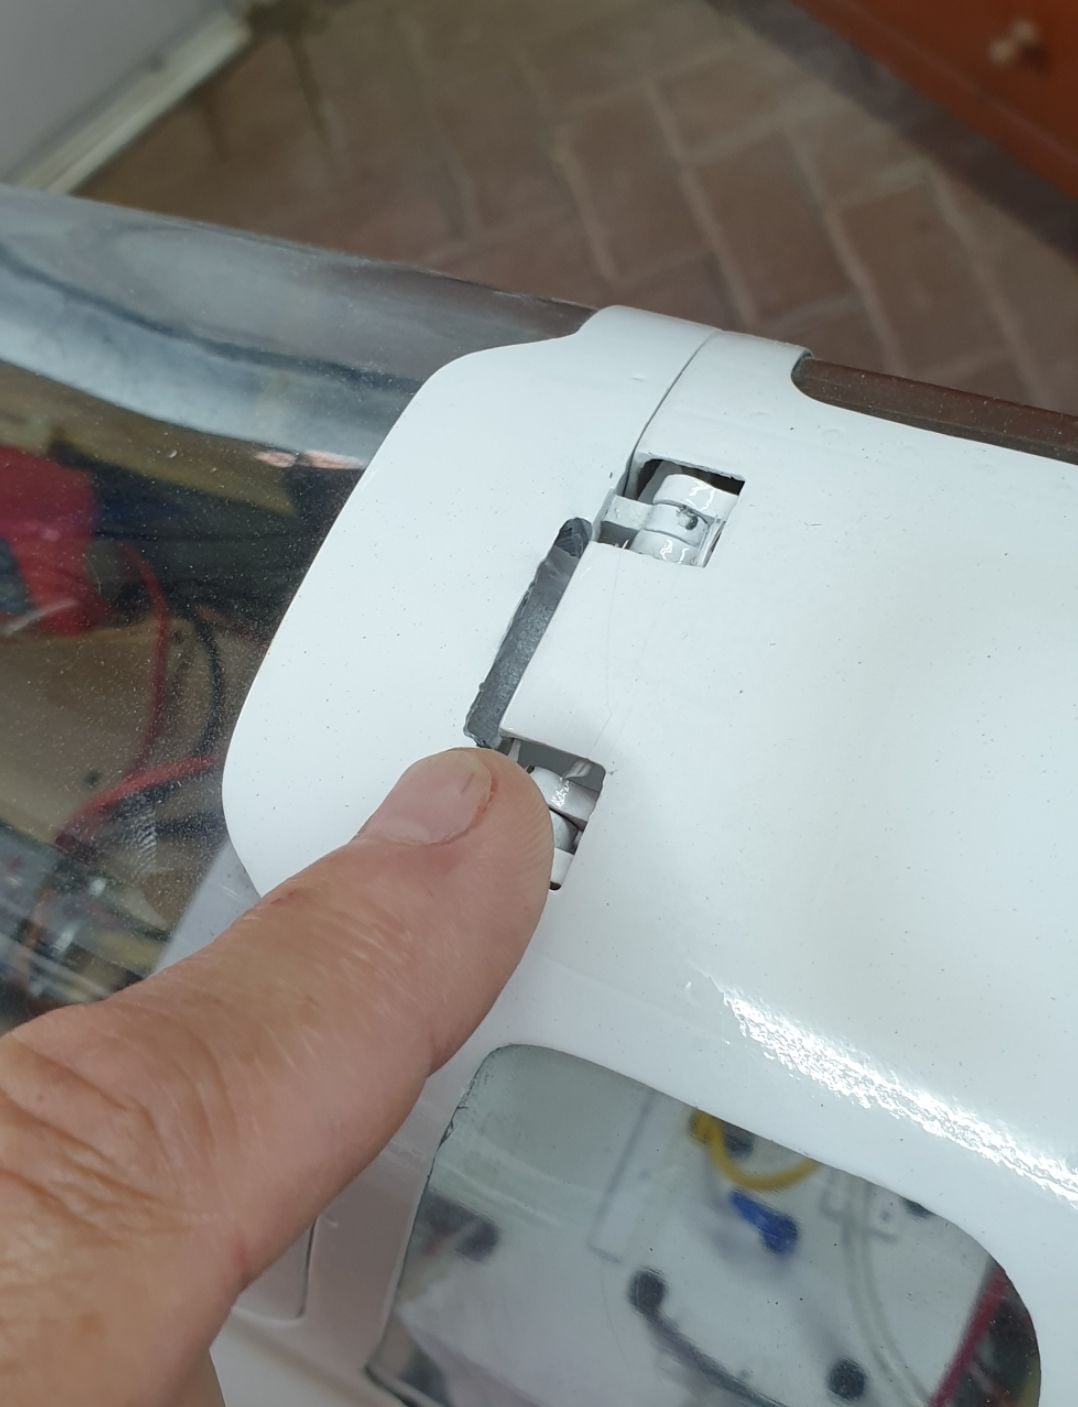
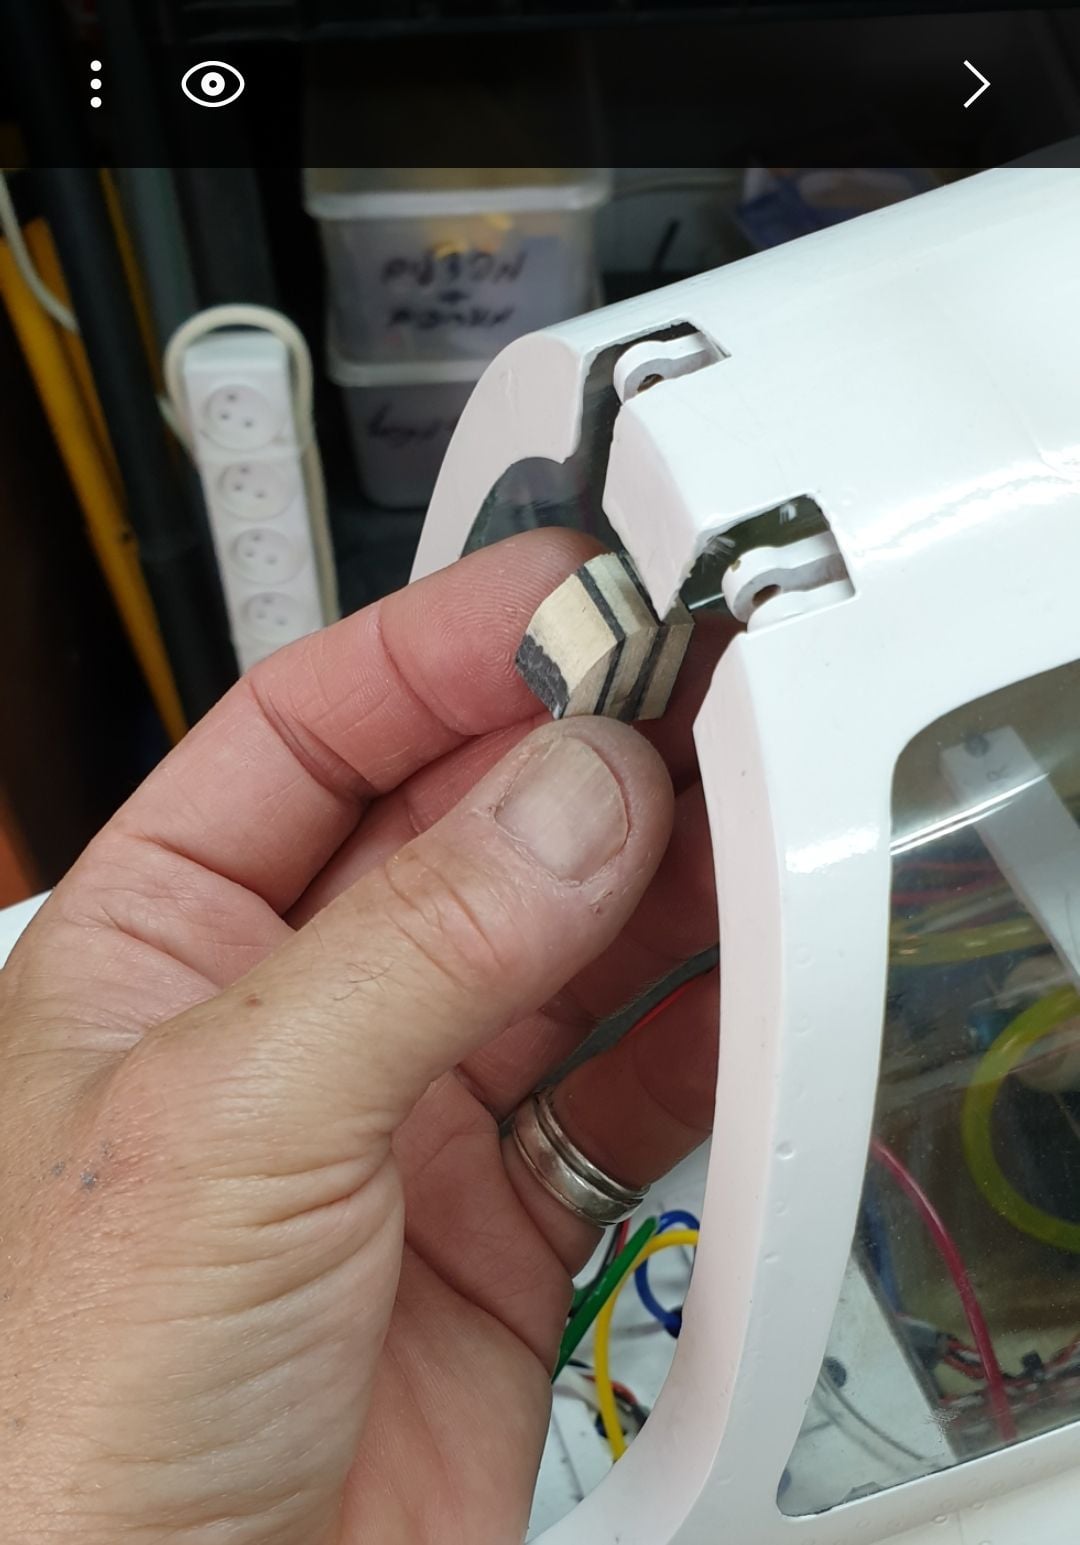
Small plywood block inserted between the "L" metal hinges to prevent them from falling.
Each canopy is positioned to place by 2 "L" shaped metal hinges. They can be removed easily but also can fall easily.
I secured them with a small plywood block.
Note the angle of canopies opening.
Small plywood block inserted between the "L" metal hinges to prevent them from falling.
Last edited by avi sirota; 03-30-2020 at 12:39 PM.
03-31-2020, 03:25 AM
#63
Thread Starter
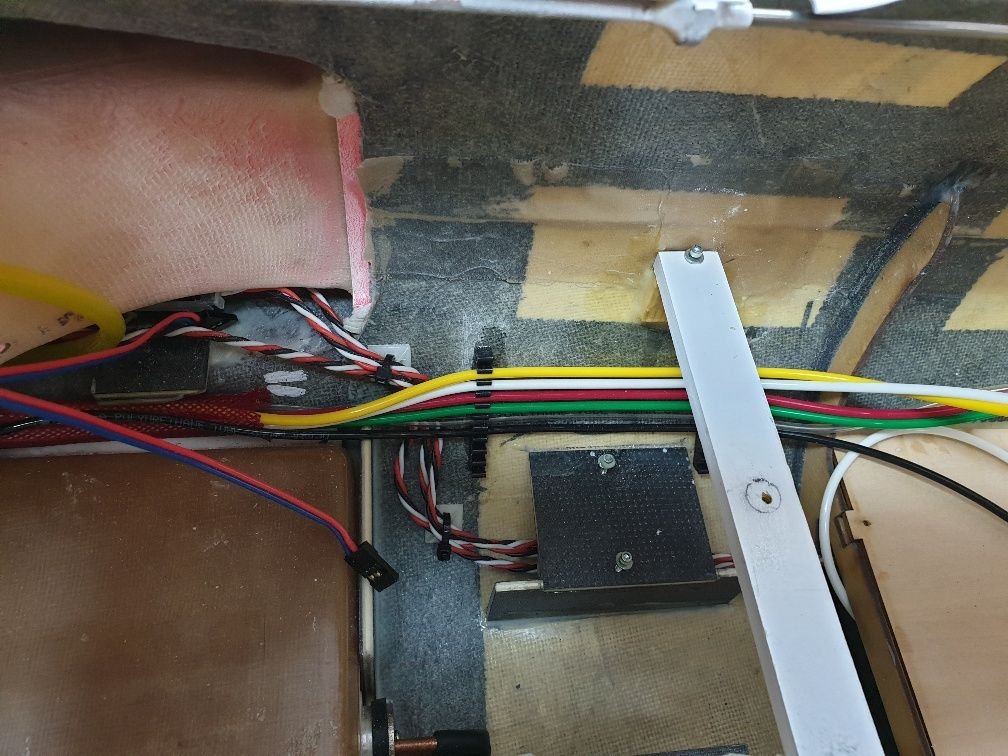
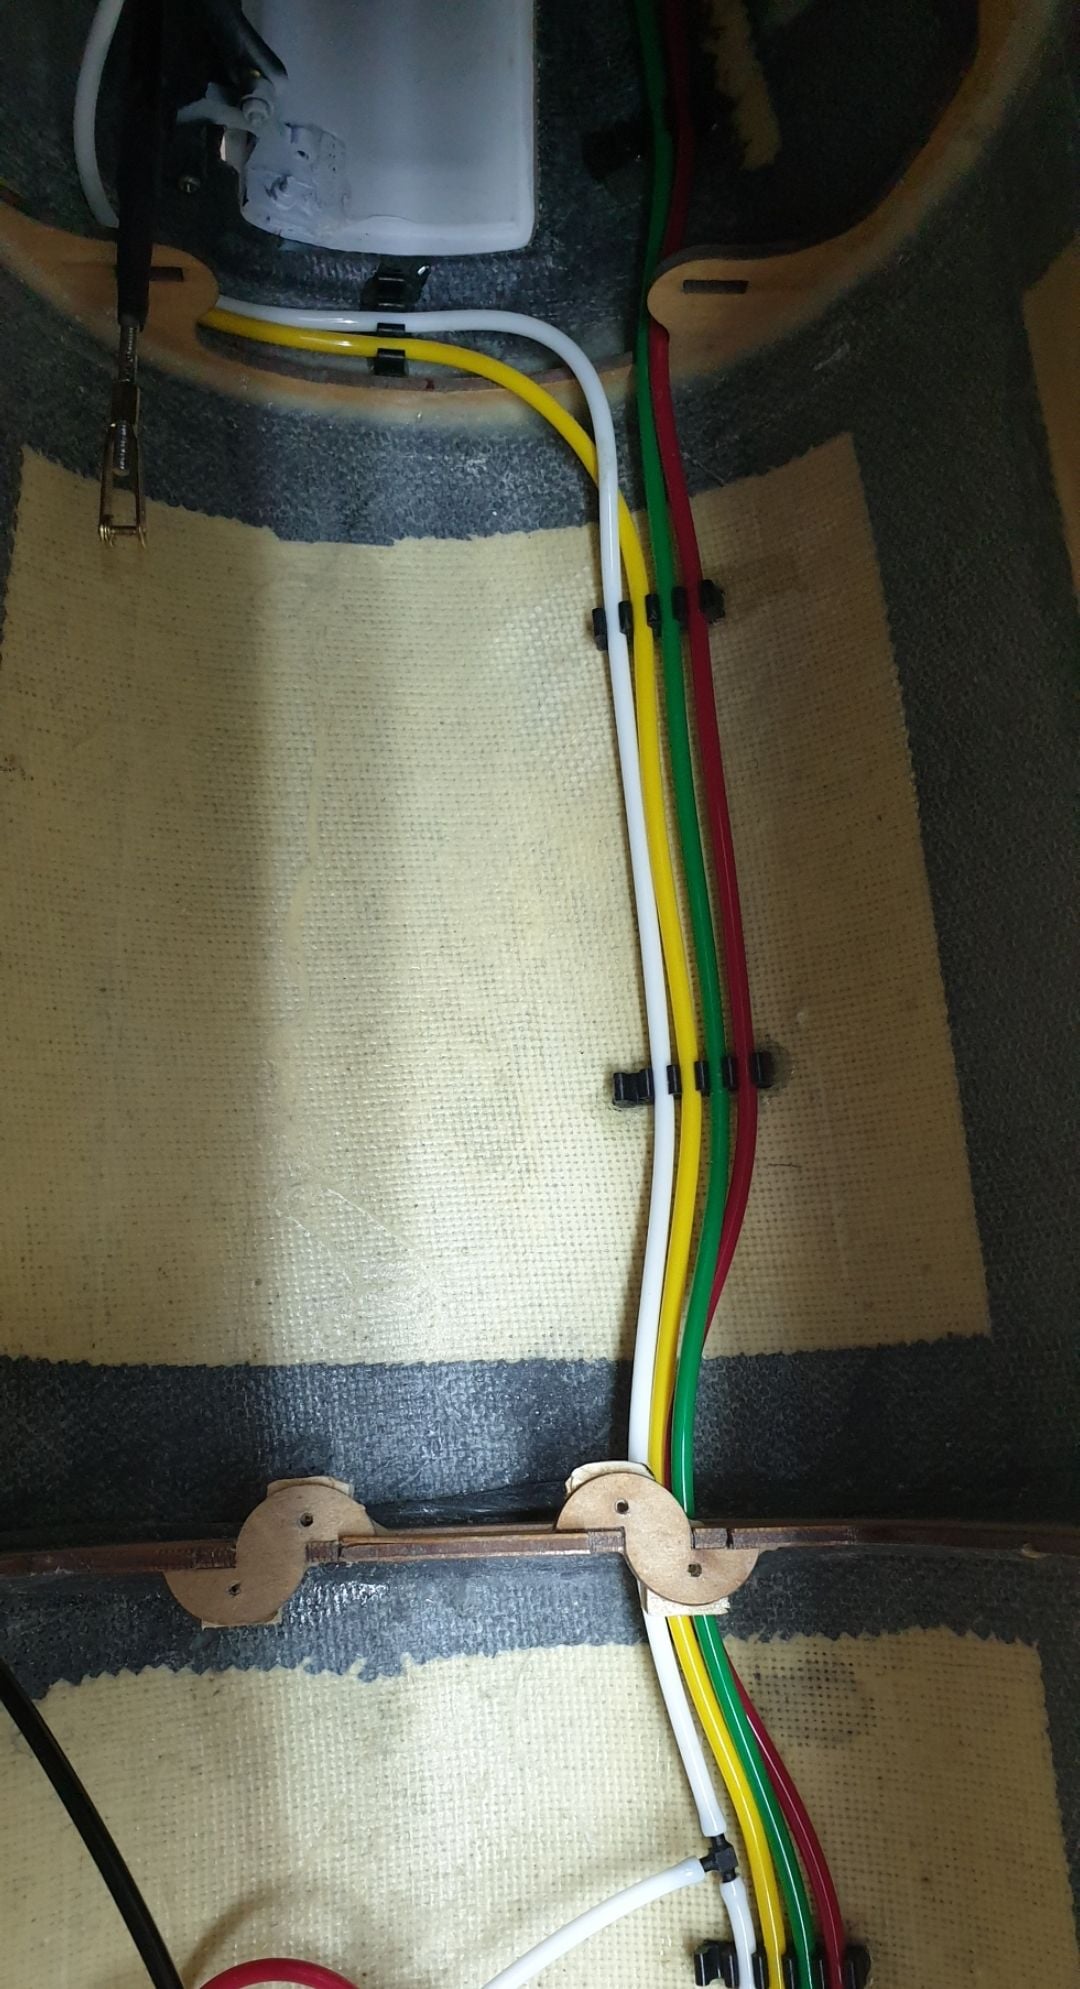
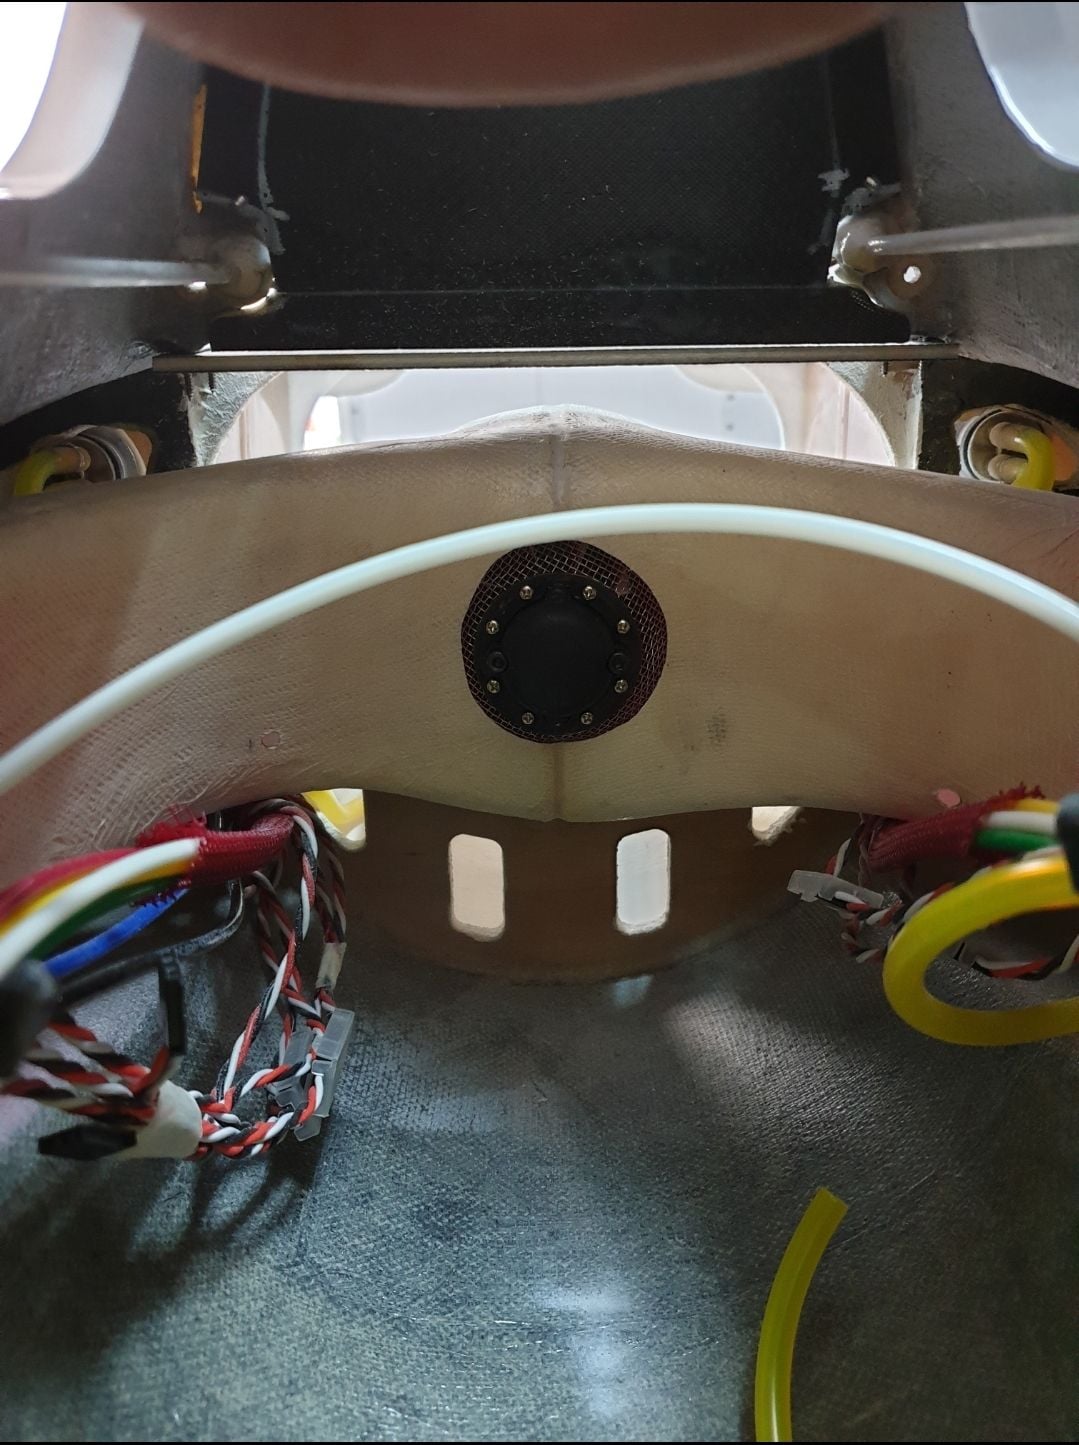
During the build I added carbon fiber material in the tail, nose and mid fuselage. Together with the original carbon fiber strips reinforcements I was worried I created a radio signal challenged environment for the receiver and antennas. I'm far from being an RF guy so I did some homework and consulted with a very good friend with experience in this field. The result was getting one of the antennas out of the fuselage while the other is facing up through the cockpit floor. This configuration was tested in taxi tests and range checks before even taking the plane out for test flight.
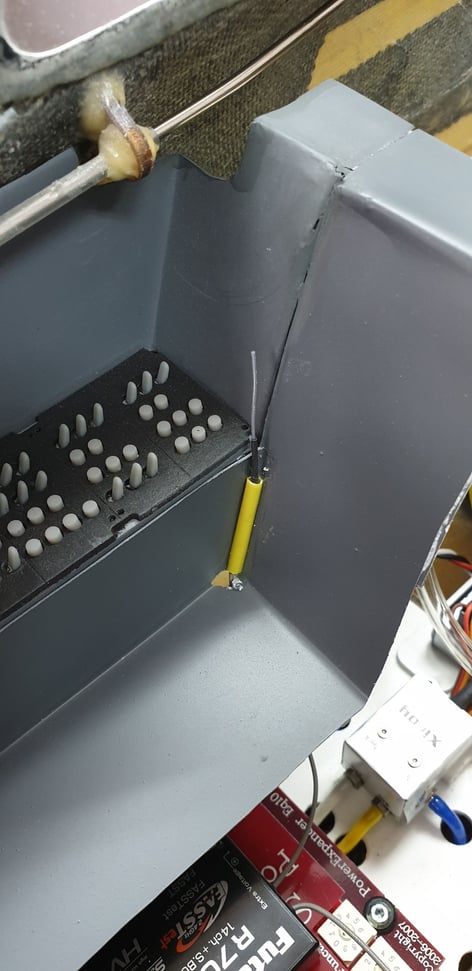
One of the receiver's antennas is facing up through the cockpit floor.
One of the receiver's antennas is facing up through the cockpit floor.
Last edited by avi sirota; 03-31-2020 at 06:06 AM.
03-31-2020, 03:31 AM
#64
Thread Starter
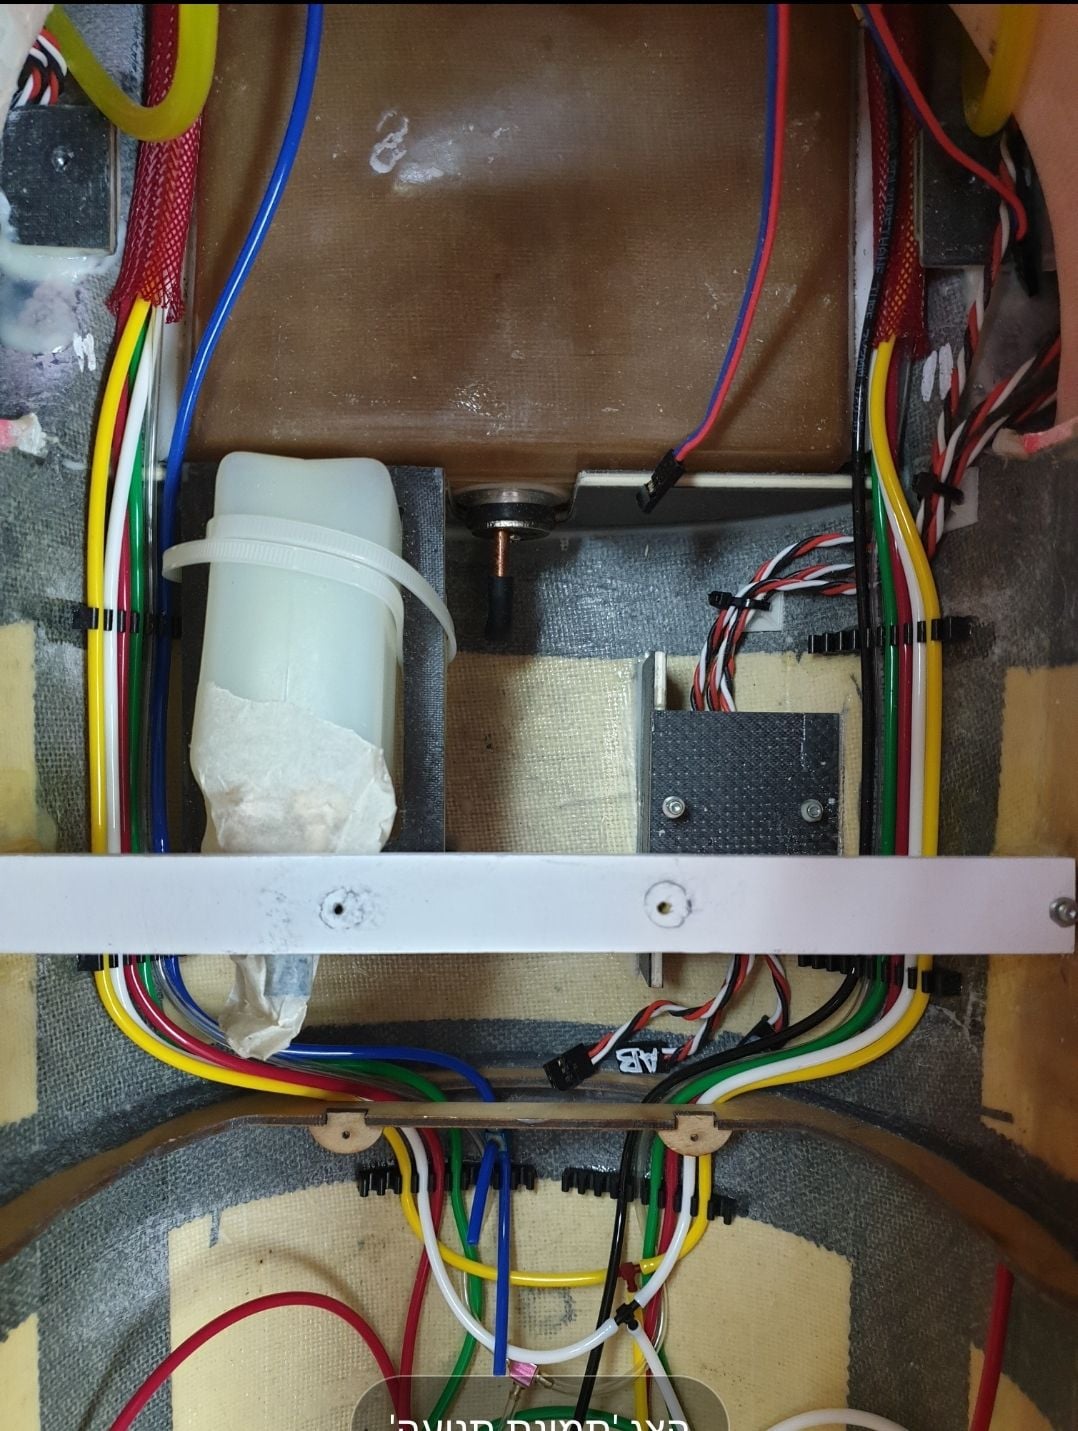
The initial location of one of the antennas-white plastic tube. Eventually it was routed out of the fuselage.
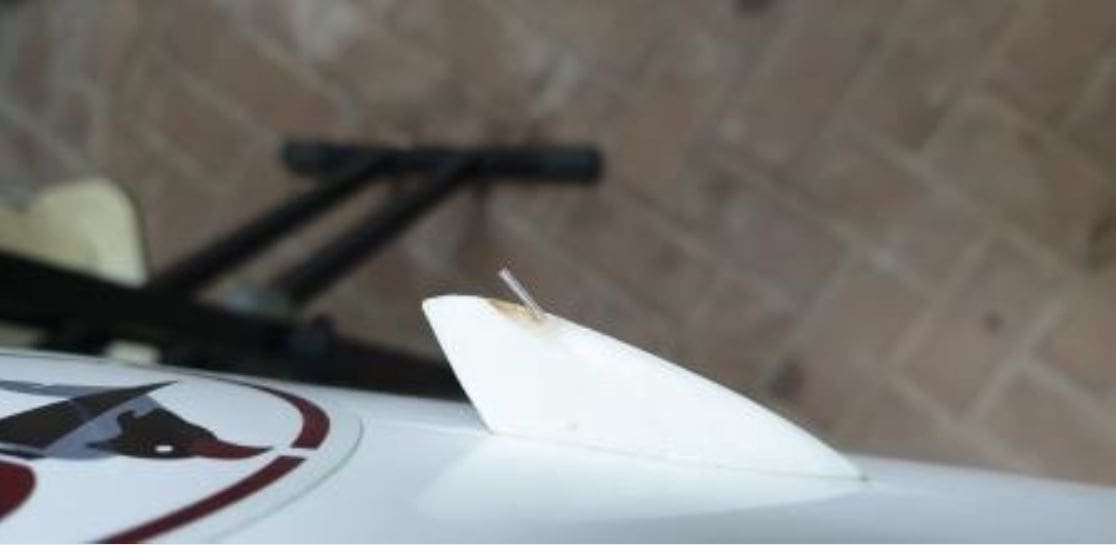
Second receiver antenna was routed outside of the fuselage and got a hand made shaped antenna from epoxy resin and fiberglass powder.
Last edited by avi sirota; 03-31-2020 at 03:53 AM.
03-31-2020, 11:44 AM
#65
Thread Starter
Turbine and tail pipe/exhaust installation was relativly easy. Had to move the turbine forward as posible to get the correct C.G without ballasts. At the same time had to move the double tail pipe rear as possible for two reasons:
1. Ensure proper distance from turbine outlet to tail pipe.
2. Get the turbine in/out without having to separate the fuselage. Note that because it is double tail pipe it cannot be moved rearward.
I ended trimming some of the double inlet duct in two places for the turbine starter.
Engine bay final mesurments. The engine rails had to be shaped to acomodate the engine. The fuel vent lines waiting to be instald.
The starter is looking forward through the inlet duct just to be engaged...

Almost there...
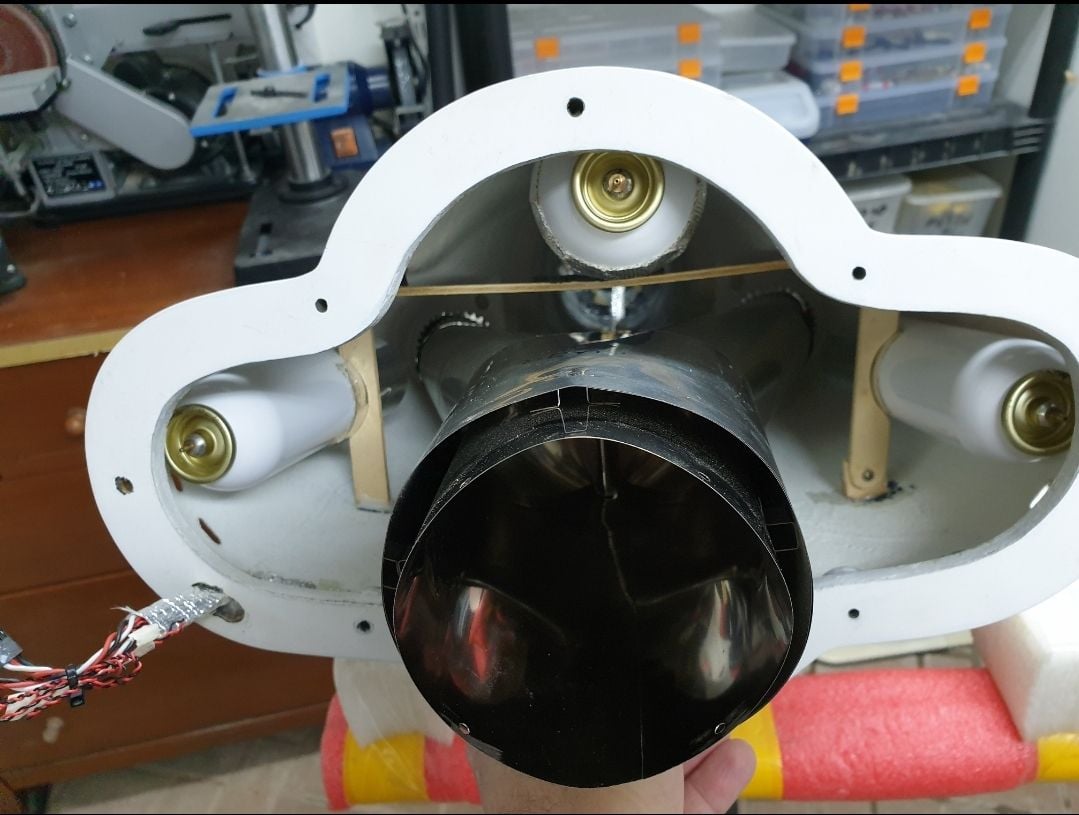
Double tail pipe-"Y" shape. This is why it can't be moved rearward too much. Note the 3 air tanks. The left one must be removed if the tail pipe has to go out.
1. Ensure proper distance from turbine outlet to tail pipe.
2. Get the turbine in/out without having to separate the fuselage. Note that because it is double tail pipe it cannot be moved rearward.
I ended trimming some of the double inlet duct in two places for the turbine starter.
Engine bay final mesurments. The engine rails had to be shaped to acomodate the engine. The fuel vent lines waiting to be instald.
The starter is looking forward through the inlet duct just to be engaged...
Almost there...
Double tail pipe-"Y" shape. This is why it can't be moved rearward too much. Note the 3 air tanks. The left one must be removed if the tail pipe has to go out.
Last edited by avi sirota; 03-31-2020 at 11:46 AM.
03-31-2020, 12:05 PM
#66
Thread Starter
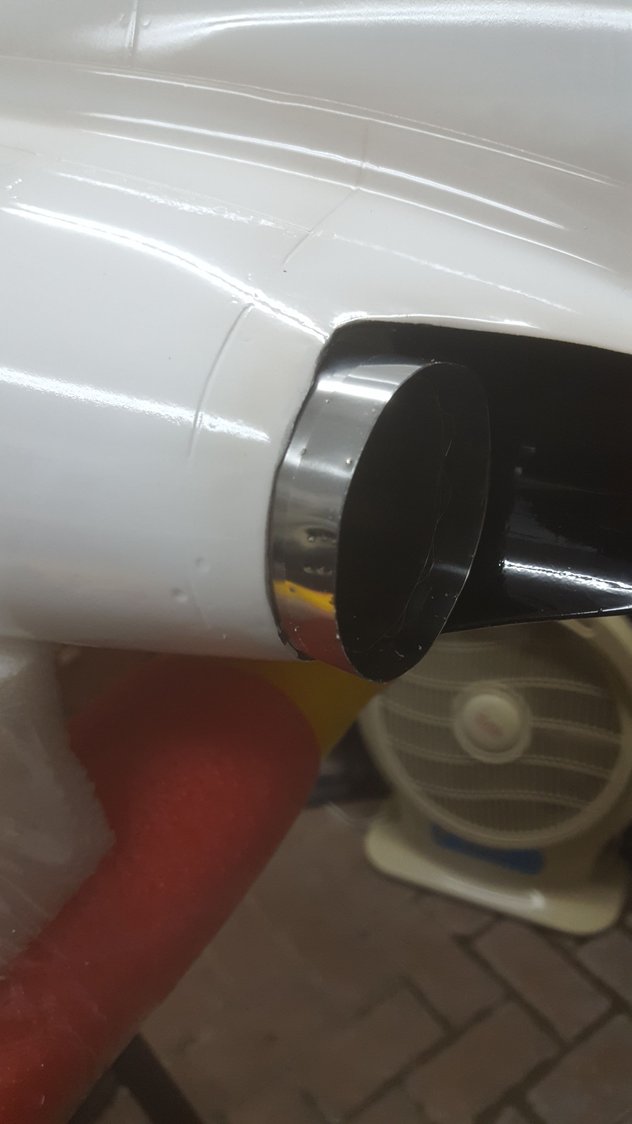
The tail pipe is about 20 mm out of the fuselage. This will not generate too much heat to harm the skin. The kit comes with two thin metal plates to be added in this location. I was in doubt what to do here since the full scale plane don't have such tail pipe sticking out like this. However I couldn't leave them too much inside(frontwise).Eventually I didn't used the metal plates and the area can handle the temp.
Last edited by avi sirota; 03-31-2020 at 10:45 PM.
04-01-2020, 12:27 AM
#67
Thread Starter
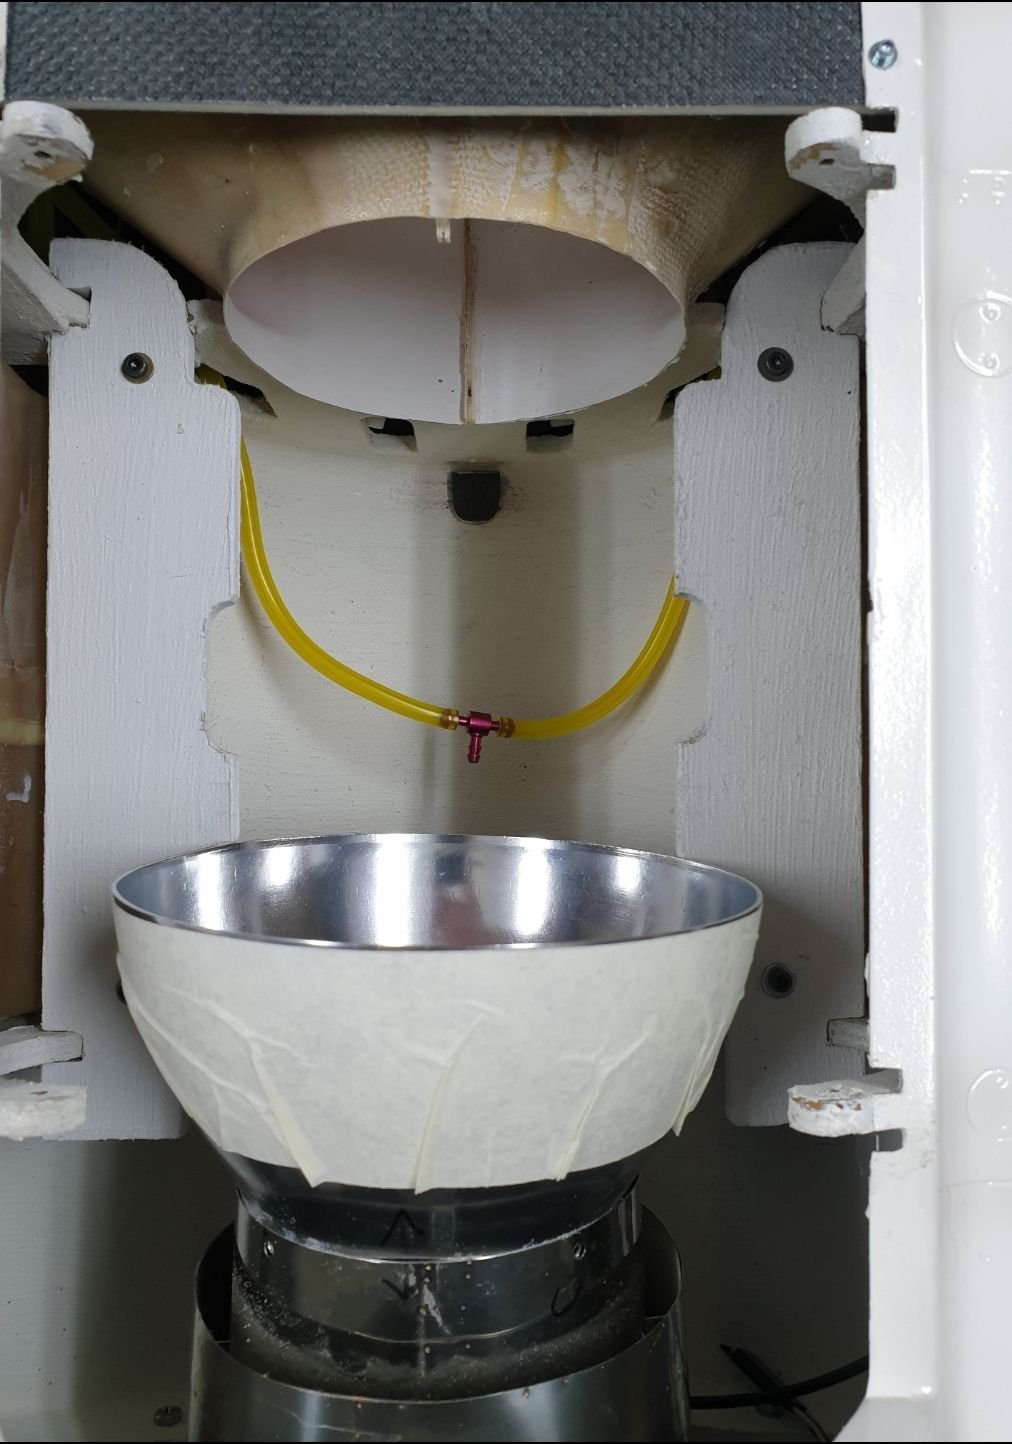
For better heat disposal at the rear fuselage it is a good idea to add another big vent port. This is not a scale feature however very much needed. This was done in another Fouga and I implemented it as well again using the pasta filter...
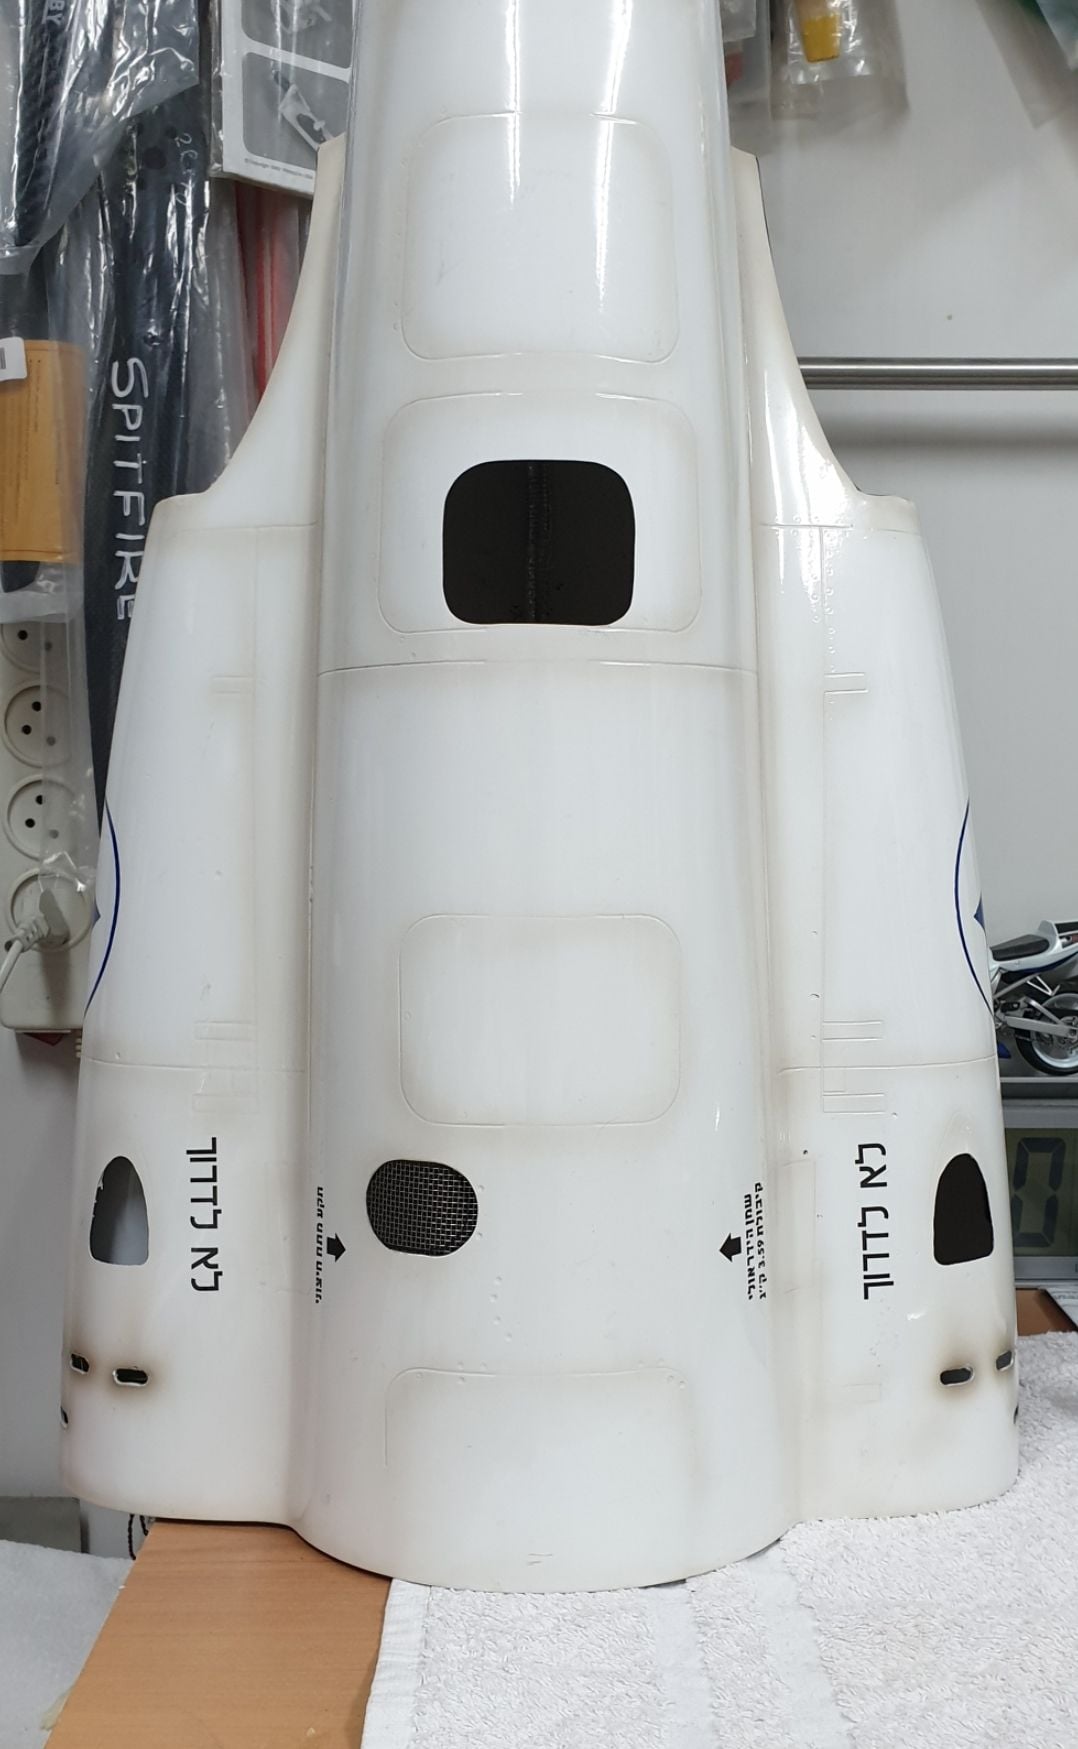
The vent port location was done in that place in the upper fuselage as the hot air tends to climb up and with the forward movment of the plane it tends to move back.
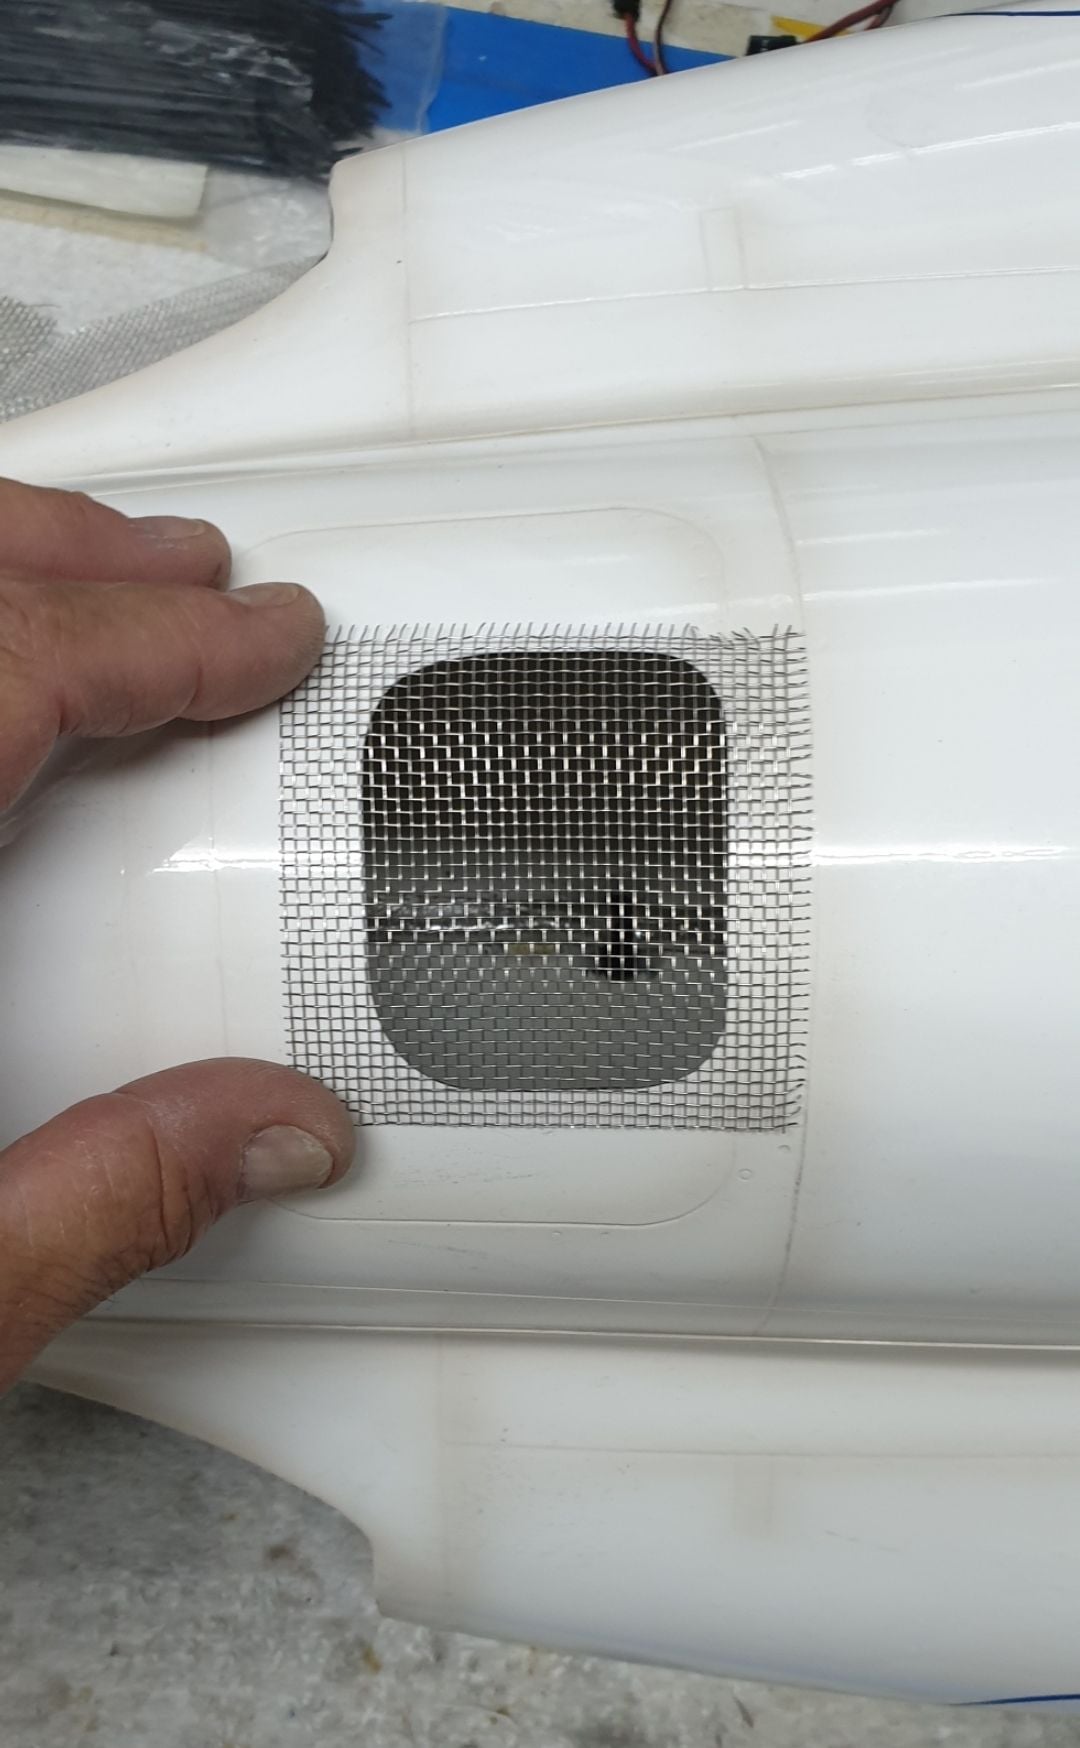
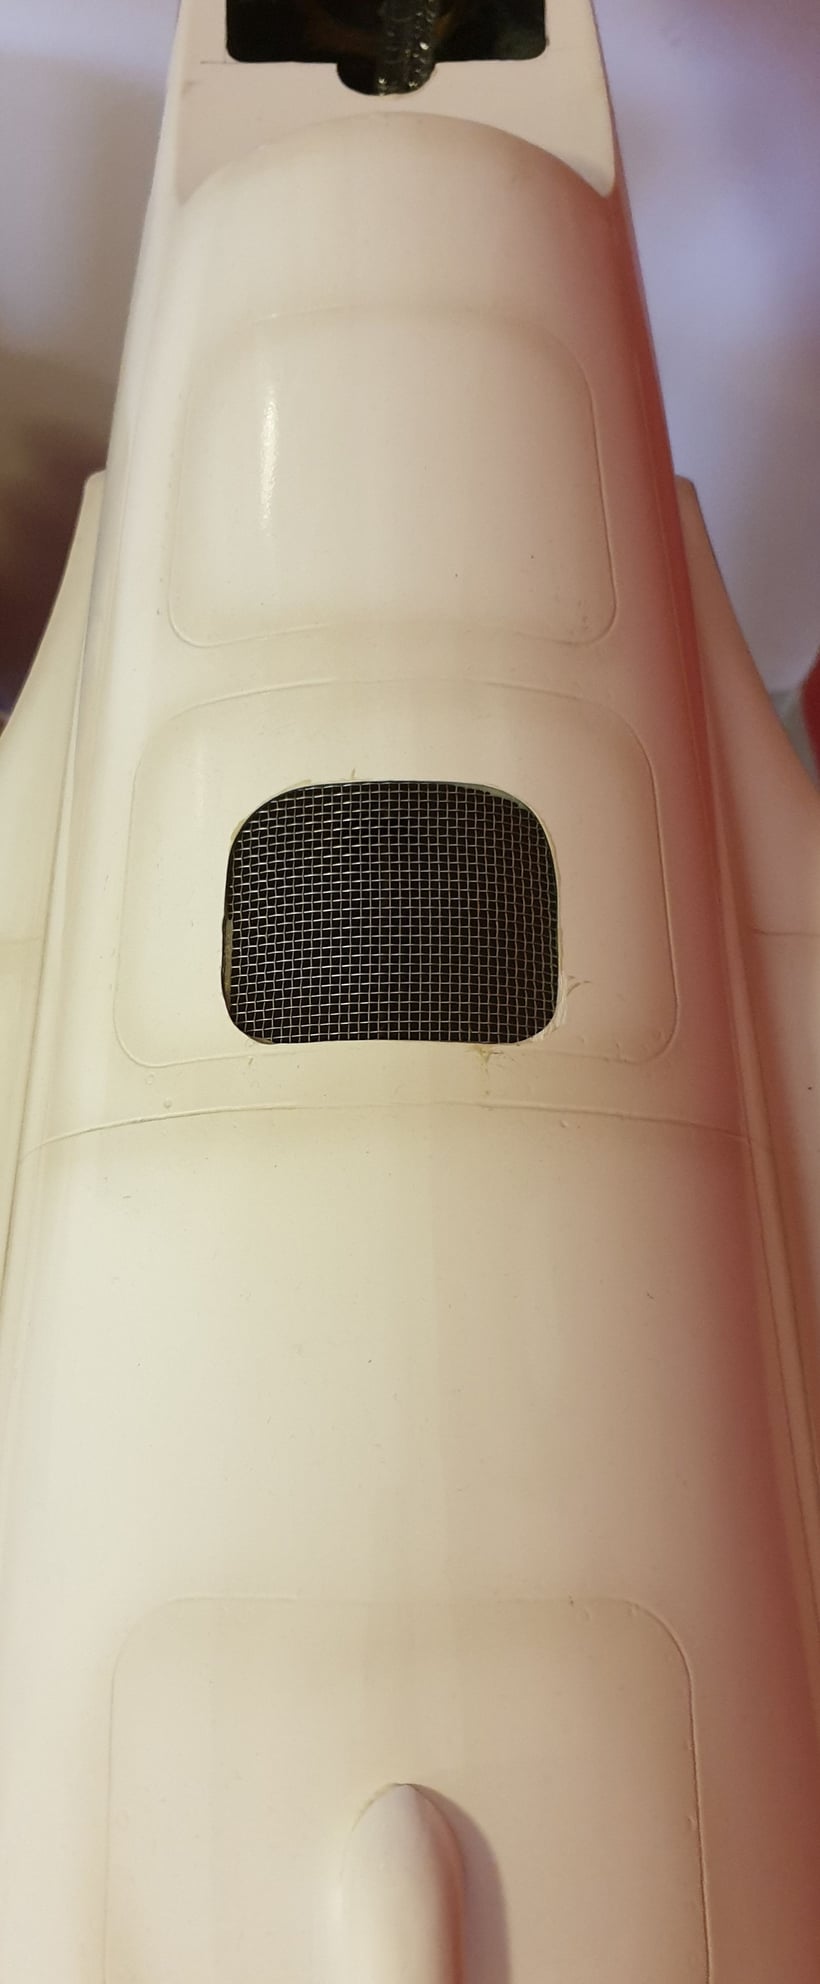
Final tesolt.
The vent port location was done in that place in the upper fuselage as the hot air tends to climb up and with the forward movment of the plane it tends to move back.
Final tesolt.

 04-08-2020, 11:49 PM
#70
Thread Starter
So, one would need wings to fly. The wings are pretty much straight forward. They are both with ailerons hinged perfectly. Each wing has location for the wing tip tanks. The wing tip tanks (not functional) are well made. Thy need to be tested for correct bolts installation. The rear bolts need to be shorten so they will not penetrate the wing upper skin. Yes, it happened to me...
One very cool feature are the air/speed brakes. They are factory installed and with good alignment. They are servo operated. I used a high torque mini servos for them. In flight they can be used for landing.
I inspected the mechanism and made sure everything was right.
Note to rout the wiring so it will not be caught by the air/speed brake operation.
The entire outer flap installation is done through the air/speed brake well when it is taken out for that.
Last edited by avi sirota; 04-09-2020 at 01:06 AM.
04-09-2020, 12:45 AM
#71
Thread Starter
Air tanks. The kit arrives with one big tank and 2 smaller tanks. To have maximum retraction cycles I decided to use the big with one of the smaller tanks for retracts+doors and the third tank for brakes.
The tanks are located in such way that one of the smaller tanks must be taken out so the tail pipe can be removed. This wad done by making a removable wooded bracket for one of the smaller tanks. All have been heat protected in relevant areas.
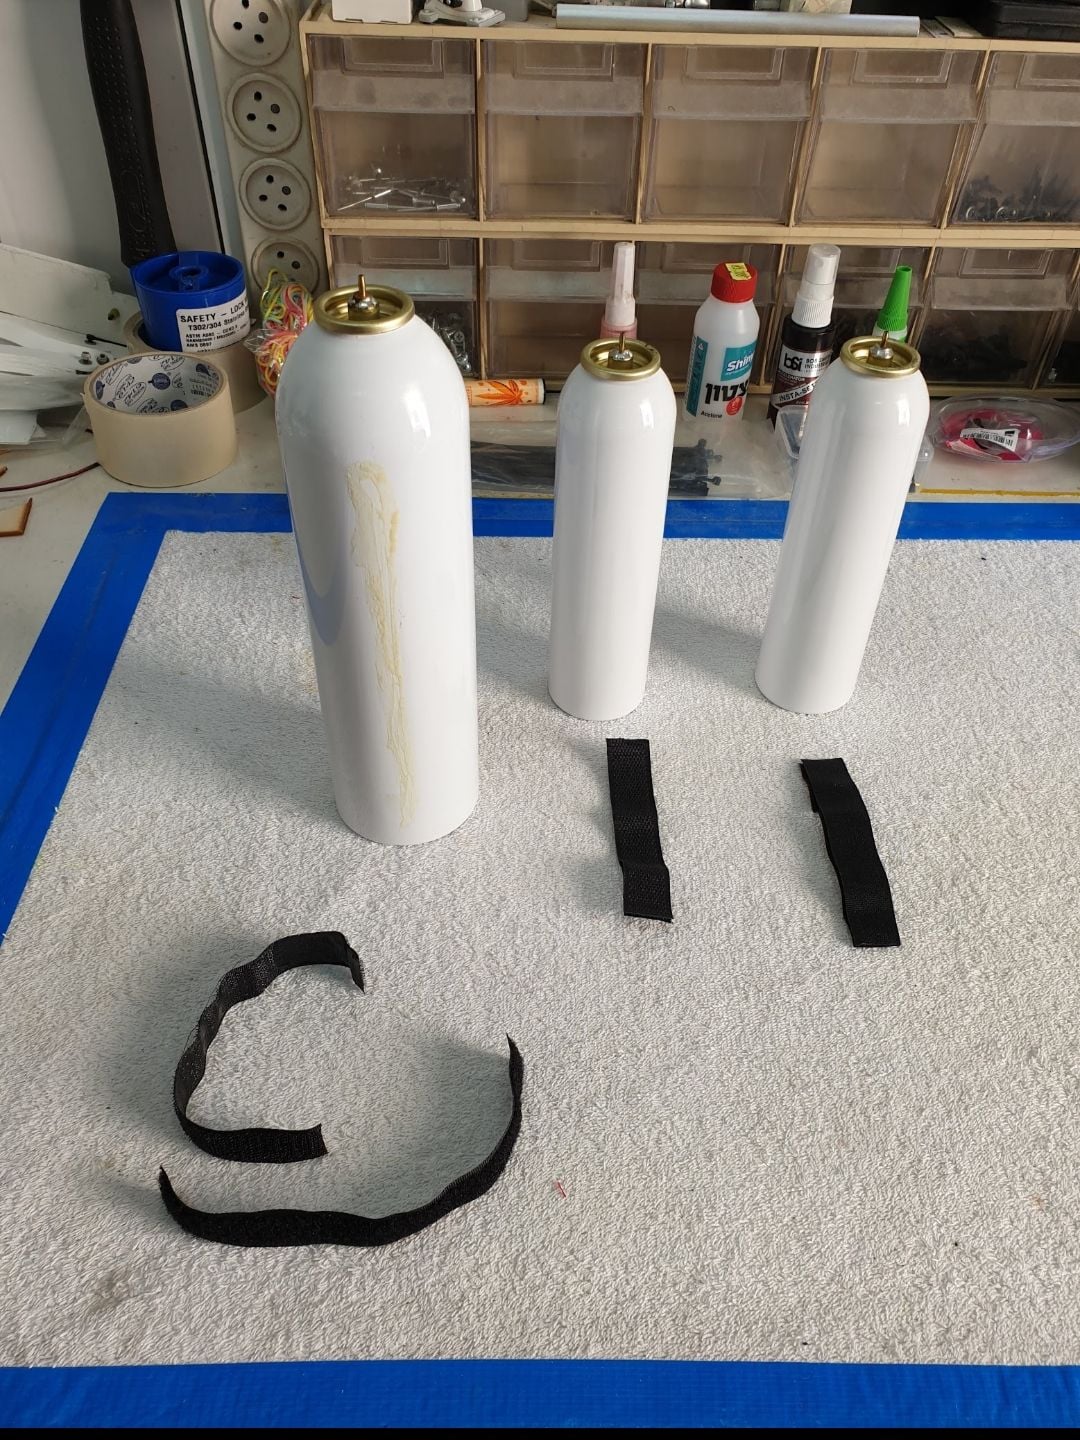
Each tank is secured with but not only valcro strips.
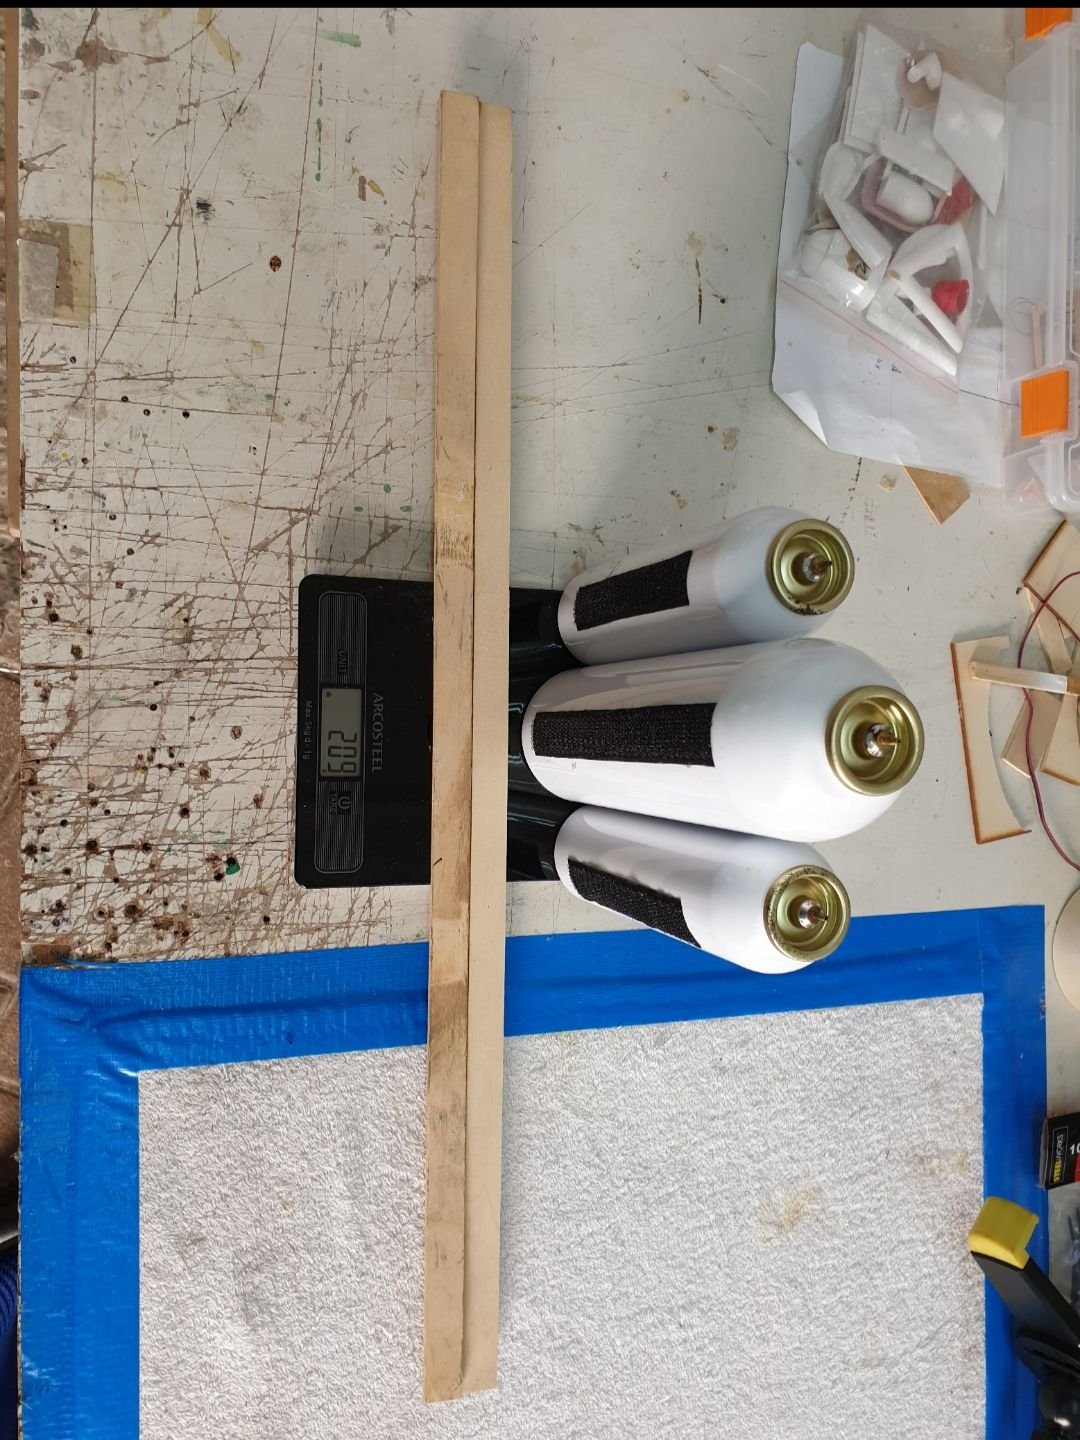
All tanks and wood for support are about 209 gr.
The air tanks arrangement . Each one is secured with valcro and wooden bracket. Note the big and one of the smaller tanks have a removable brackets. The big tank is almost in center to give space for one of the hot air vents.
The tanks are located in such way that one of the smaller tanks must be taken out so the tail pipe can be removed. This wad done by making a removable wooded bracket for one of the smaller tanks. All have been heat protected in relevant areas.
Each tank is secured with but not only valcro strips.
All tanks and wood for support are about 209 gr.
The air tanks arrangement . Each one is secured with valcro and wooden bracket. Note the big and one of the smaller tanks have a removable brackets. The big tank is almost in center to give space for one of the hot air vents.
Last edited by avi sirota; 04-09-2020 at 11:05 PM.
04-15-2020, 07:22 AM
#72
Thread Starter
Test flight.
It is always a smart thing to give the controls to a trusted and more experienced pilot to make a test flight. I know this, I did it before and will do that again in the future. BUT this project was very special and sentimental to me and I knew from the beginning Ill be doing the test flight myself.
For a rookie in jets as myself It is definitely NOT the right way to do things.
We have several gifted pilots here in our small Israeli RC community. Some are well known worldwide and they offered to assist. I had to politely refuse their good intentions.
Knowing I was doing the wrong thing in such situation I prepared the plane and myself to do the right thing for me. I did however got assistance from one of the best pilots I know-Amir Cohen and he followed me during the preparations and stood next to me as a safety pilot. Just in case.
Thanks to Isrsel Shaked for the video I now got a good after flight movie to track all the bad points of my piloting skiles and the good ones as well.
I was lucky. I also have full confidence in myself and know better my piloting skiles. It was something I just had to do by myself and I was willing to pay the price.
During the next months after my first flight I have loged 3 more flights. I then approached and got assistance from Mr. Ofir Babish in how to manage and handle this jet properly.
I'm still learning to fly it. I have much to learn but I know I can do it. My way.
Its short but thrialing...
Thank you for reading. Comments are wellcome.
Avi
Last edited by avi sirota; 04-15-2020 at 08:33 AM.
 04-19-2020, 07:10 AM
#74
Thread Starter
Dry weight with full UAT is about 16.5kg (about 36.3 lb). CG is as described in the manual.
Did you fly yours till now? why do you plan on a rebuild?
Avi
Last edited by avi sirota; 04-19-2020 at 10:42 AM.
04-19-2020, 06:36 PM
#75
Avi,
Mine hasn’t flown yet, I was having trouble with a few things last year, and had changed my mind on the turbine so that brought me to the end of the season. I had originally installed a Jet Central rabbit 100nm and it had a hard time taxing in the grass so I decided I wanted more power. I am also having a strange problem with the gear. When it’s sitting on it’s wheels it is very hard to move. It does’t want to move freely, it took full power just to get it to move. However when it’s suspended the wheels move freely. I have taken everything apart several times, lubricated/adjusted/etc, and even removed the brakes to try and get things to move freely.
Also after several measures to mitigate heat soaking (no vents like yours, that’s one of the mods I will incorporate) the brake lines have come off more then once from the tanks. I had used the stock air lines, but I think I will take them out and replace them with festo, I think that will help. Also one of my air cylinders for the main gear doors is leaking badly so I will need to deal with that.
When I install the turbine again I will move it more forward, I was afraid the fist time I installed it to cut out material from the intake ducking. Now that Ive seen yours I will do the same, which will give me proper spacing to the thrust tube and take out some weight out of the nose.
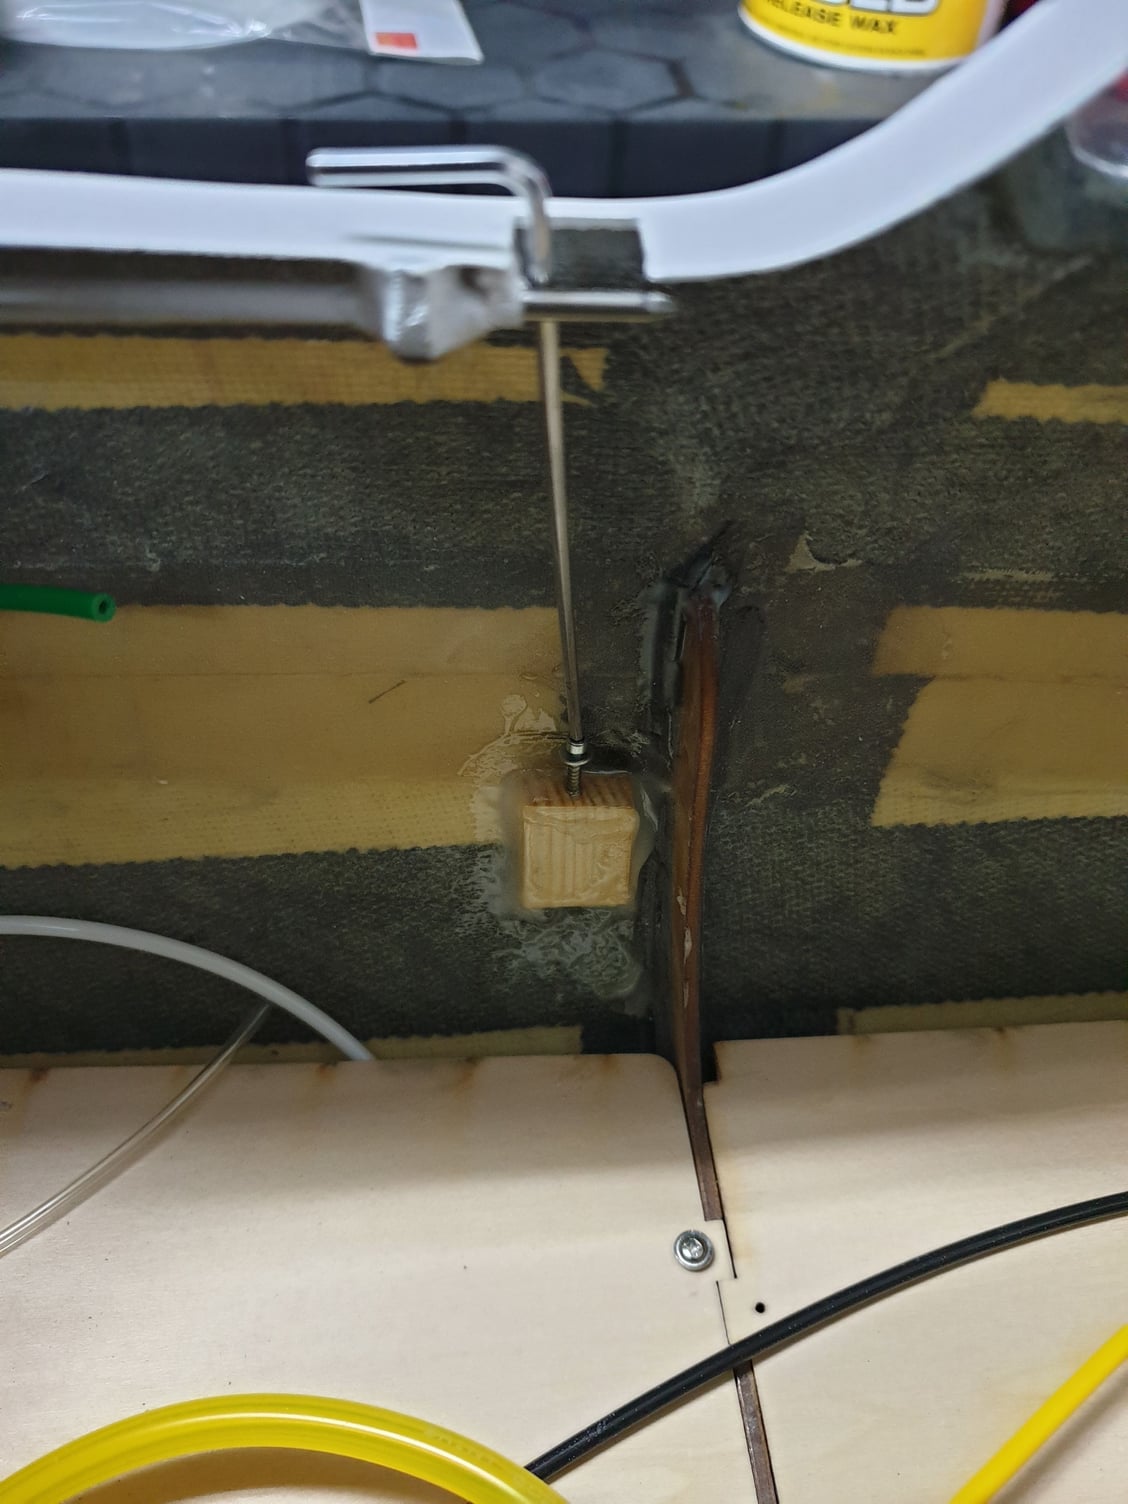
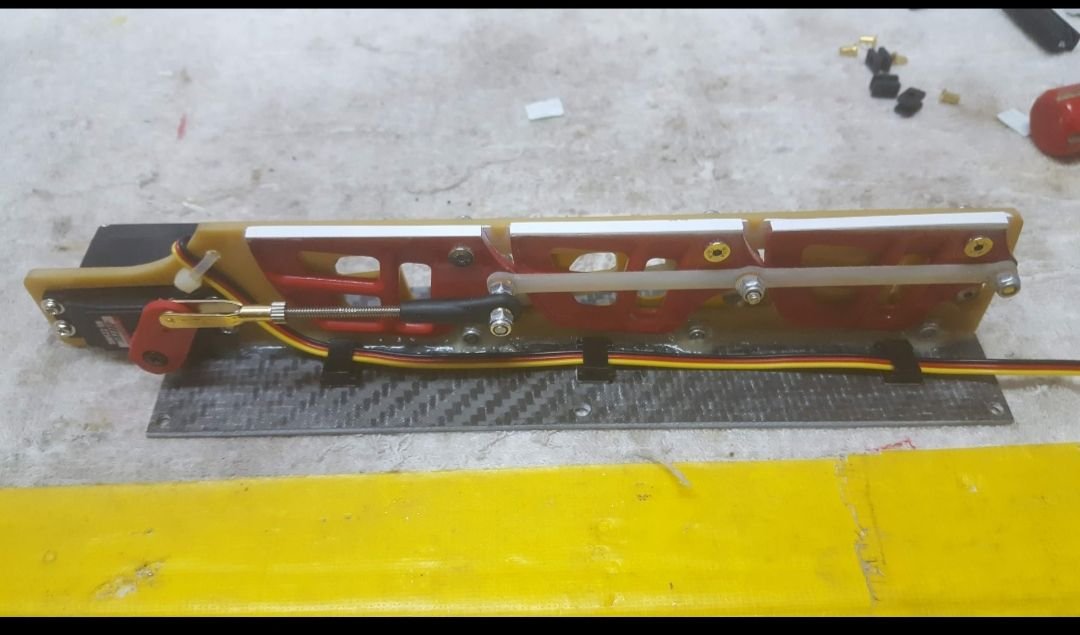
Lastly I never liked the pull pull cable nose wheel steering, and after seeing yours I think I will do the same modification to mine to eliminate the cable system.
So not quite a total rebuild, but several changes need to be done to make me more happy with the plane. As soon as I am done my current build I will get the Fouga on the bench and start the refit.
Mine hasn’t flown yet, I was having trouble with a few things last year, and had changed my mind on the turbine so that brought me to the end of the season. I had originally installed a Jet Central rabbit 100nm and it had a hard time taxing in the grass so I decided I wanted more power. I am also having a strange problem with the gear. When it’s sitting on it’s wheels it is very hard to move. It does’t want to move freely, it took full power just to get it to move. However when it’s suspended the wheels move freely. I have taken everything apart several times, lubricated/adjusted/etc, and even removed the brakes to try and get things to move freely.
Also after several measures to mitigate heat soaking (no vents like yours, that’s one of the mods I will incorporate) the brake lines have come off more then once from the tanks. I had used the stock air lines, but I think I will take them out and replace them with festo, I think that will help. Also one of my air cylinders for the main gear doors is leaking badly so I will need to deal with that.
When I install the turbine again I will move it more forward, I was afraid the fist time I installed it to cut out material from the intake ducking. Now that Ive seen yours I will do the same, which will give me proper spacing to the thrust tube and take out some weight out of the nose.
Lastly I never liked the pull pull cable nose wheel steering, and after seeing yours I think I will do the same modification to mine to eliminate the cable system.
So not quite a total rebuild, but several changes need to be done to make me more happy with the plane. As soon as I am done my current build I will get the Fouga on the bench and start the refit.