


SIG Four-Star 60 Build
 04-02-2019, 02:04 PM
#76

Thread Starter
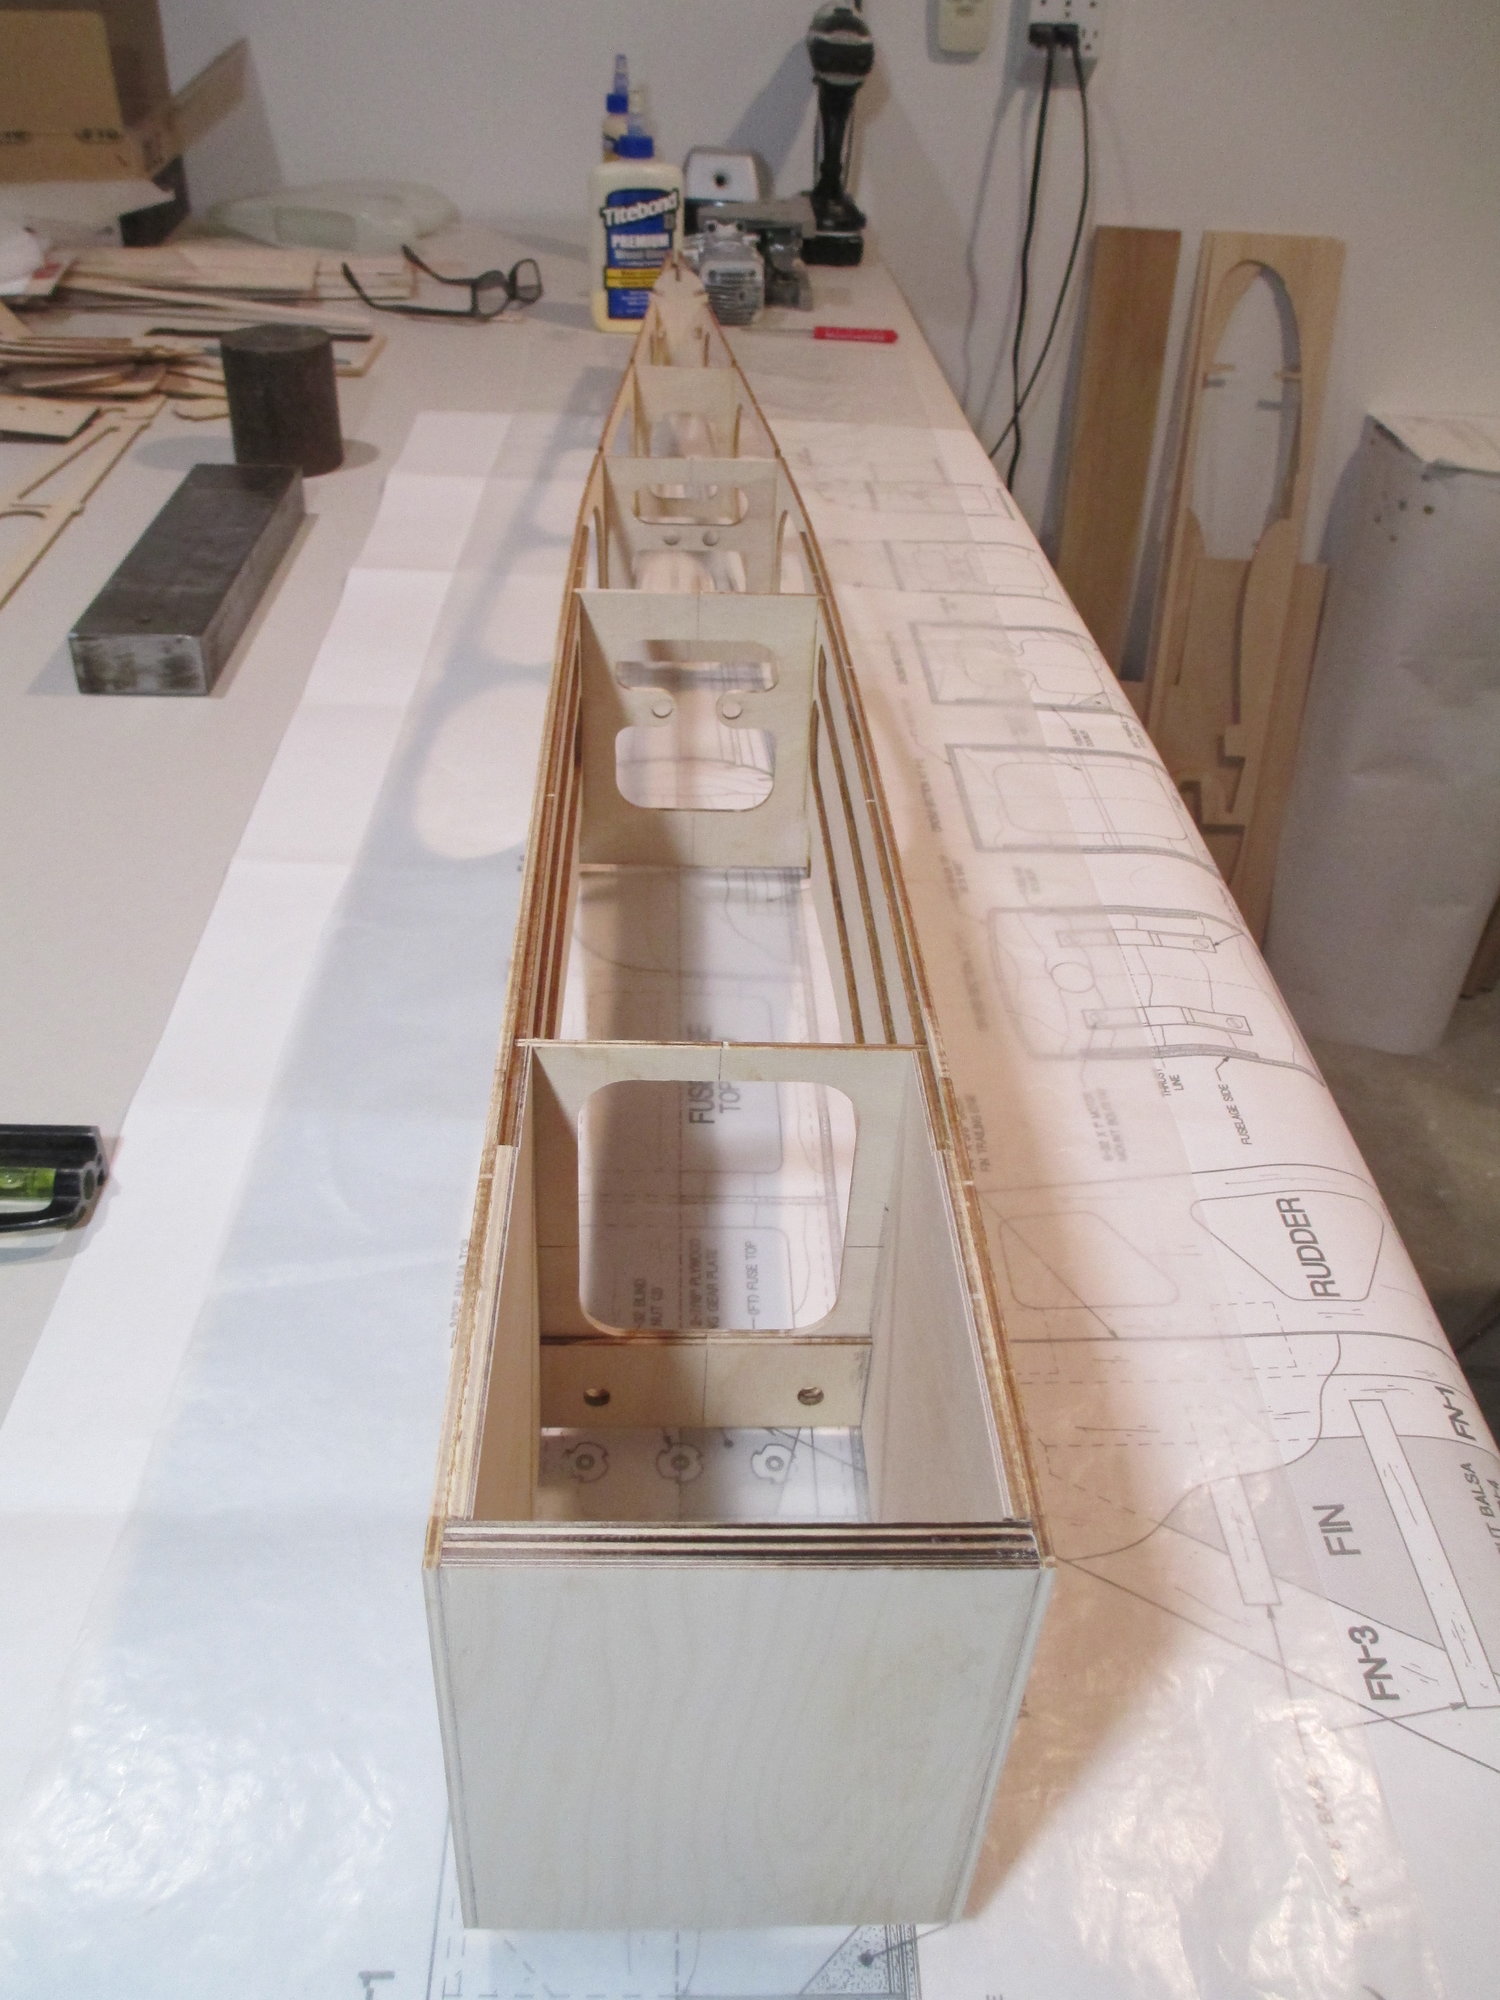
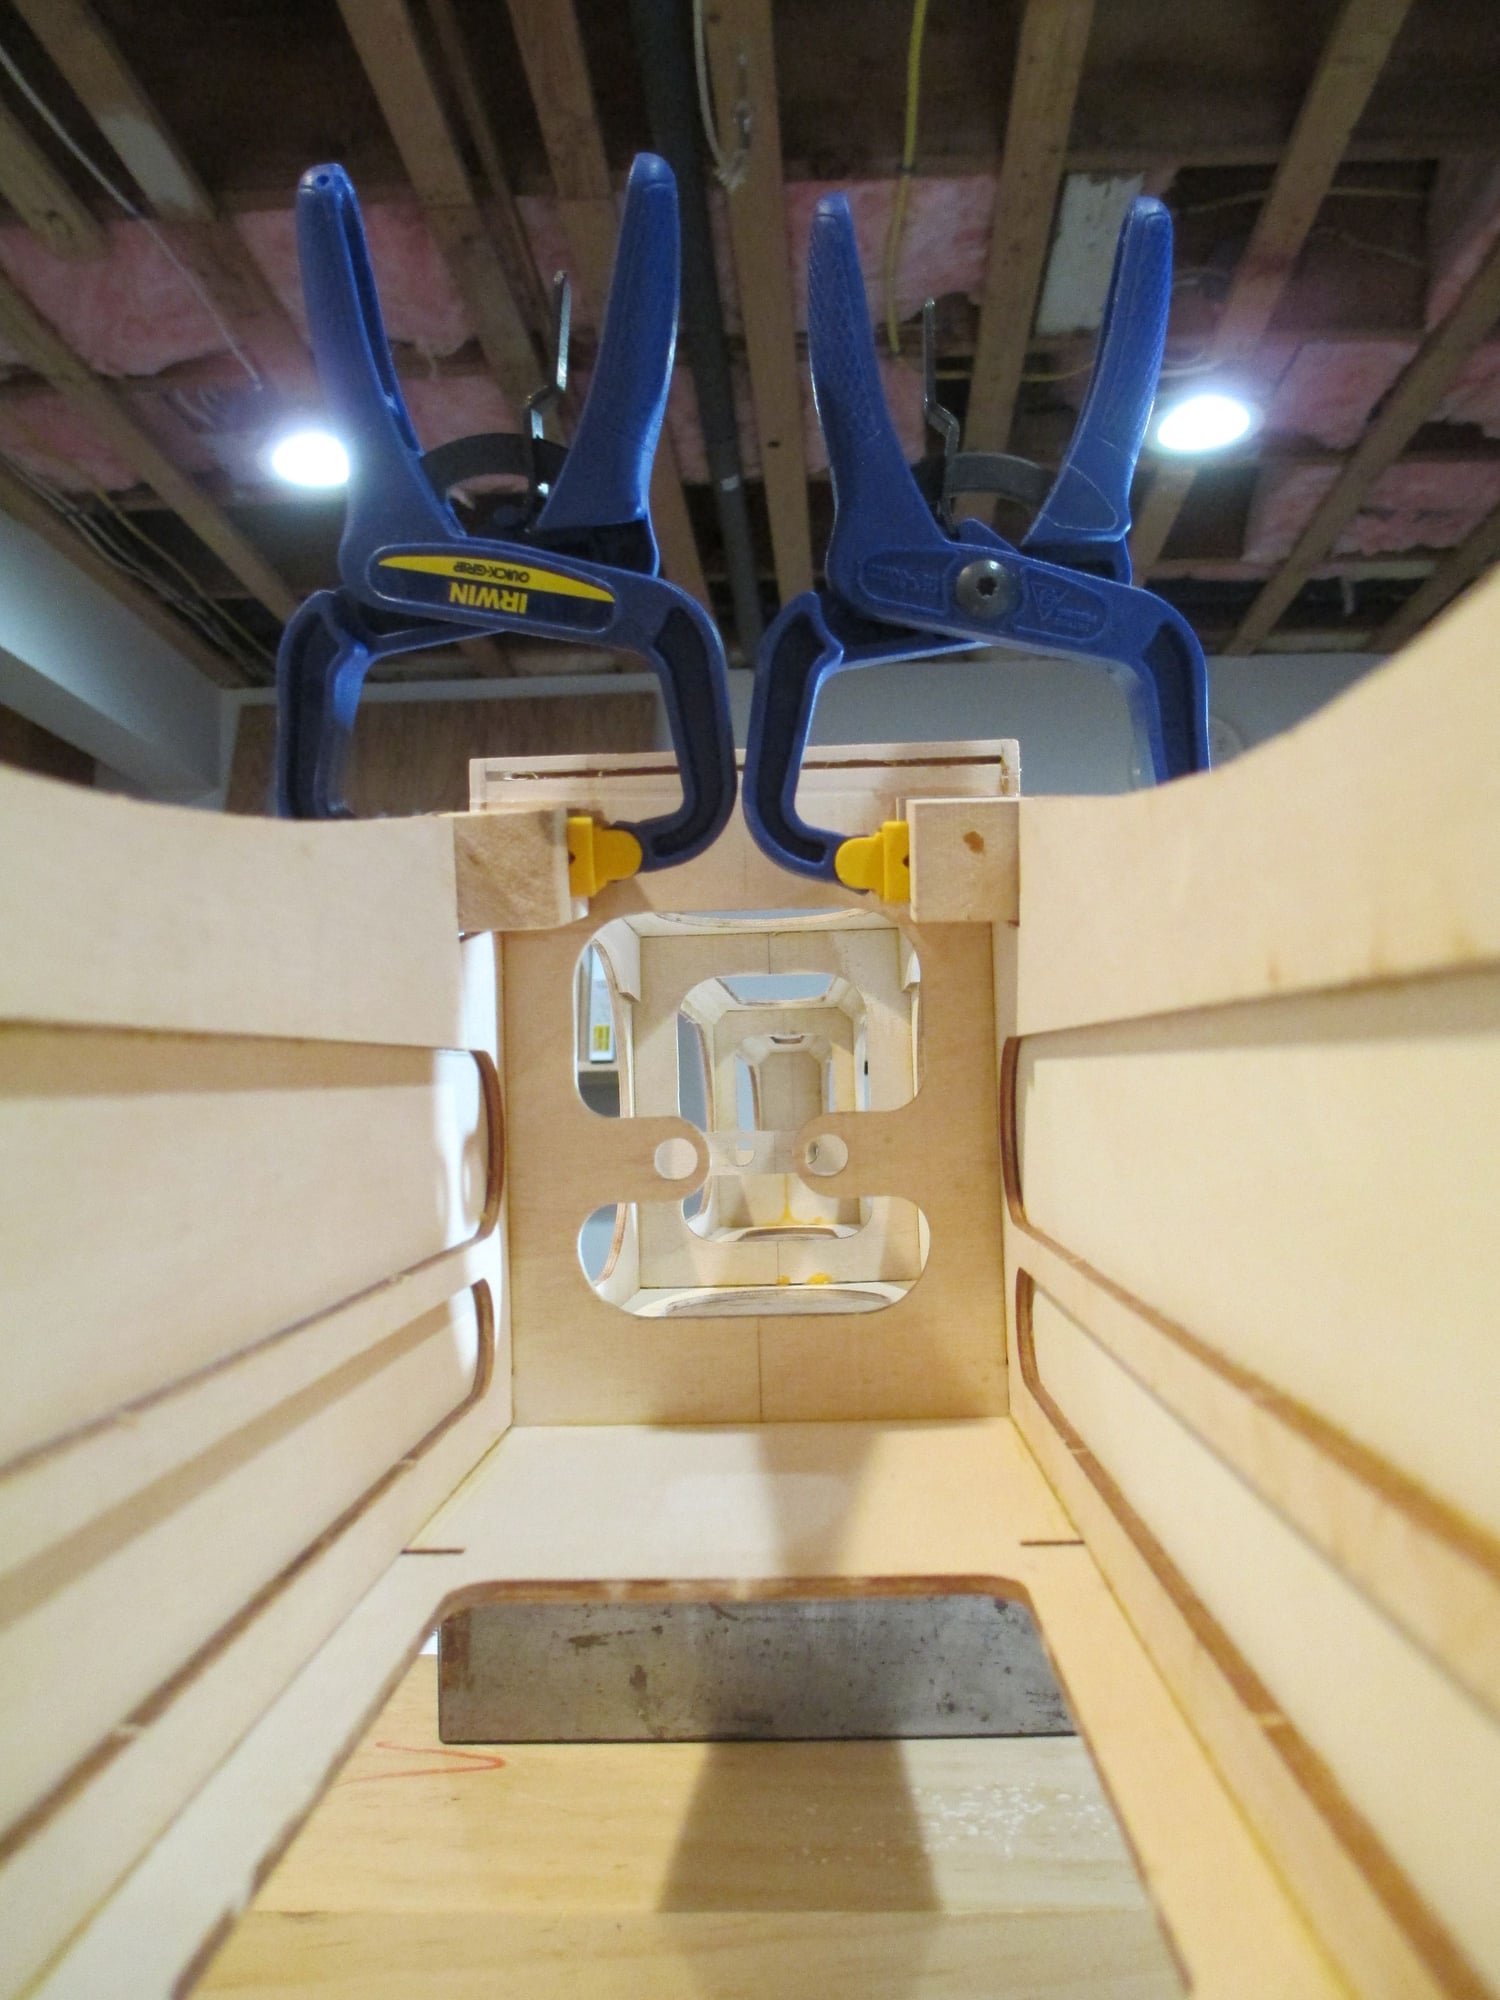
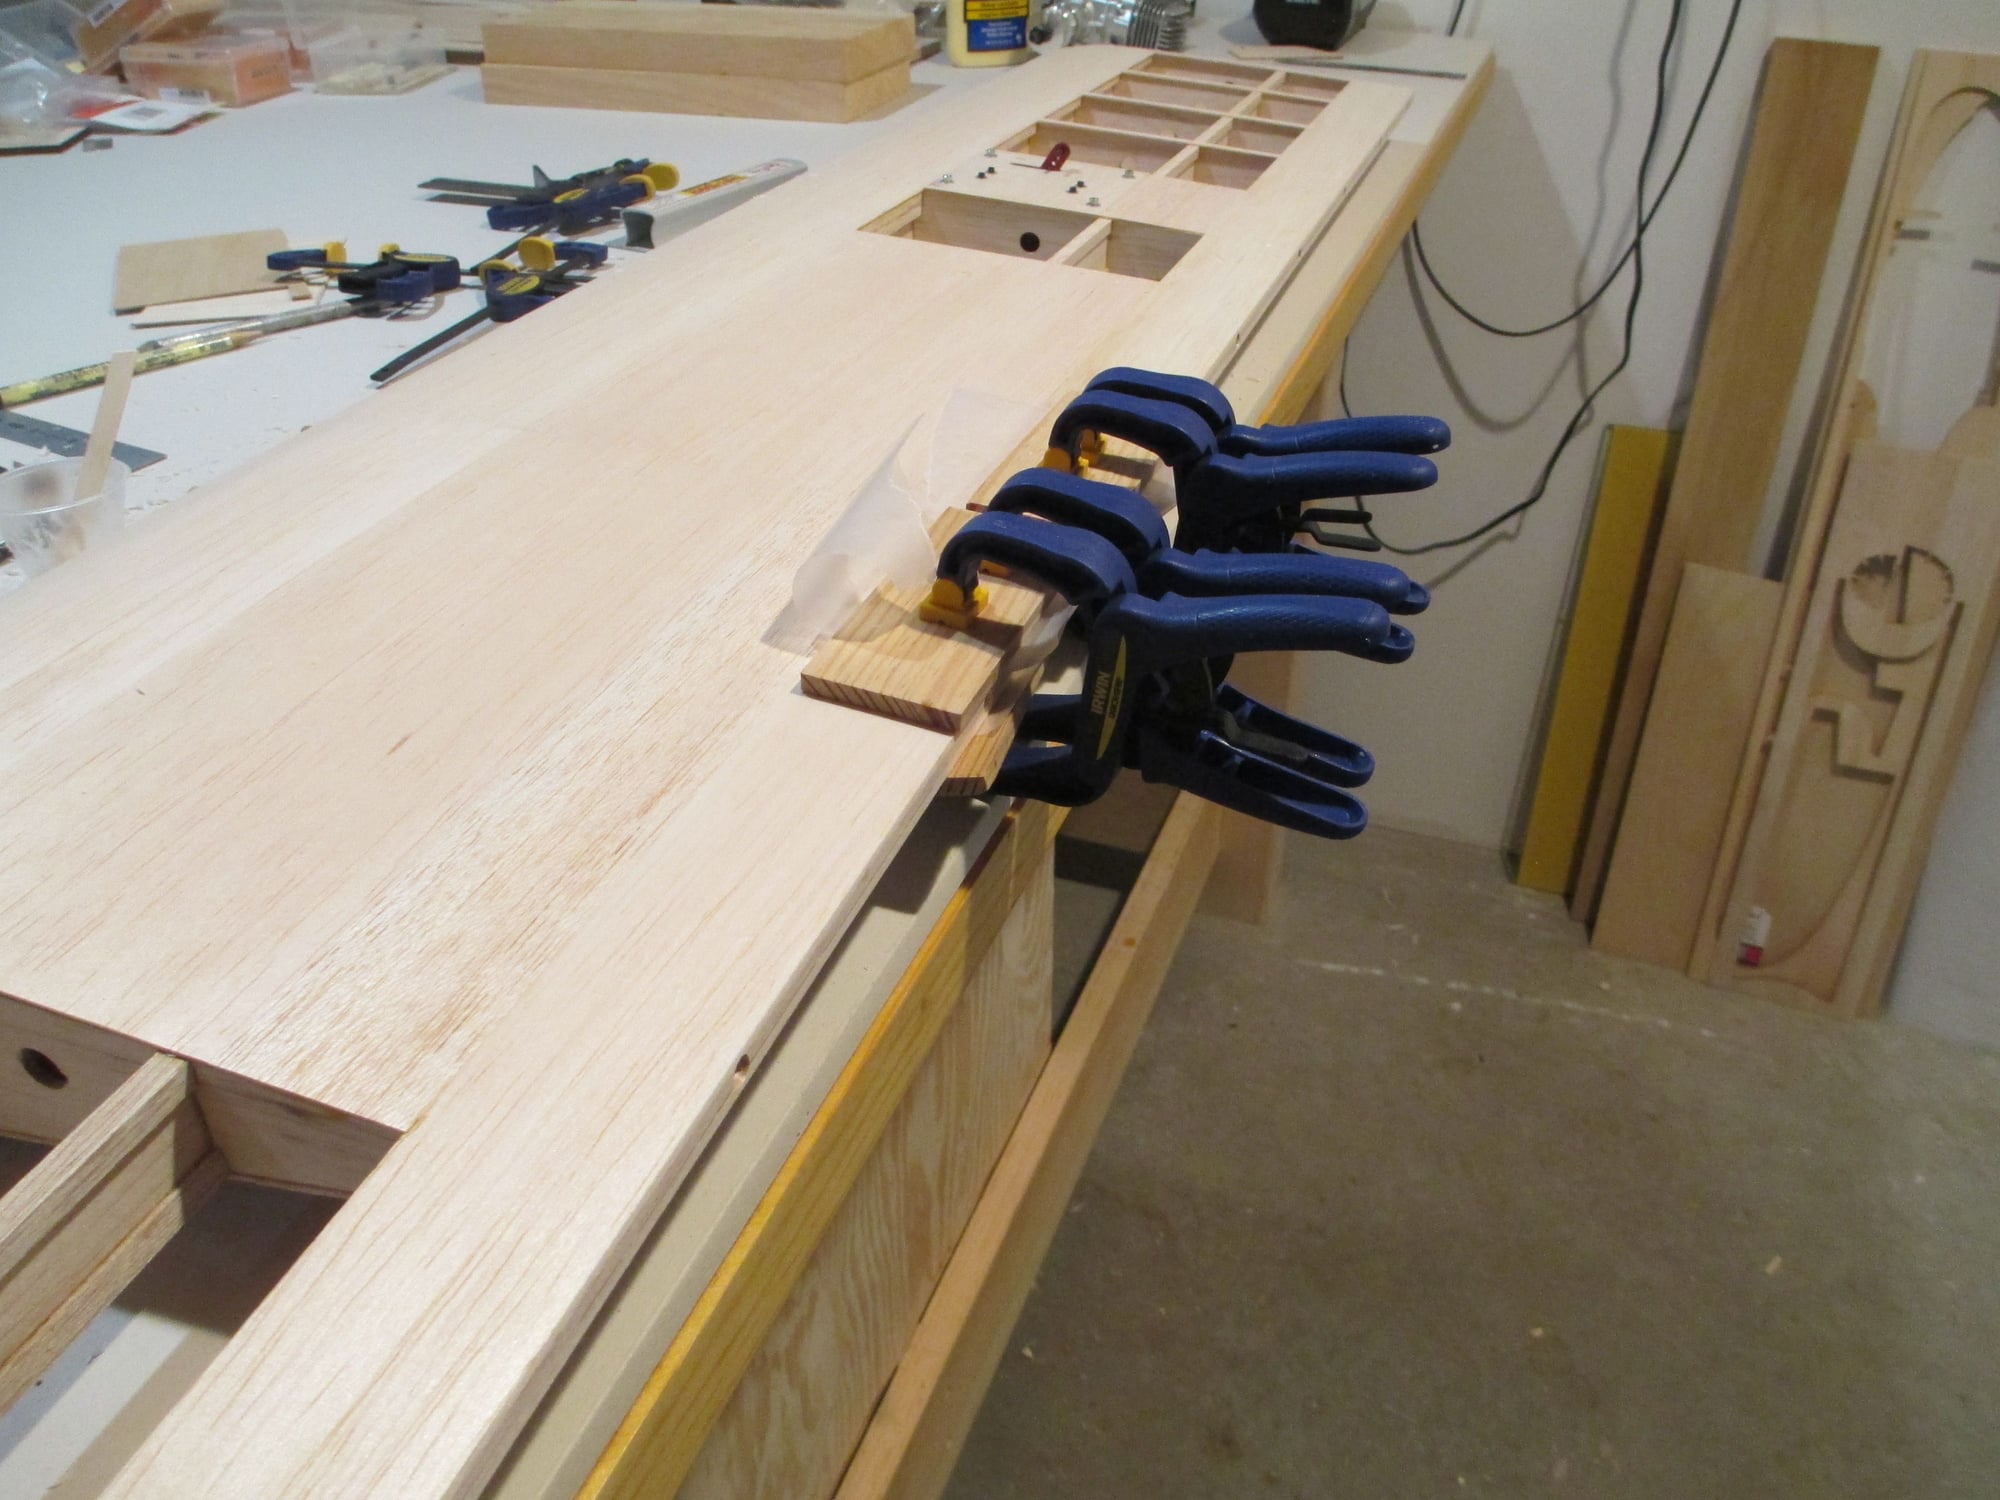
All of the clamps have been removed!
I've capped off the bottom of the fuse and out came the clamps again. I couldn't believe how well the plywood fit into place, it pays to take the time to get the fuselage straight...
No matter how many clamps that you seem to have you're always short one or two!!!
Last edited by VincentJ; 04-02-2019 at 02:10 PM.
 04-02-2019, 06:23 PM
#77

And if you're not short one or two clamps, you're usually short of the size you actually need. I ran into that a couple of days ago, lots of clamps but not enough that have the reach I needed 
 04-02-2019, 11:08 PM
#78
Thread Starter
04-03-2019, 01:15 PM
#79
Thread Starter
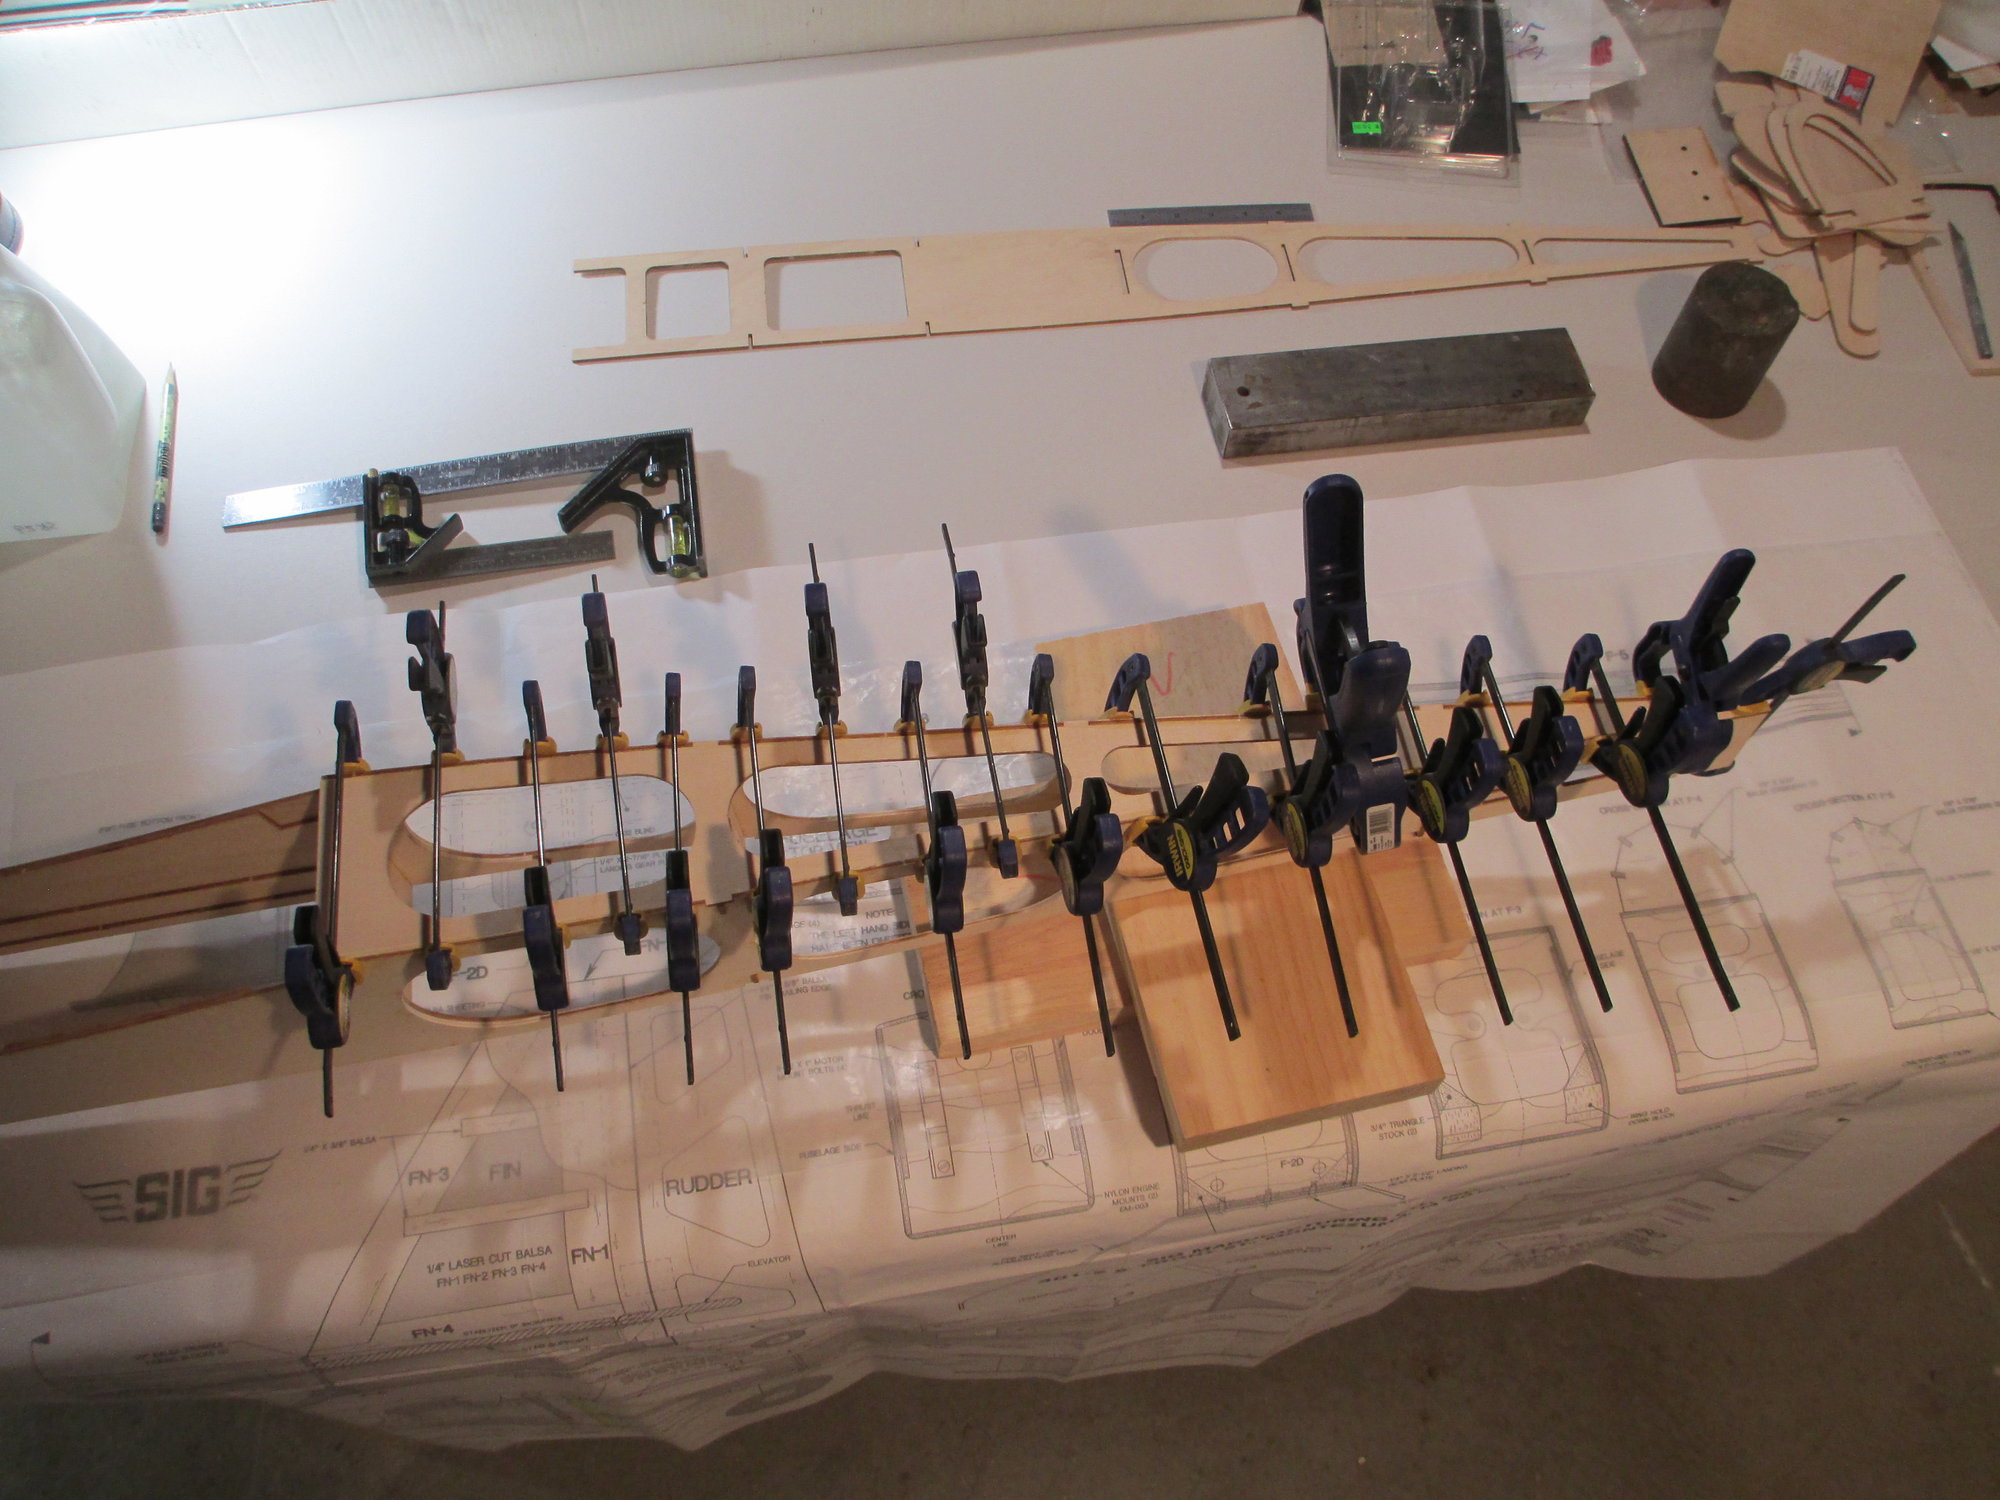
Top Formers for the turtle deck in place and glued.
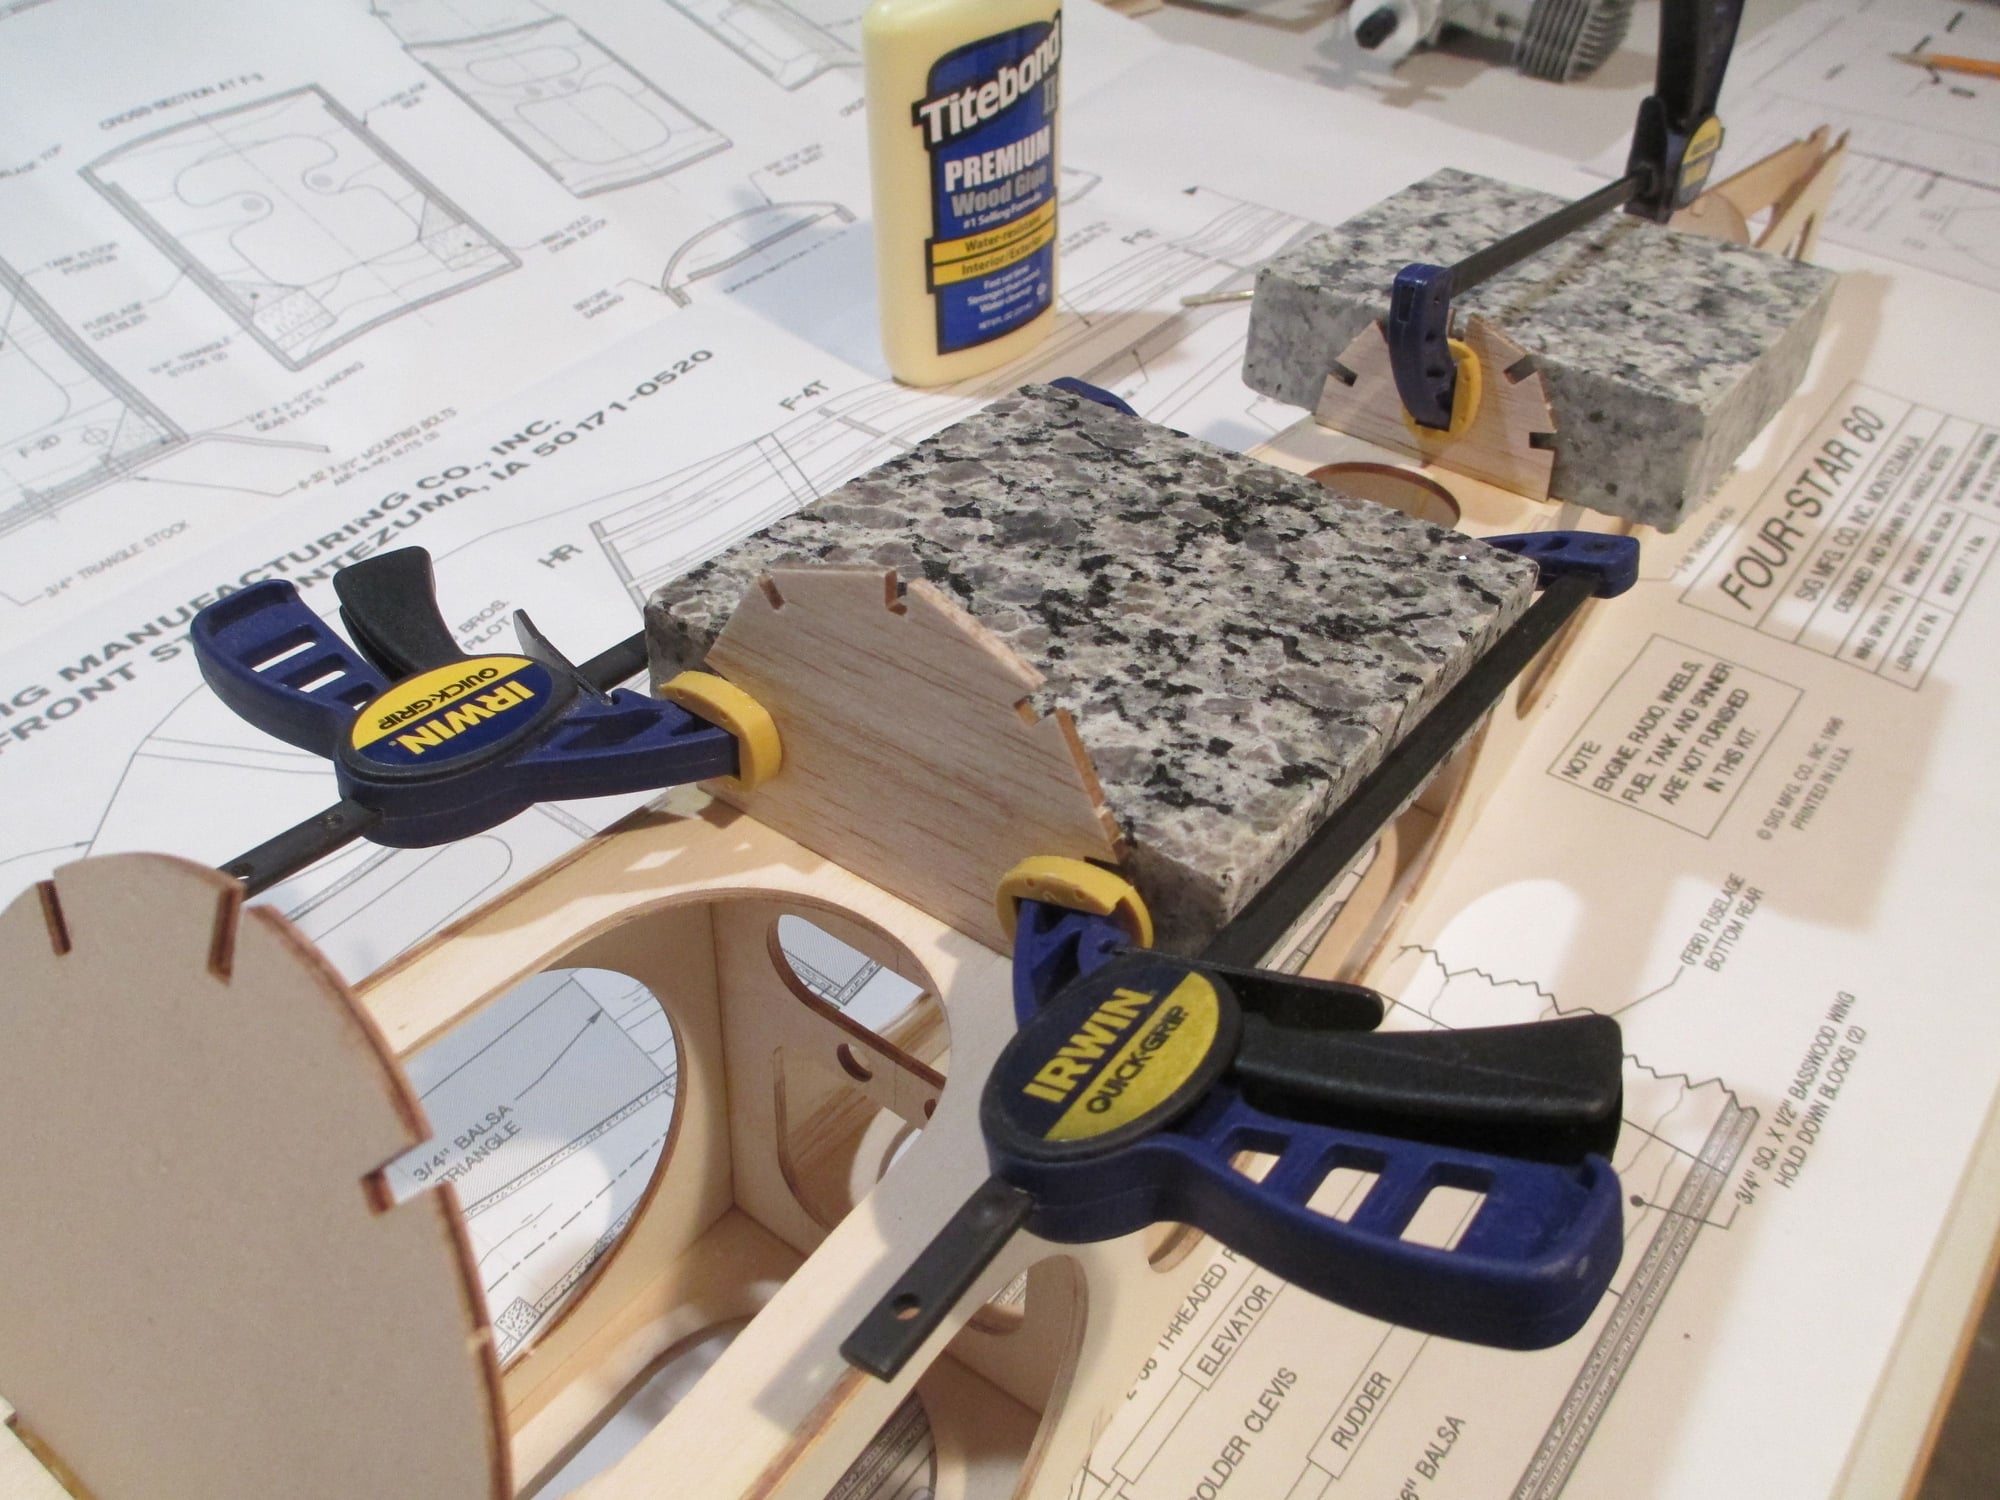
To keep the Formers at a 90 degree angle from the top of the fuselage, I clamped them in place using marble squares.
04-04-2019, 03:09 PM
#80
Thread Starter
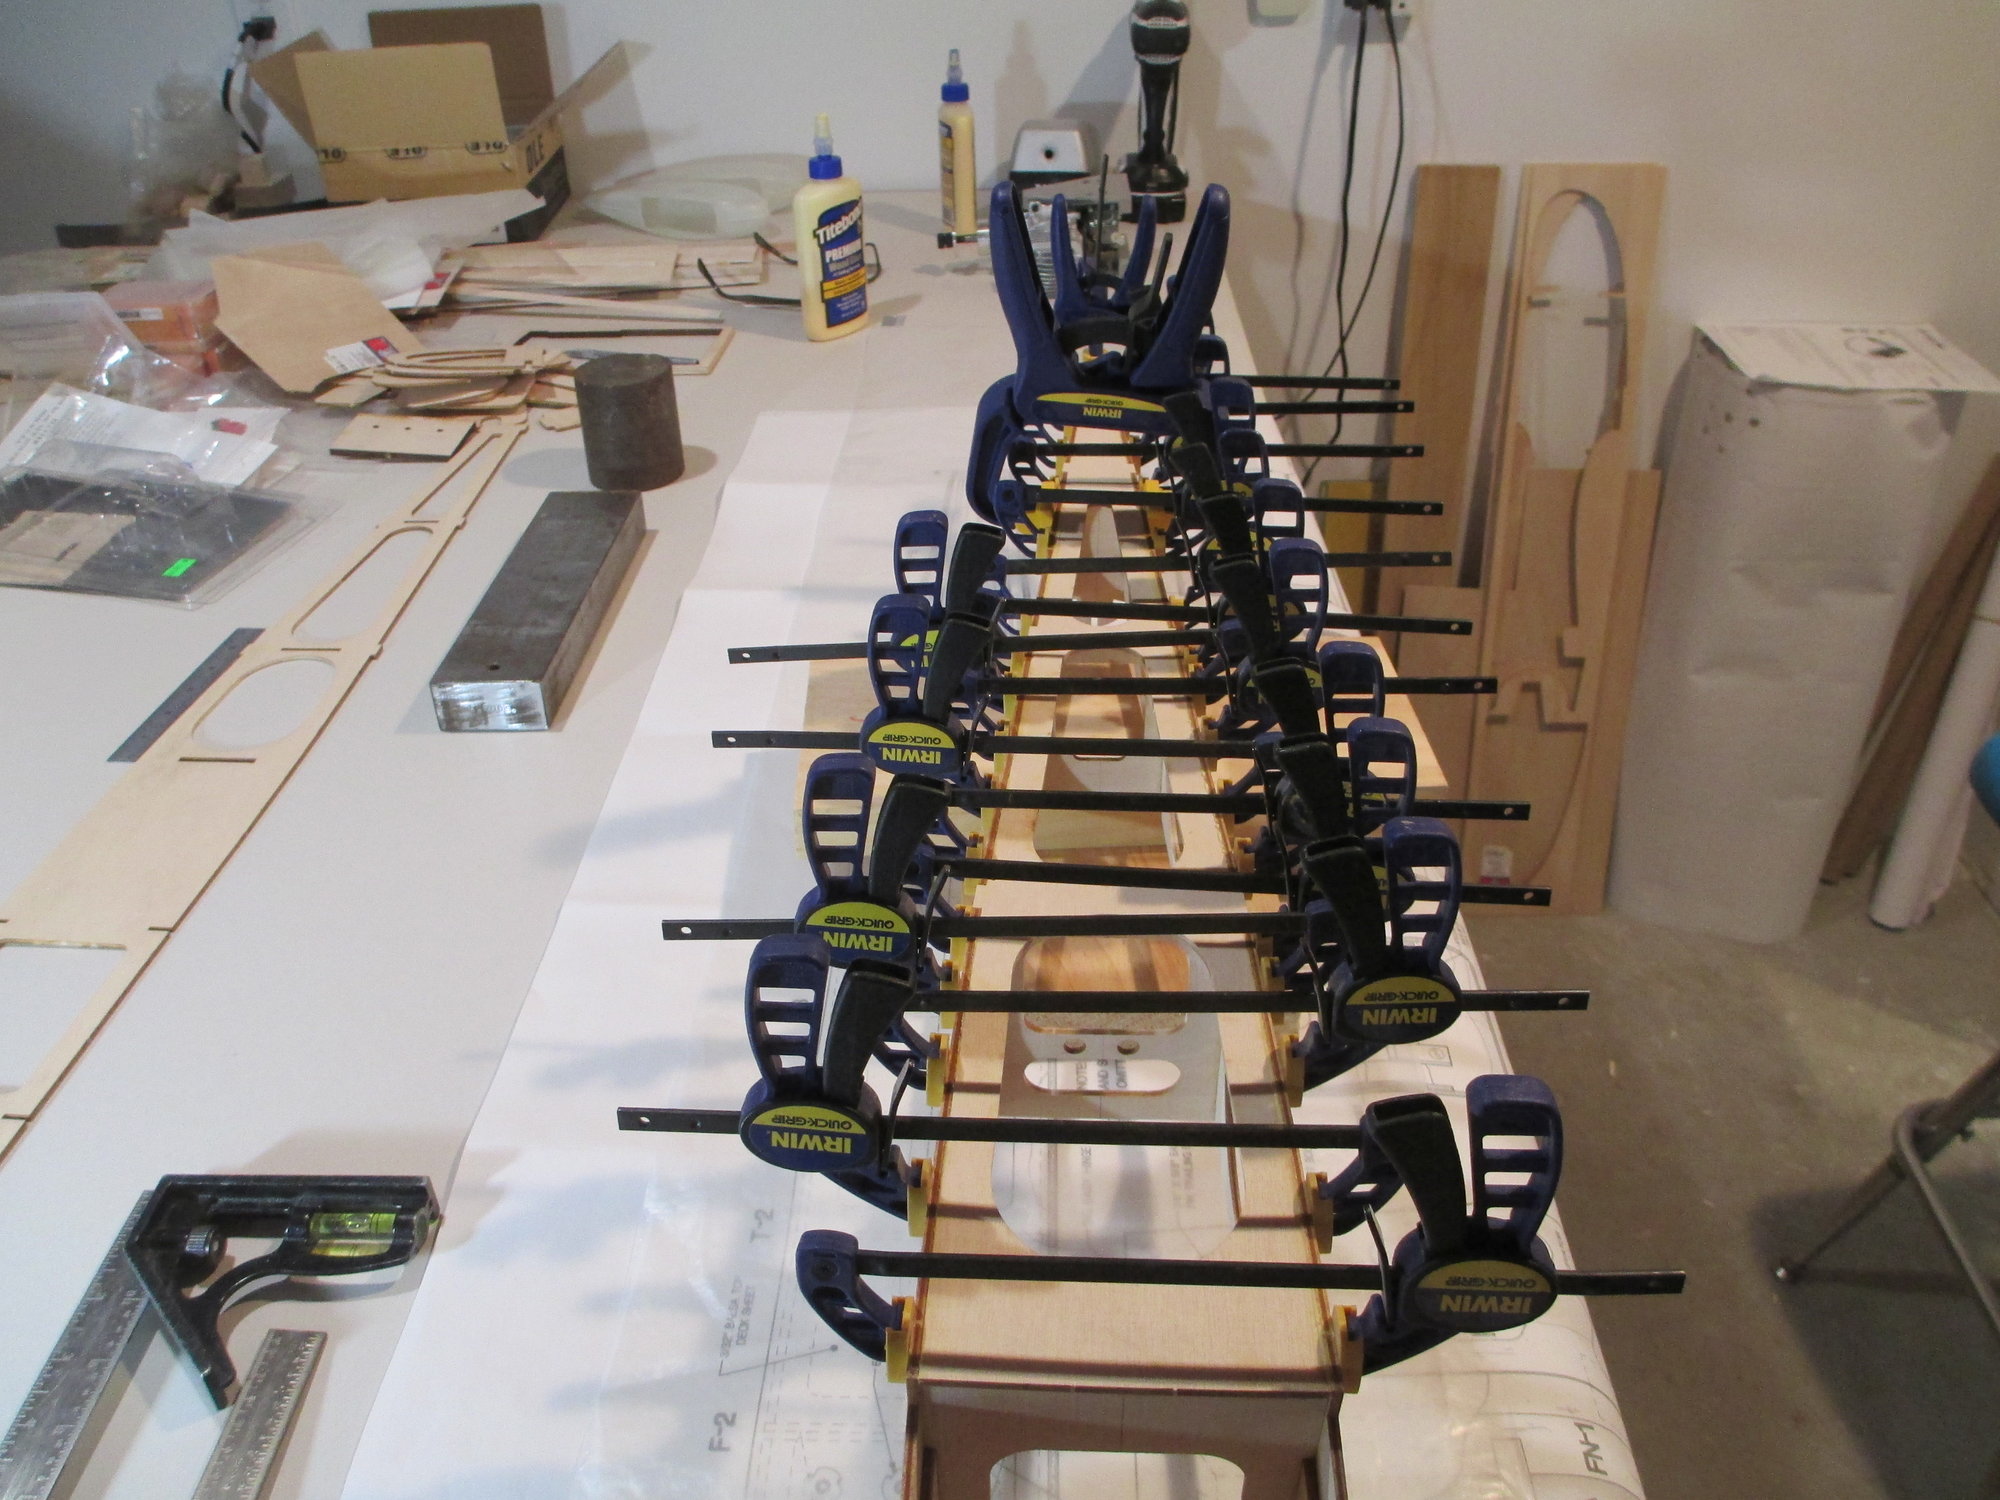
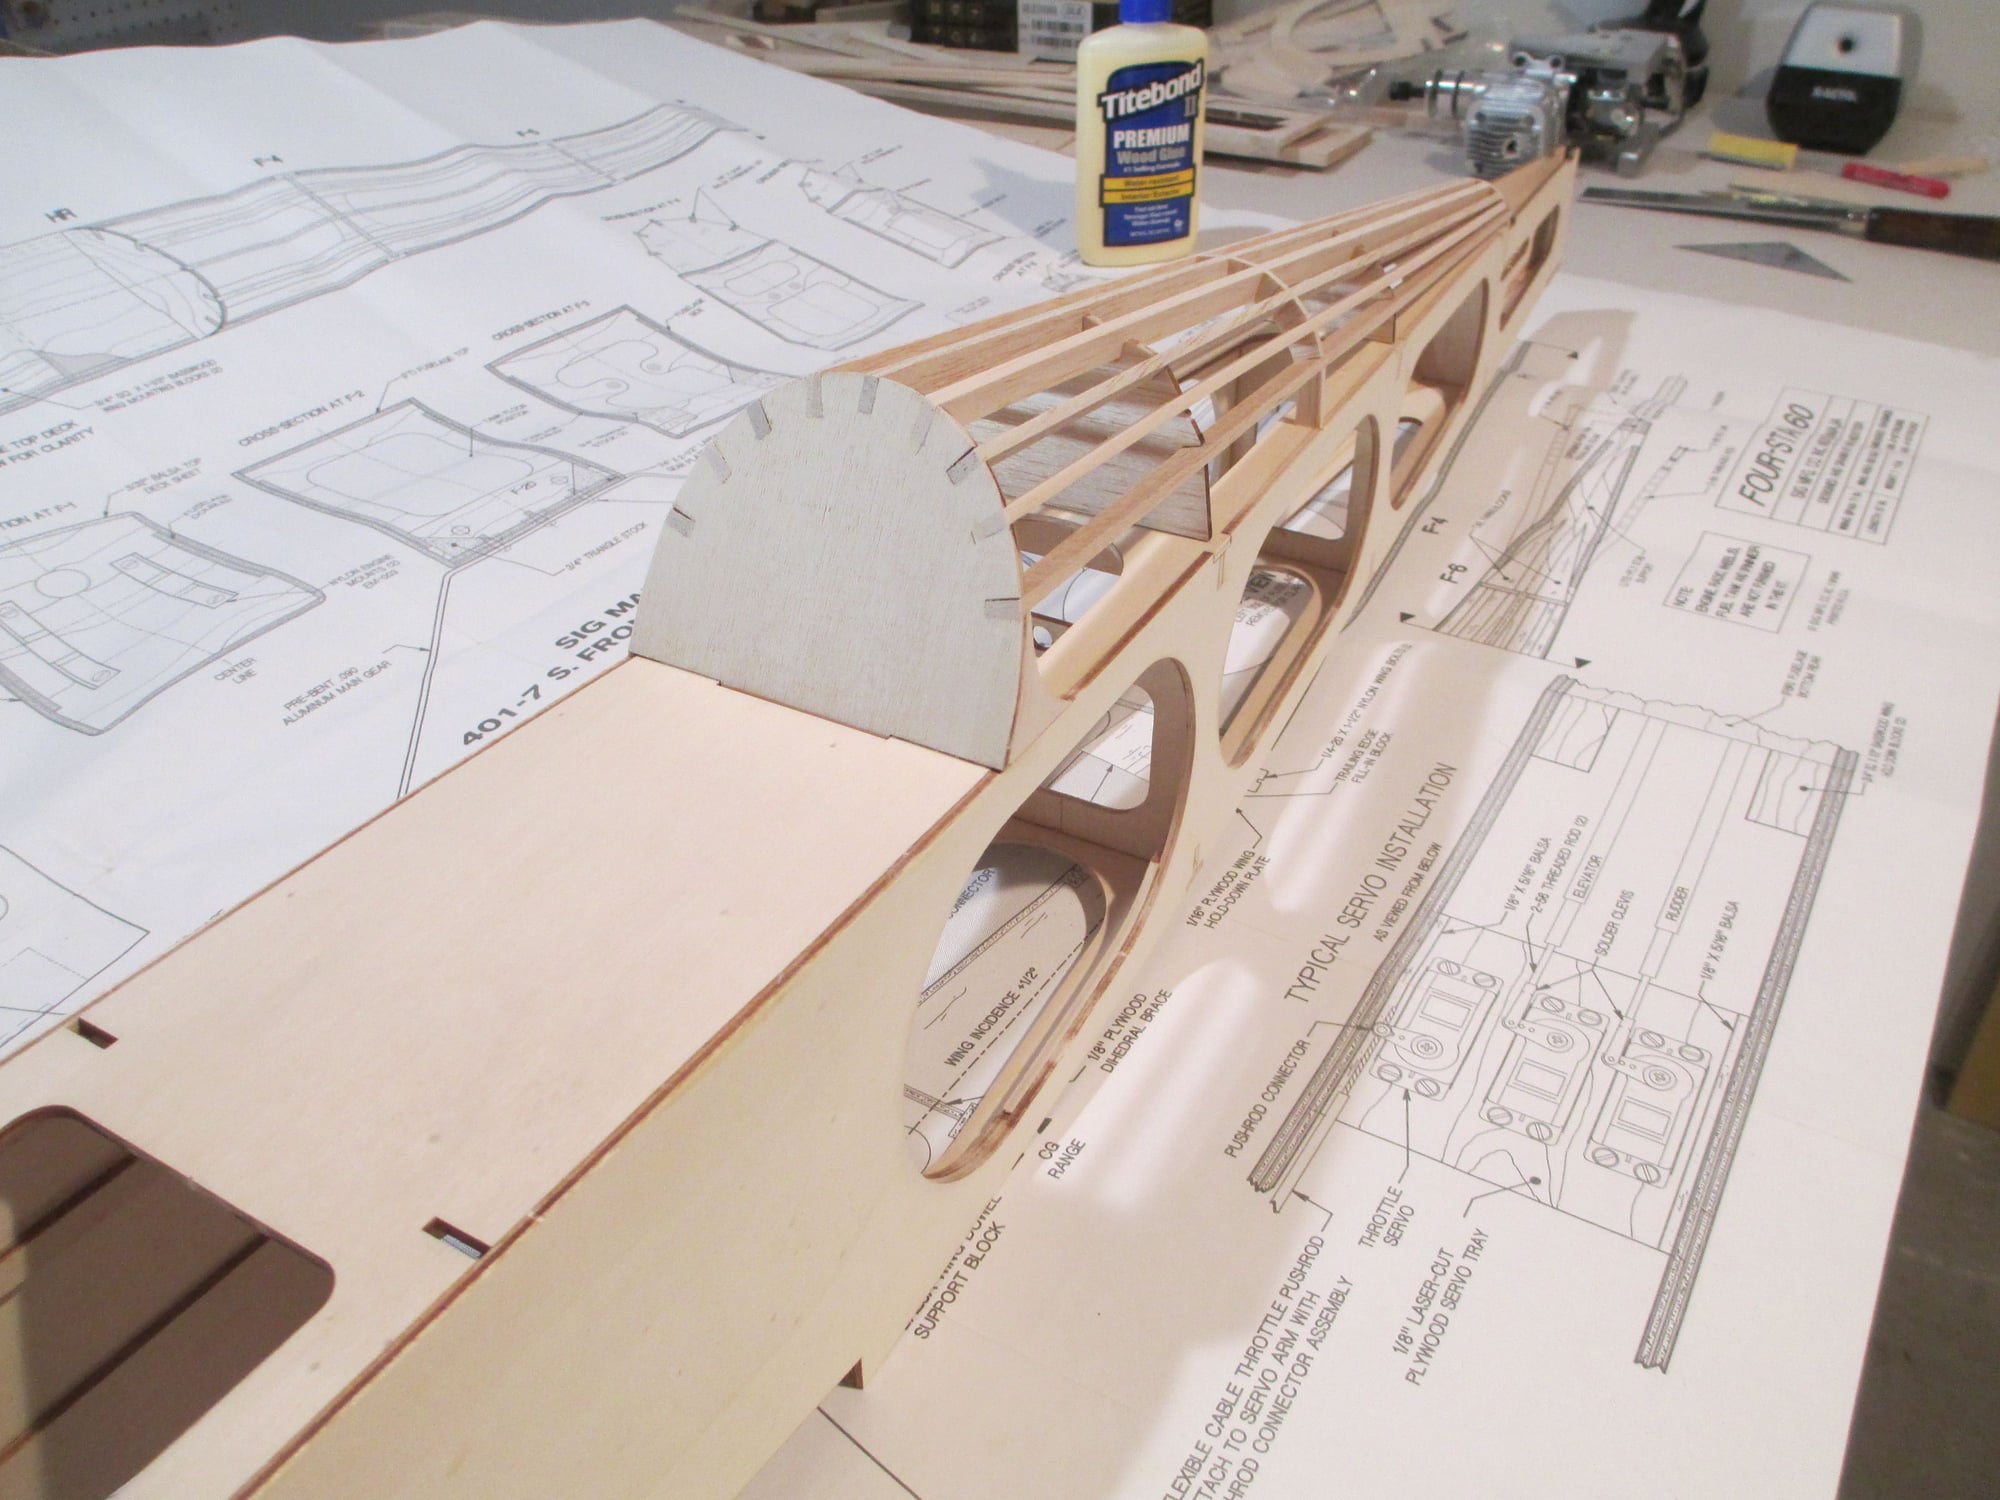
Tonight's task is to glue in the 5 turtle deck stringers. Shouldn't take me long...
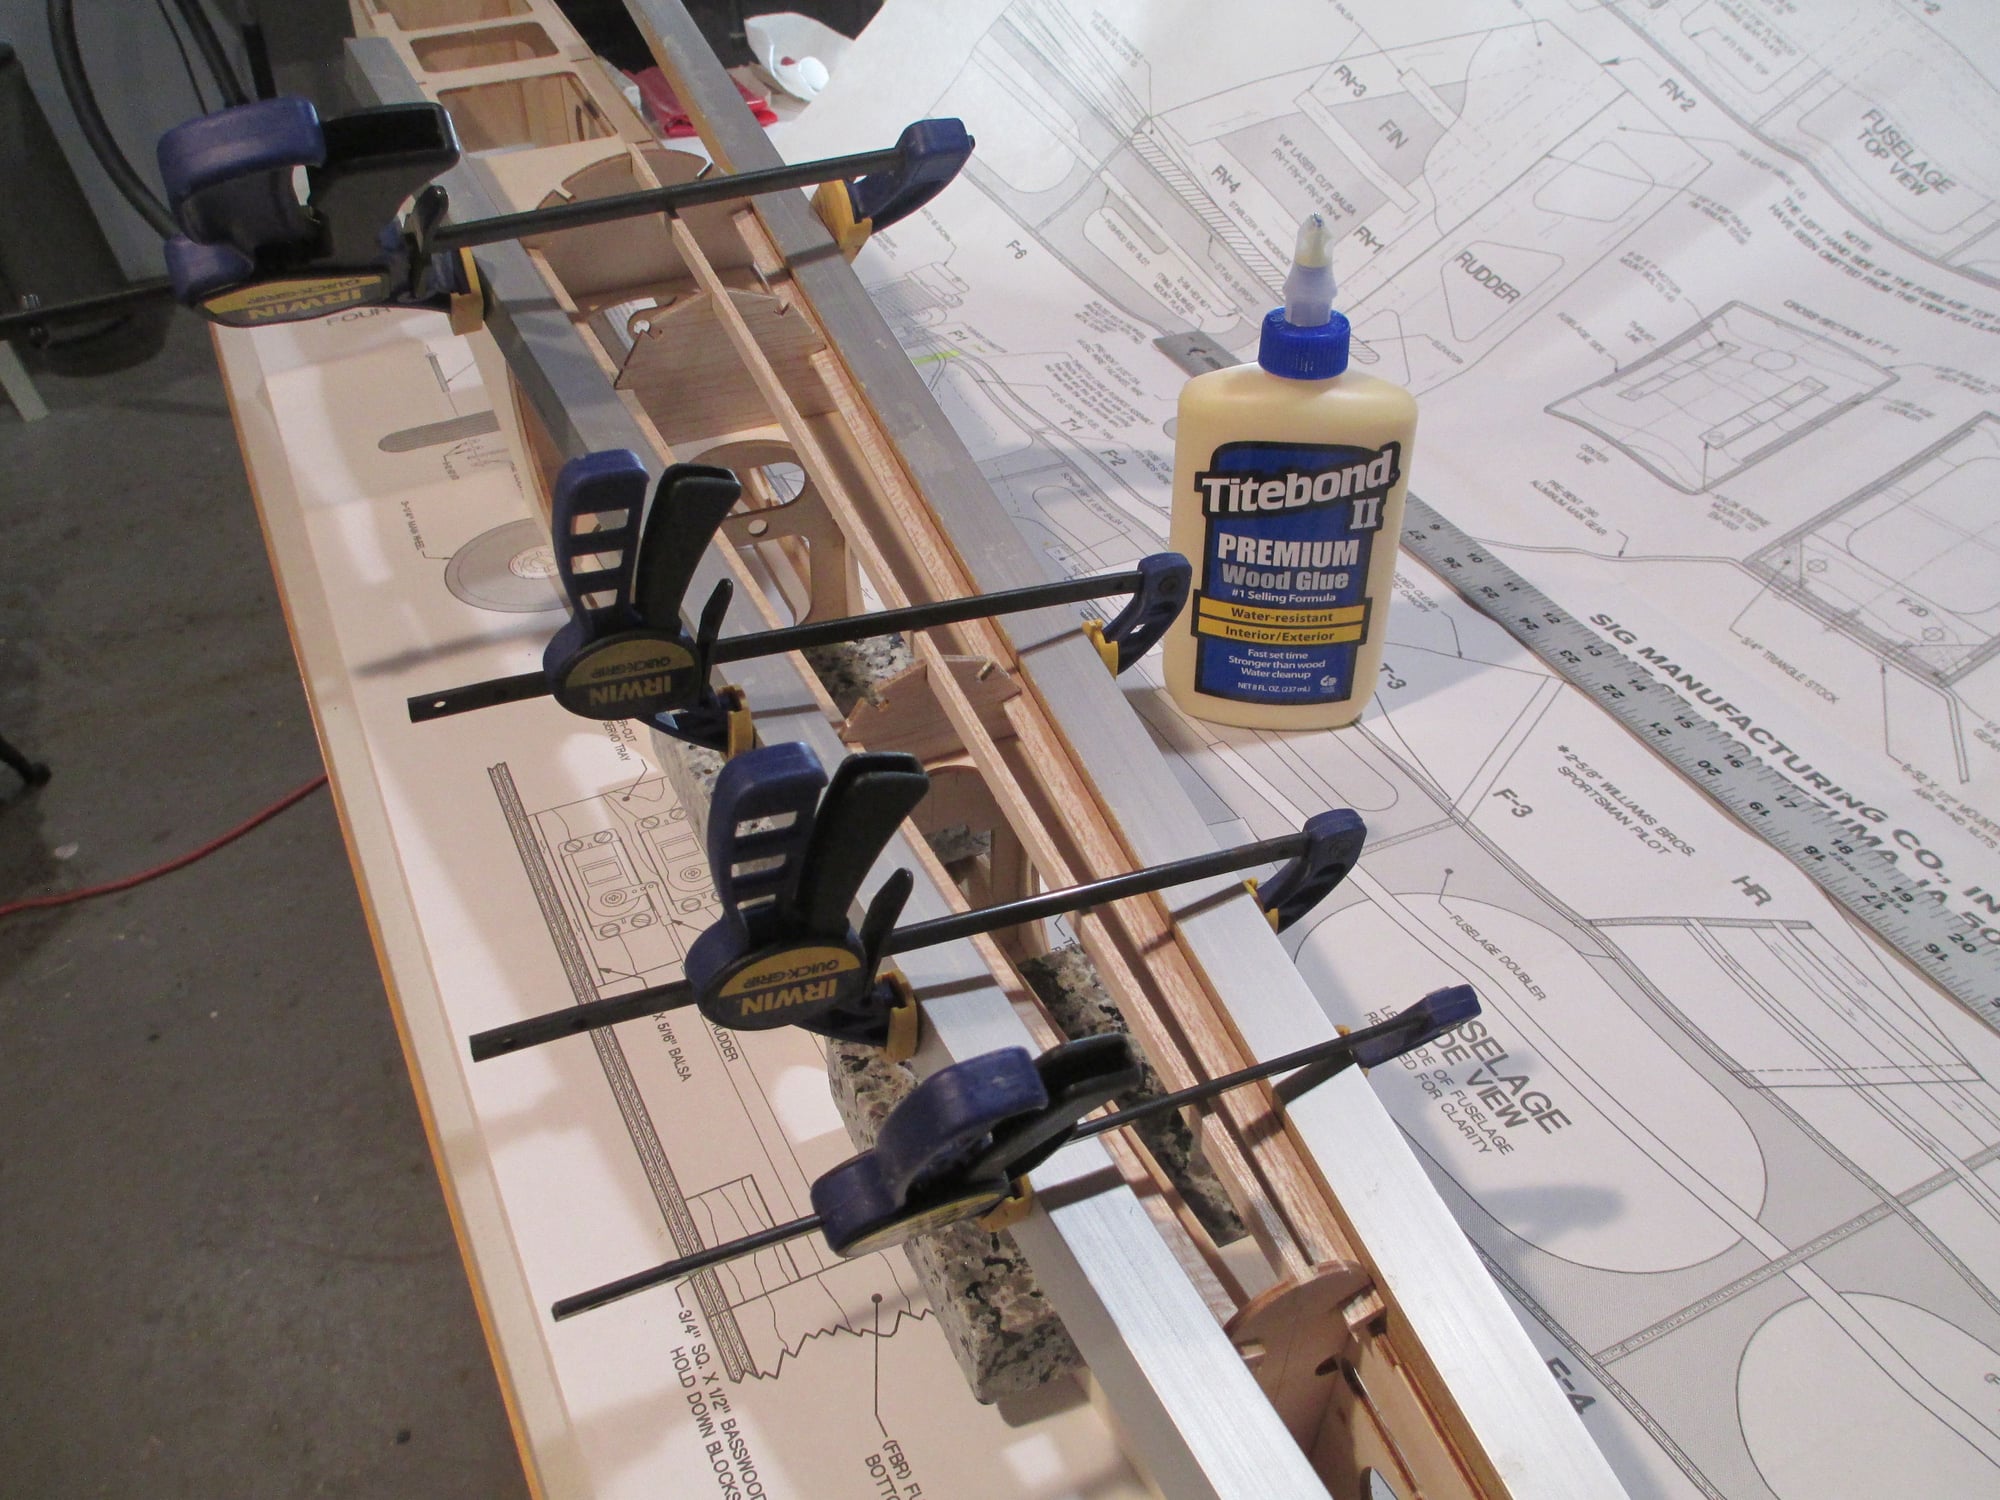
Builder's tip:
I picked up several 1" aluminum square stock in different lengths from my local hardware store. I find them very useful when I'm building. Here they are being used to ensure the stringers are installed straight and not bowed. Also note, that on one side of the square stock I applied 220 self stick sandpaper, this helps stop the square stock from moving.
Last edited by VincentJ; 04-05-2019 at 07:59 AM.
04-05-2019, 03:32 PM
#81
Thread Starter
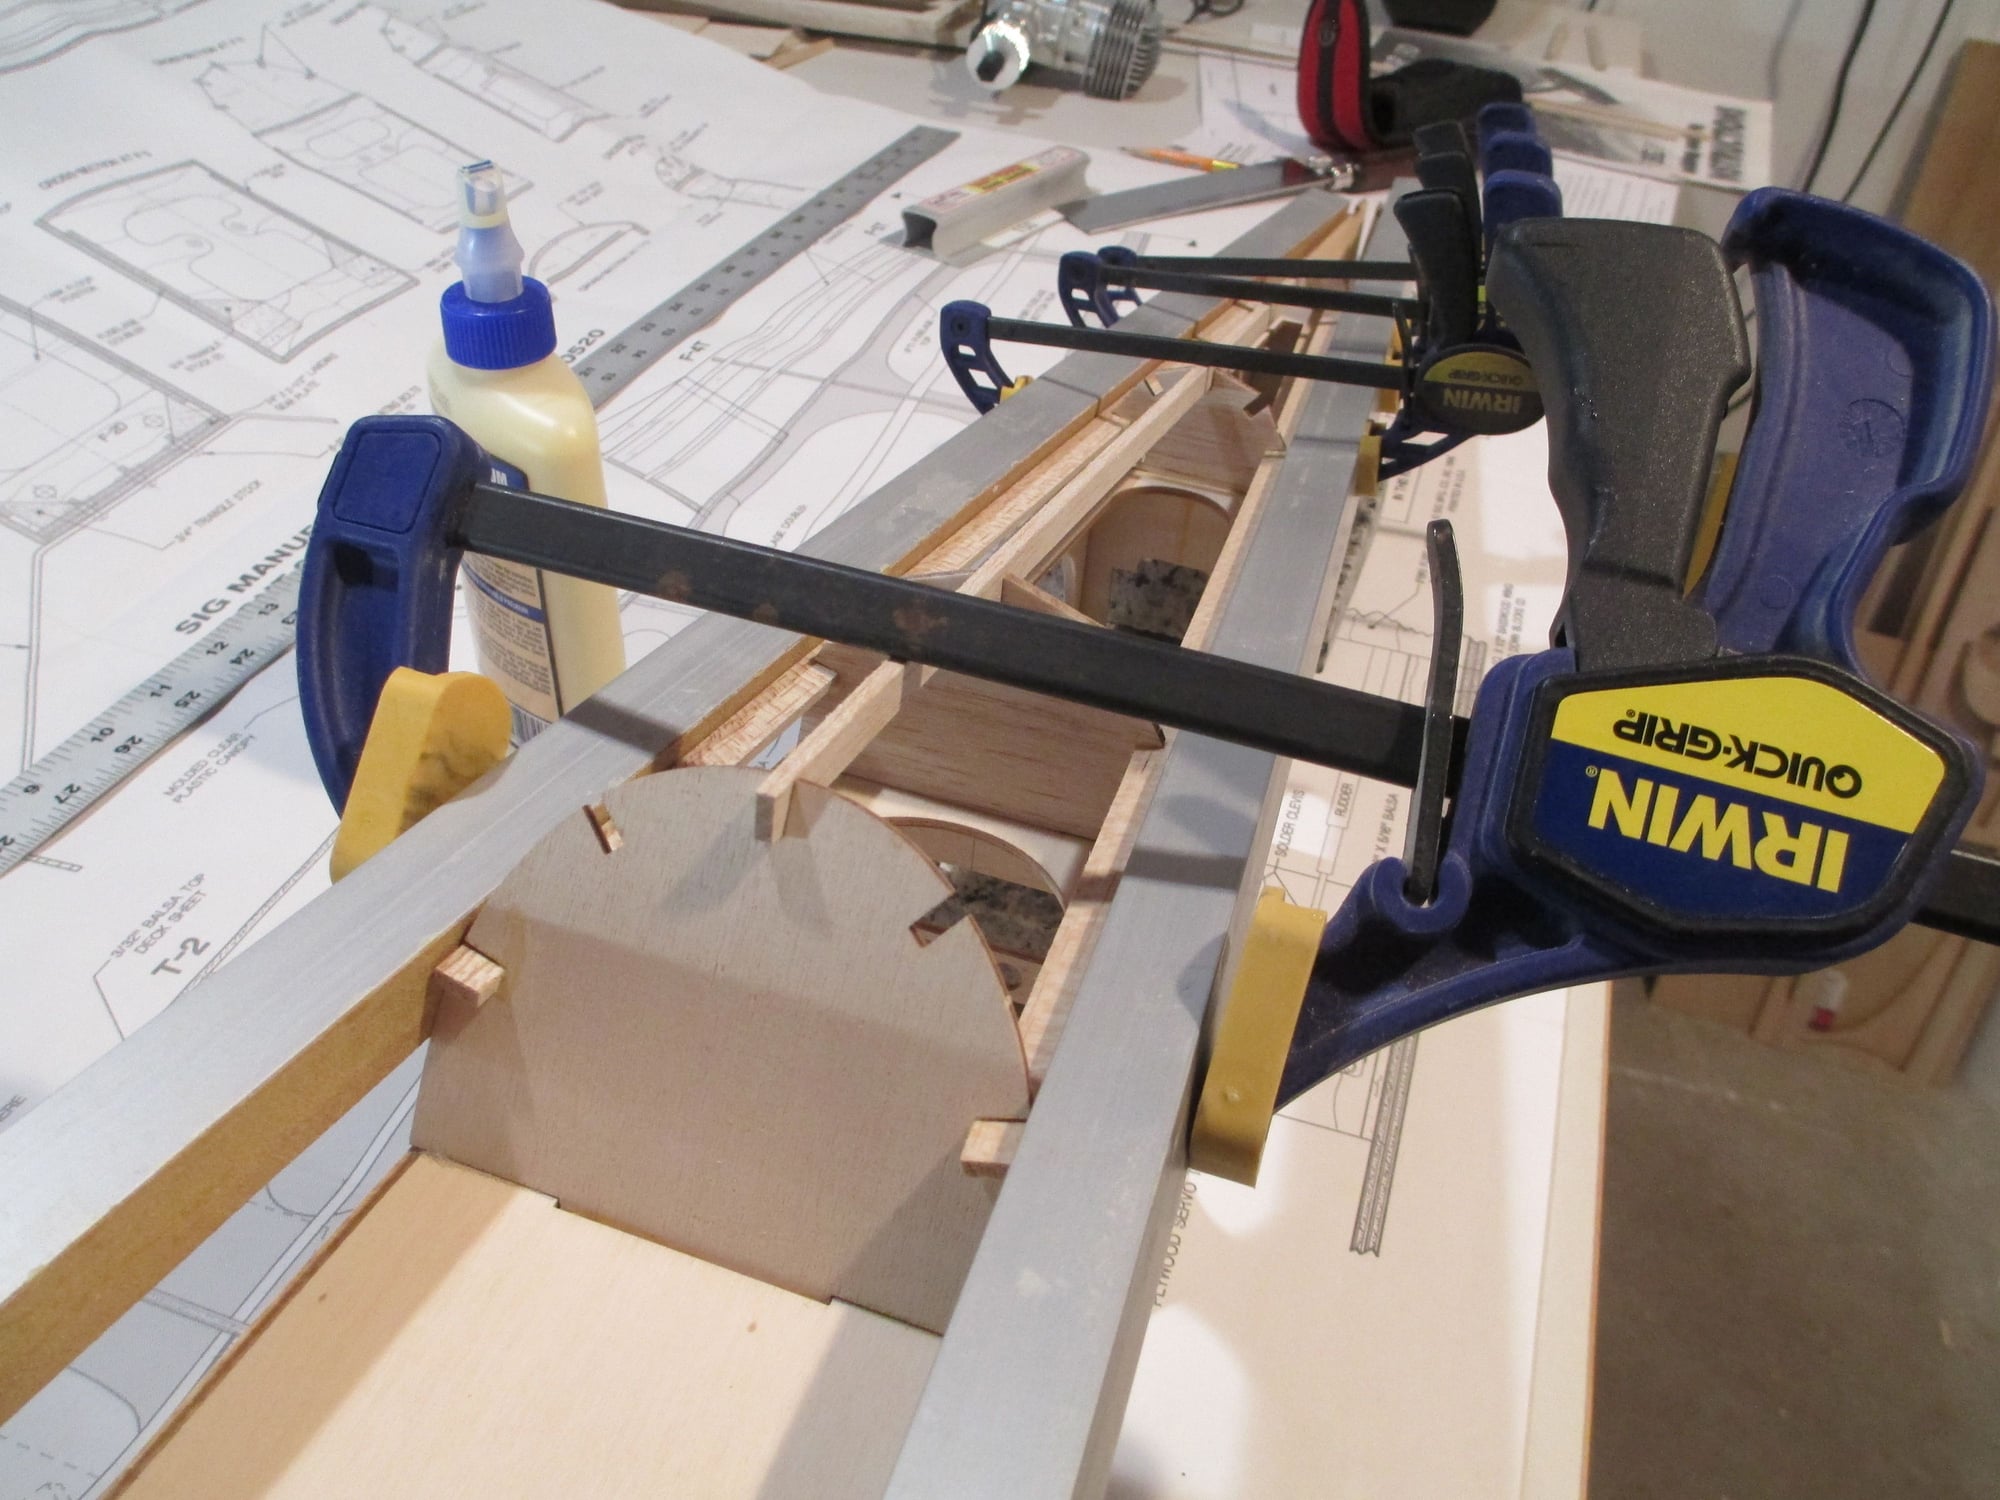
Five top stringers have been installed, but I have decided to add four additional stringers totaling nine. I'm doing this to give a more rounded look to the turtle deck after the covering is applied. I will also add blocking between the stringers to stiffen everything up.
Top view, everything looks nice and straight.
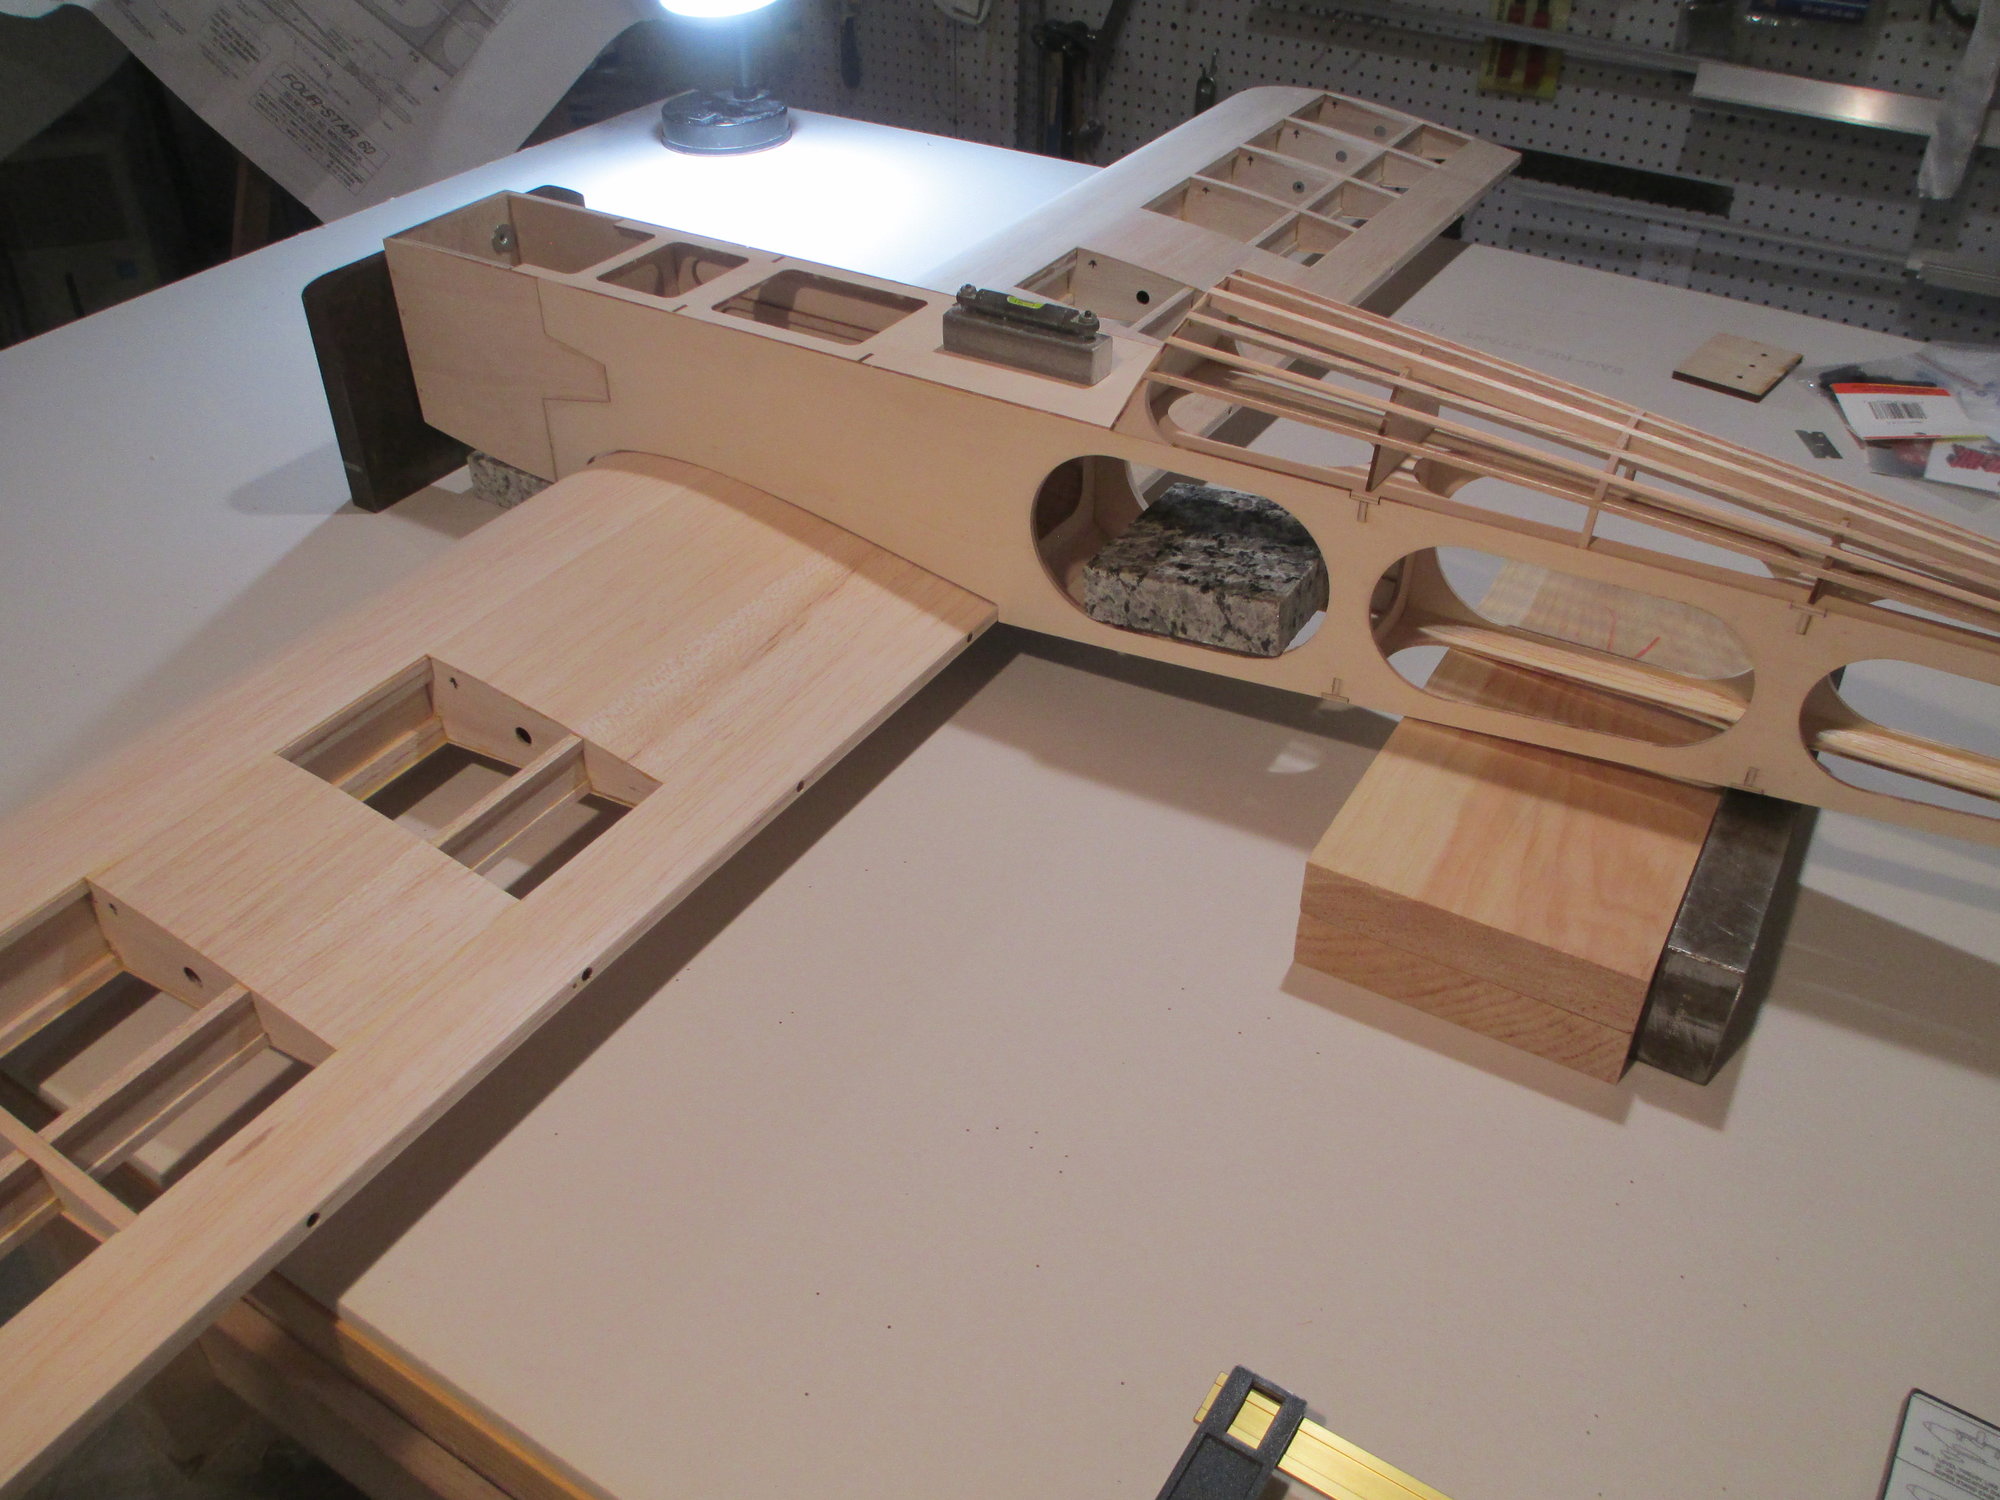
Talking about stiffening/adding strength, I've been eyeing this bay directly behind the wing for days now. To give more strength in this area, I've added additional scrap plywood to each side of the fuse.
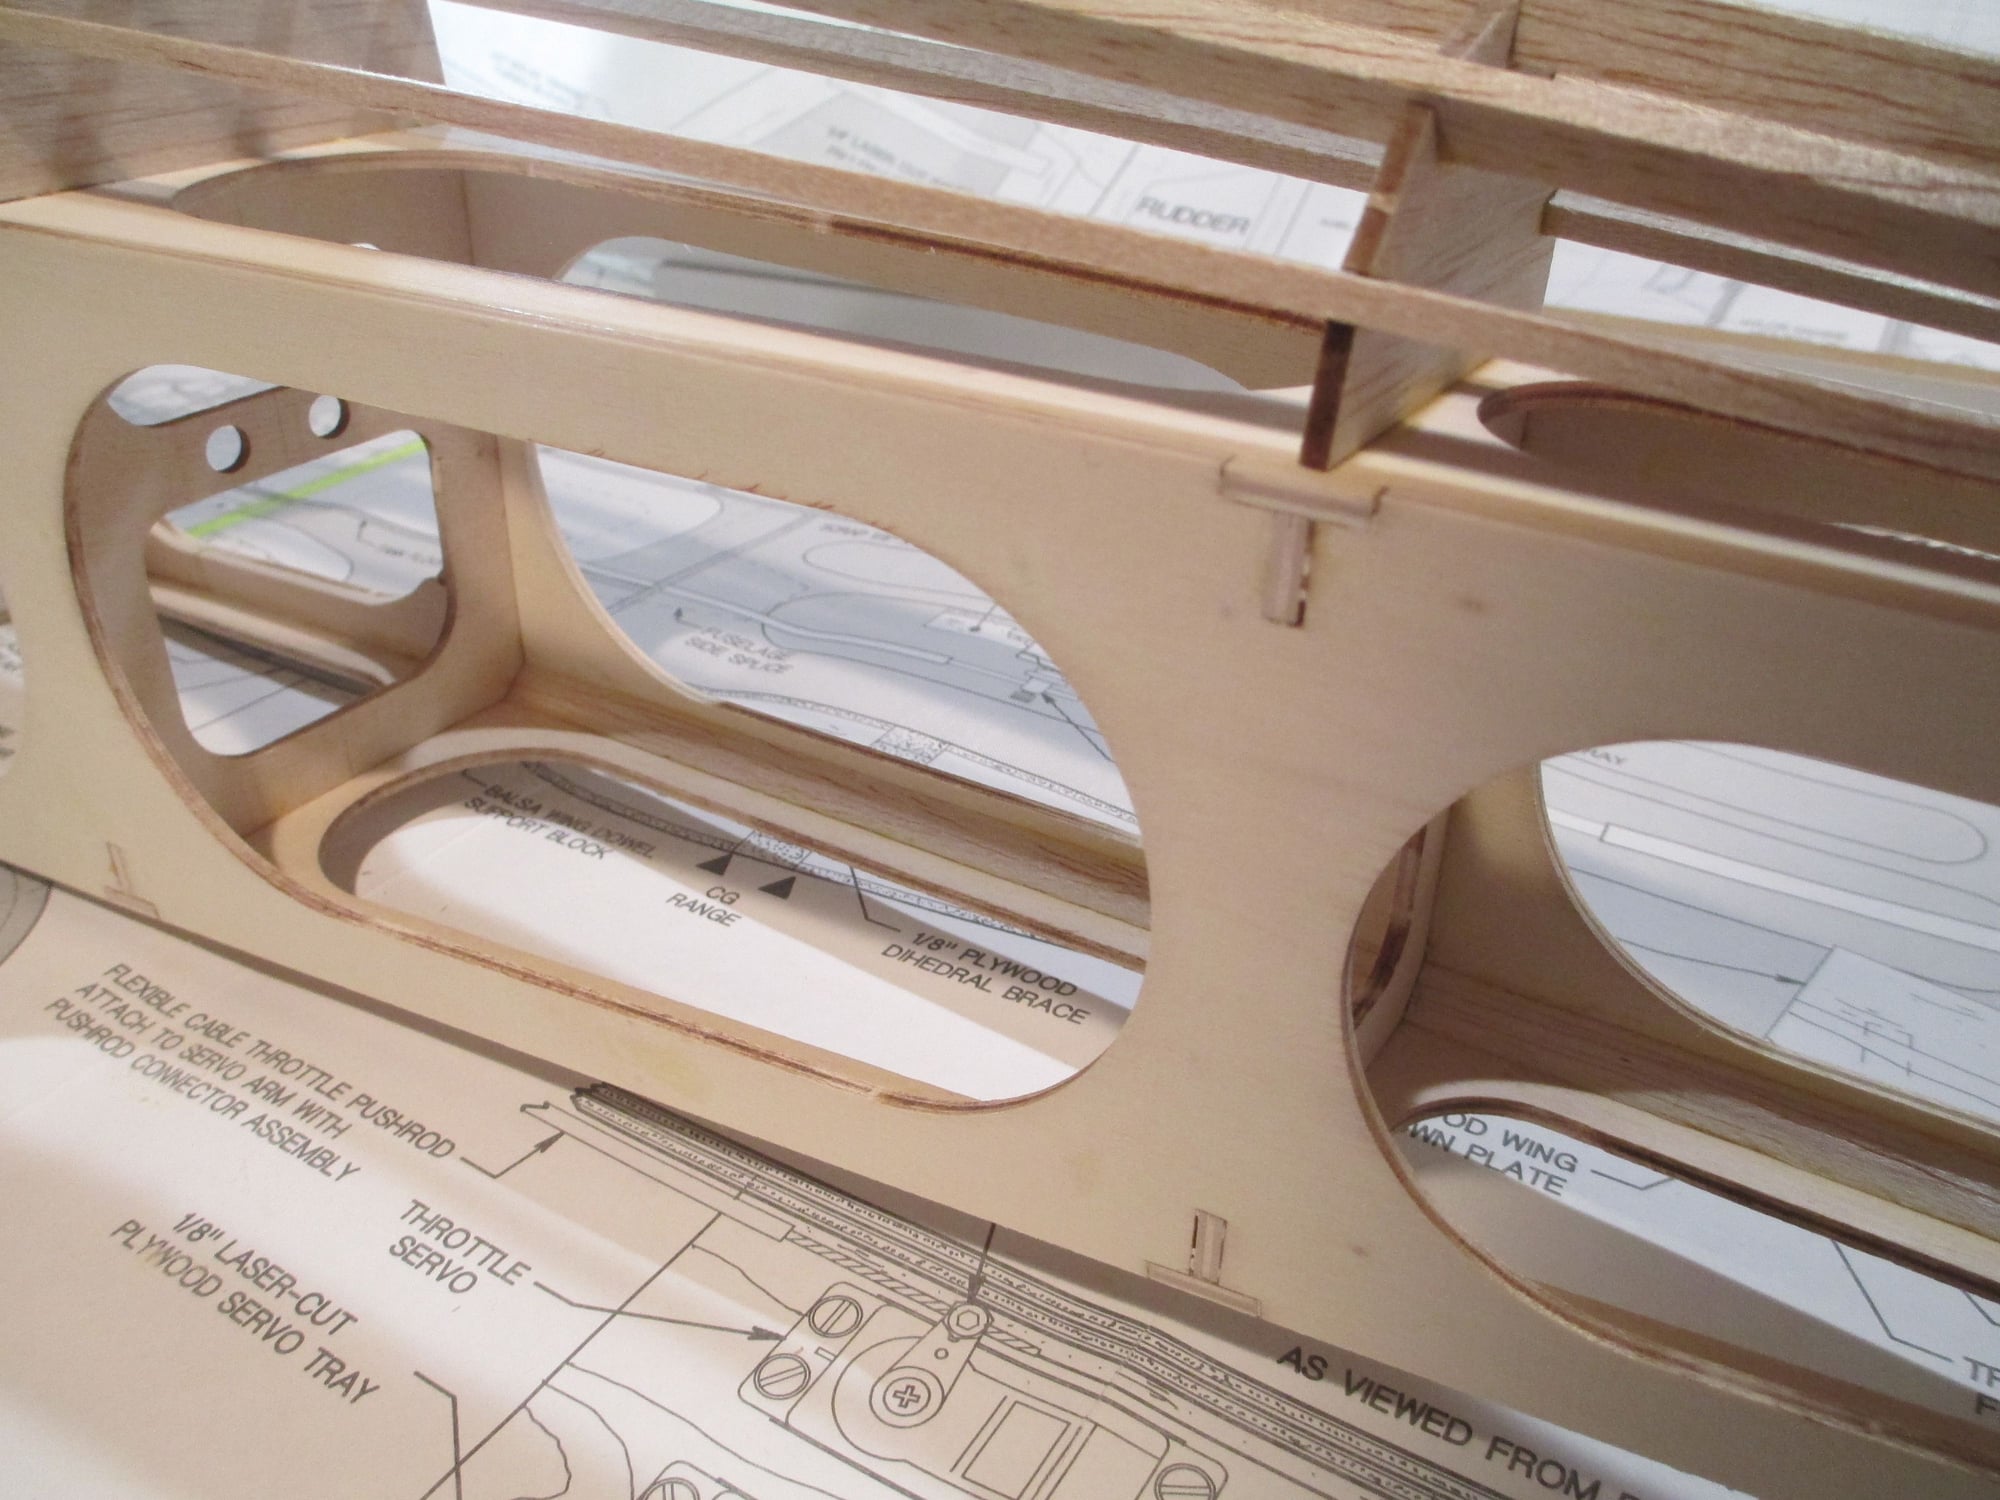
I also added balsa tri-stock to the bottom side of the fuselage only running from one Former to the next. This will give additional strength and stop any tail flex.
04-06-2019, 06:43 AM
#82
Thread Starter
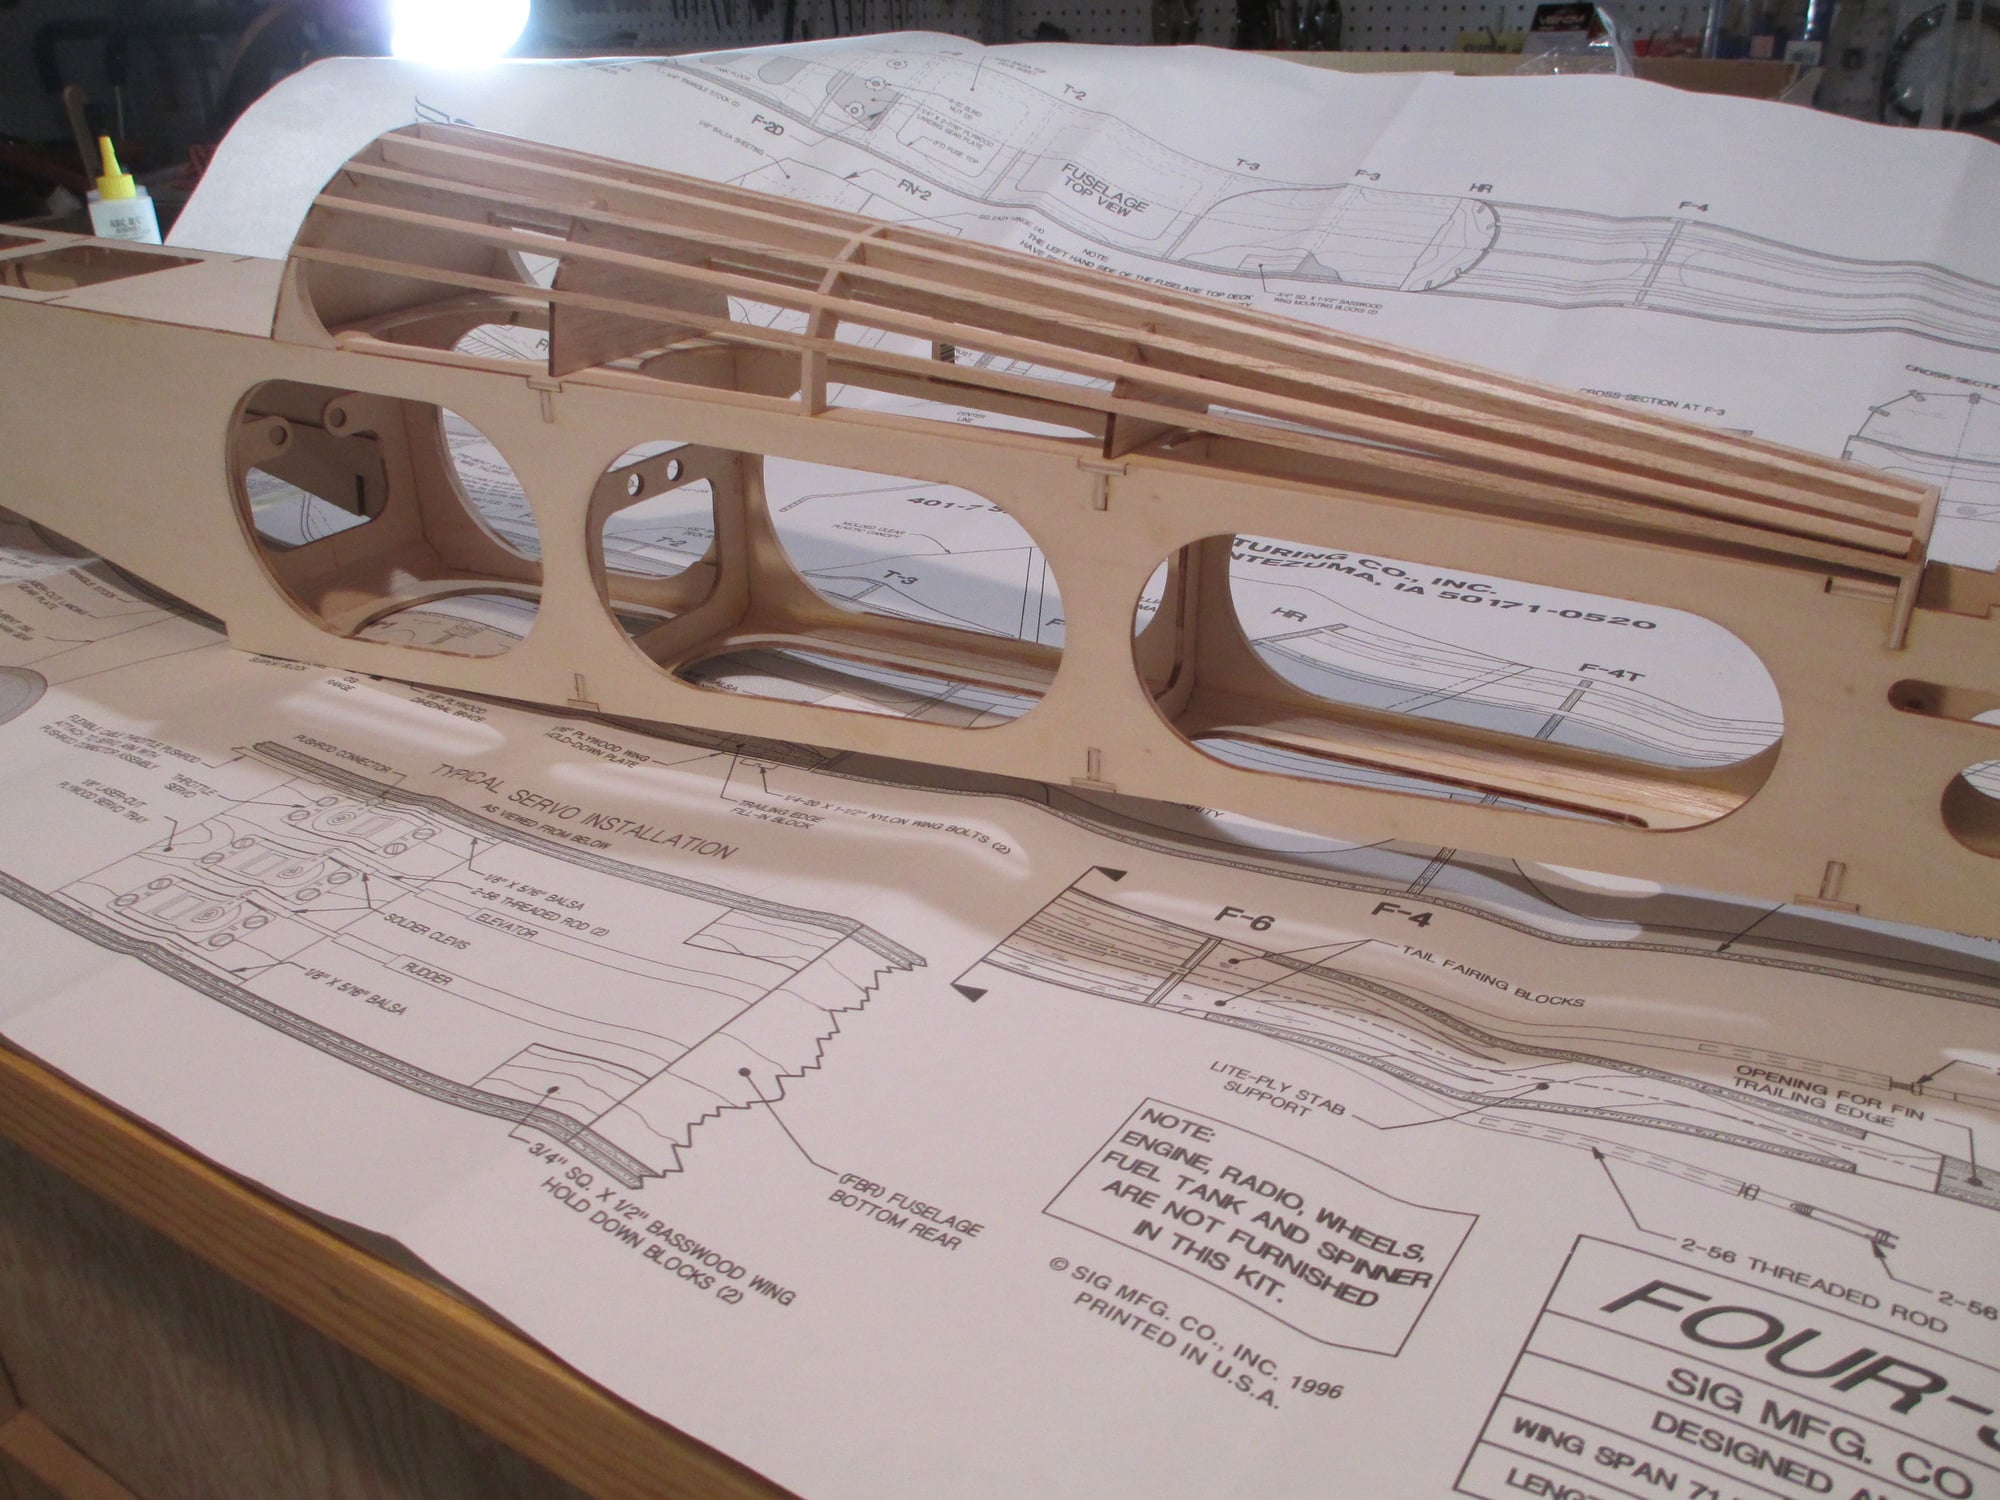
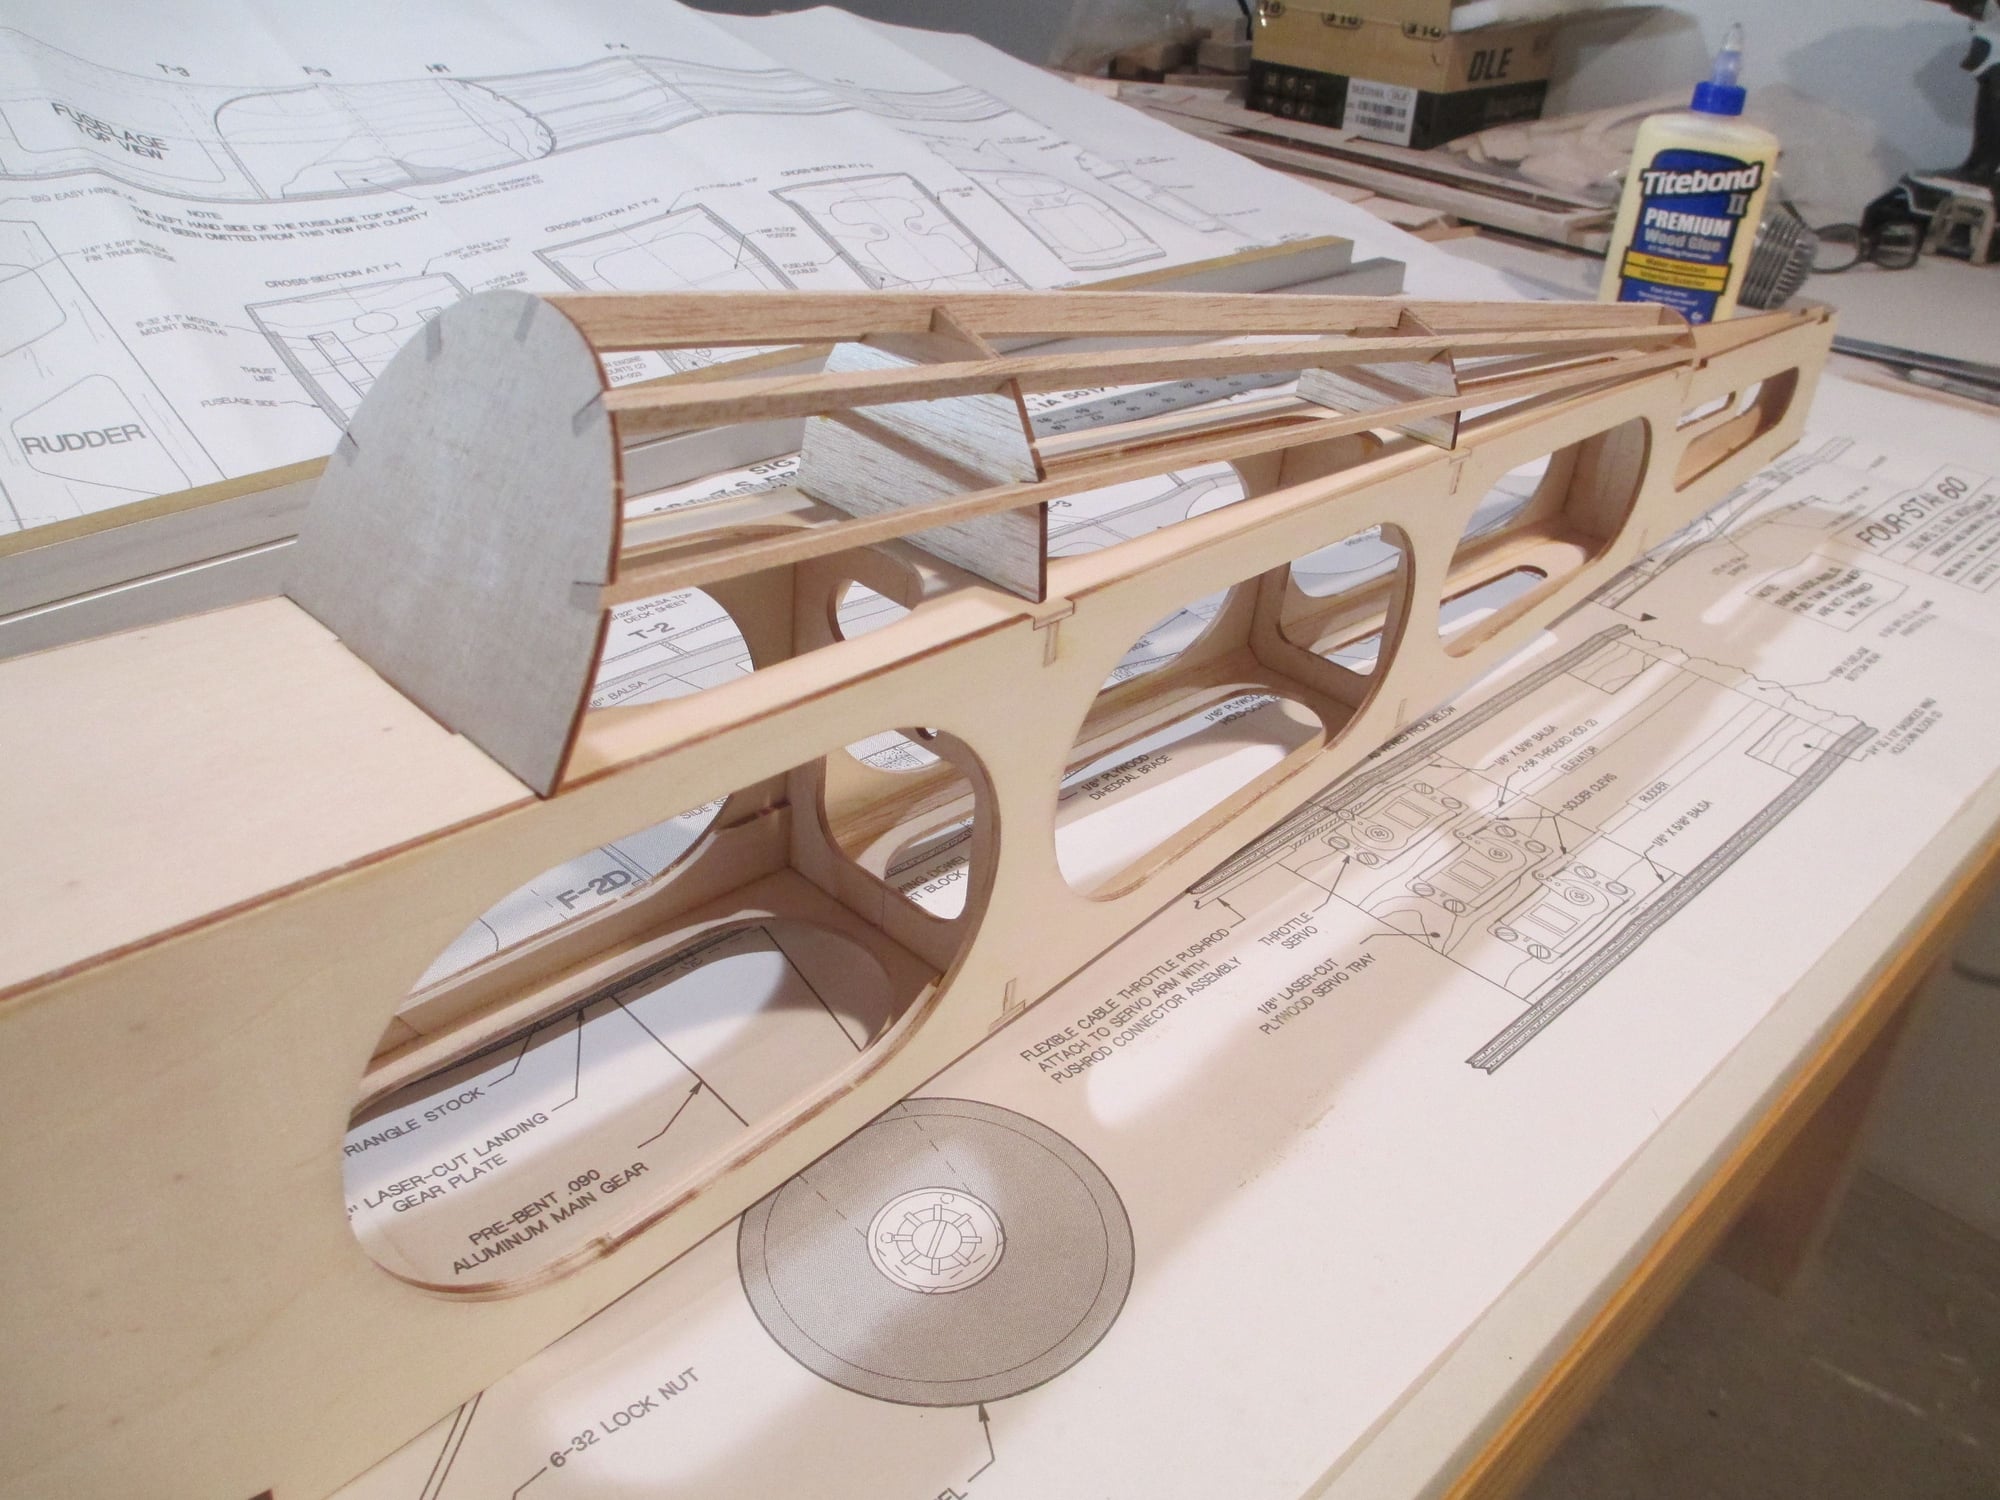
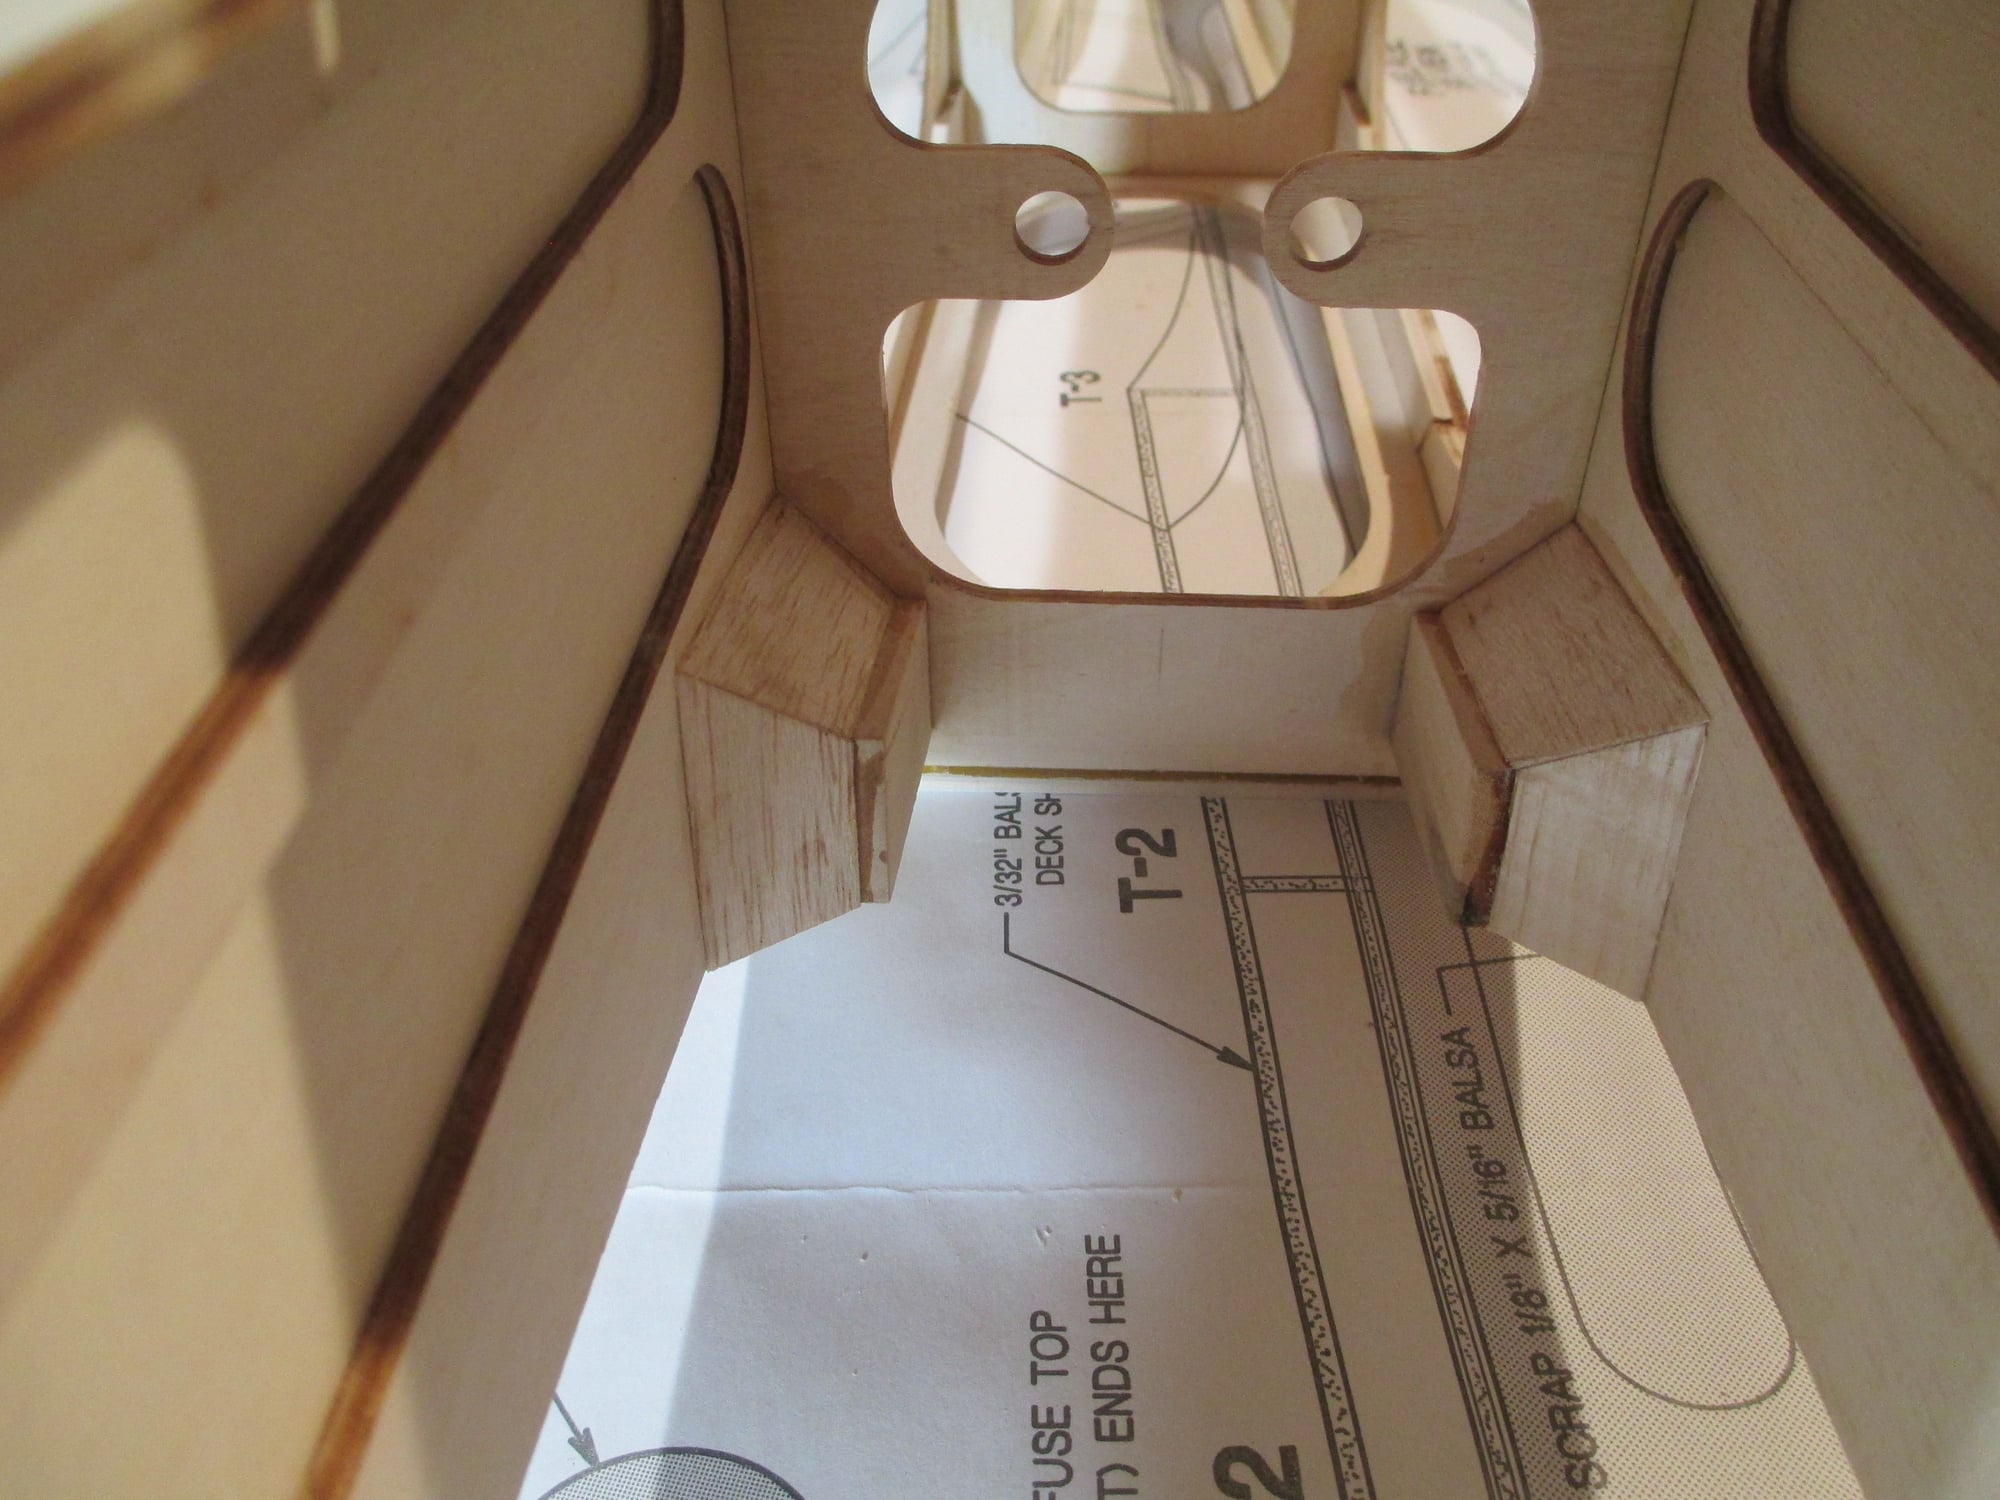
Here's what the turtle deck now looks like with the additional stringers added.
I think by adding these stringers, the covering once in place will look better.
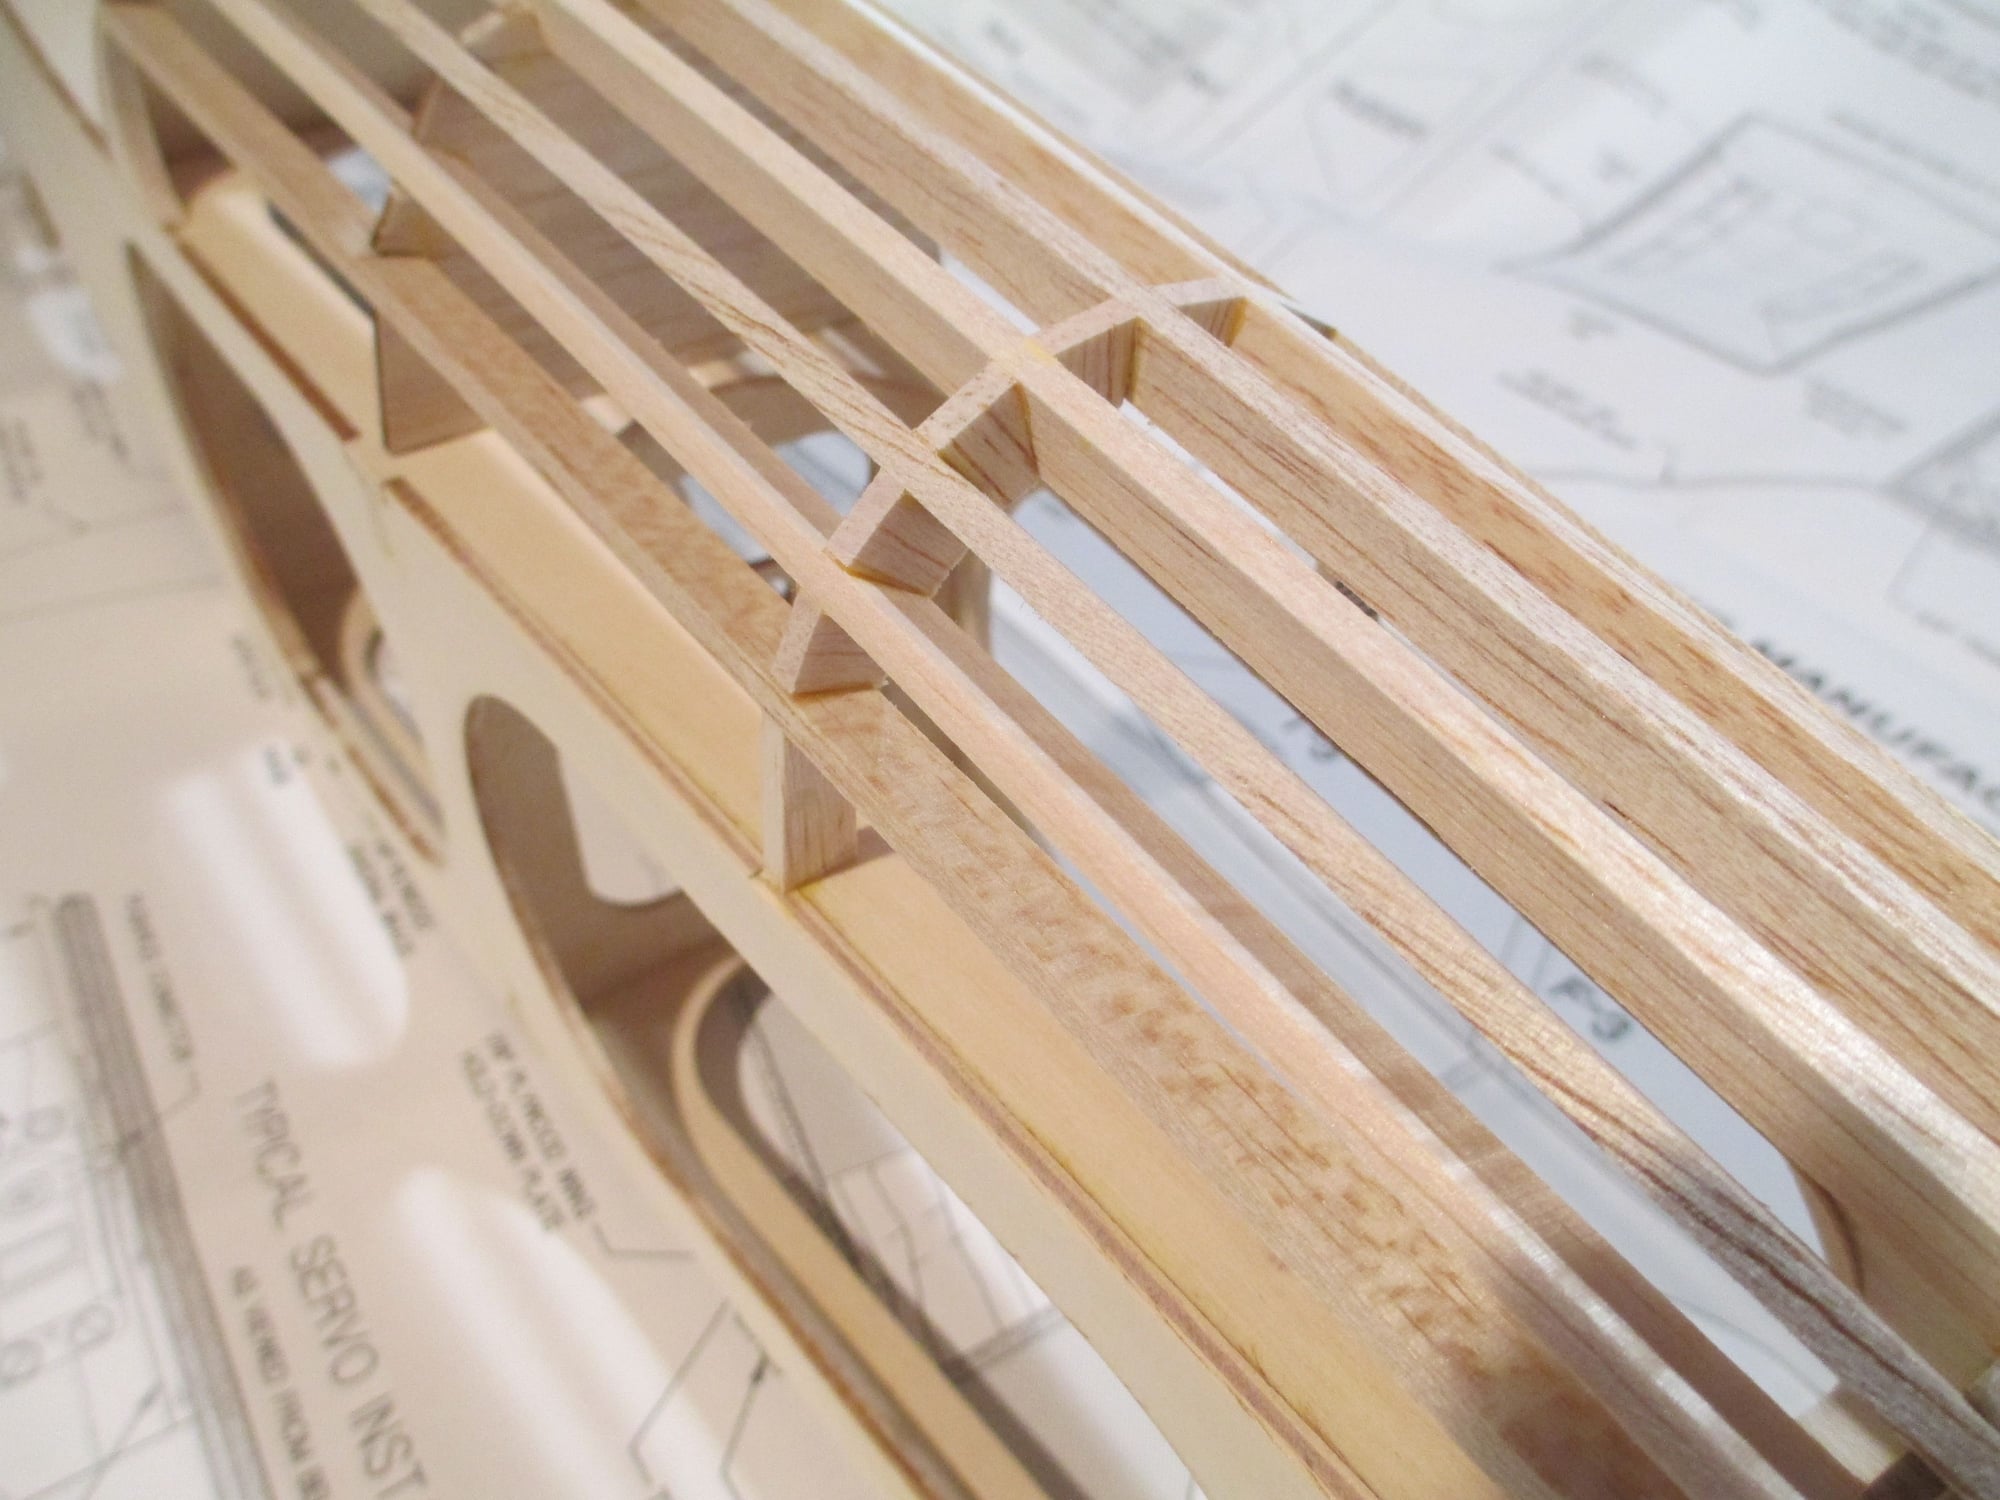
I added blocking between the stringers because the span between each Former was too great. This would have been a problematic area with the covering getting loose because the stringers would have bowed from the pulling of the covering.
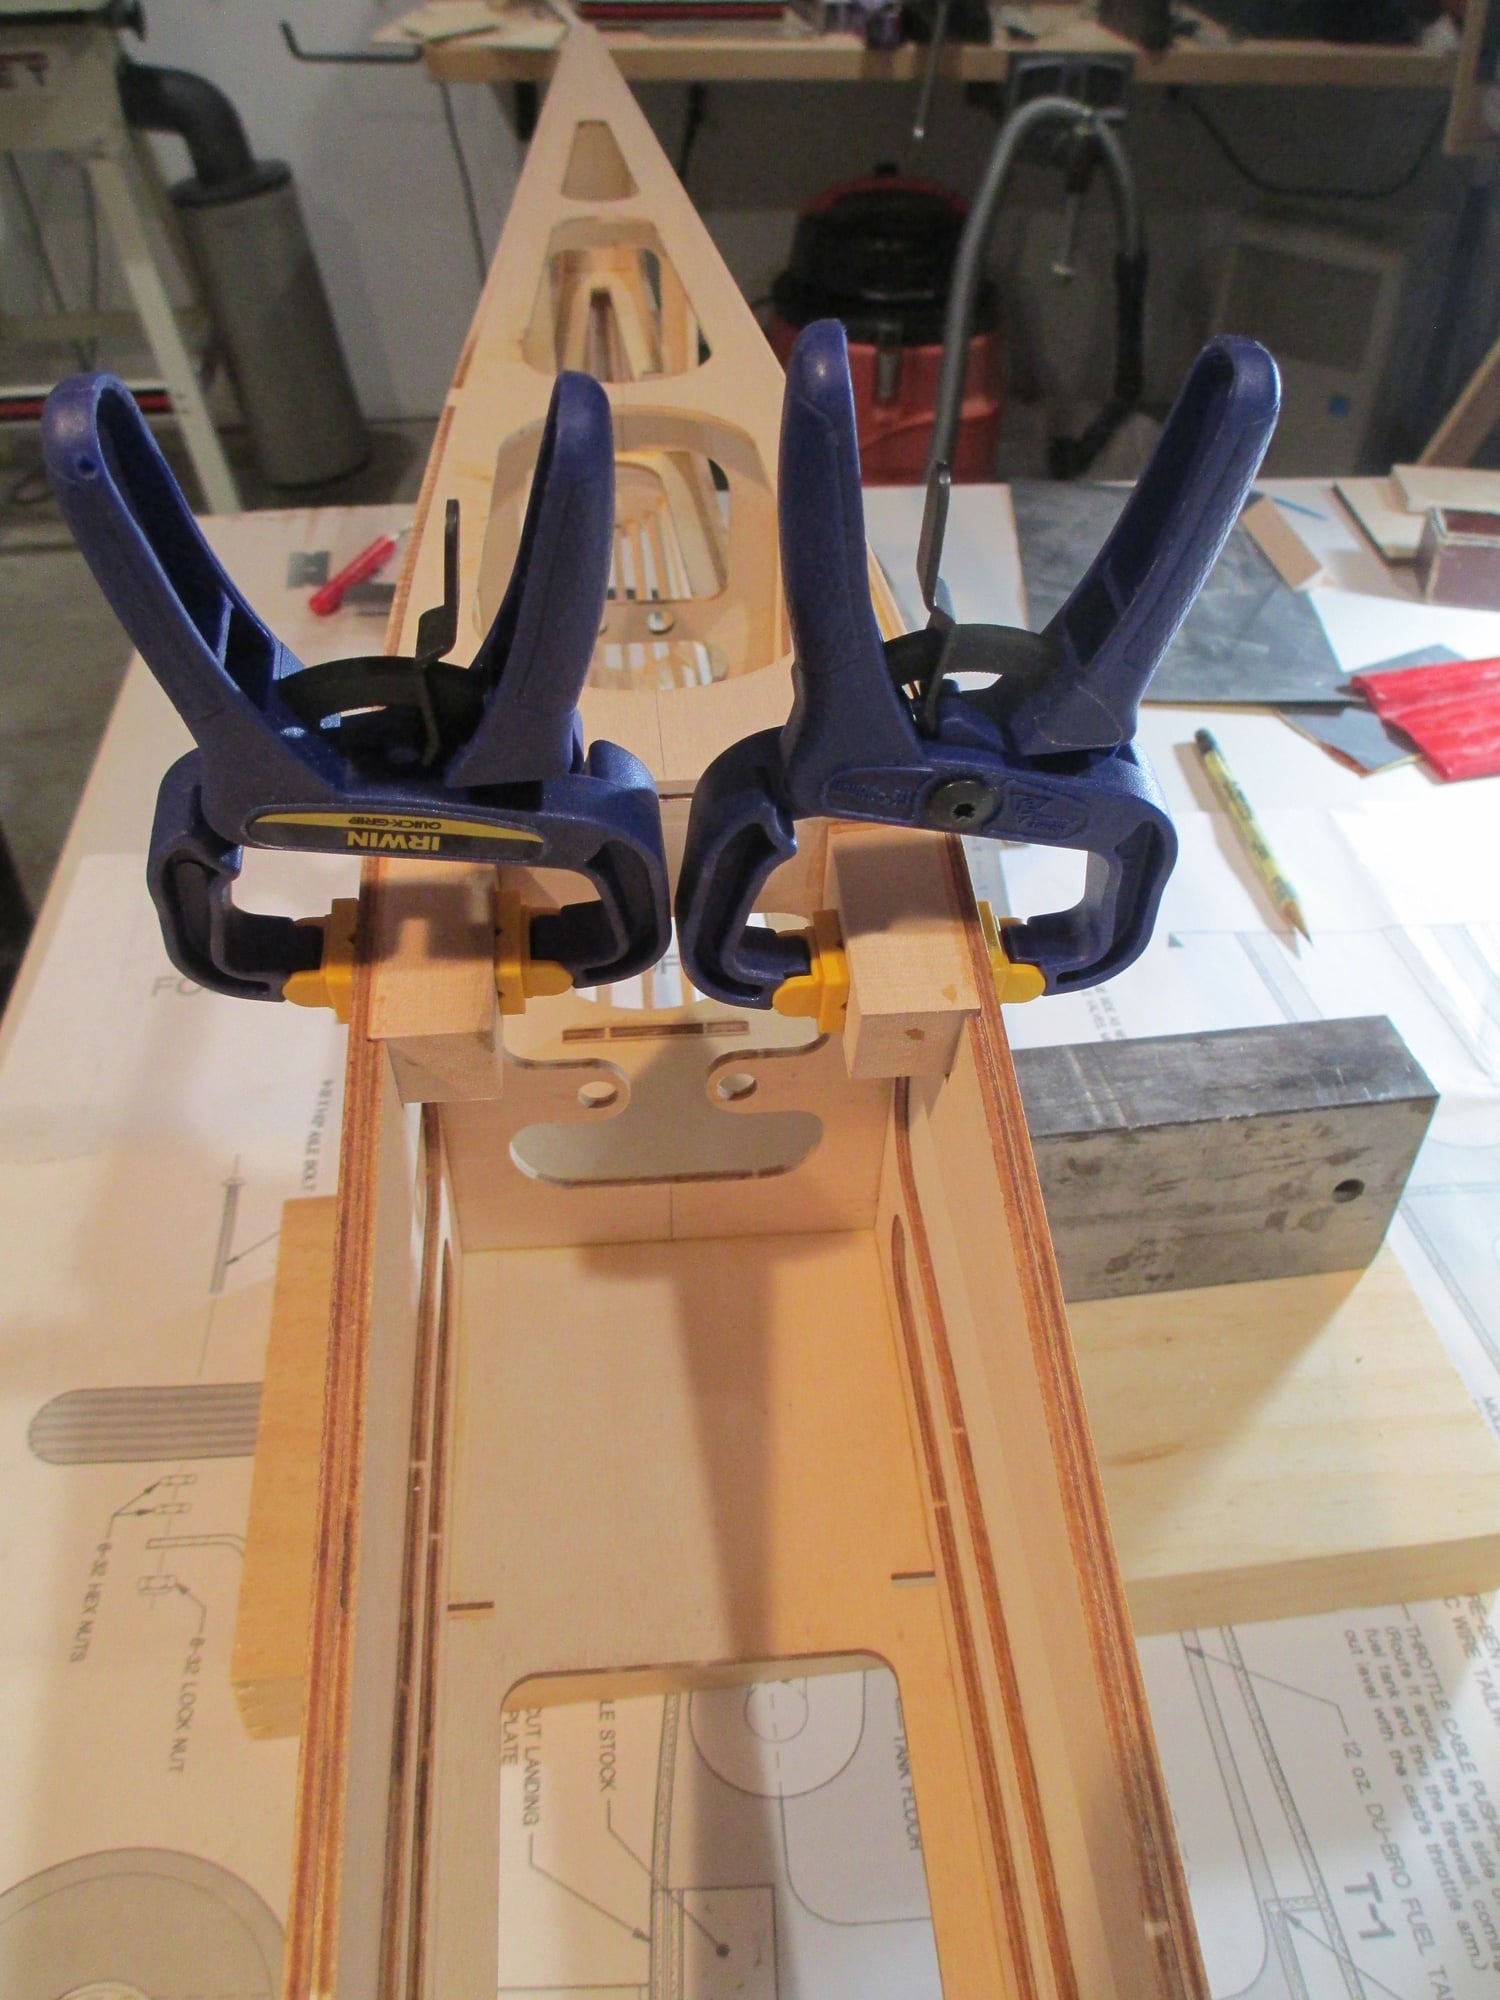
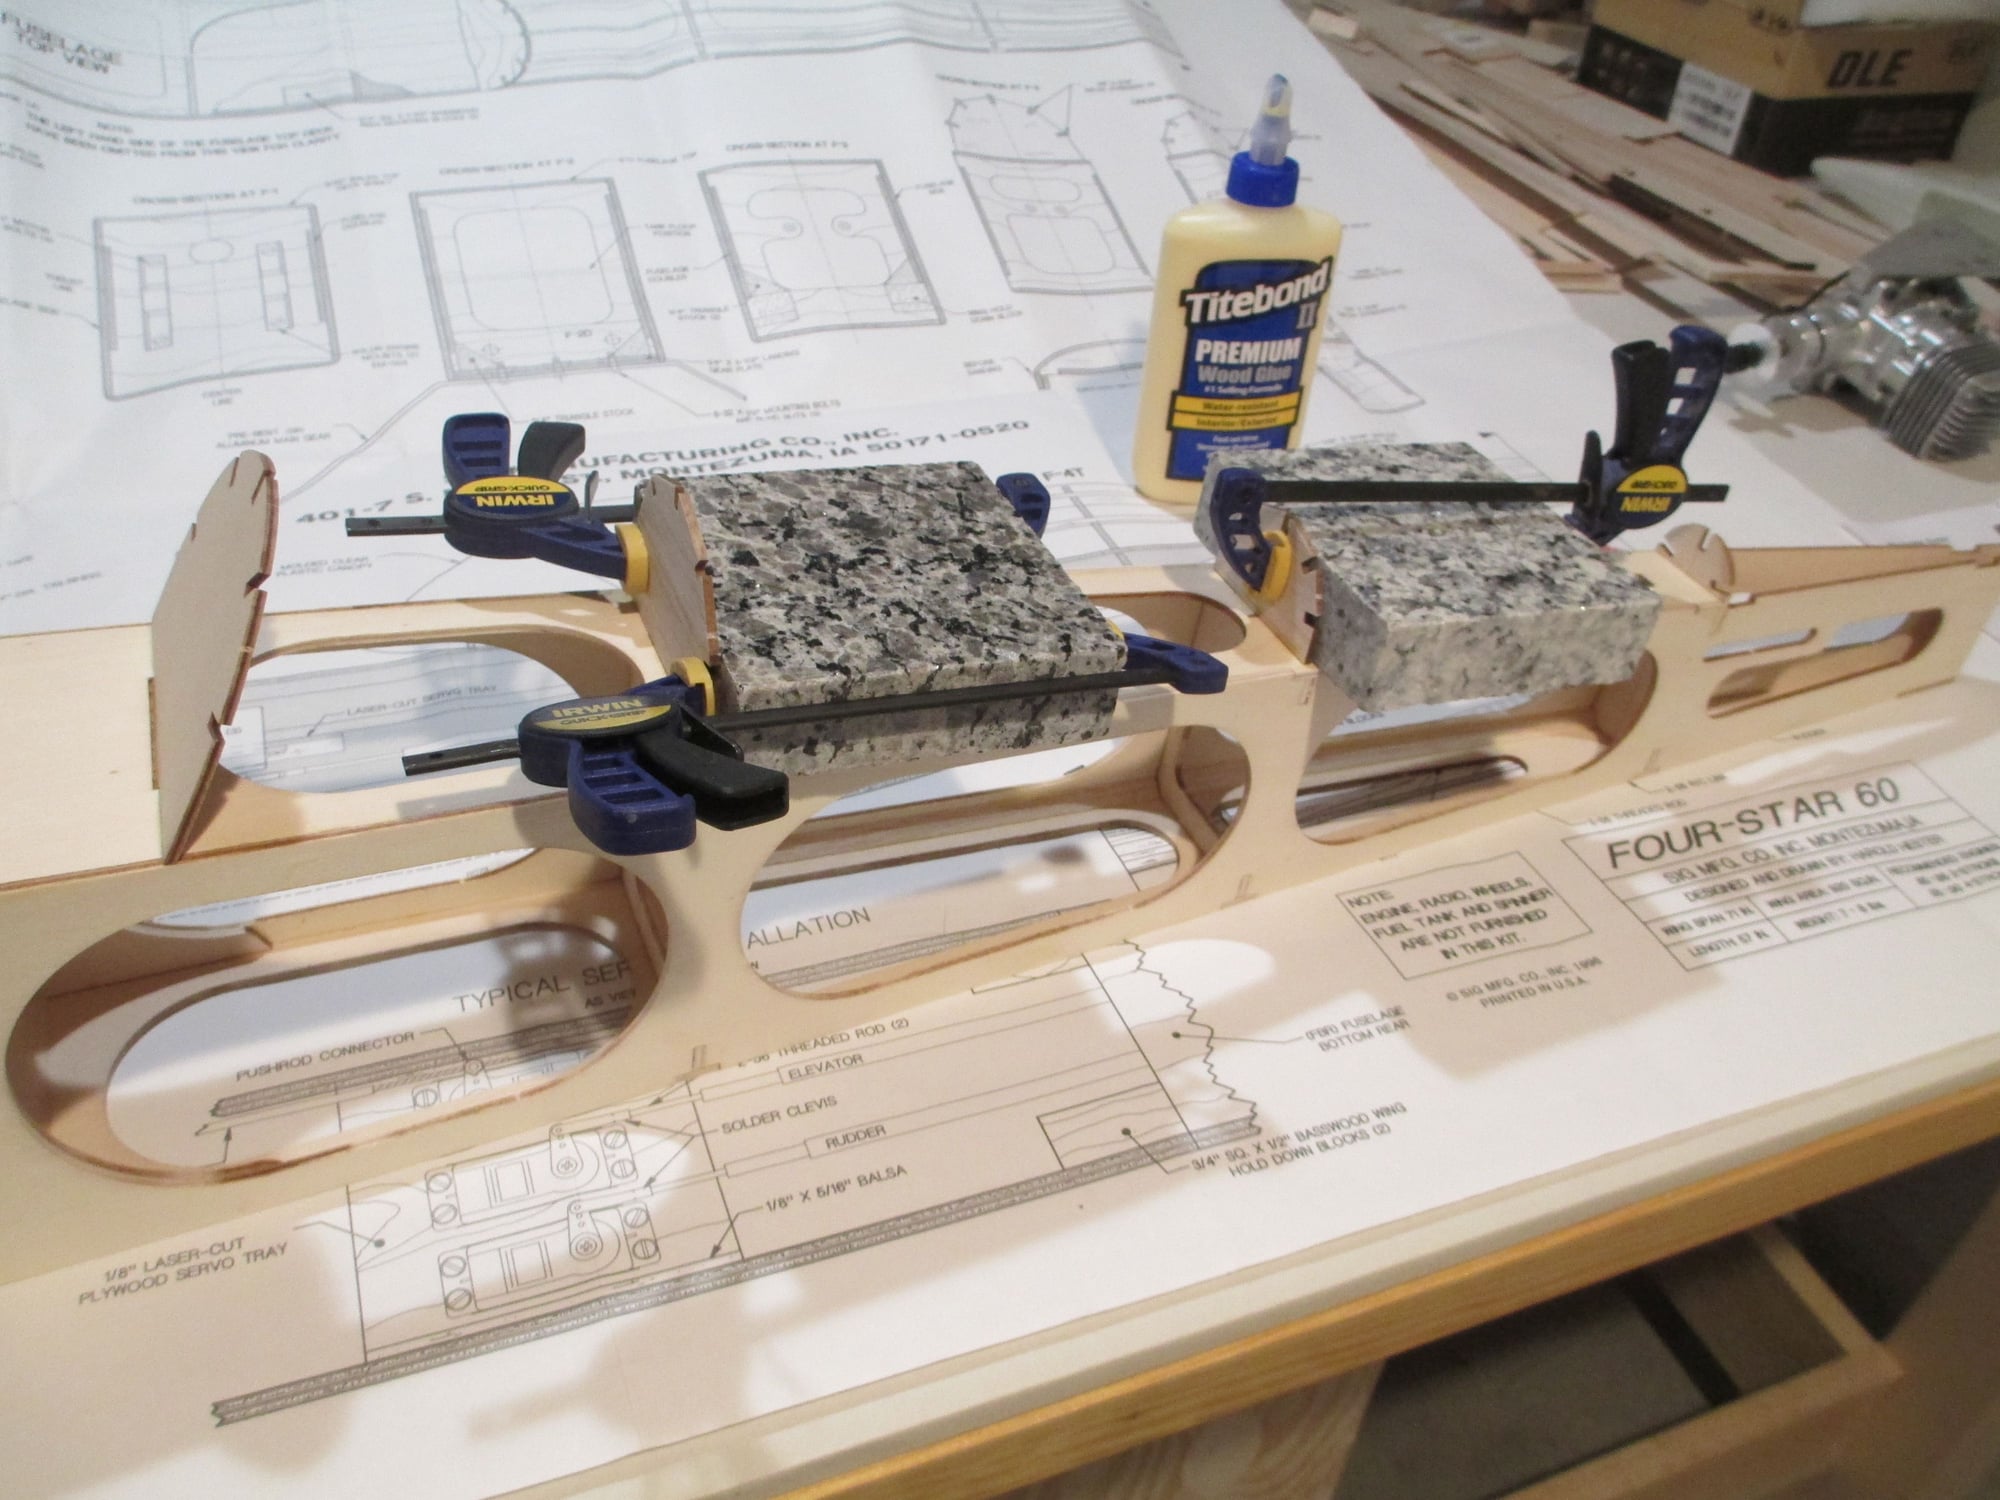
I placed the wing on the fuselage for the first time to check how the wing blocks would fit. Now would be the time to make adjustments in the fit between the blocks and the top of the wing.
Epoxy was used, then the blocks were clamped into position. Once cured I will further reinforce these blocks by adding balsa tri-stock to them.
 04-06-2019, 04:42 PM
#83
Thread Starter
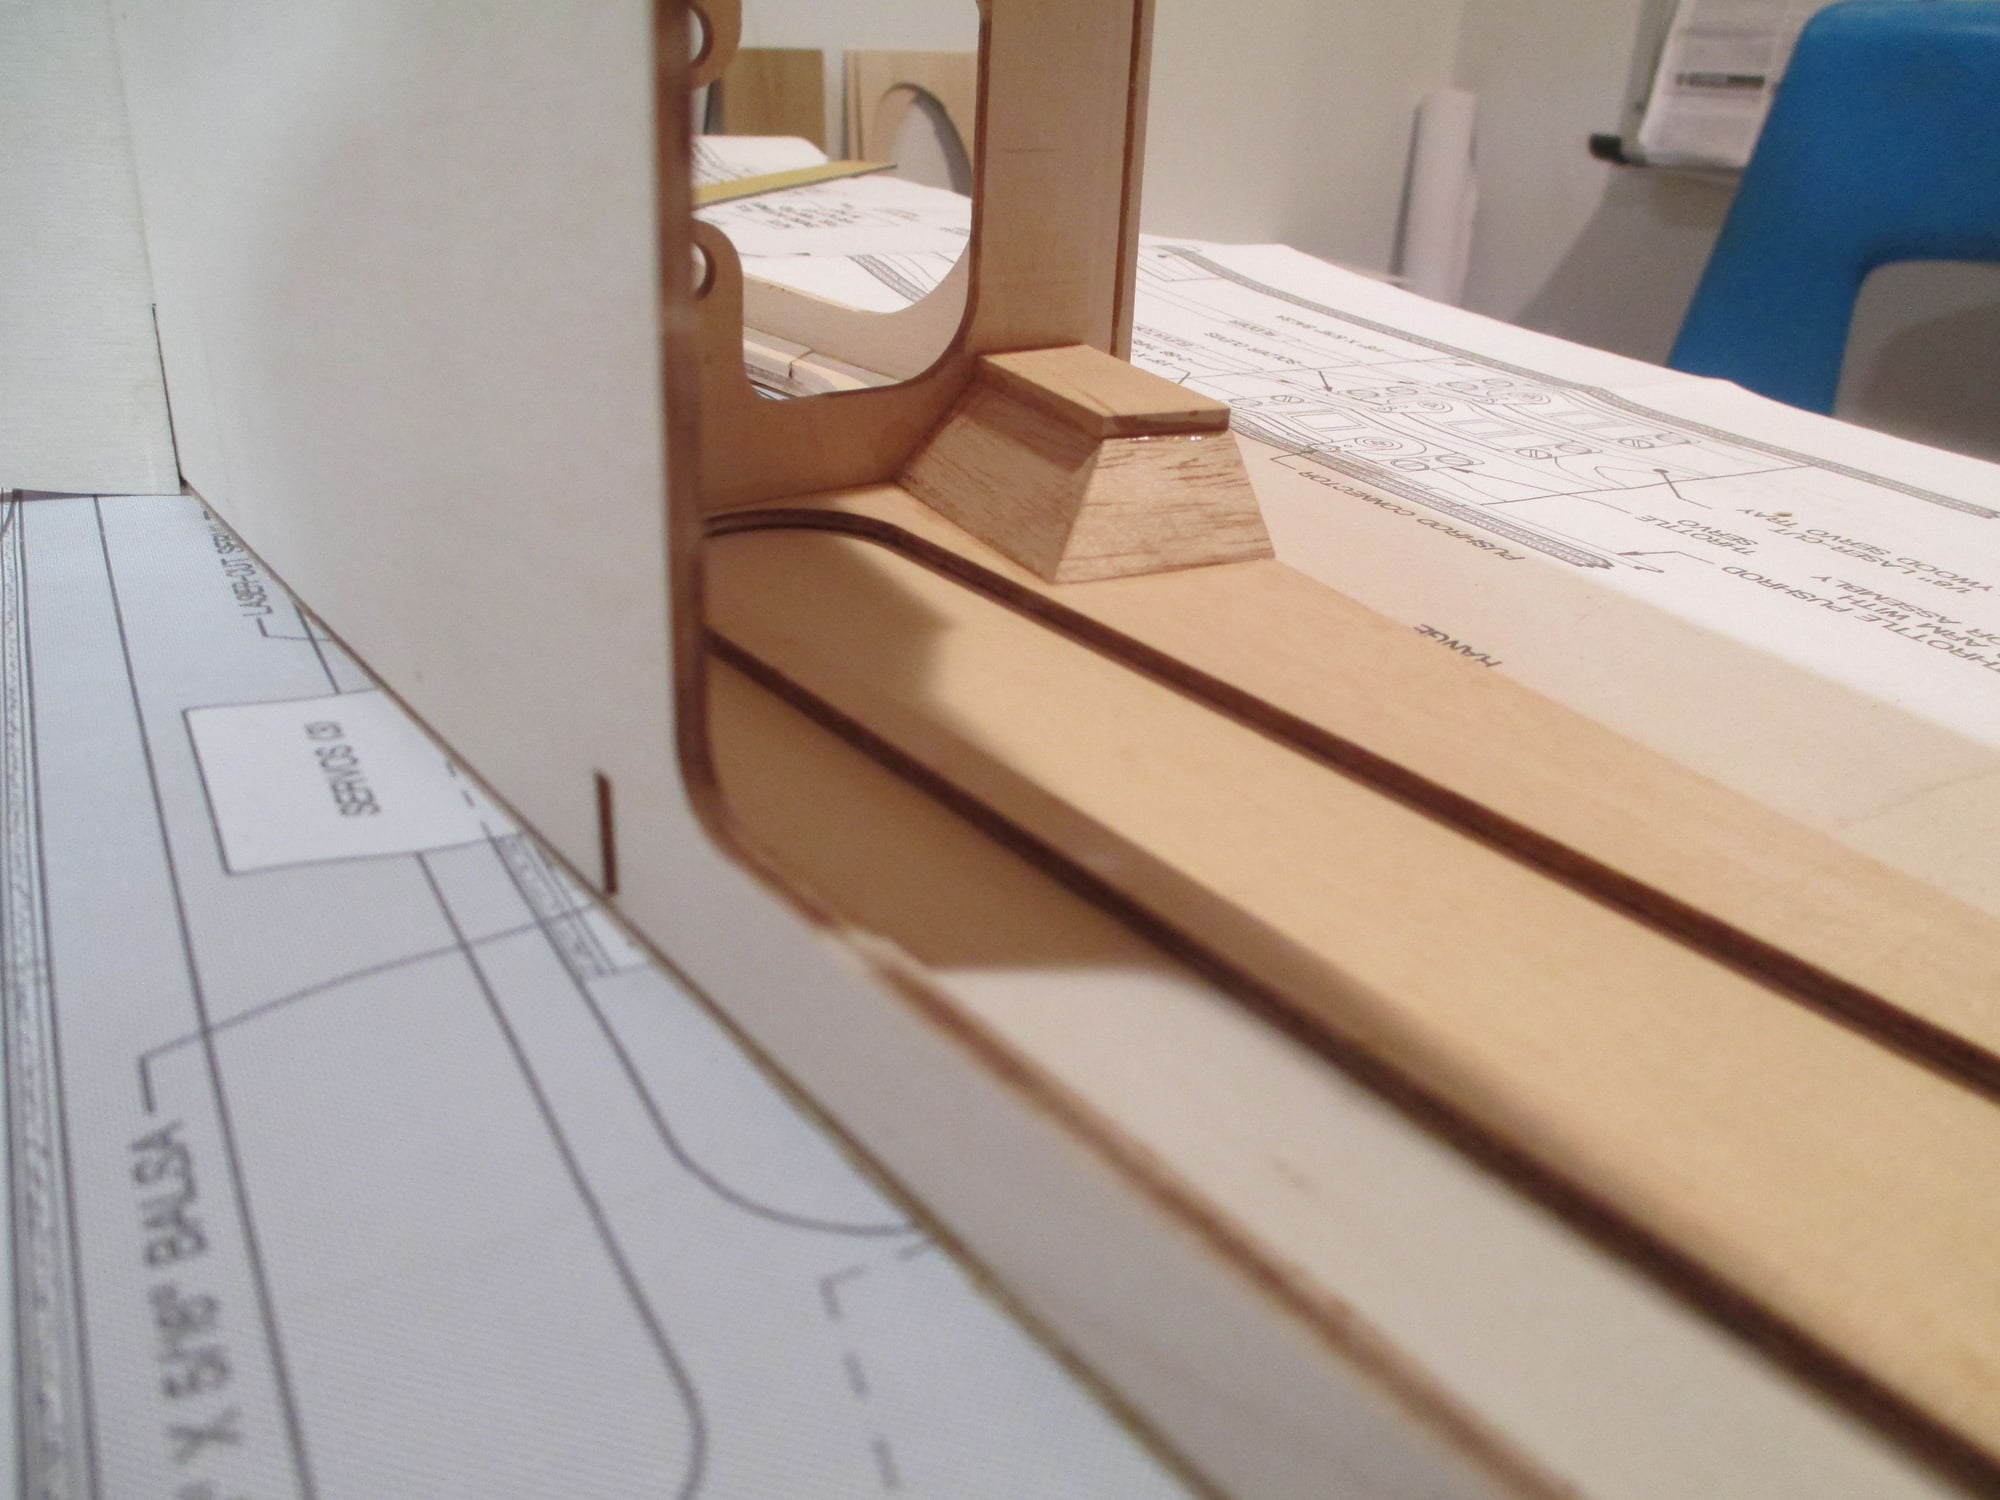
3//4" Balsa tri-stock is cut and fit around each Basswood wing block.
Epoxying in the tri-stock will lock the wing block to the fuselage.
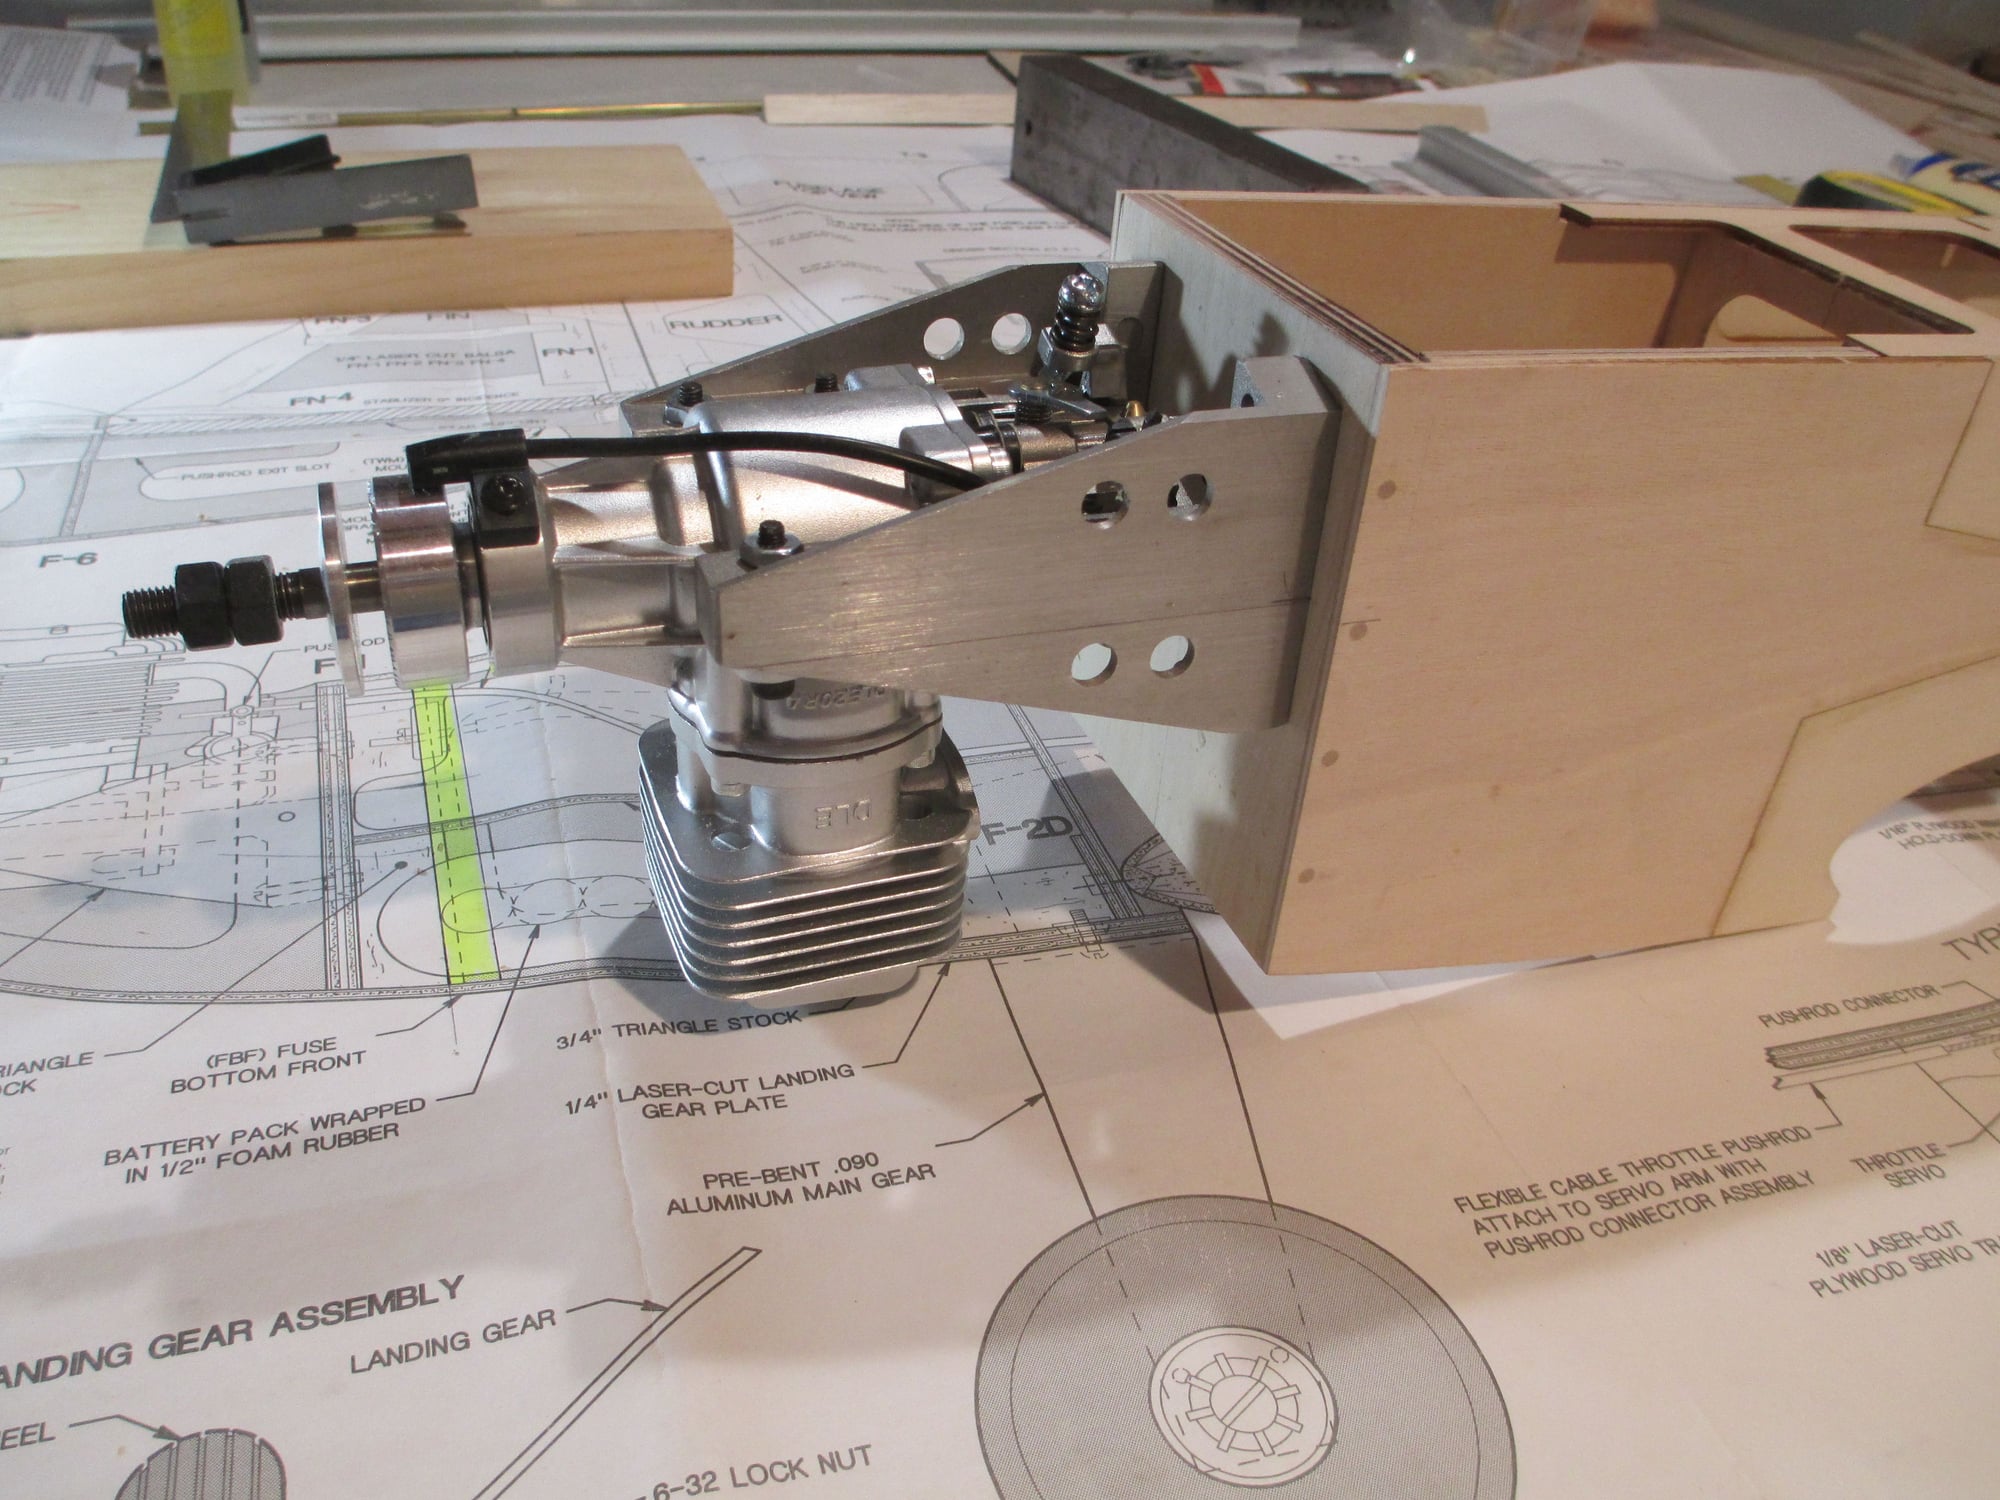
While waiting for the epoxy to cure, I decided to mount the engine on the firewall.
10-24 cap head screws along with blind nuts were used. The blind nuts will get epoxied into place after I reinforce the inside corners of the firewall with 3/4" tri-stock.
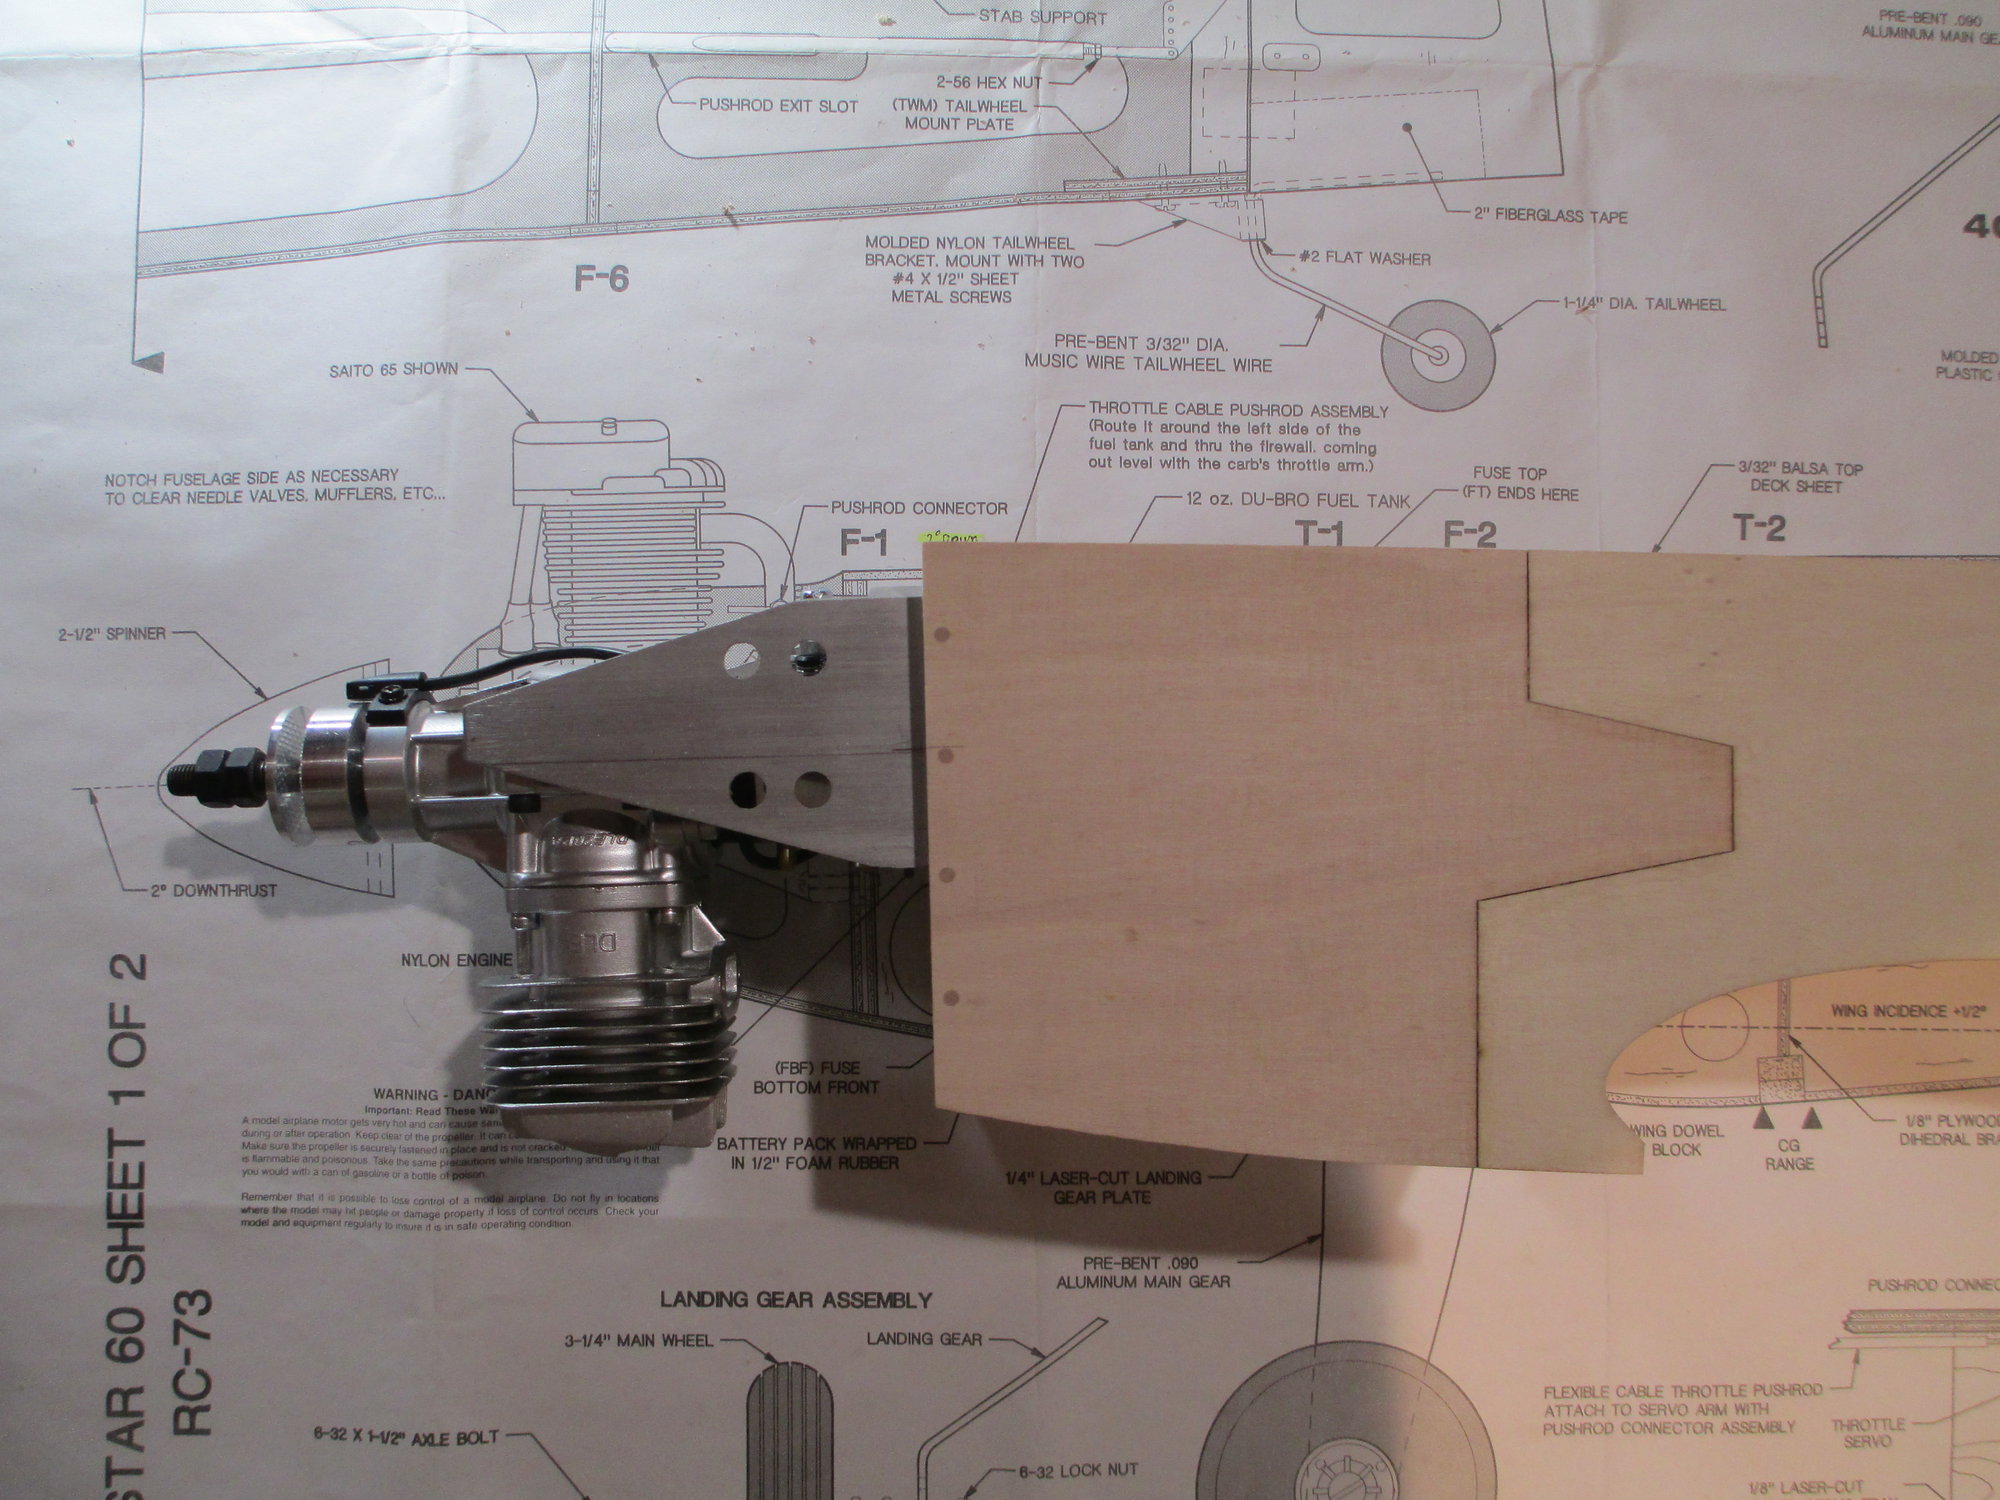
Everything has lined up as I had planned.
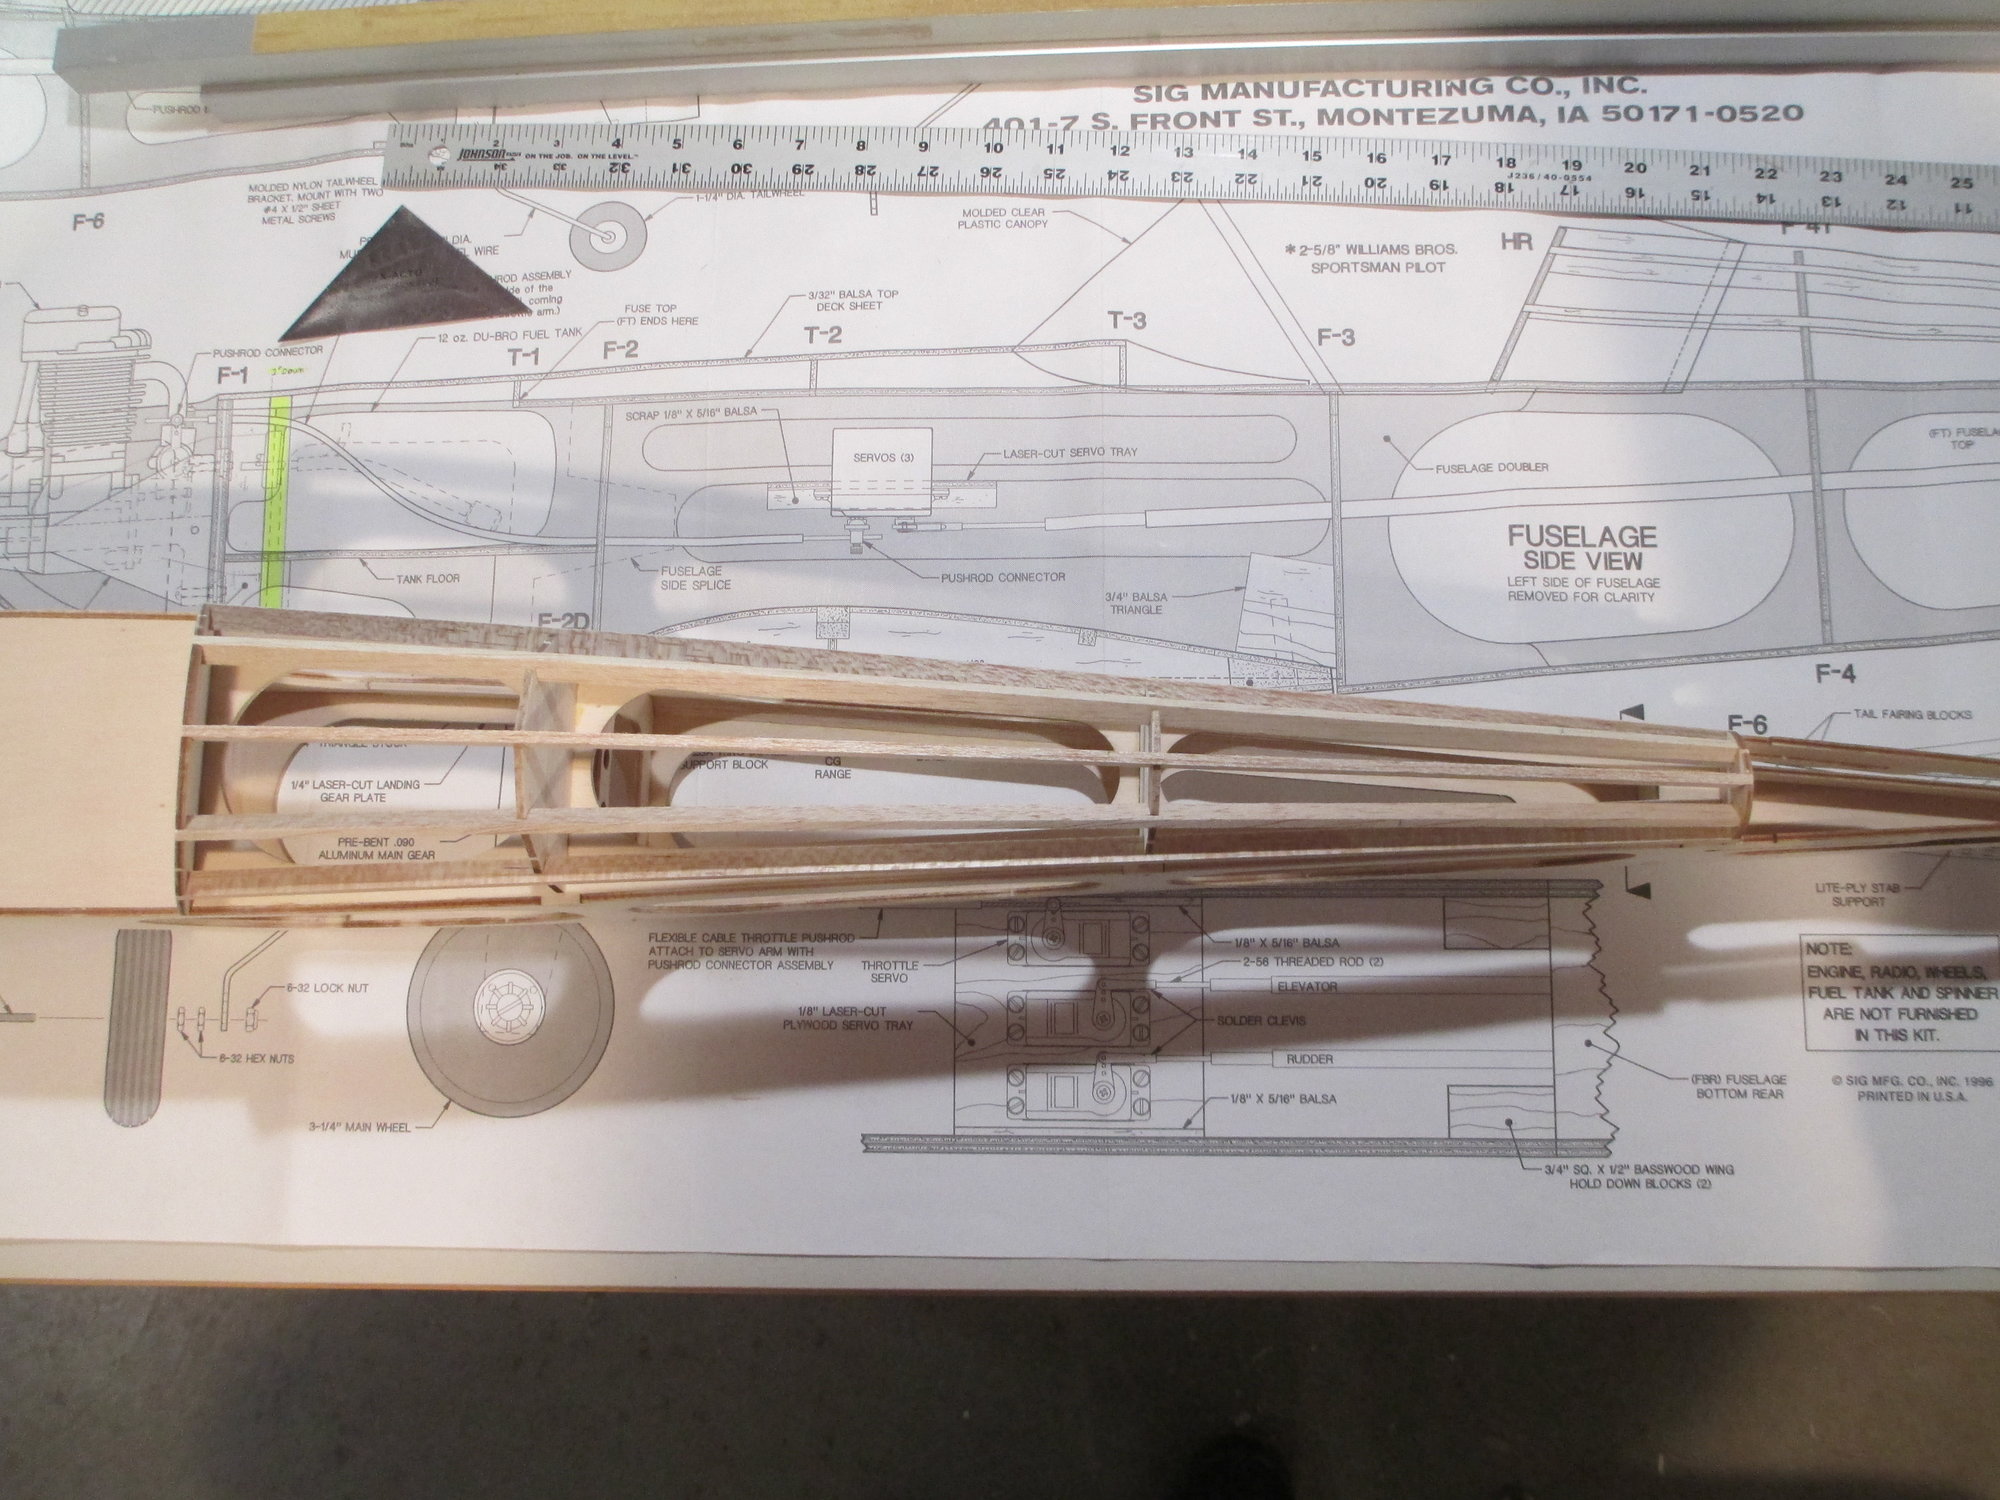
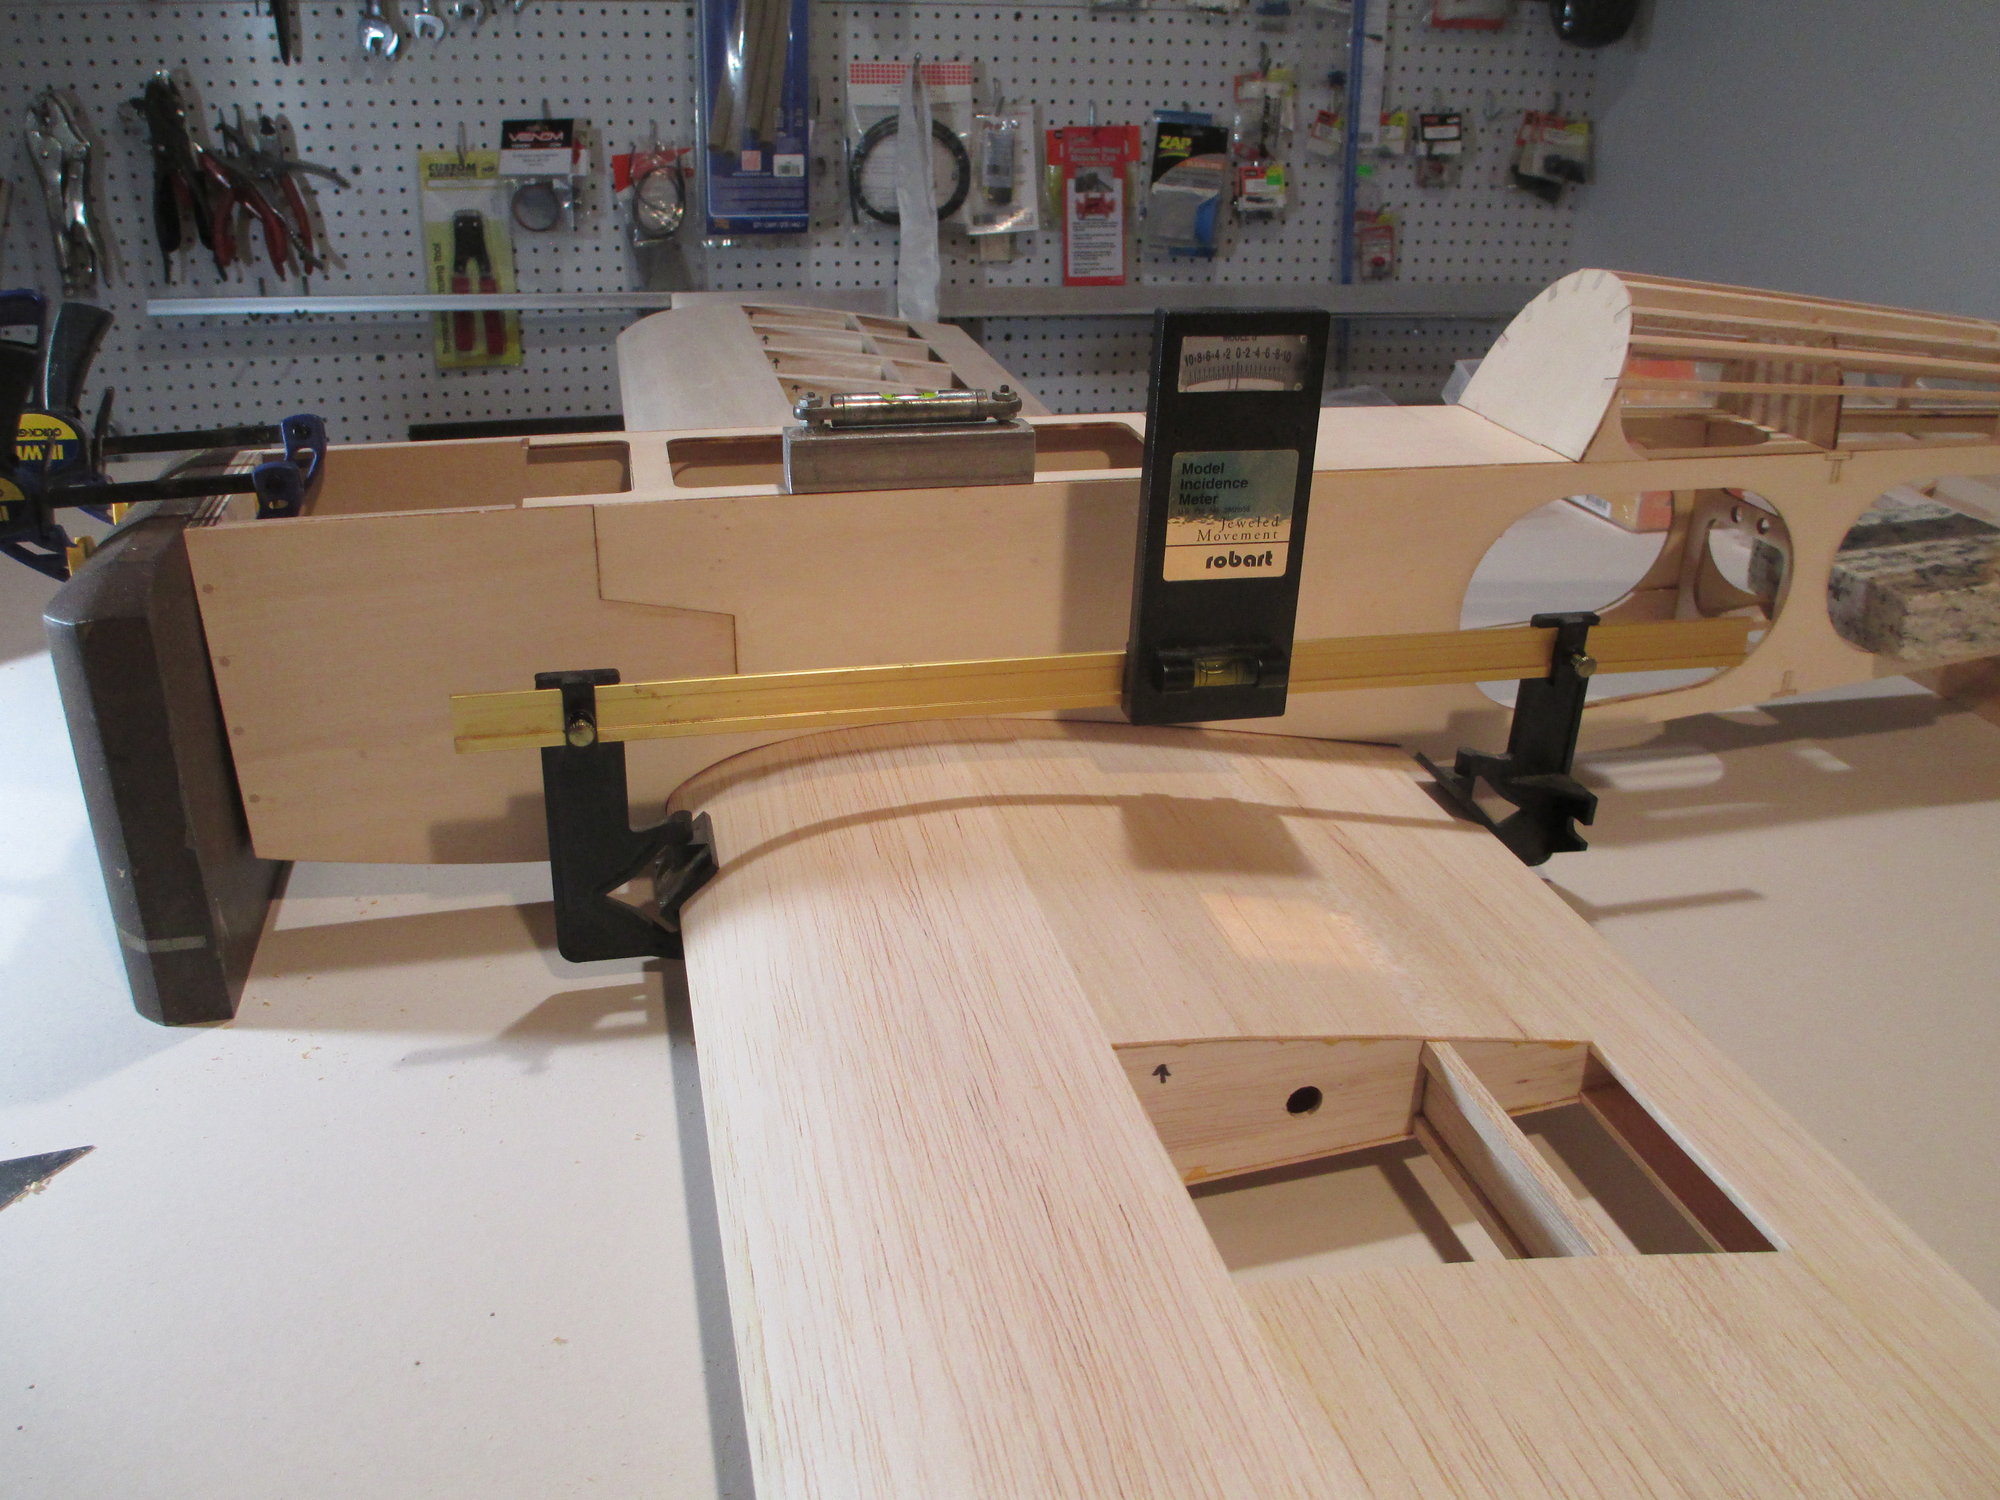
Before I drill the wing mounting holes into the wing blocks I first want to check the wing's incidence. Step #1 in this process is to level the fuselage on the fuselage's *Datum line.
*Datum Line- a line to which dimensions are referred on engineering drawings, and from which measurements are calculated.
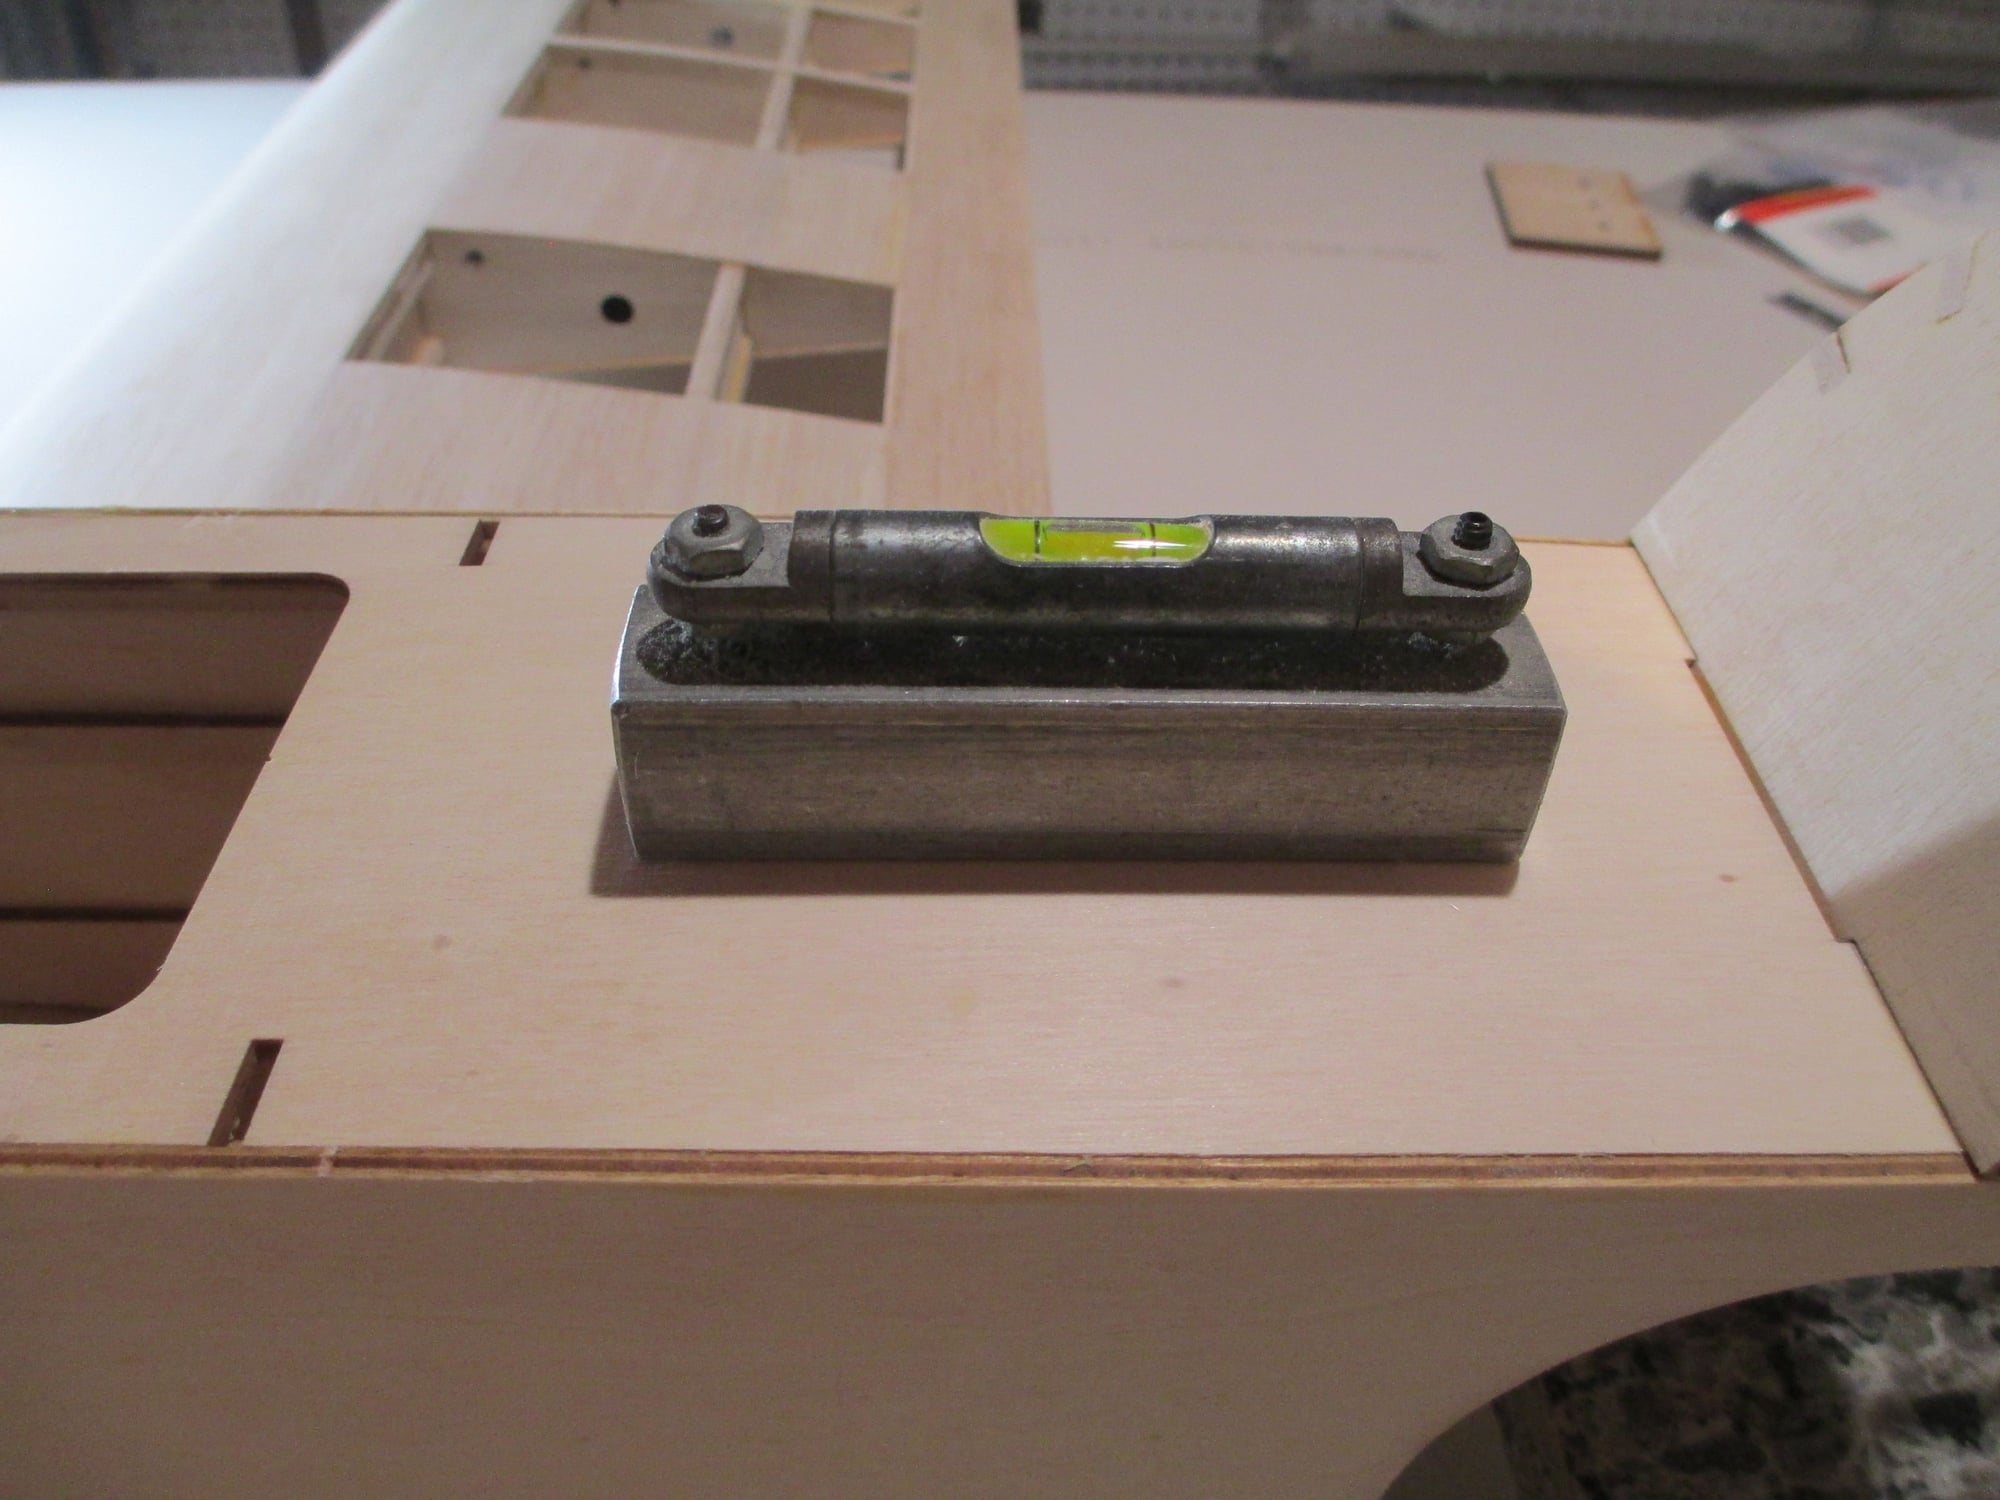
Once leveled front to back and side to side, the fuselage will need to be secured to the build table so it doesn't move. This can be accomplished using sand bags or heavy weights to keep the fuselage from moving.
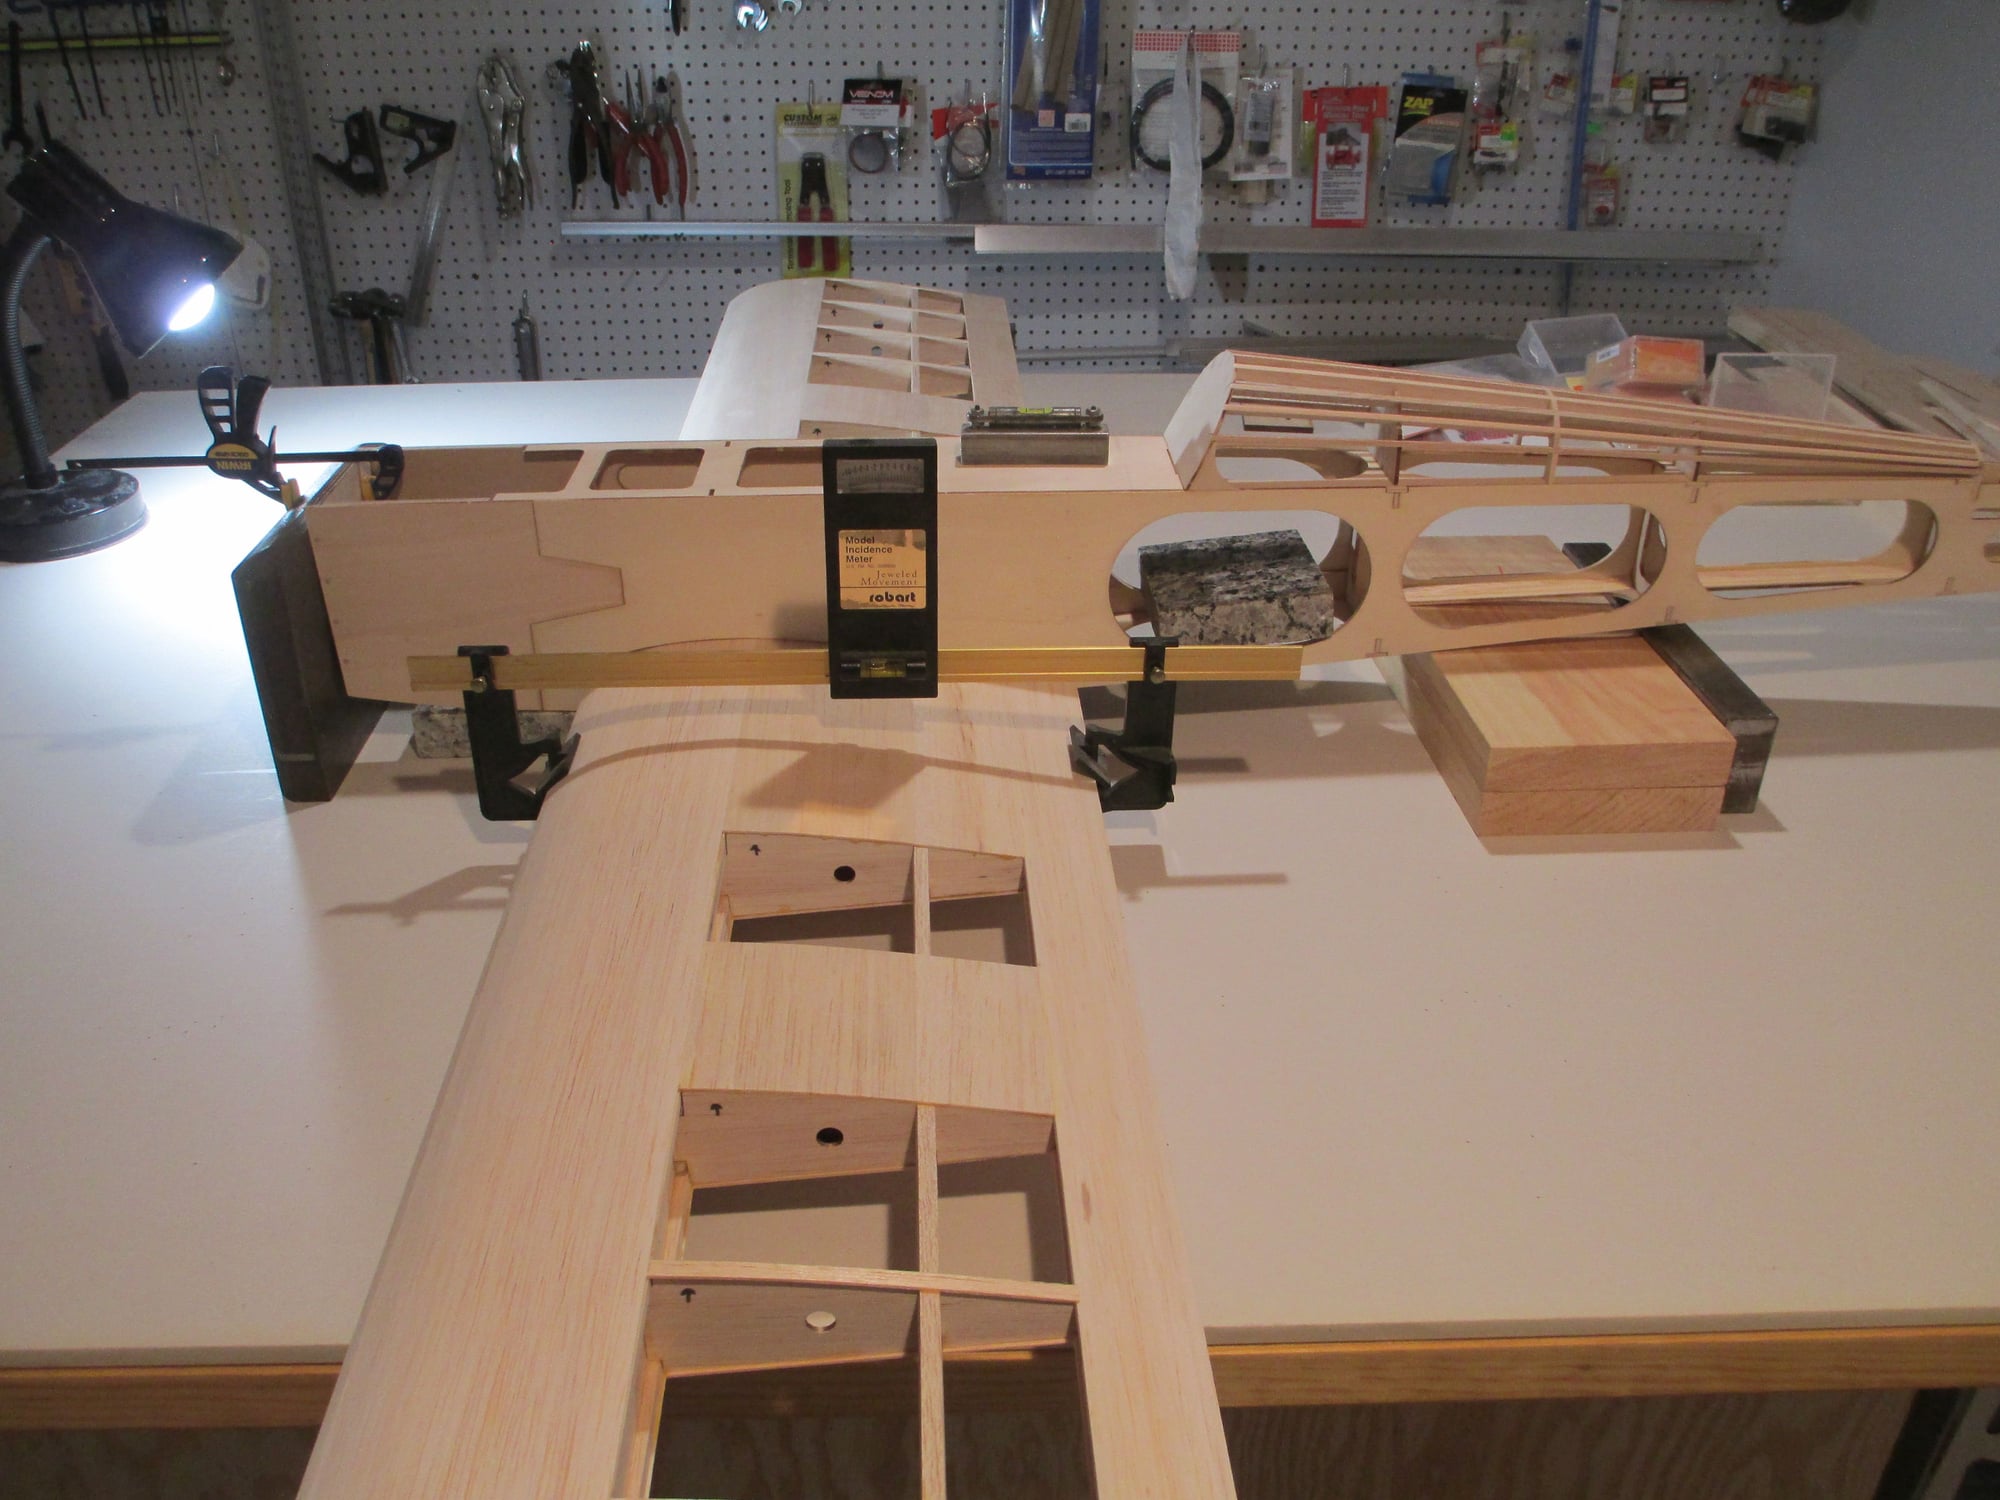
Step #2 is to mount the Incidence meter to the wing's leading and trailing edges and take your reading. It really is that simple...
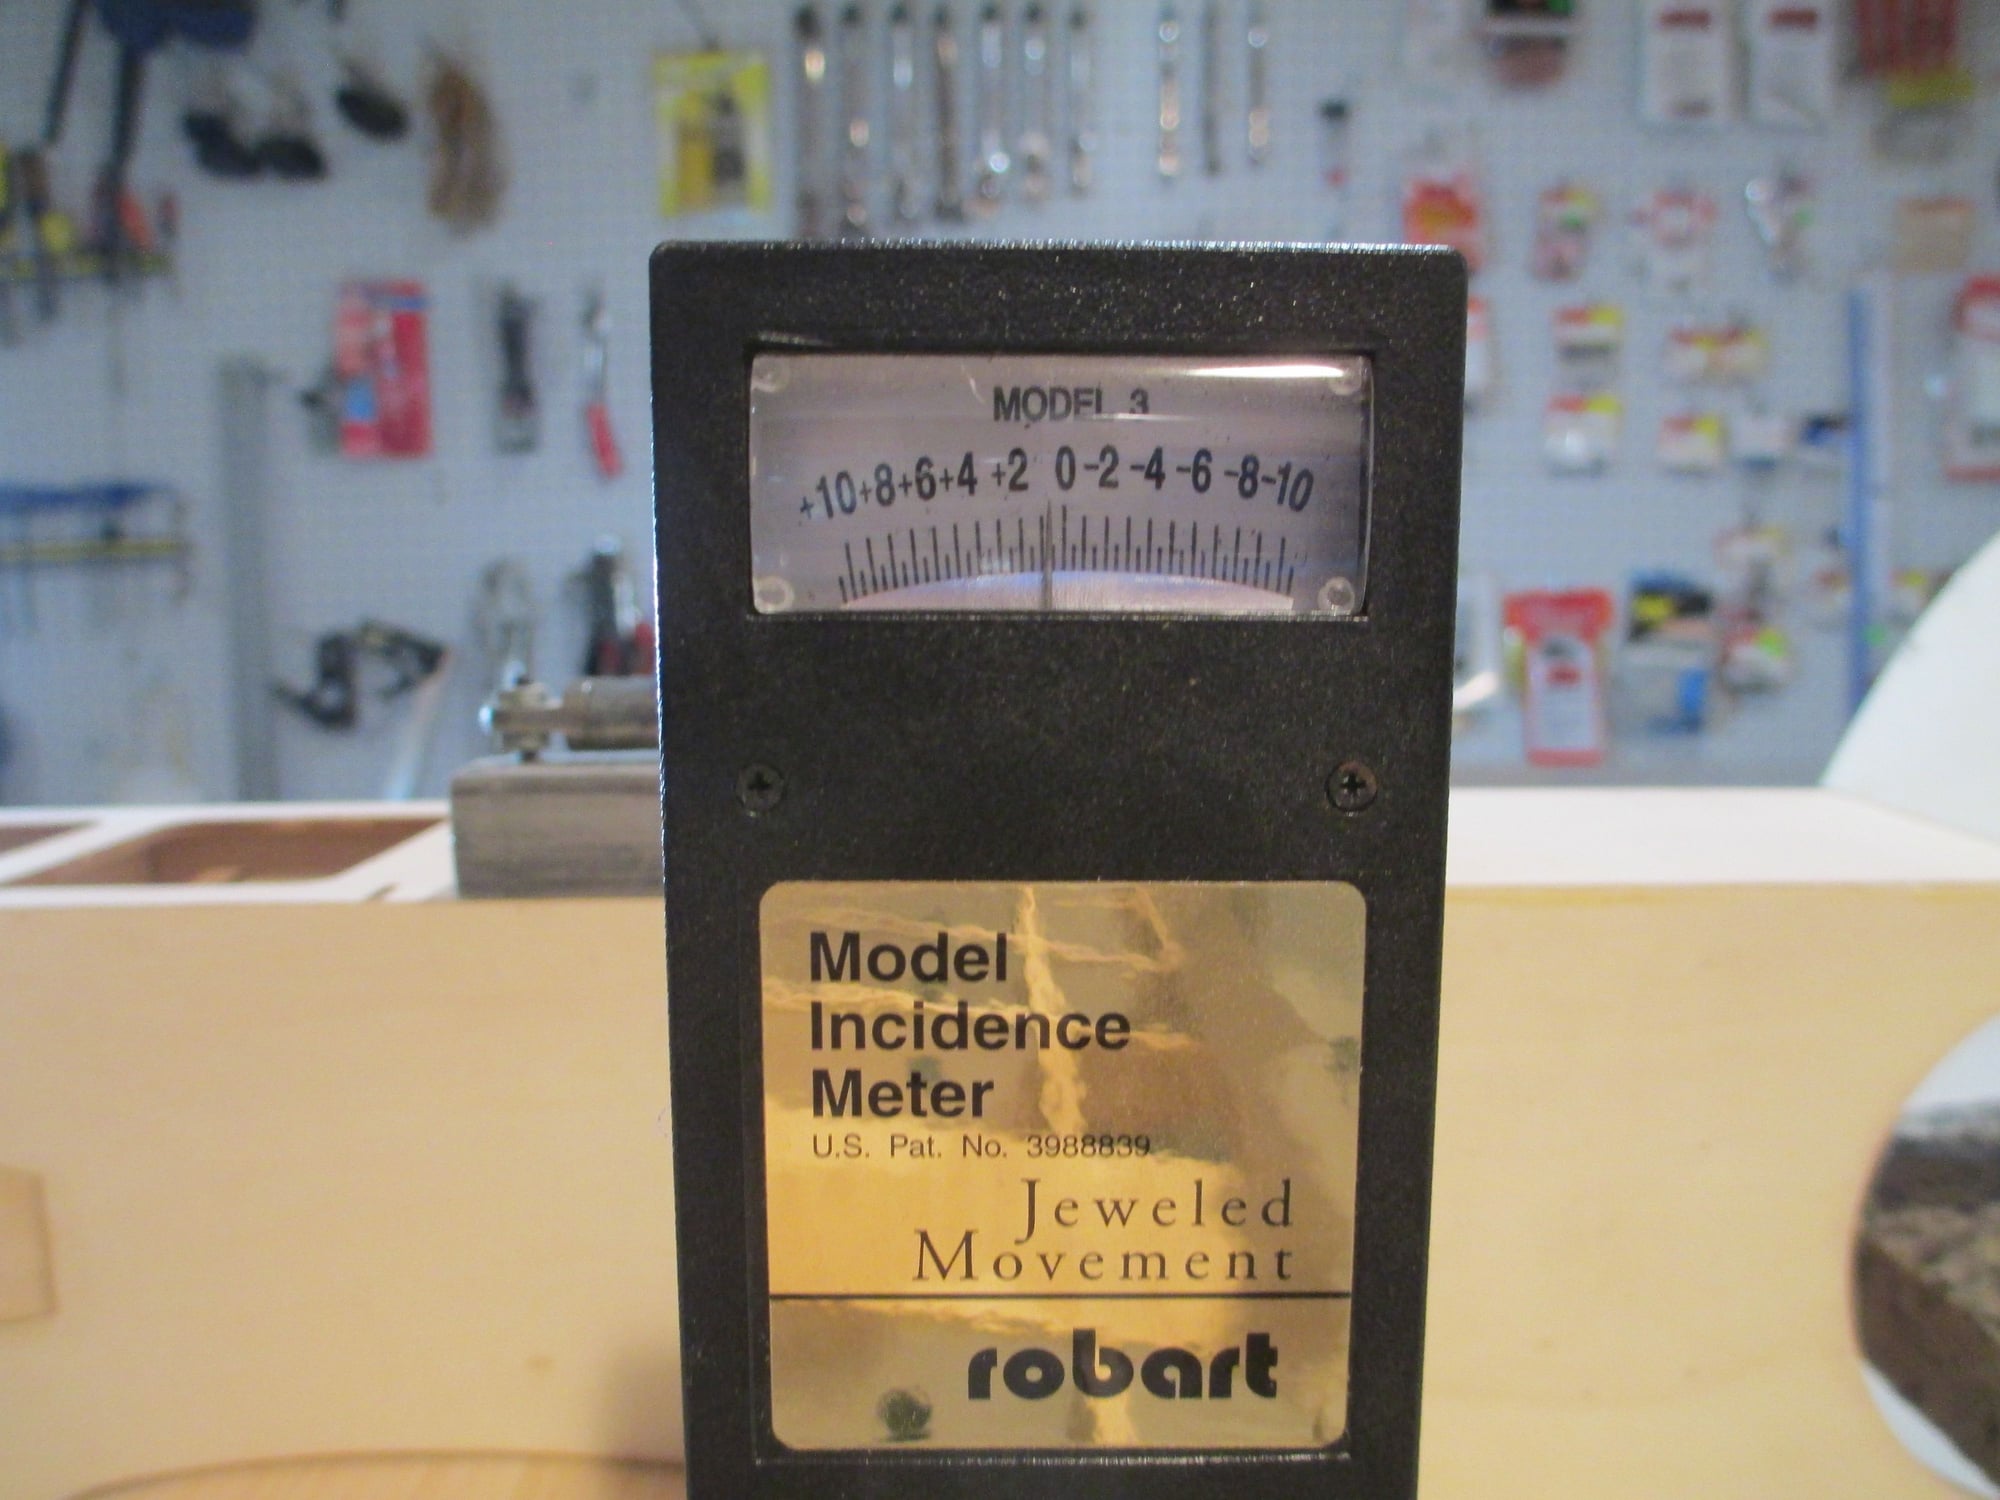
Plans call for a wing incidence of +1/2 degree. I'm almost at +3/4. The saddle of the wing can be sanded to adjust the incidence. Since I'm not that far off, I am going to drill and tap the wing blocks as is. Once the wing bolts suck up the wing against the saddle I'm pretty confident that the incidence will fall into place.
Last edited by VincentJ; 04-06-2019 at 05:00 PM.
04-07-2019, 05:20 AM
#84
Thread Starter

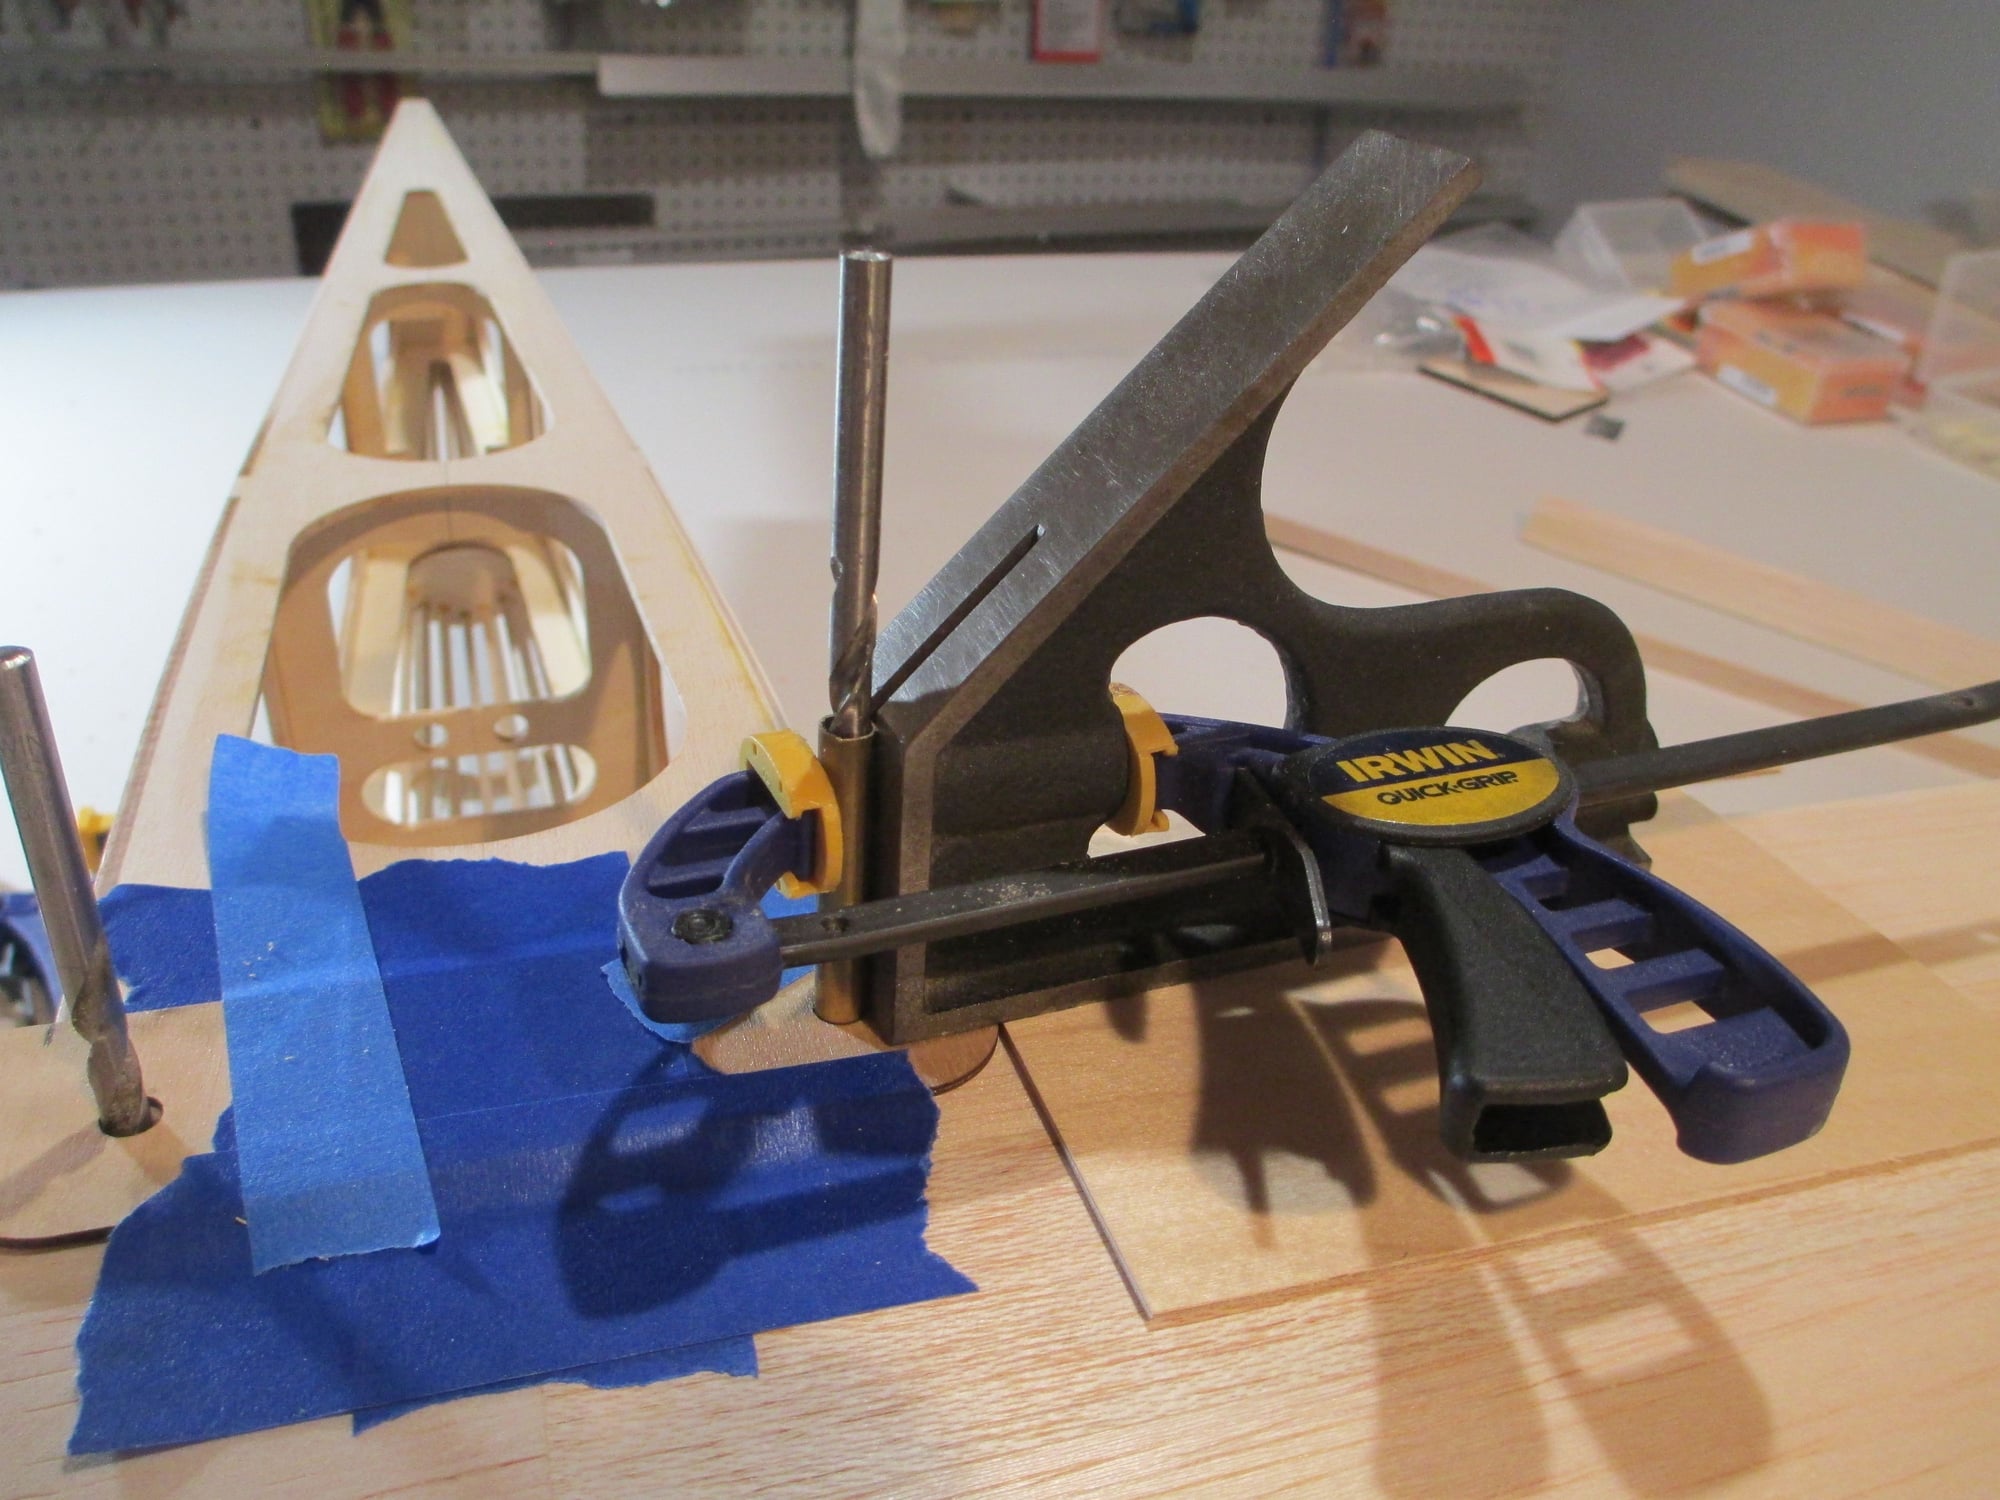
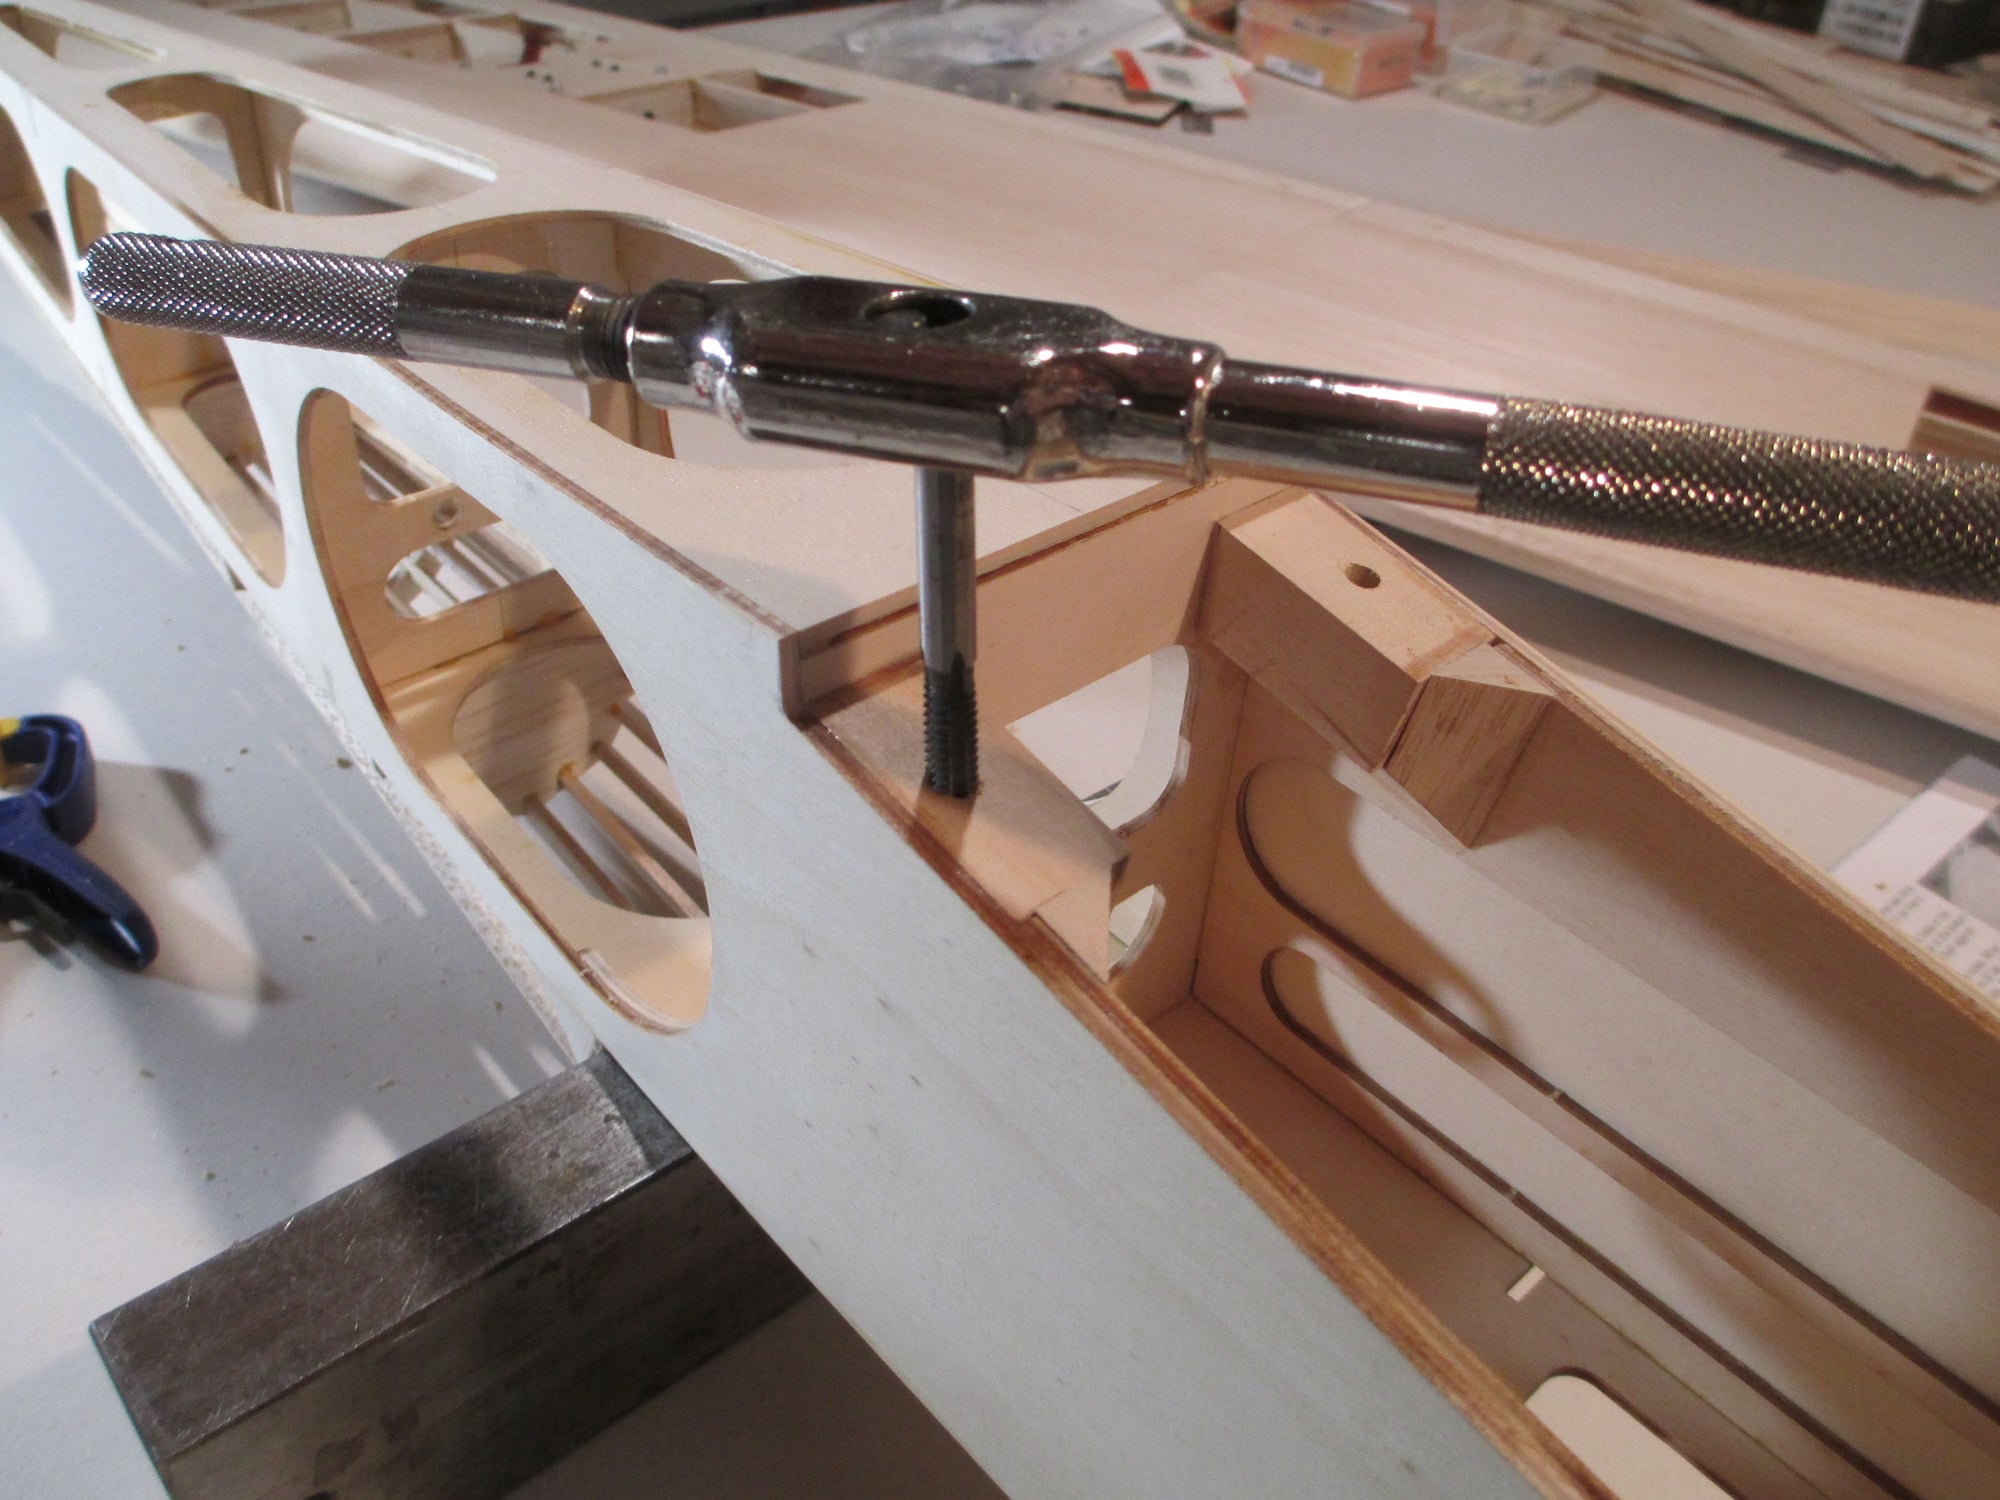
Drilling into soft balsa with a twist bit usually results with a very poor quality hole. So ditch the bits and let me show you a better way...Take a length of brass tubing and grind a chamfer on one end and chuck that into your drill instead!
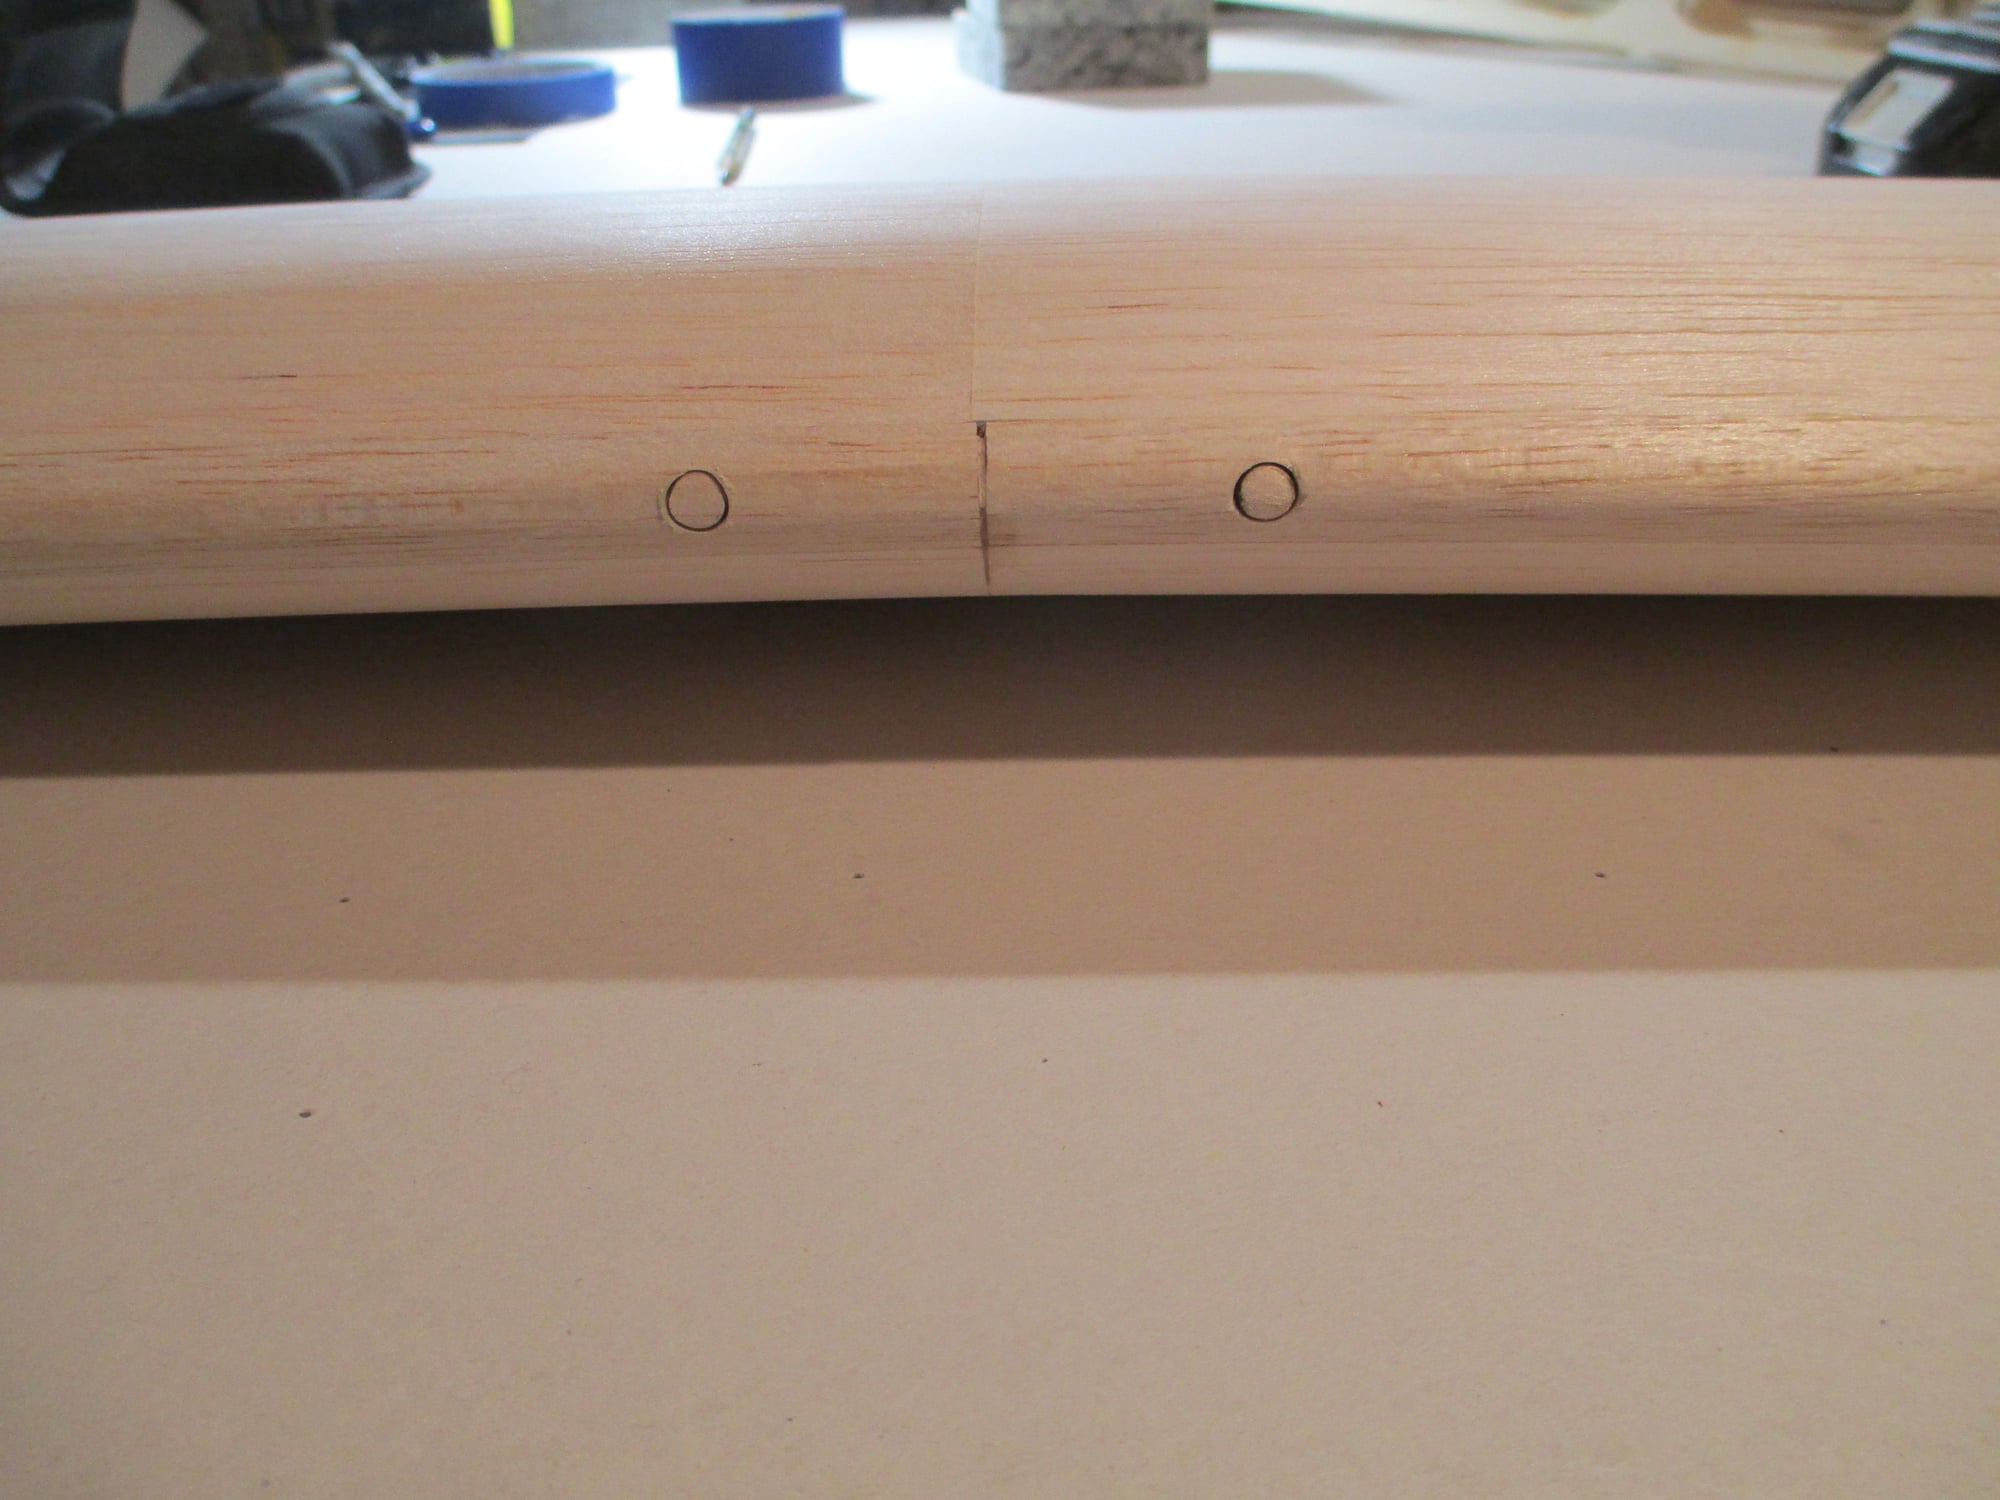
The task here was to drill two 1/4" holes into the leading edge of the wing for the hardwood wing dowels. With the wing in place, I used the former (F-2) in the fuselage with the holes already in place as a quide to hand mark the exact position of the holes.
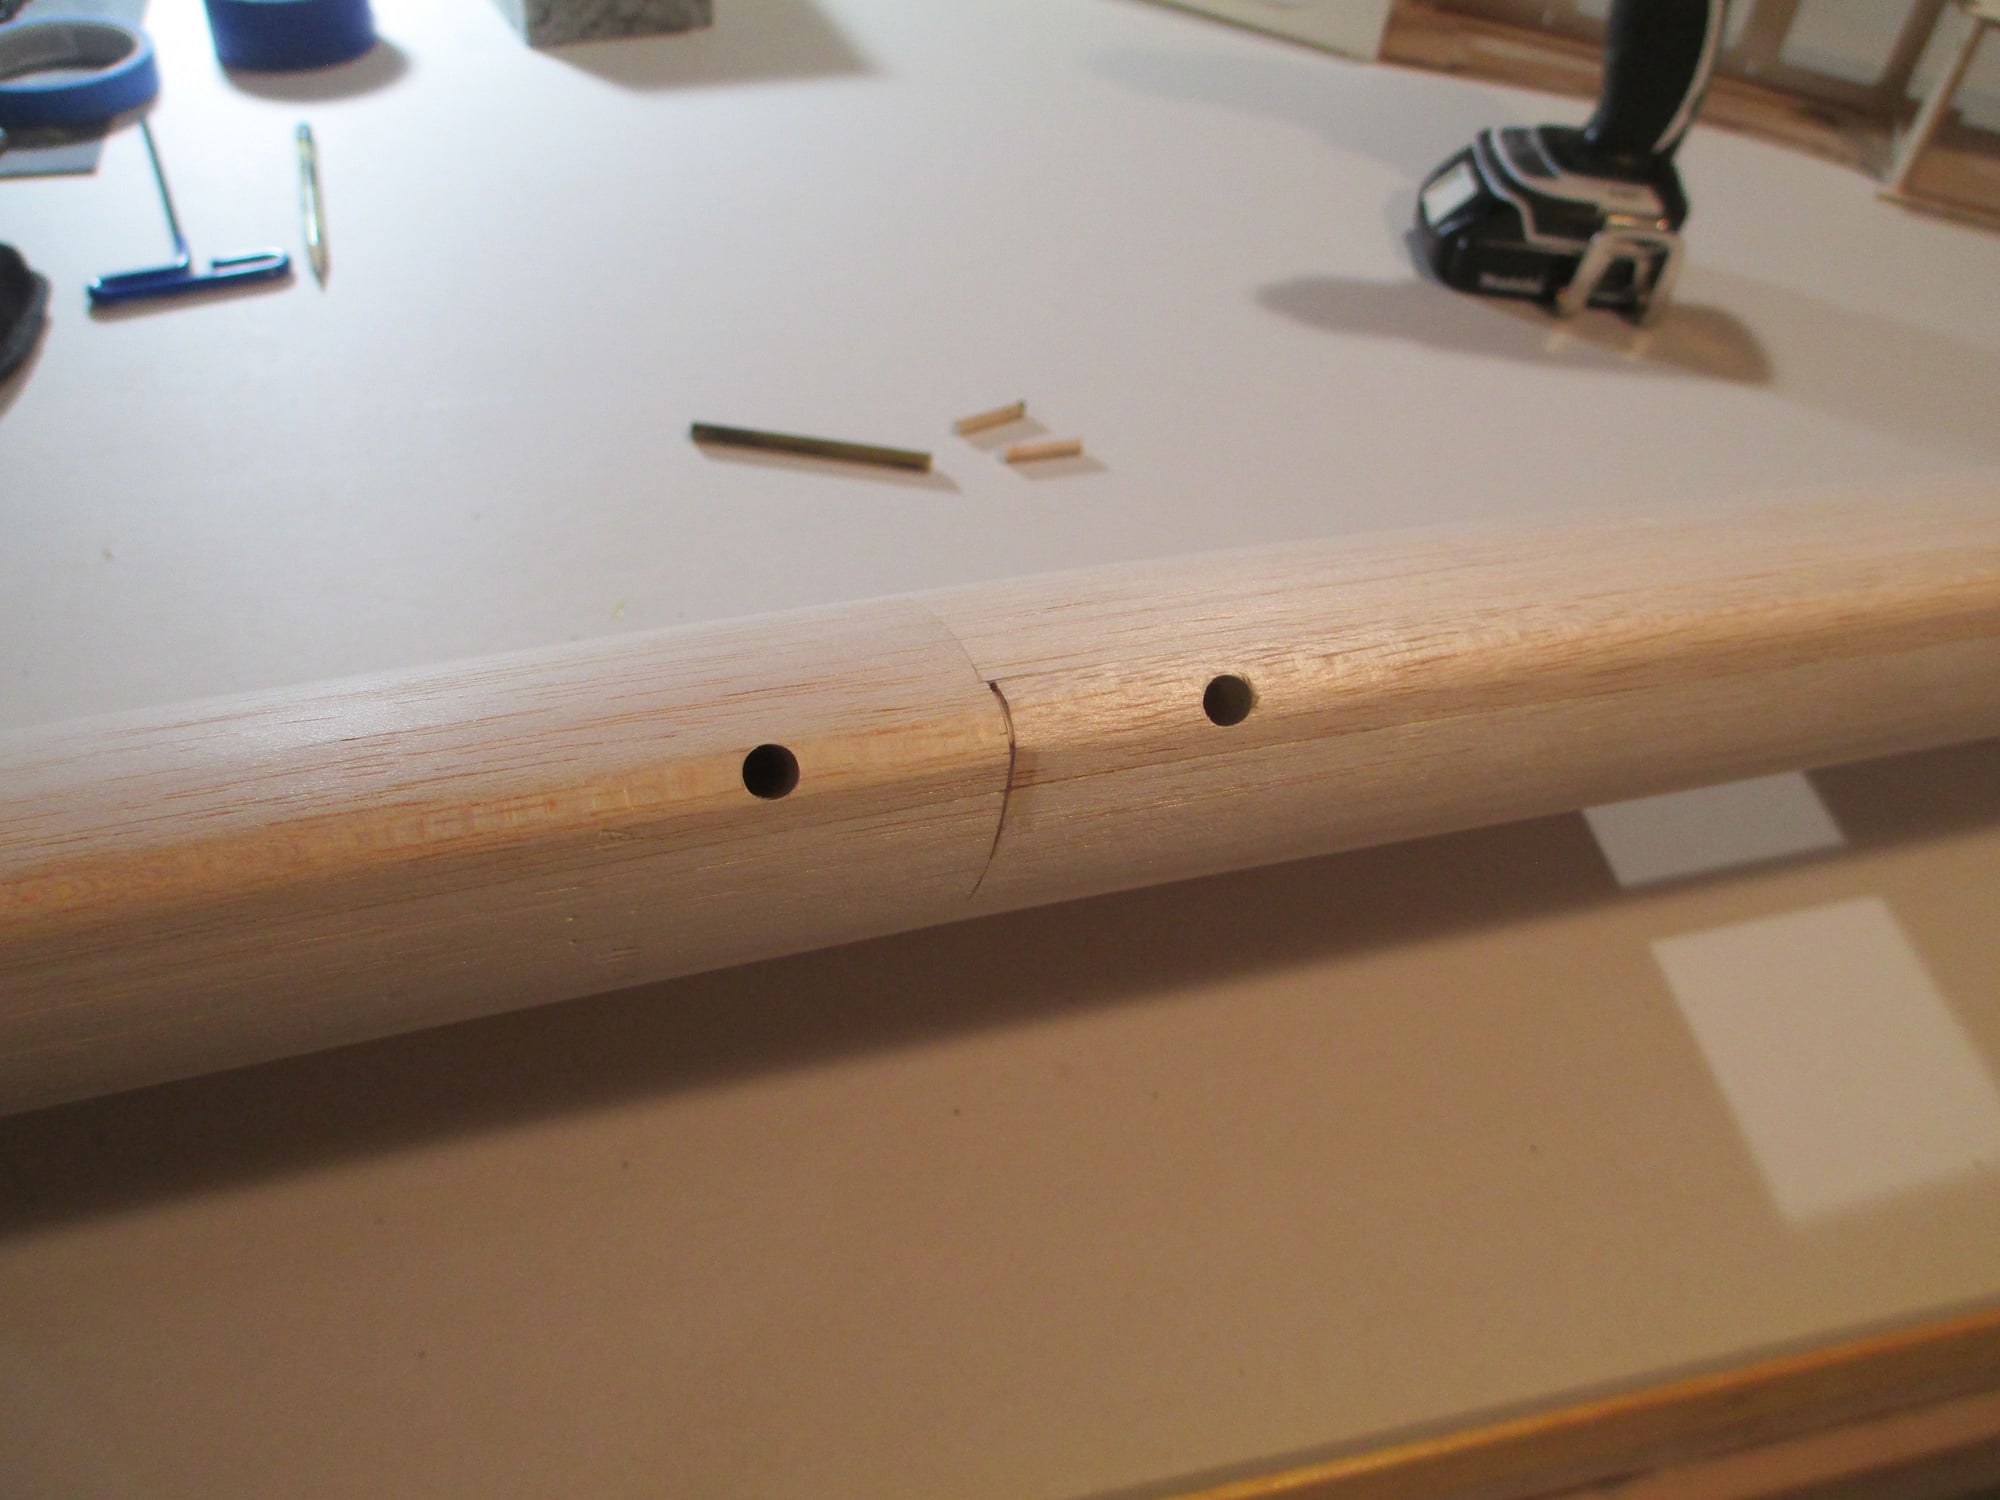
This is what the holes look like completed.
Builder's Tip: Don't epoxy your pins in yet as all they will do is get in your way when covering the wing. They can be epoxied AFTER the wing is covered...
Last edited by VincentJ; 04-07-2019 at 05:24 AM.
 04-07-2019, 01:44 PM
#86
Thread Starter
I'm sure that you can relate that at some point in time while building you had to drill wing bolt mount holes. Your results were maybe not what you had expected or planned.  Drilling straight, using a hand drill can be a daunting task, not to mention having the hole hit your mark on a small hardwood block beneath the wing that you can't even see. You measure, you take your time, you recheck, but when you pull the wing off to check your work, your worst fears are realized. Or, maybe the angle of the hole is off causing unnecessary stress under the head of the nylon wing bolt.
Let me show you how I do it...
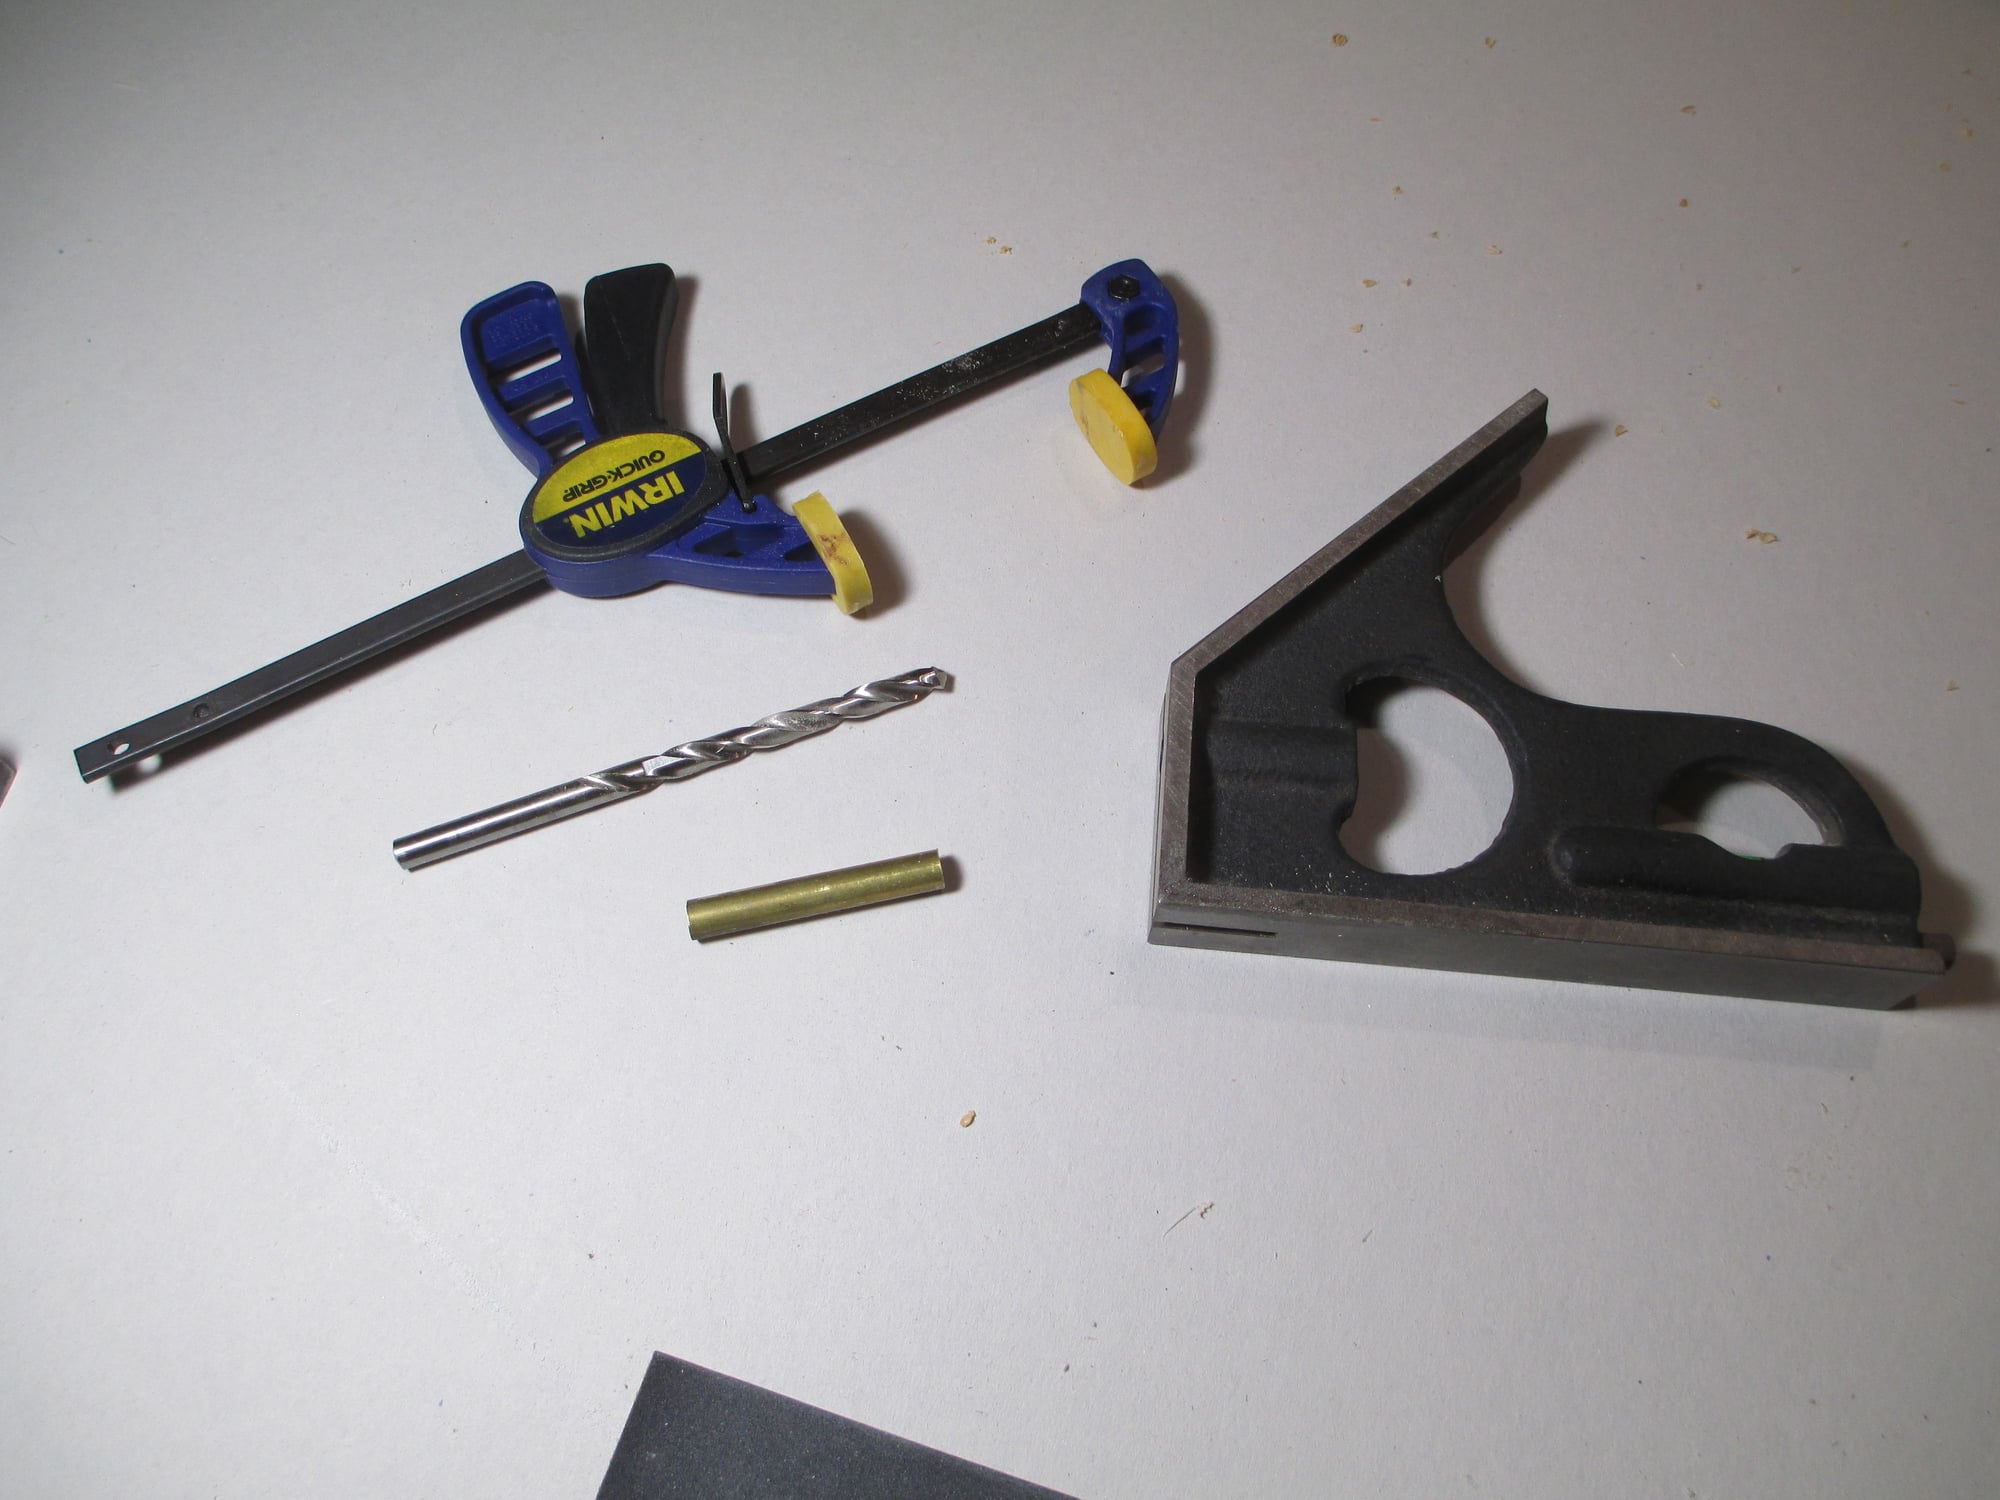
Some of these items may seem odd, but stay with me if you want straight and true wing bolts...
Take the sliding ruler off your square. The slot in your square will work just like a poor mans "V" block.
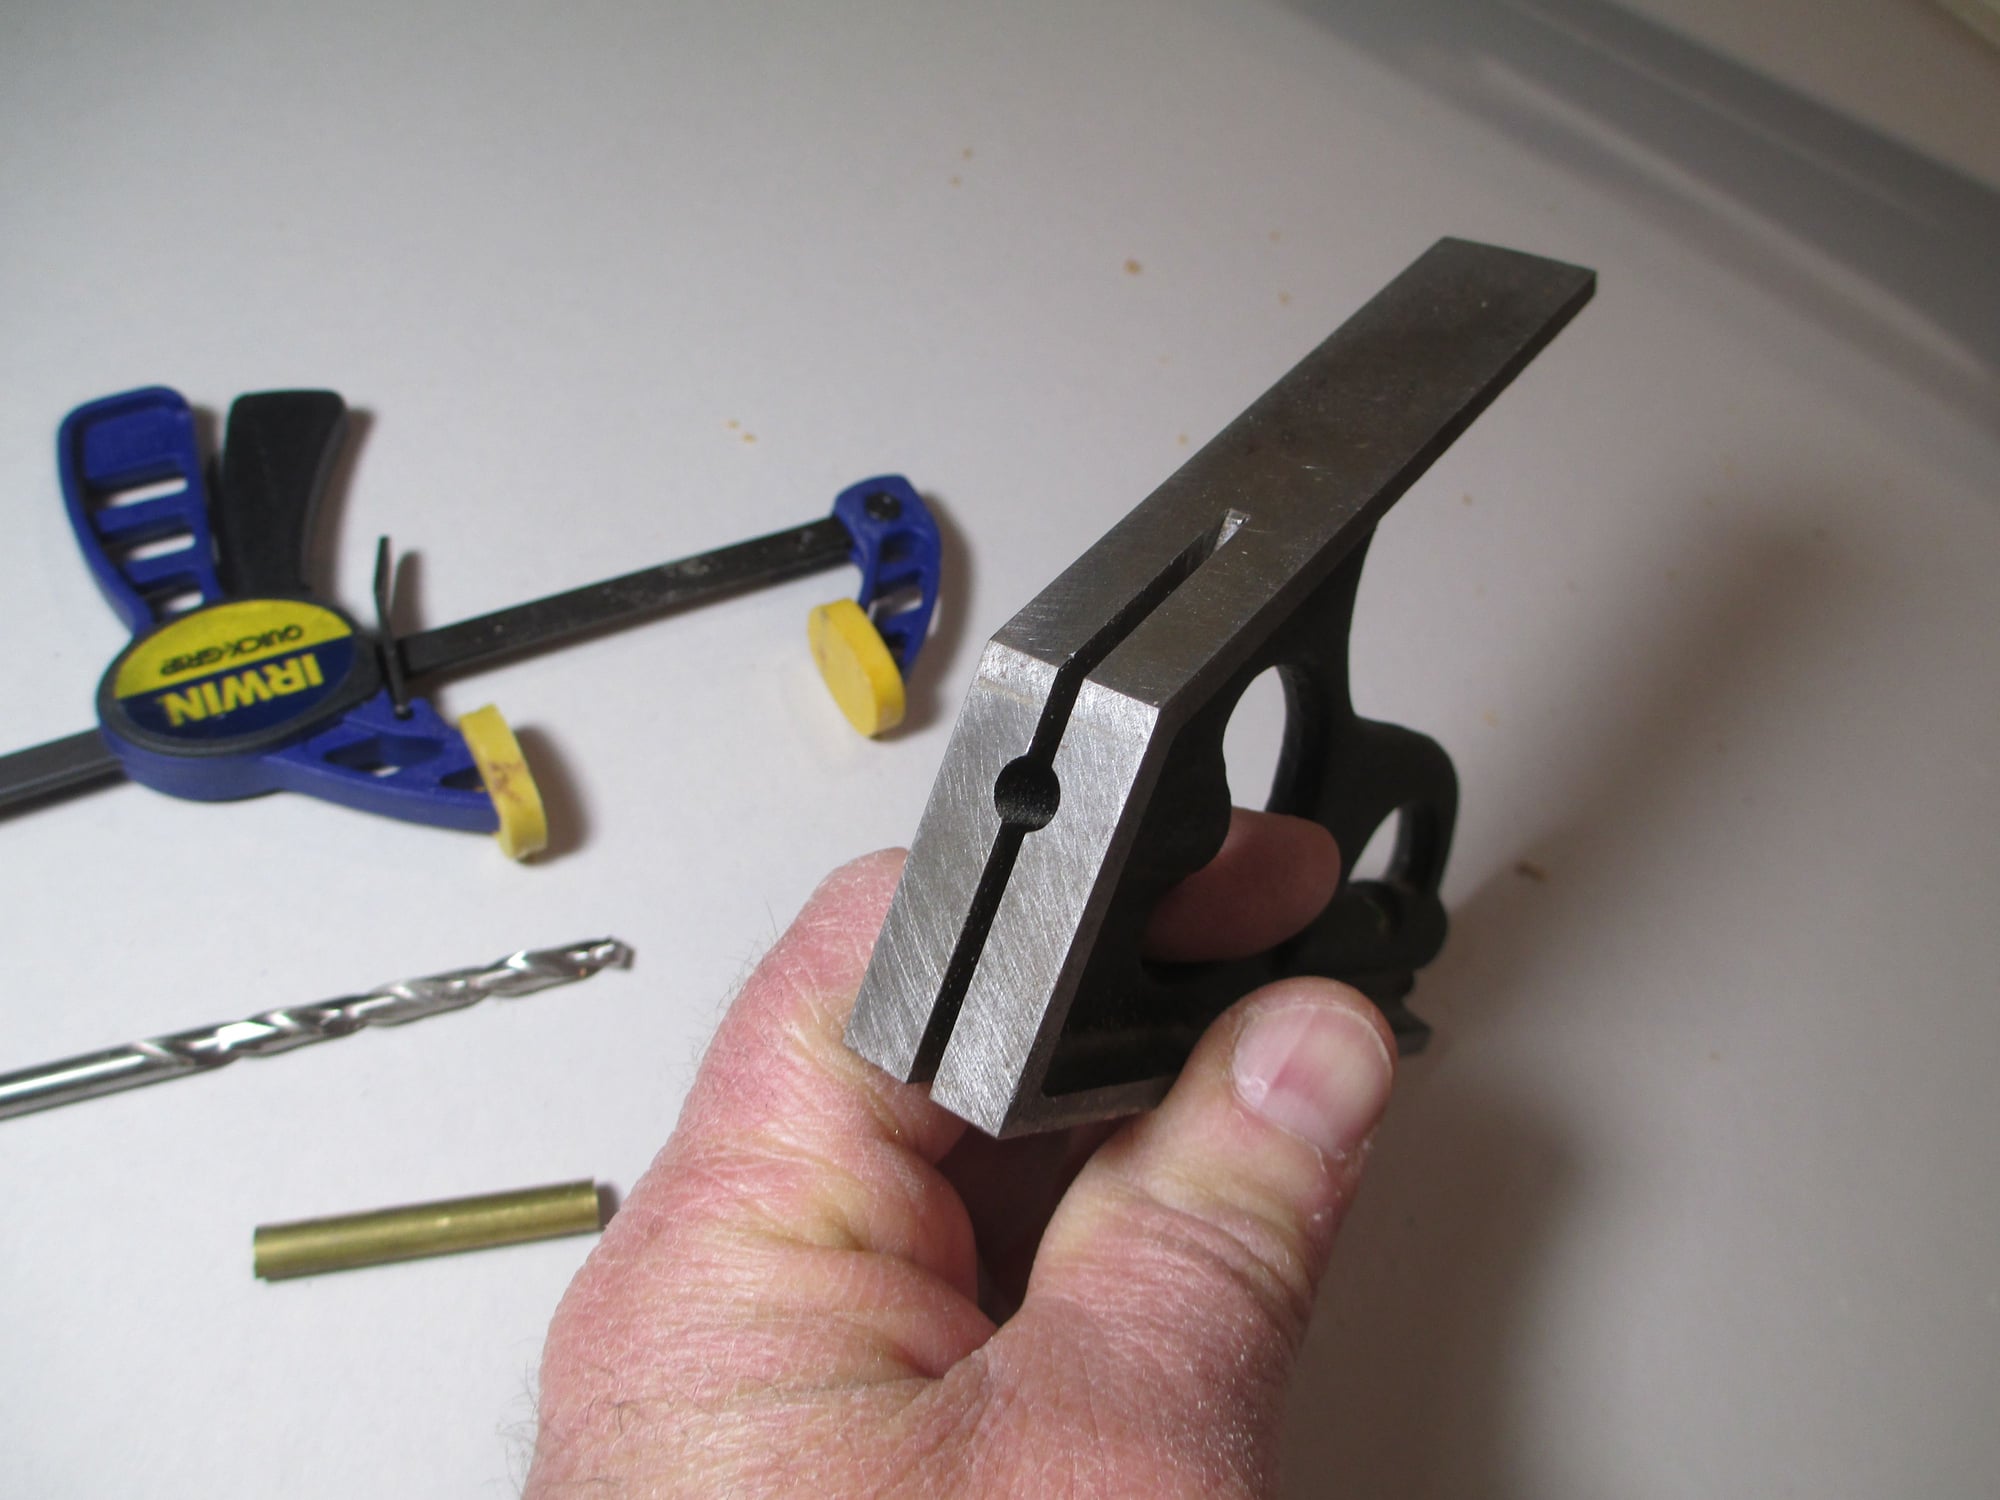
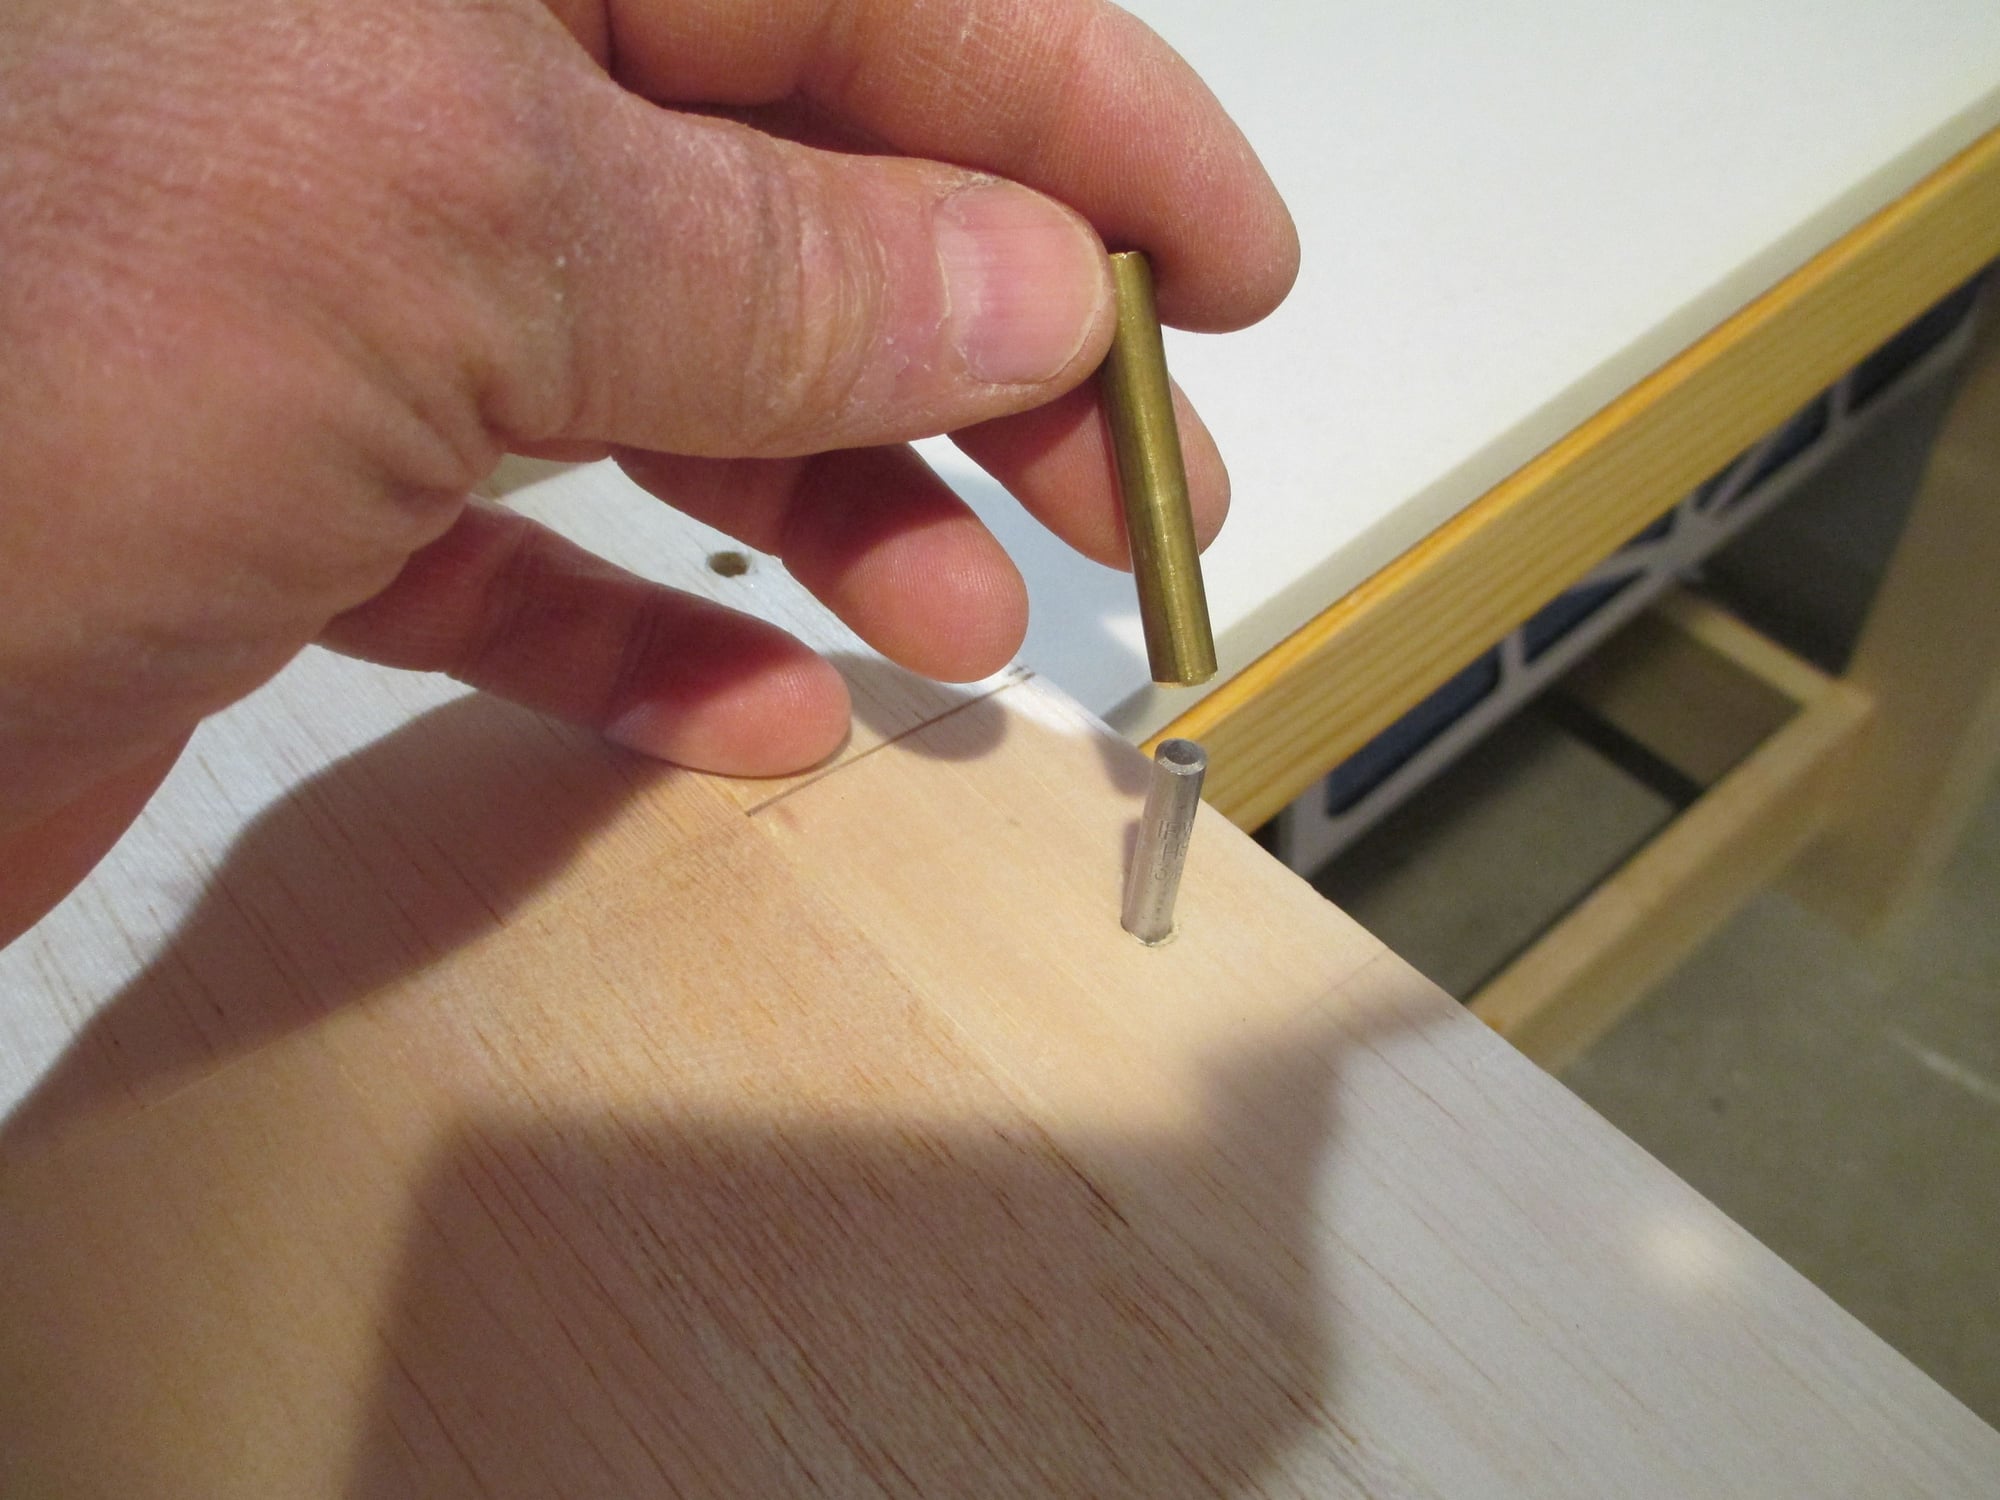
The wing bolt holes in the Basswood blocking need to be drilled 13/64" in order to tap them to 1/4-20. So I'm using a 1/4" brass tubing cut to length, only this time it will act as a drill guide. Just clamp the tubing in the slot of the square.
The square and the brass tube are now the perfect fixture for you to take your 13/64" drill bit and slip it inside the brass tubing.
The holes are perfectly positioned and at the correct angle to ensure that the nylon wing bolt head sits flush on the wings surface.
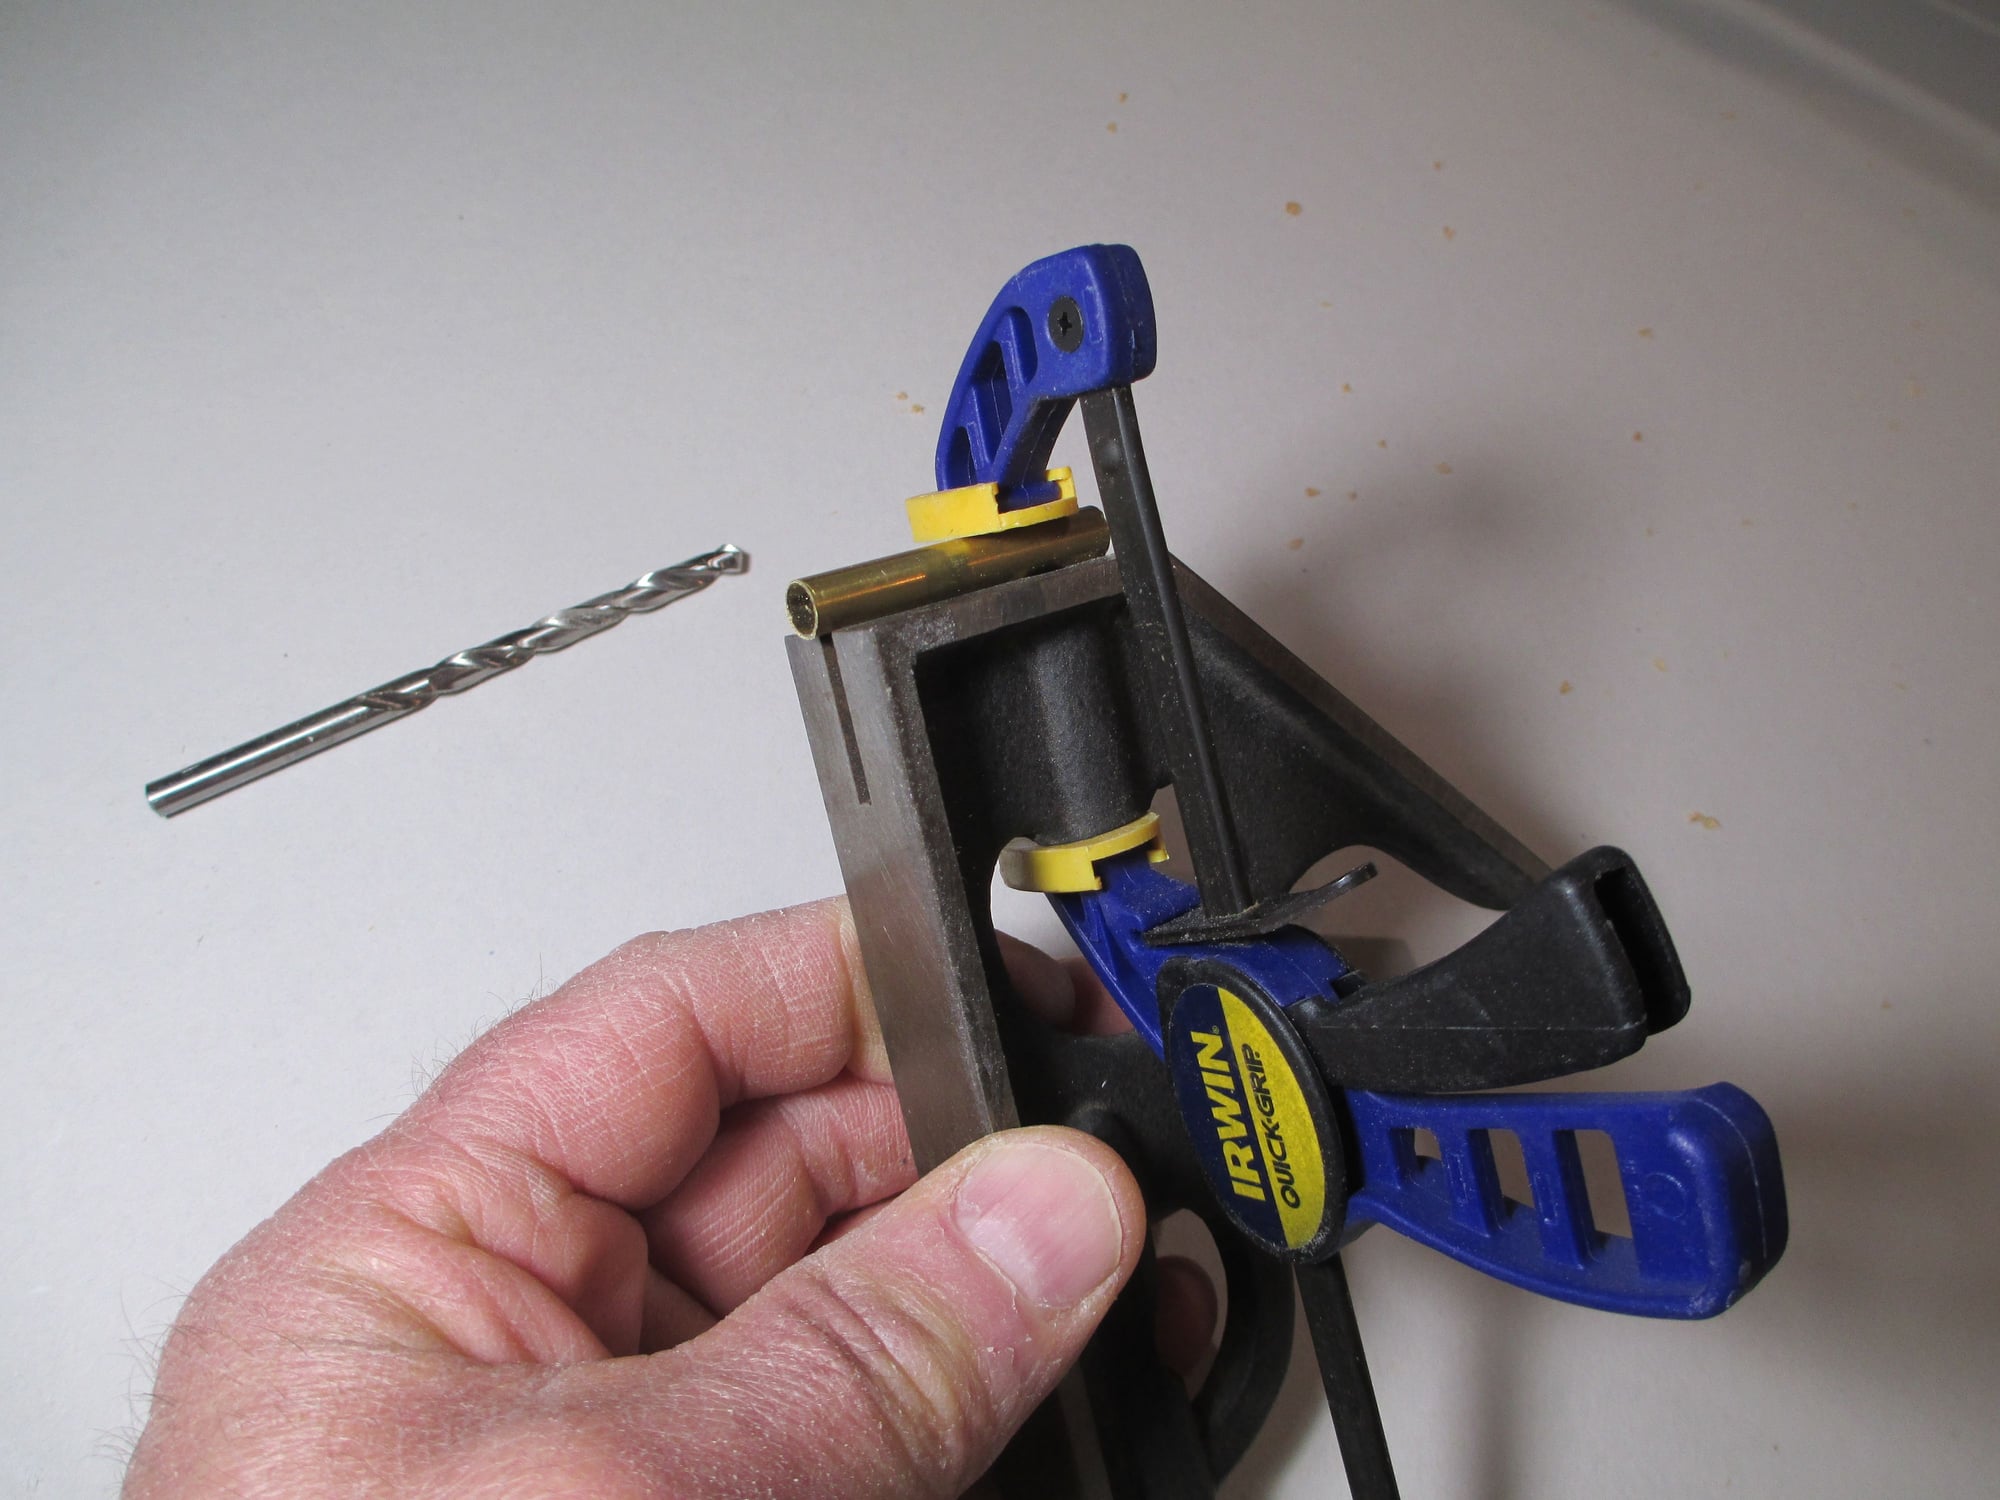
Now take the 13/64" drill bit and put it through the wing bolt hole that you have already drilled. Place the 1/4" brass tubing over the drill bit and now the drill bit will act as the guide to give you the final 1/4" wing bolt hole that is needed.
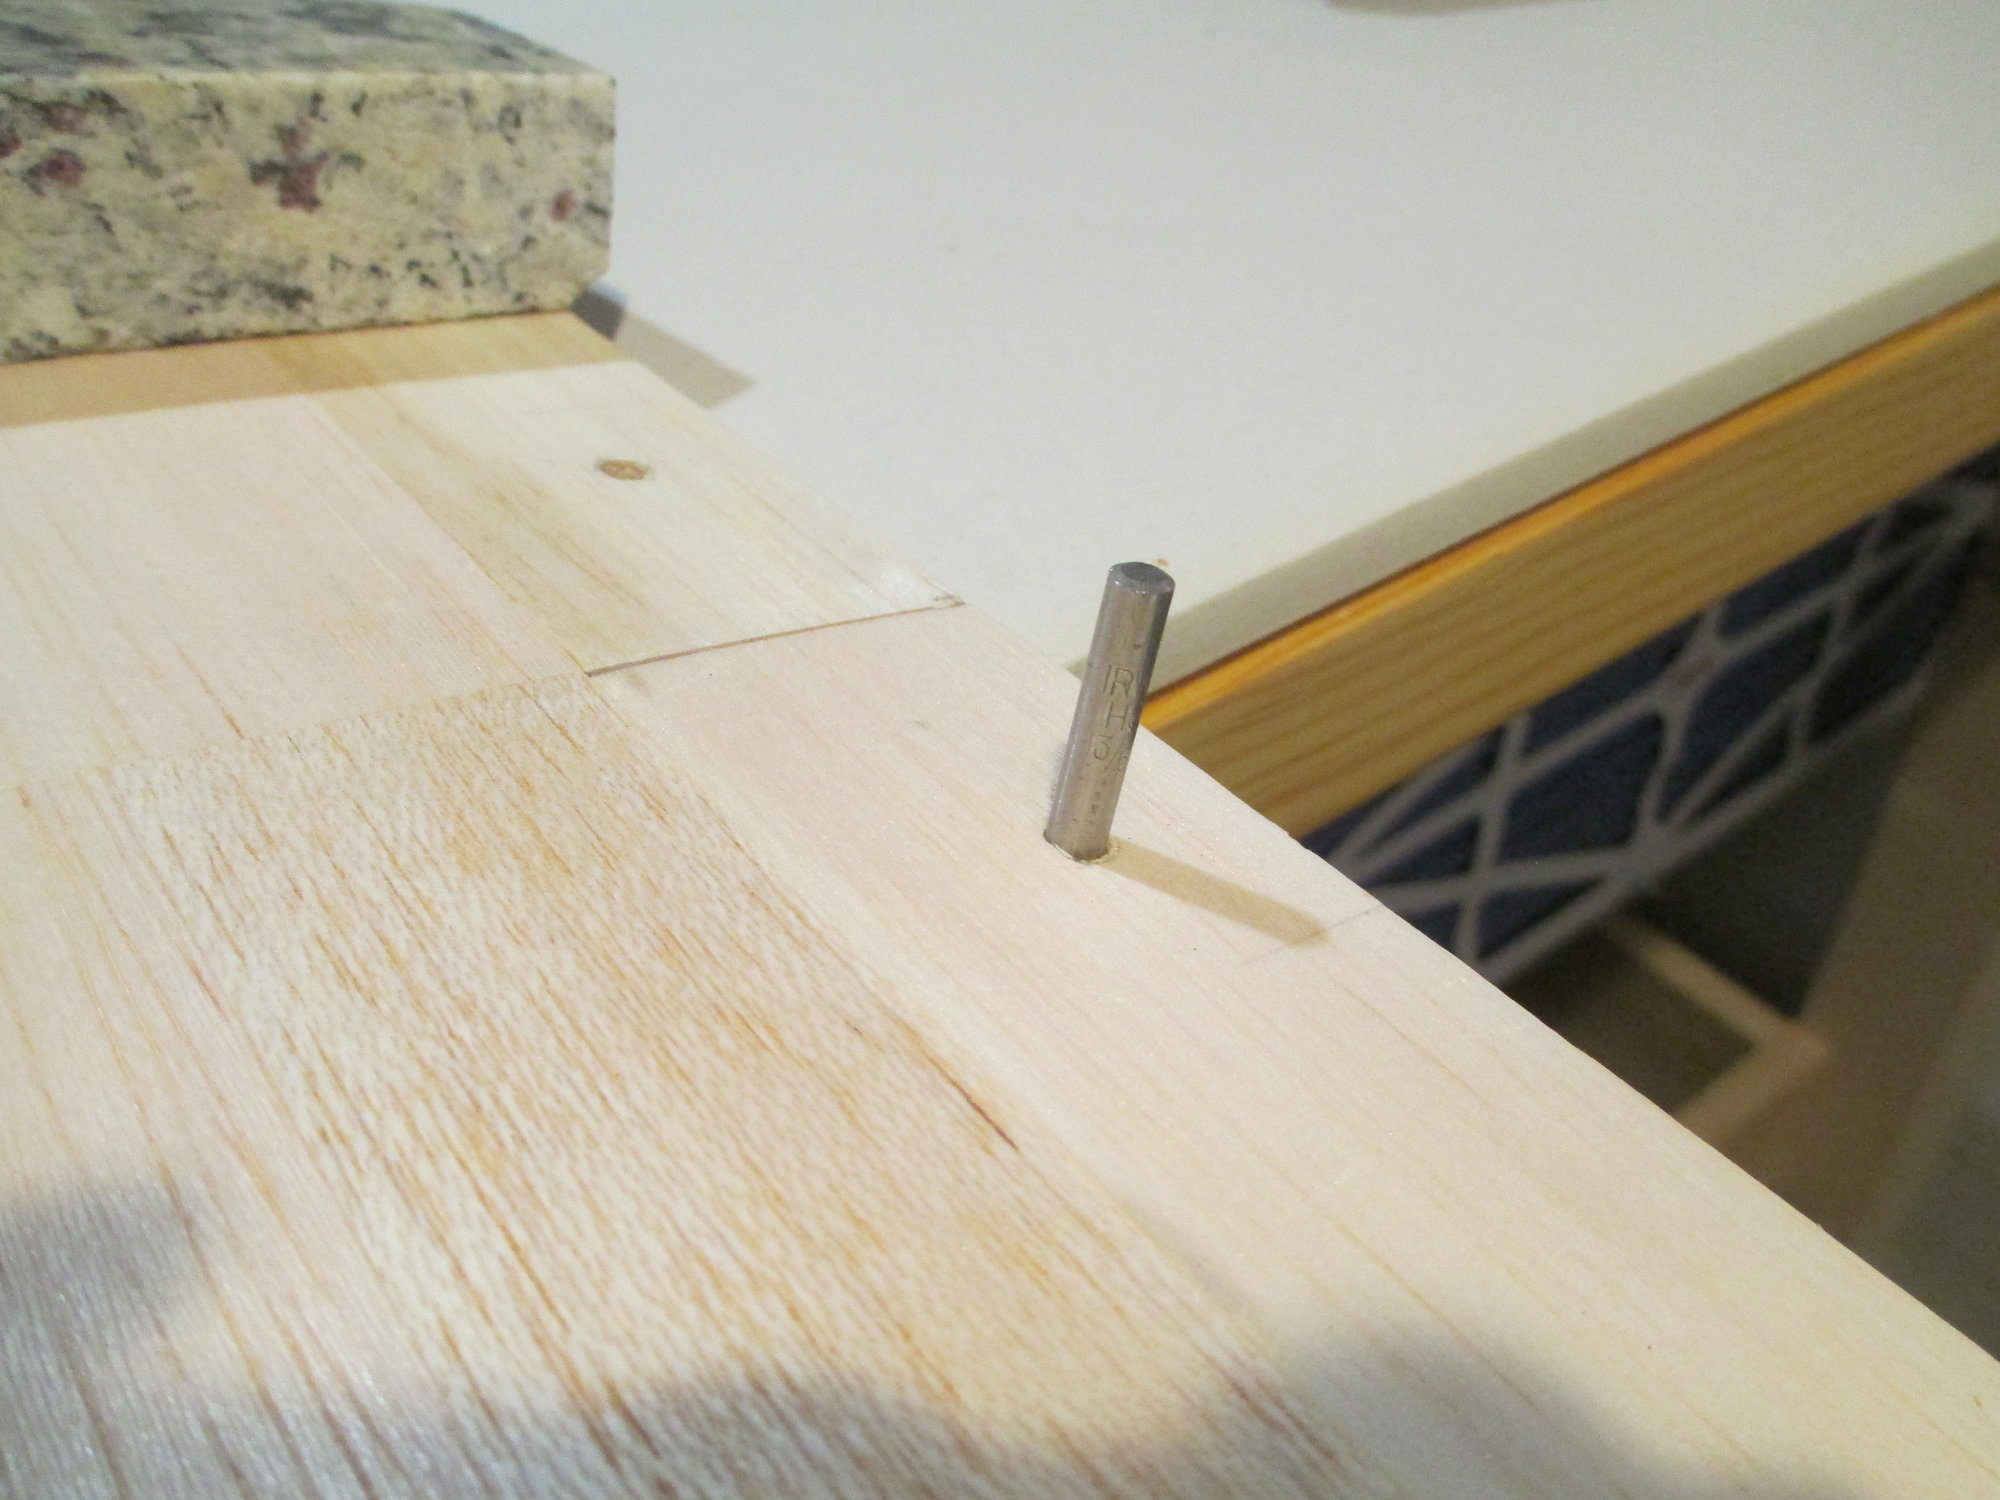
This is what it should look like with the brass tubing over the drill bit.
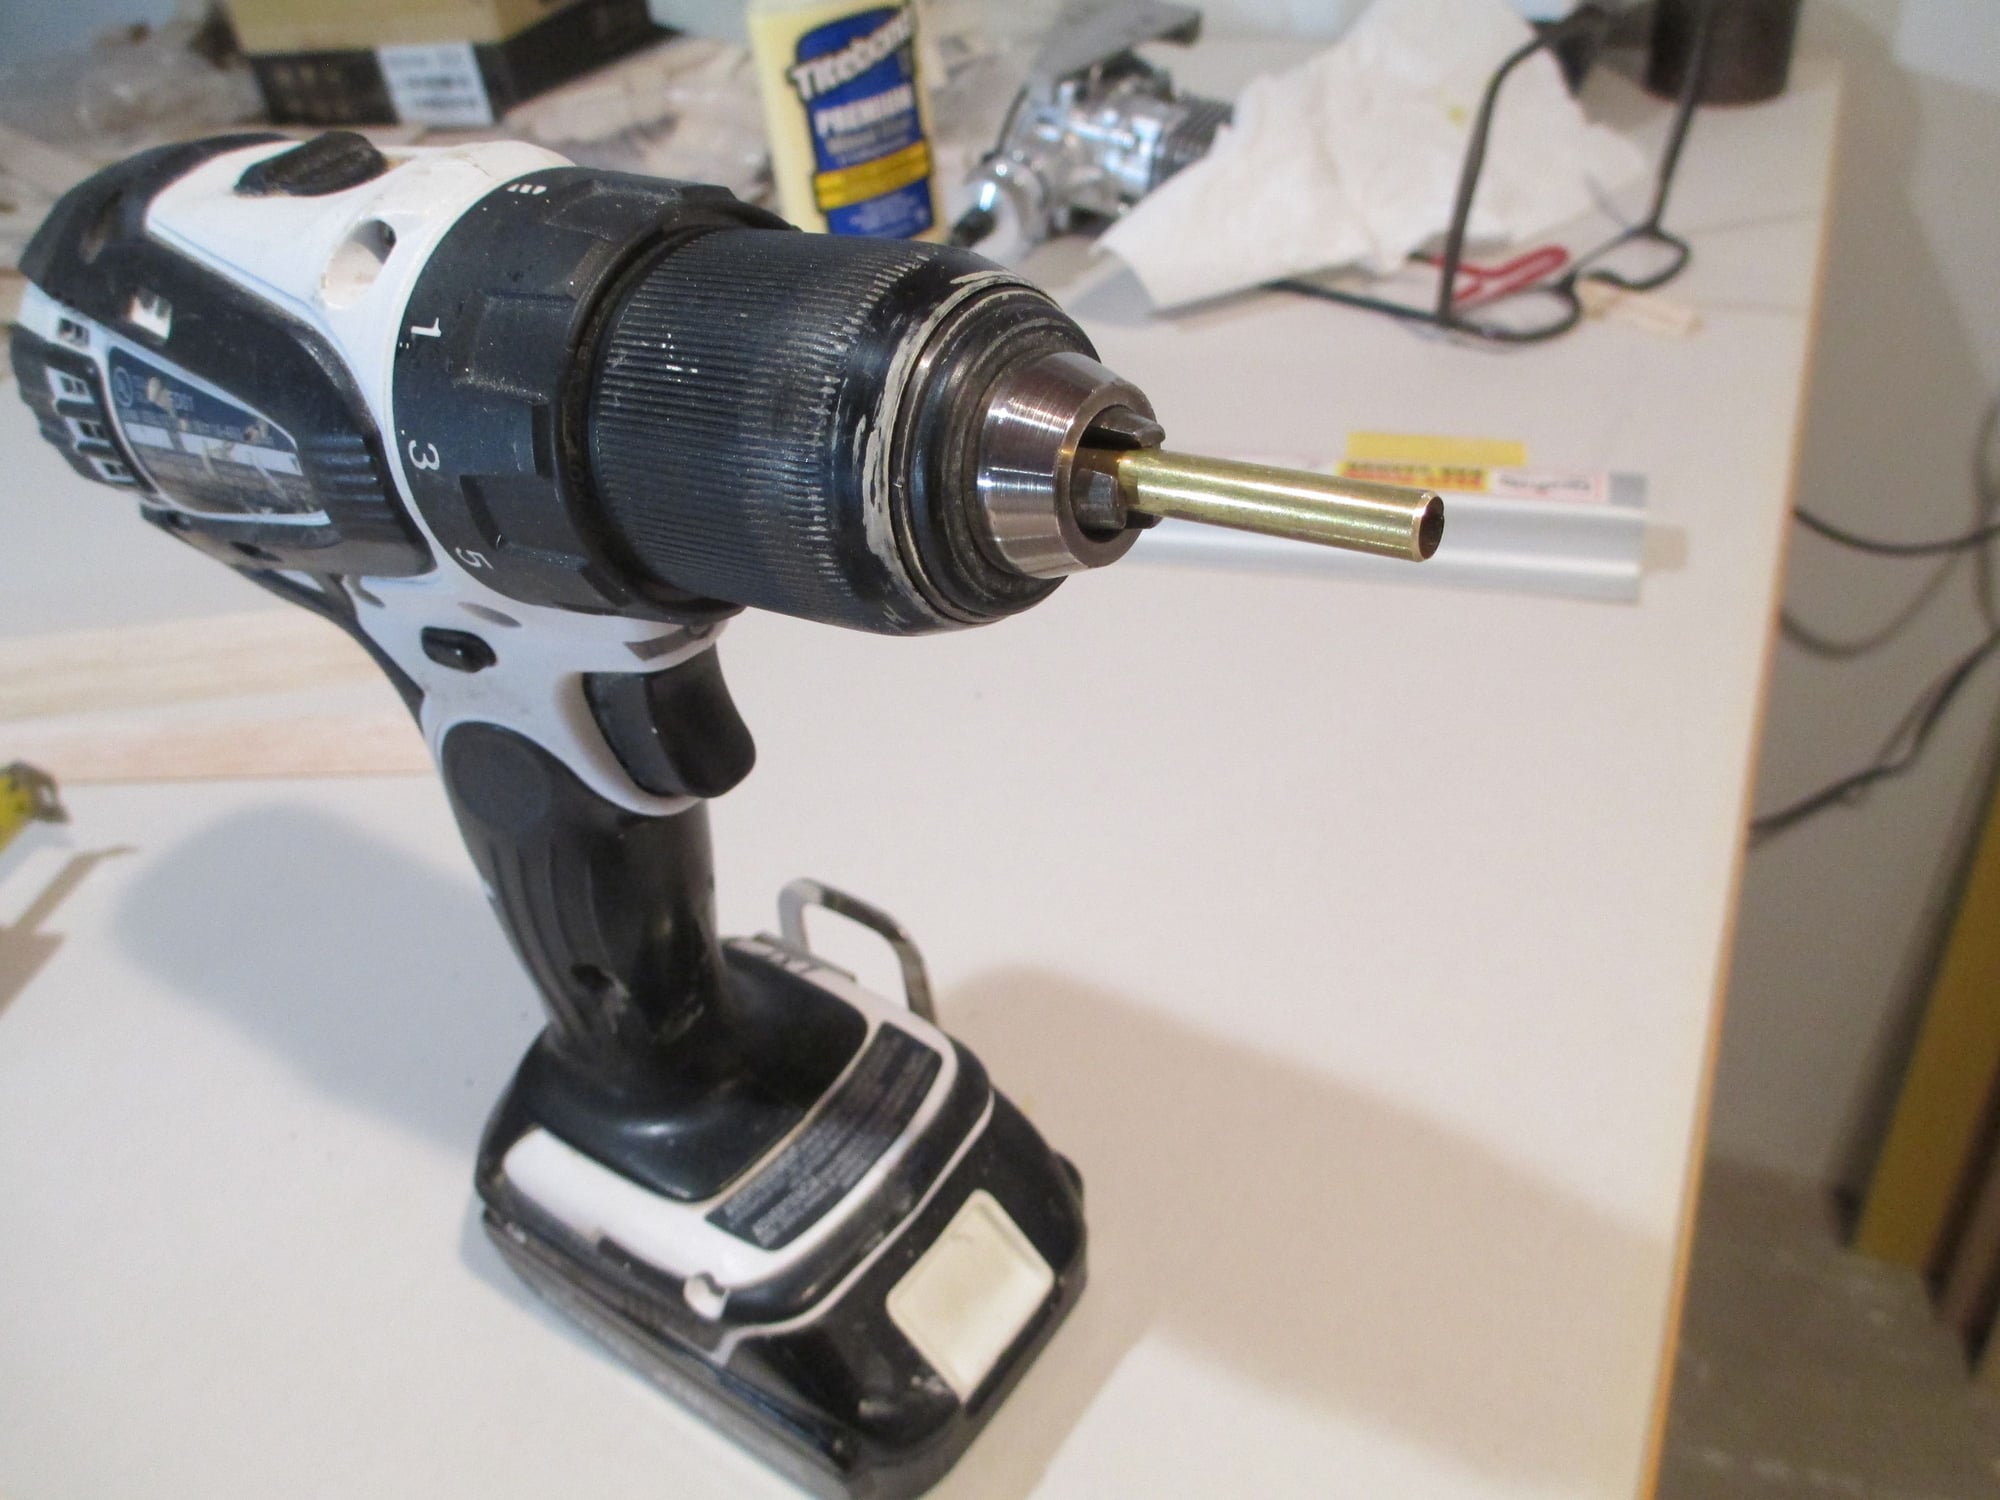
Chuck the brass tube in your cordless and drill away with confidence!
Tapping the basswood blocks to 1/4-20.
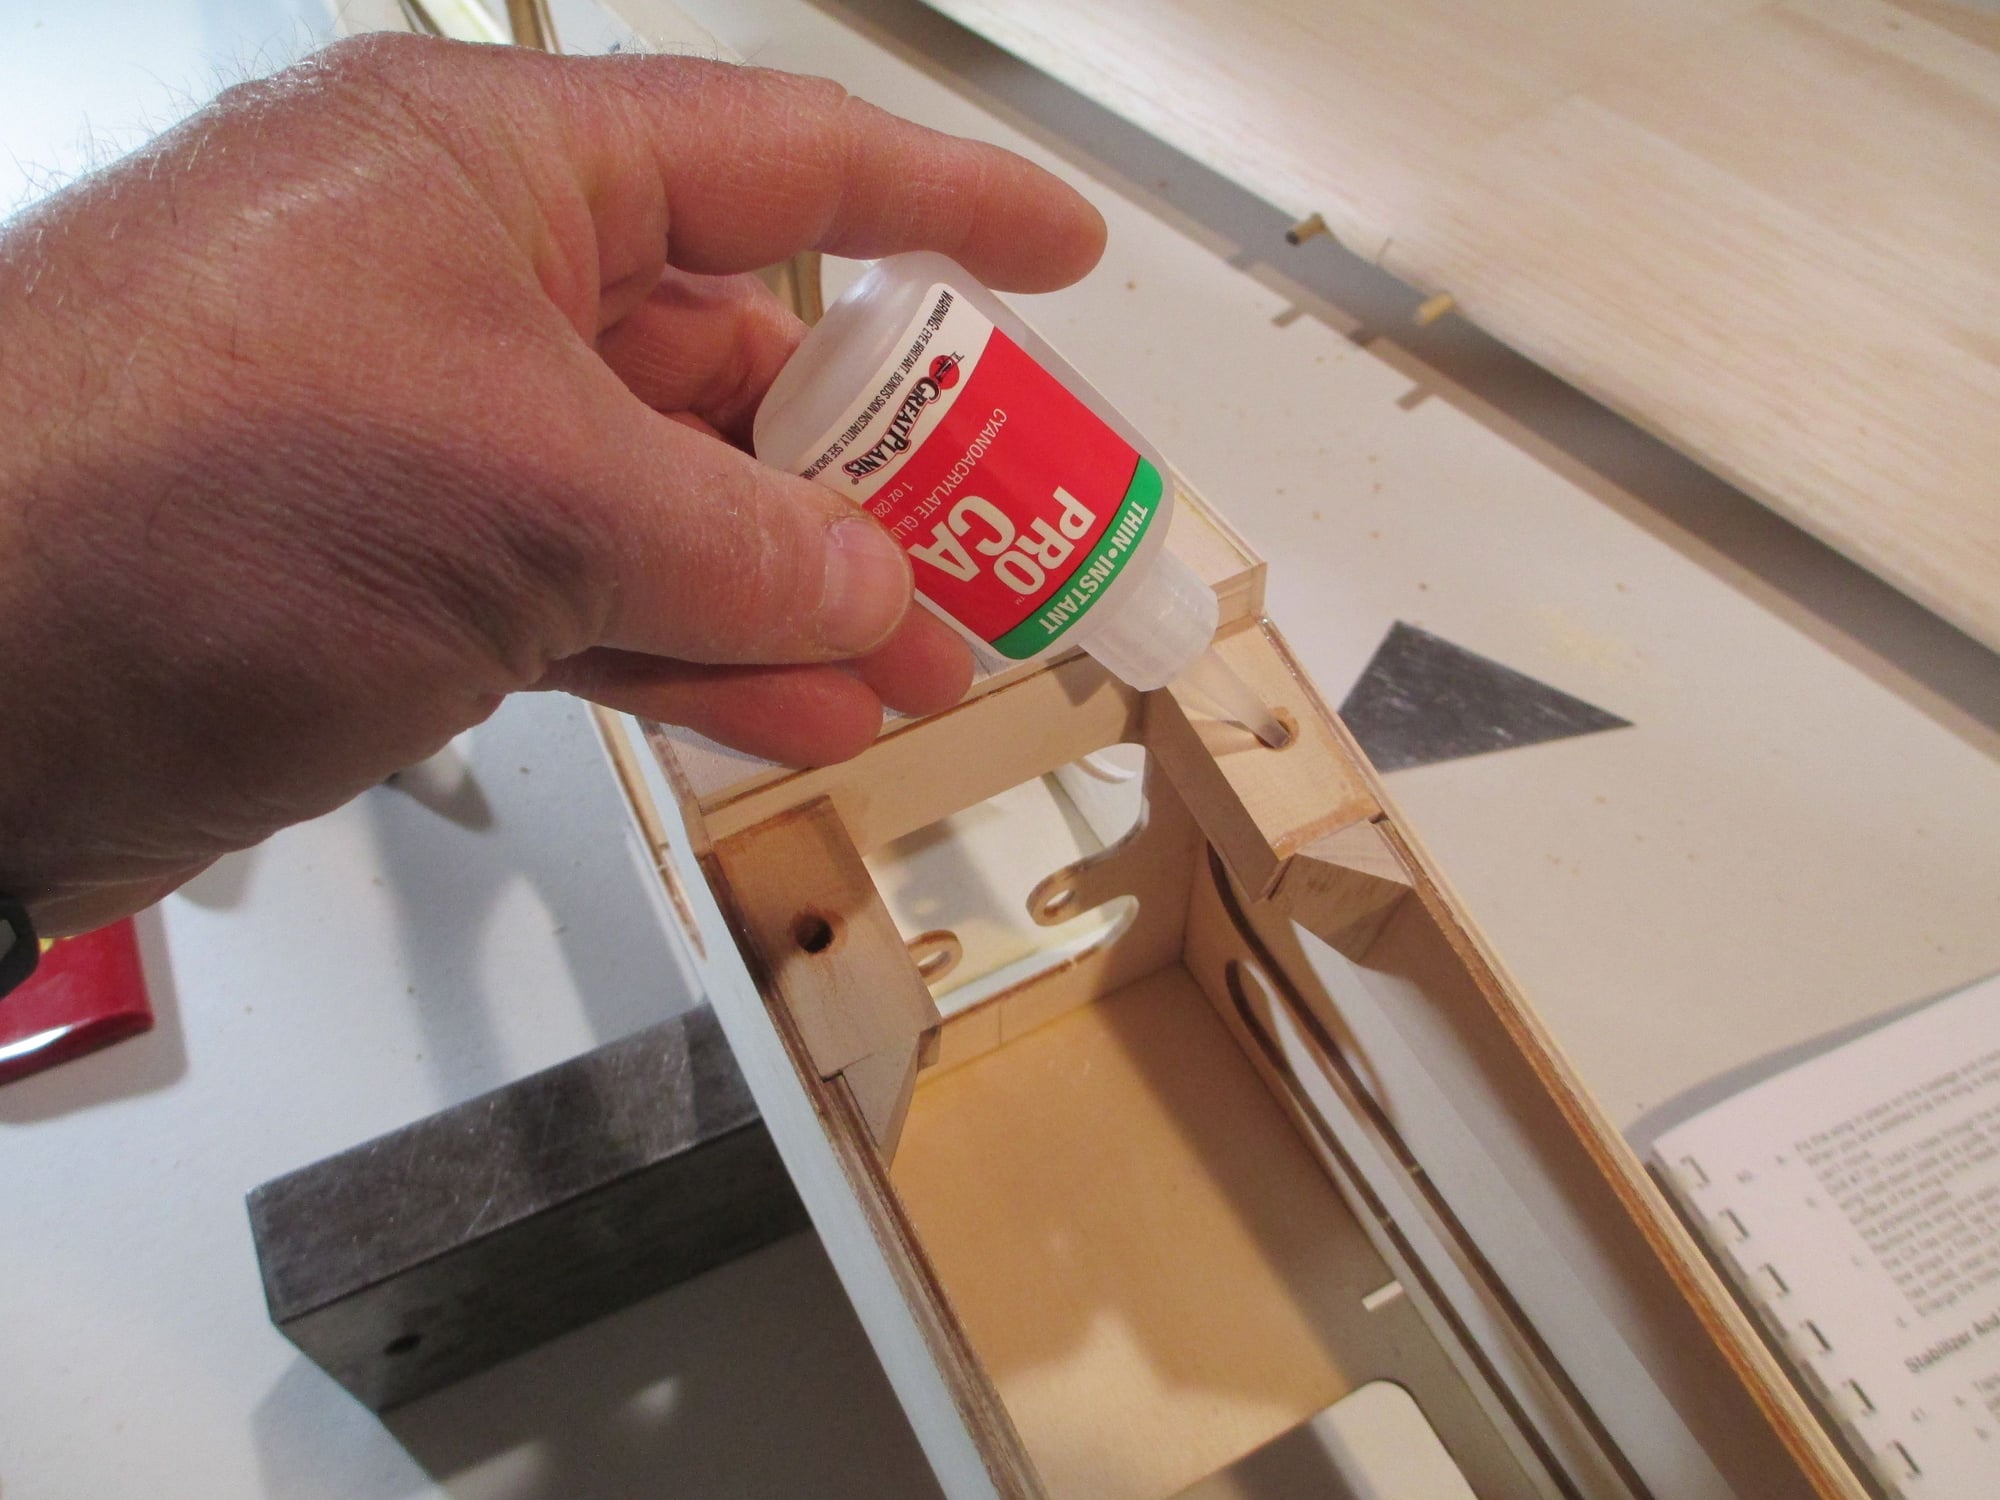
I use very little CA while I'm building, but this is one of those times that I do use it. Liberally apply the CA to harden the wood threads. Once cured, run the tap though again...
Drilling straight, using a hand drill can be a daunting task, not to mention having the hole hit your mark on a small hardwood block beneath the wing that you can't even see. You measure, you take your time, you recheck, but when you pull the wing off to check your work, your worst fears are realized. Or, maybe the angle of the hole is off causing unnecessary stress under the head of the nylon wing bolt.Let me show you how I do it...
Some of these items may seem odd, but stay with me if you want straight and true wing bolts...
Take the sliding ruler off your square. The slot in your square will work just like a poor mans "V" block.
The wing bolt holes in the Basswood blocking need to be drilled 13/64" in order to tap them to 1/4-20. So I'm using a 1/4" brass tubing cut to length, only this time it will act as a drill guide. Just clamp the tubing in the slot of the square.
The square and the brass tube are now the perfect fixture for you to take your 13/64" drill bit and slip it inside the brass tubing.
The holes are perfectly positioned and at the correct angle to ensure that the nylon wing bolt head sits flush on the wings surface.
Now take the 13/64" drill bit and put it through the wing bolt hole that you have already drilled. Place the 1/4" brass tubing over the drill bit and now the drill bit will act as the guide to give you the final 1/4" wing bolt hole that is needed.
This is what it should look like with the brass tubing over the drill bit.
Chuck the brass tube in your cordless and drill away with confidence!
Tapping the basswood blocks to 1/4-20.
I use very little CA while I'm building, but this is one of those times that I do use it. Liberally apply the CA to harden the wood threads. Once cured, run the tap though again...
Last edited by VincentJ; 04-08-2019 at 03:41 AM.
04-07-2019, 02:08 PM
#87
Thread Starter
Now that the wing can now be fastened to the fuselage with wing bolts, let's see if the wing's incidence has changed as I had hoped.

Bingo! Good enough...
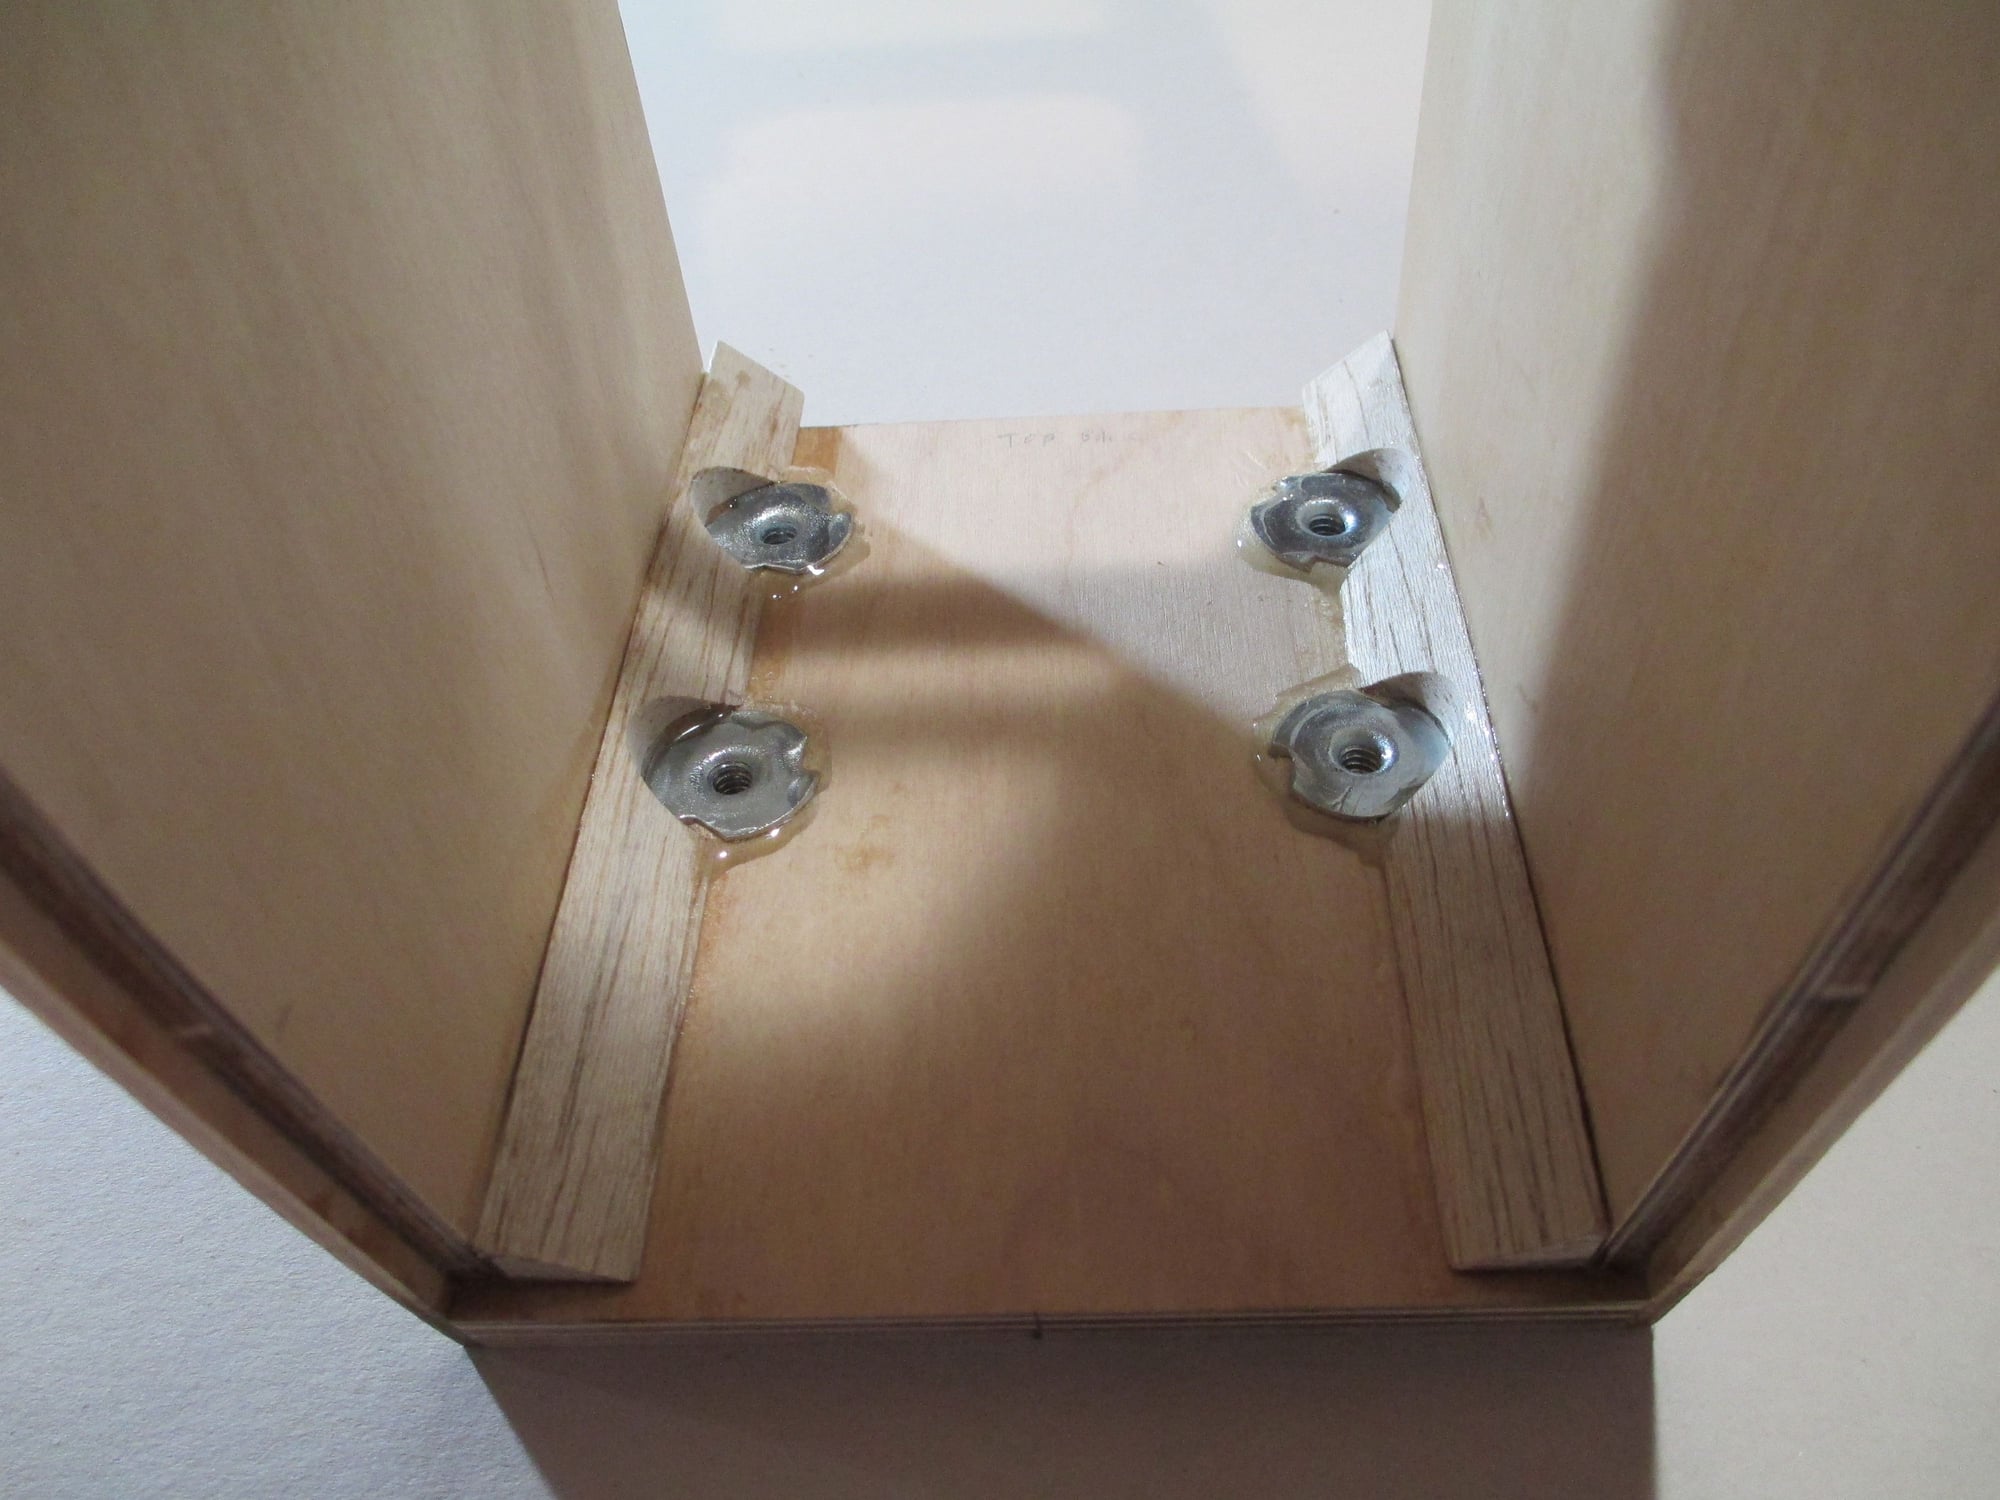
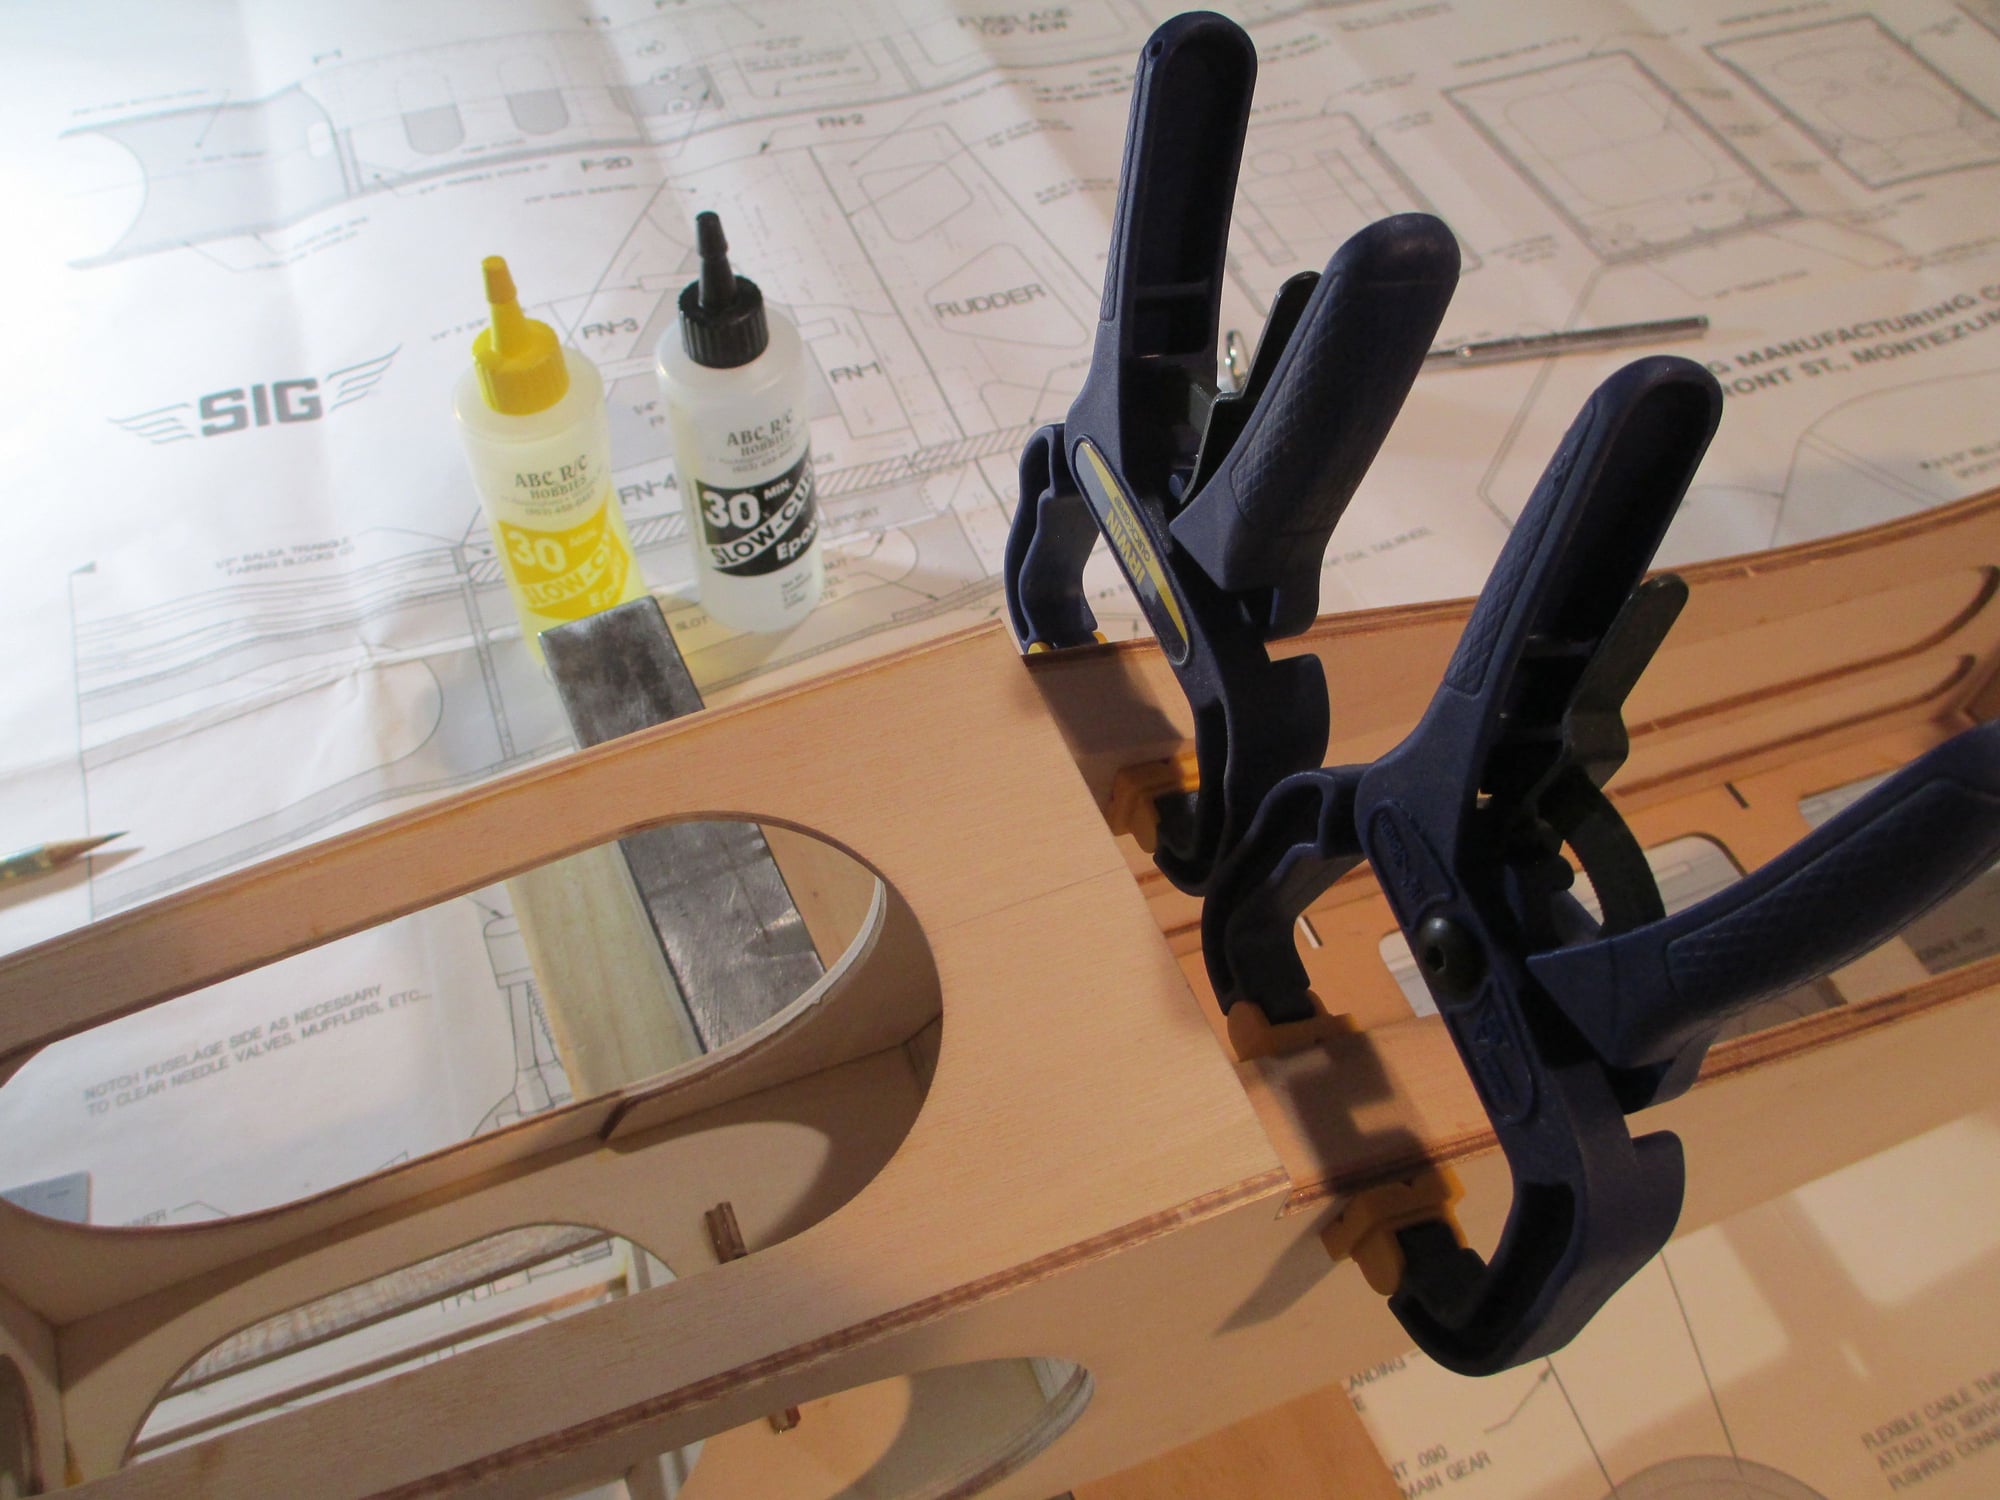
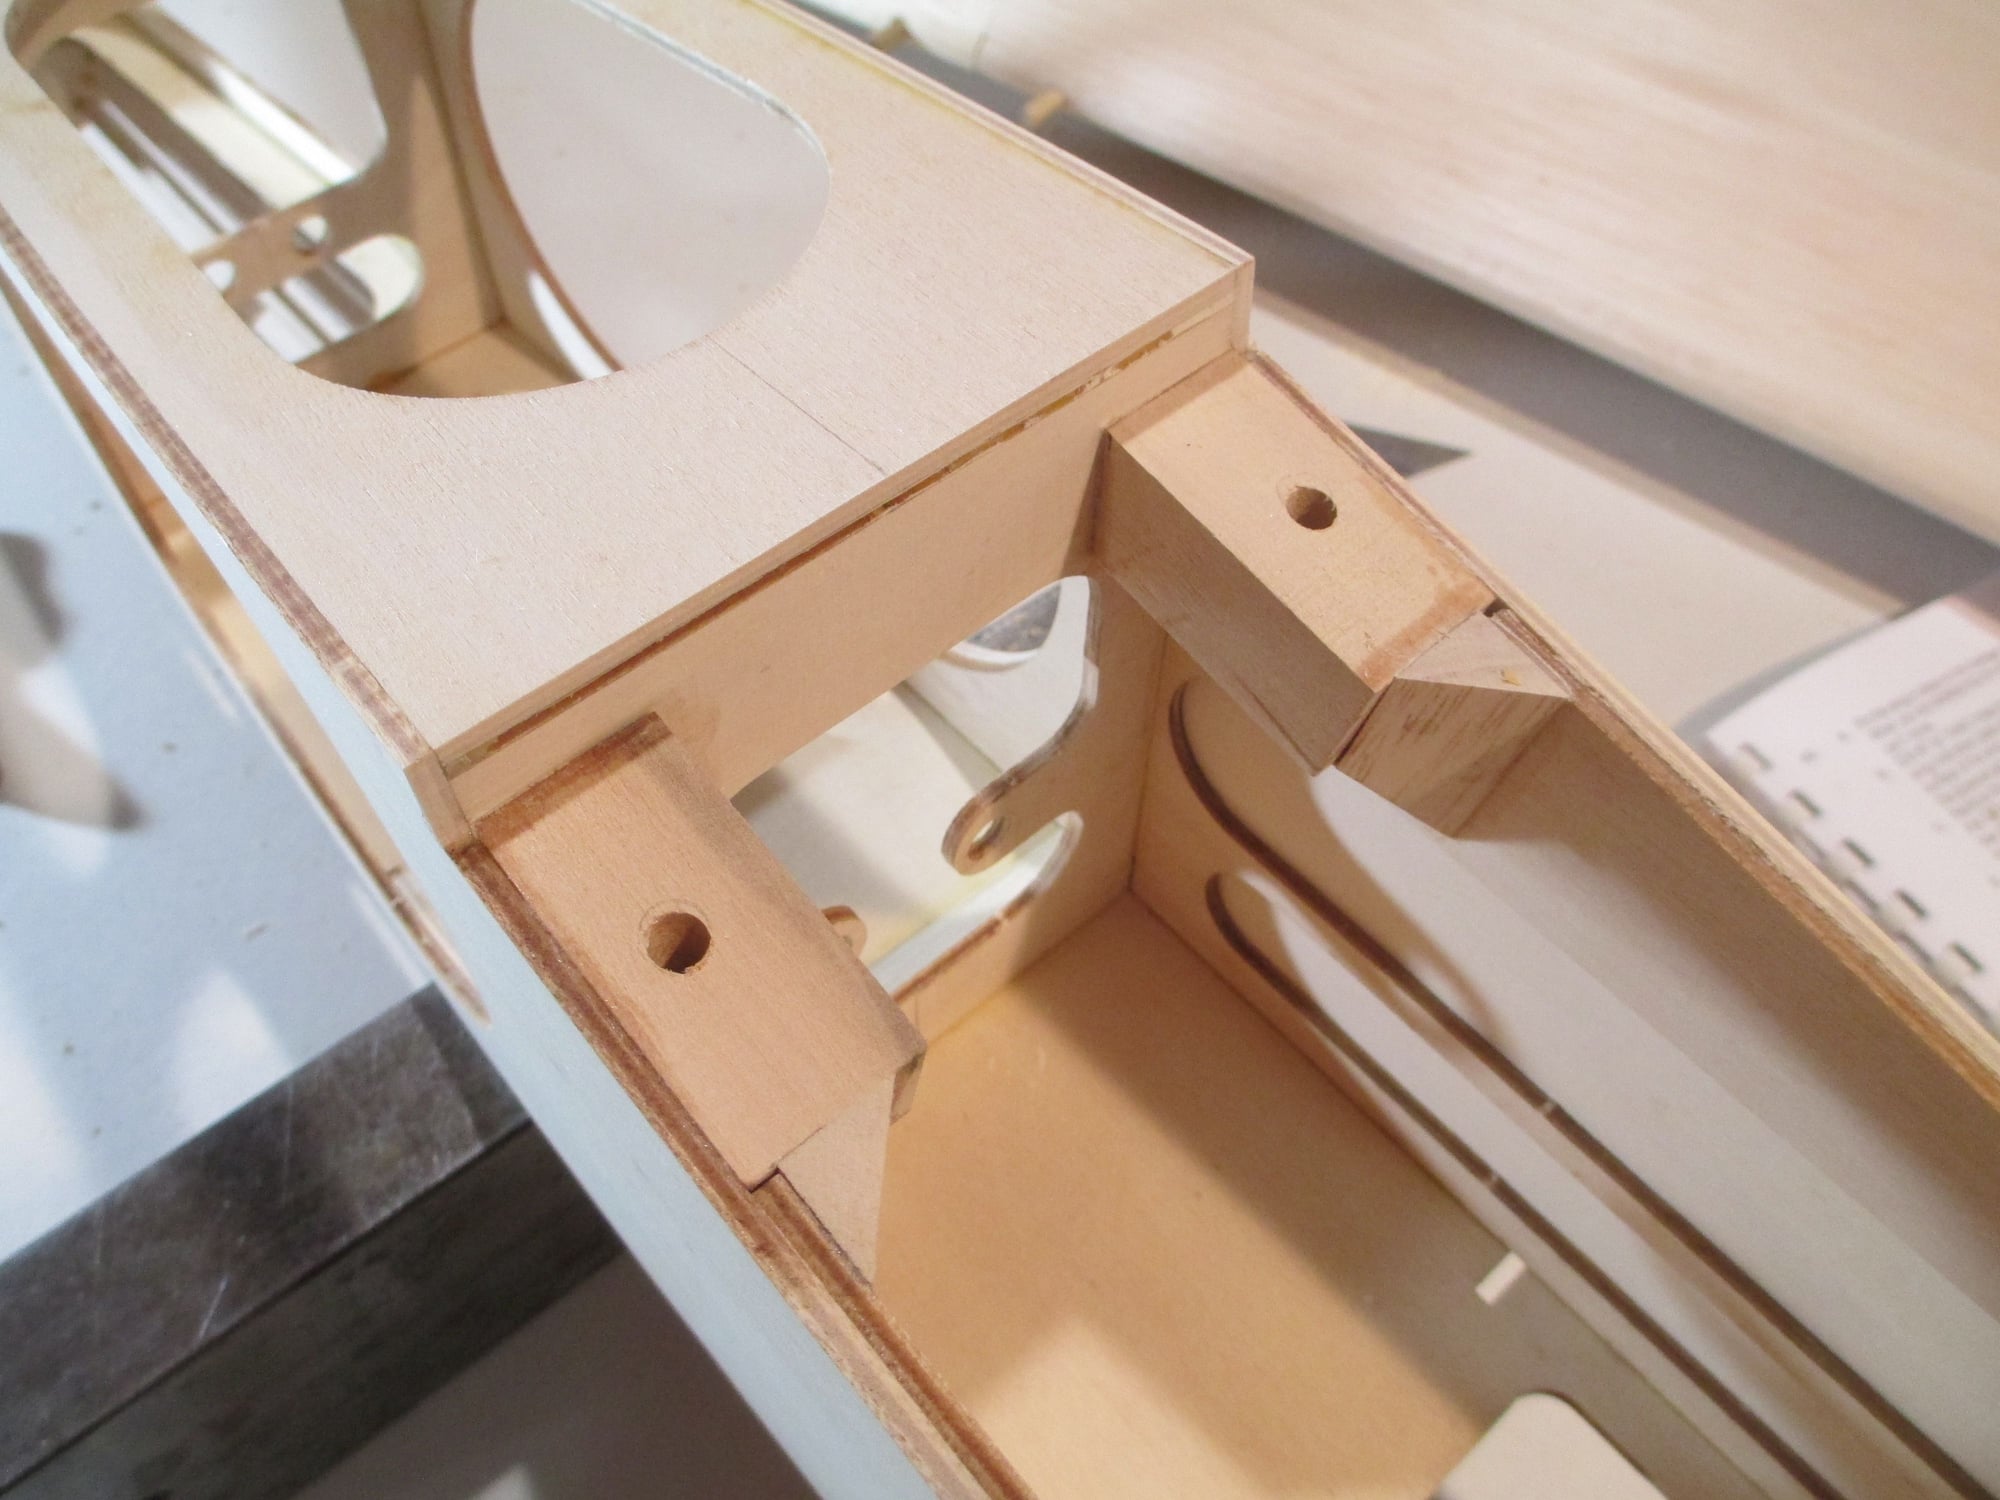
Decided to reinforce the firewall to the sides of the fuselage using tri-stock which is epoxied into place.
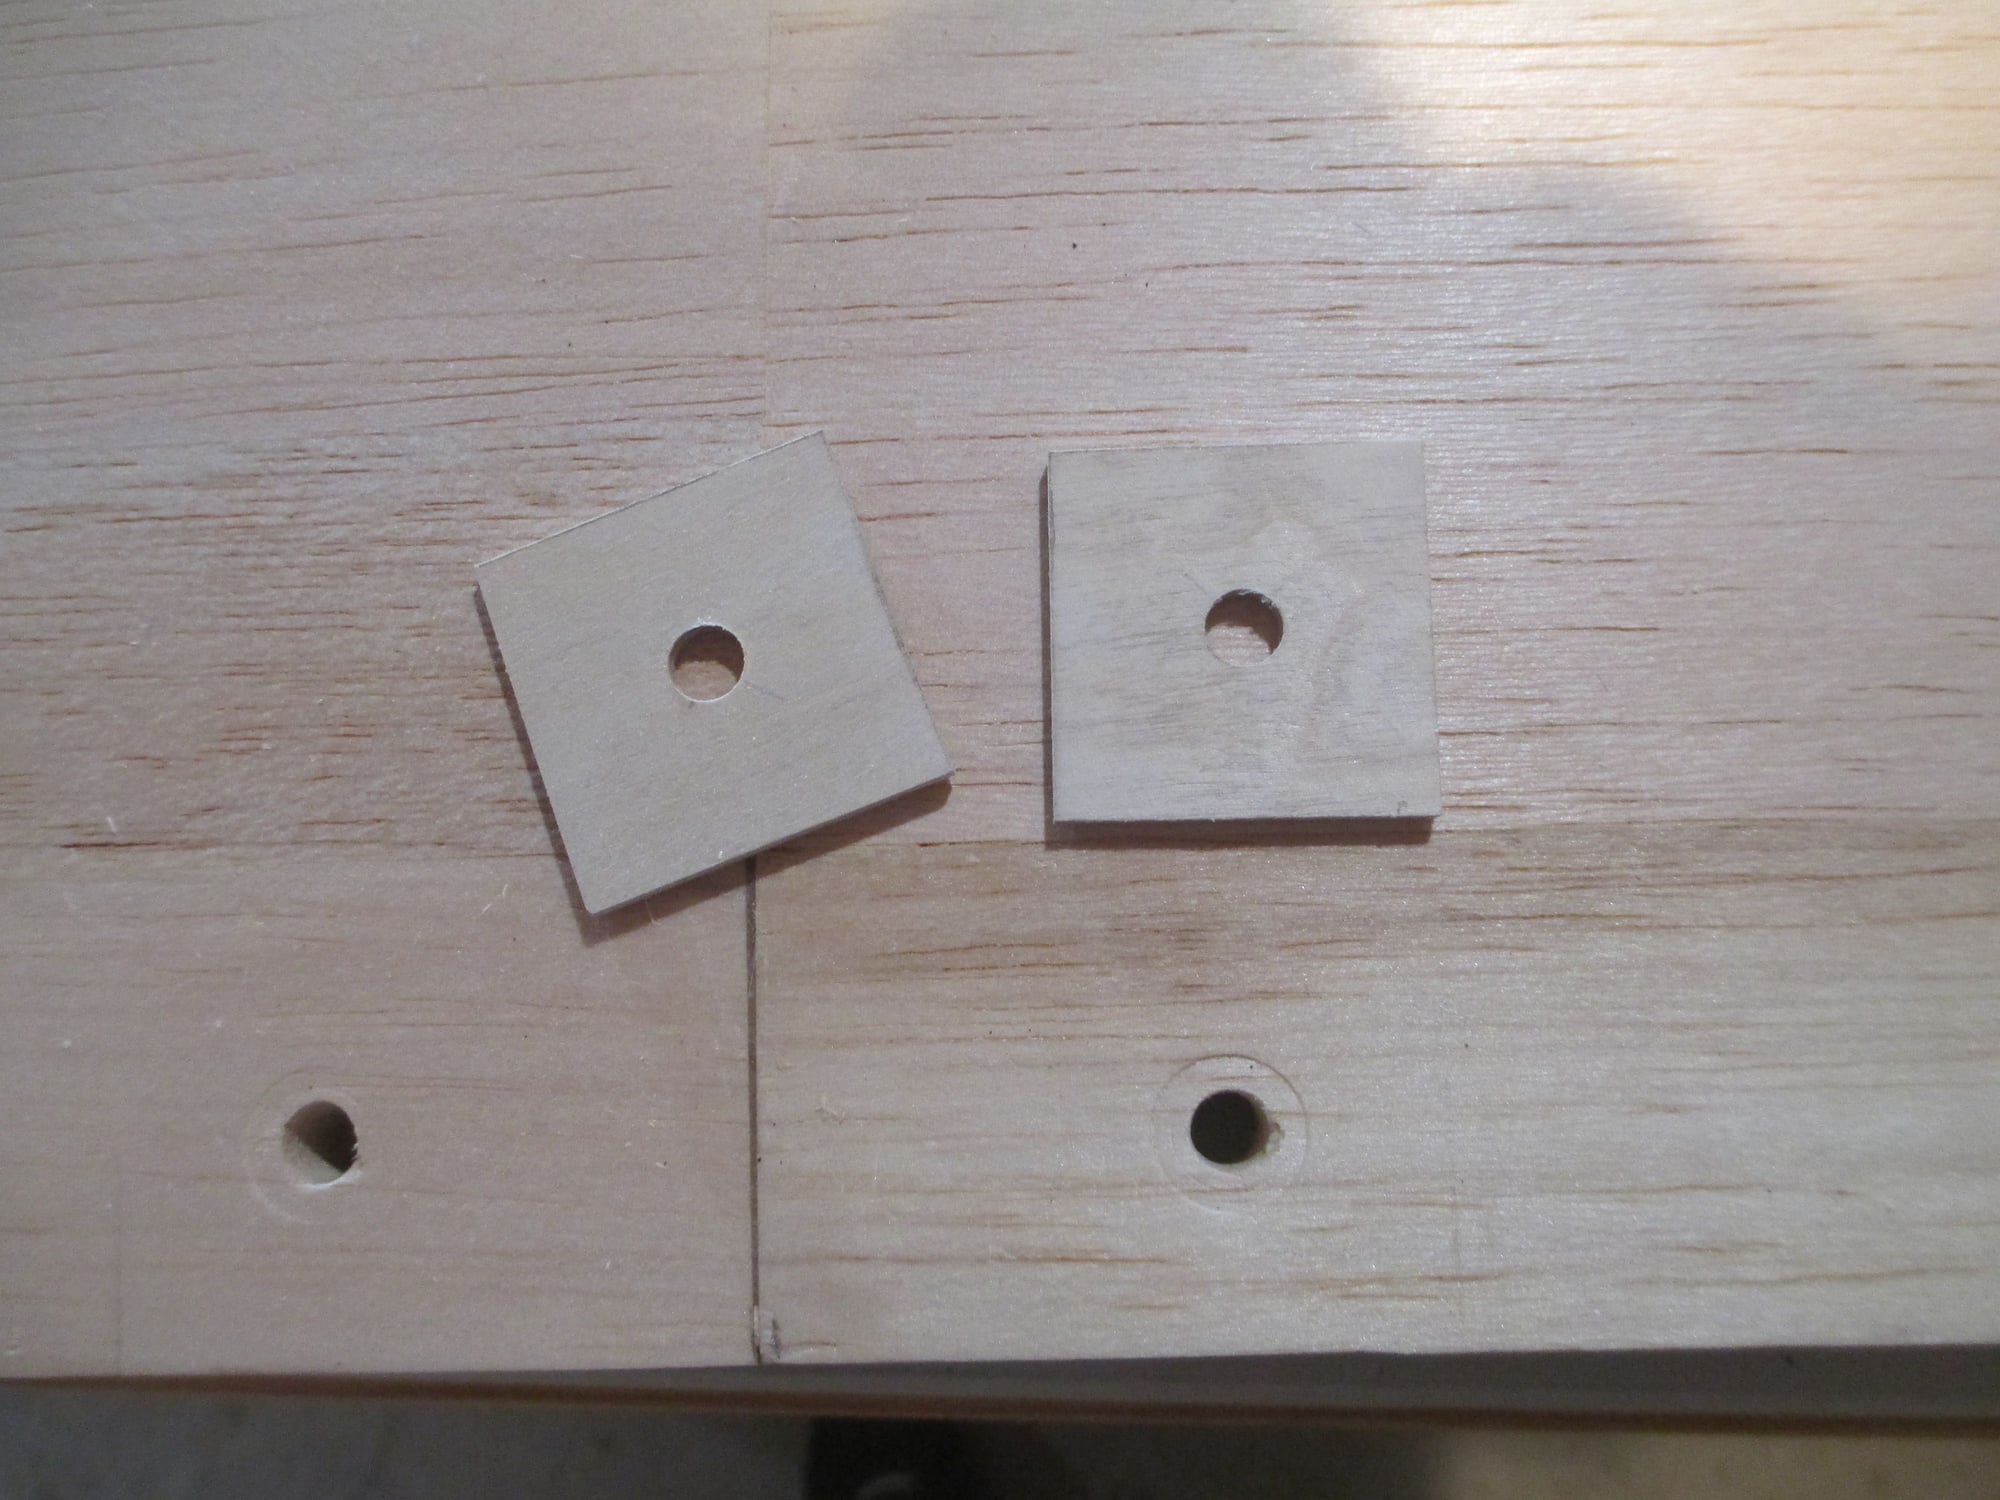
Not wanting to use the supplied 1/16" plywood sheeting supplied in the kit which are supposed to sit atop the wing, I decided to use my own and recess them making them flush.

I've removed enough material on each wing panel so the plates will now be level with the surface of the wing. Not only will it look better, but it will be easier to cover now that I won't have to go around/over those blocks.
Epoxy was spread under each block then clamped into position. I made sure to put wax paper over each plate expecting squeeze out.
That's it for tonight, you'll have to wait until tomorrow to see how it came out! I'm tired!

Last edited by VincentJ; 04-08-2019 at 05:54 AM.
04-08-2019, 02:24 AM
#88
Thread Starter
04-08-2019, 08:51 AM
#89

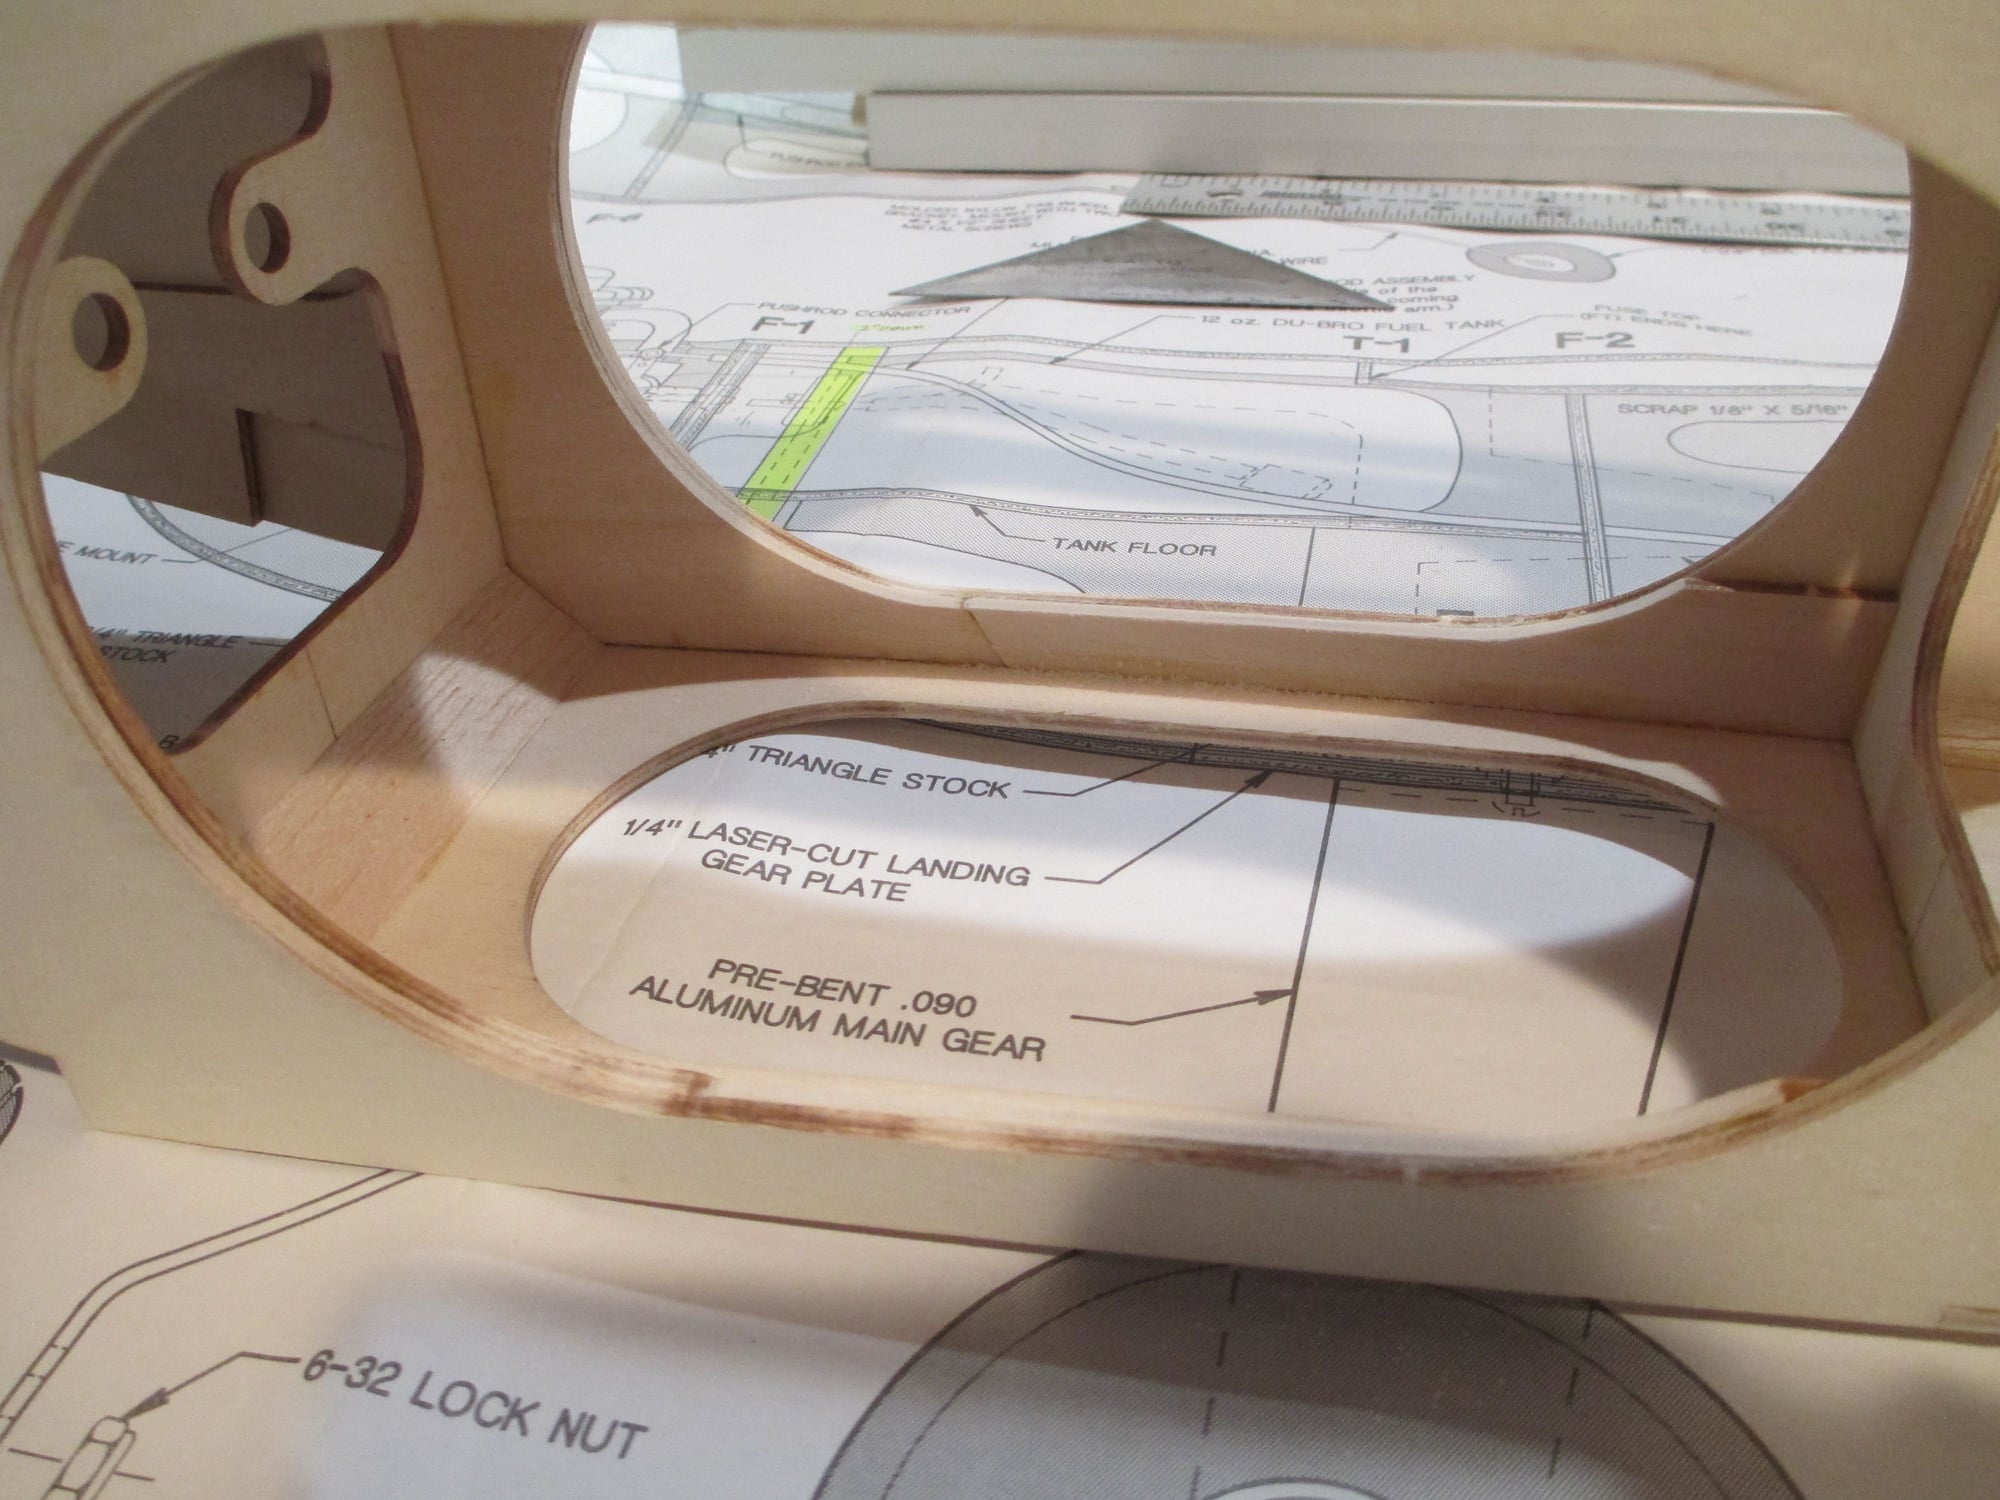
Lots of admiration for your construction technique. Your mention of increasing strength reminded me that both of my Four-Stars (.40 and .60 size) benefited from some triangle stock added to the landing gear mounts.
04-08-2019, 10:41 AM
#90
Thread Starter
 I too will be reinforcing the landing gear plate, but I can't install it until my custom CF landing gear arrives. I like to drill the holes in the plate on my drill press rather than chancing them by hand...
Last edited by VincentJ; 04-08-2019 at 10:46 AM.
04-08-2019, 02:28 PM
#91
Thread Starter
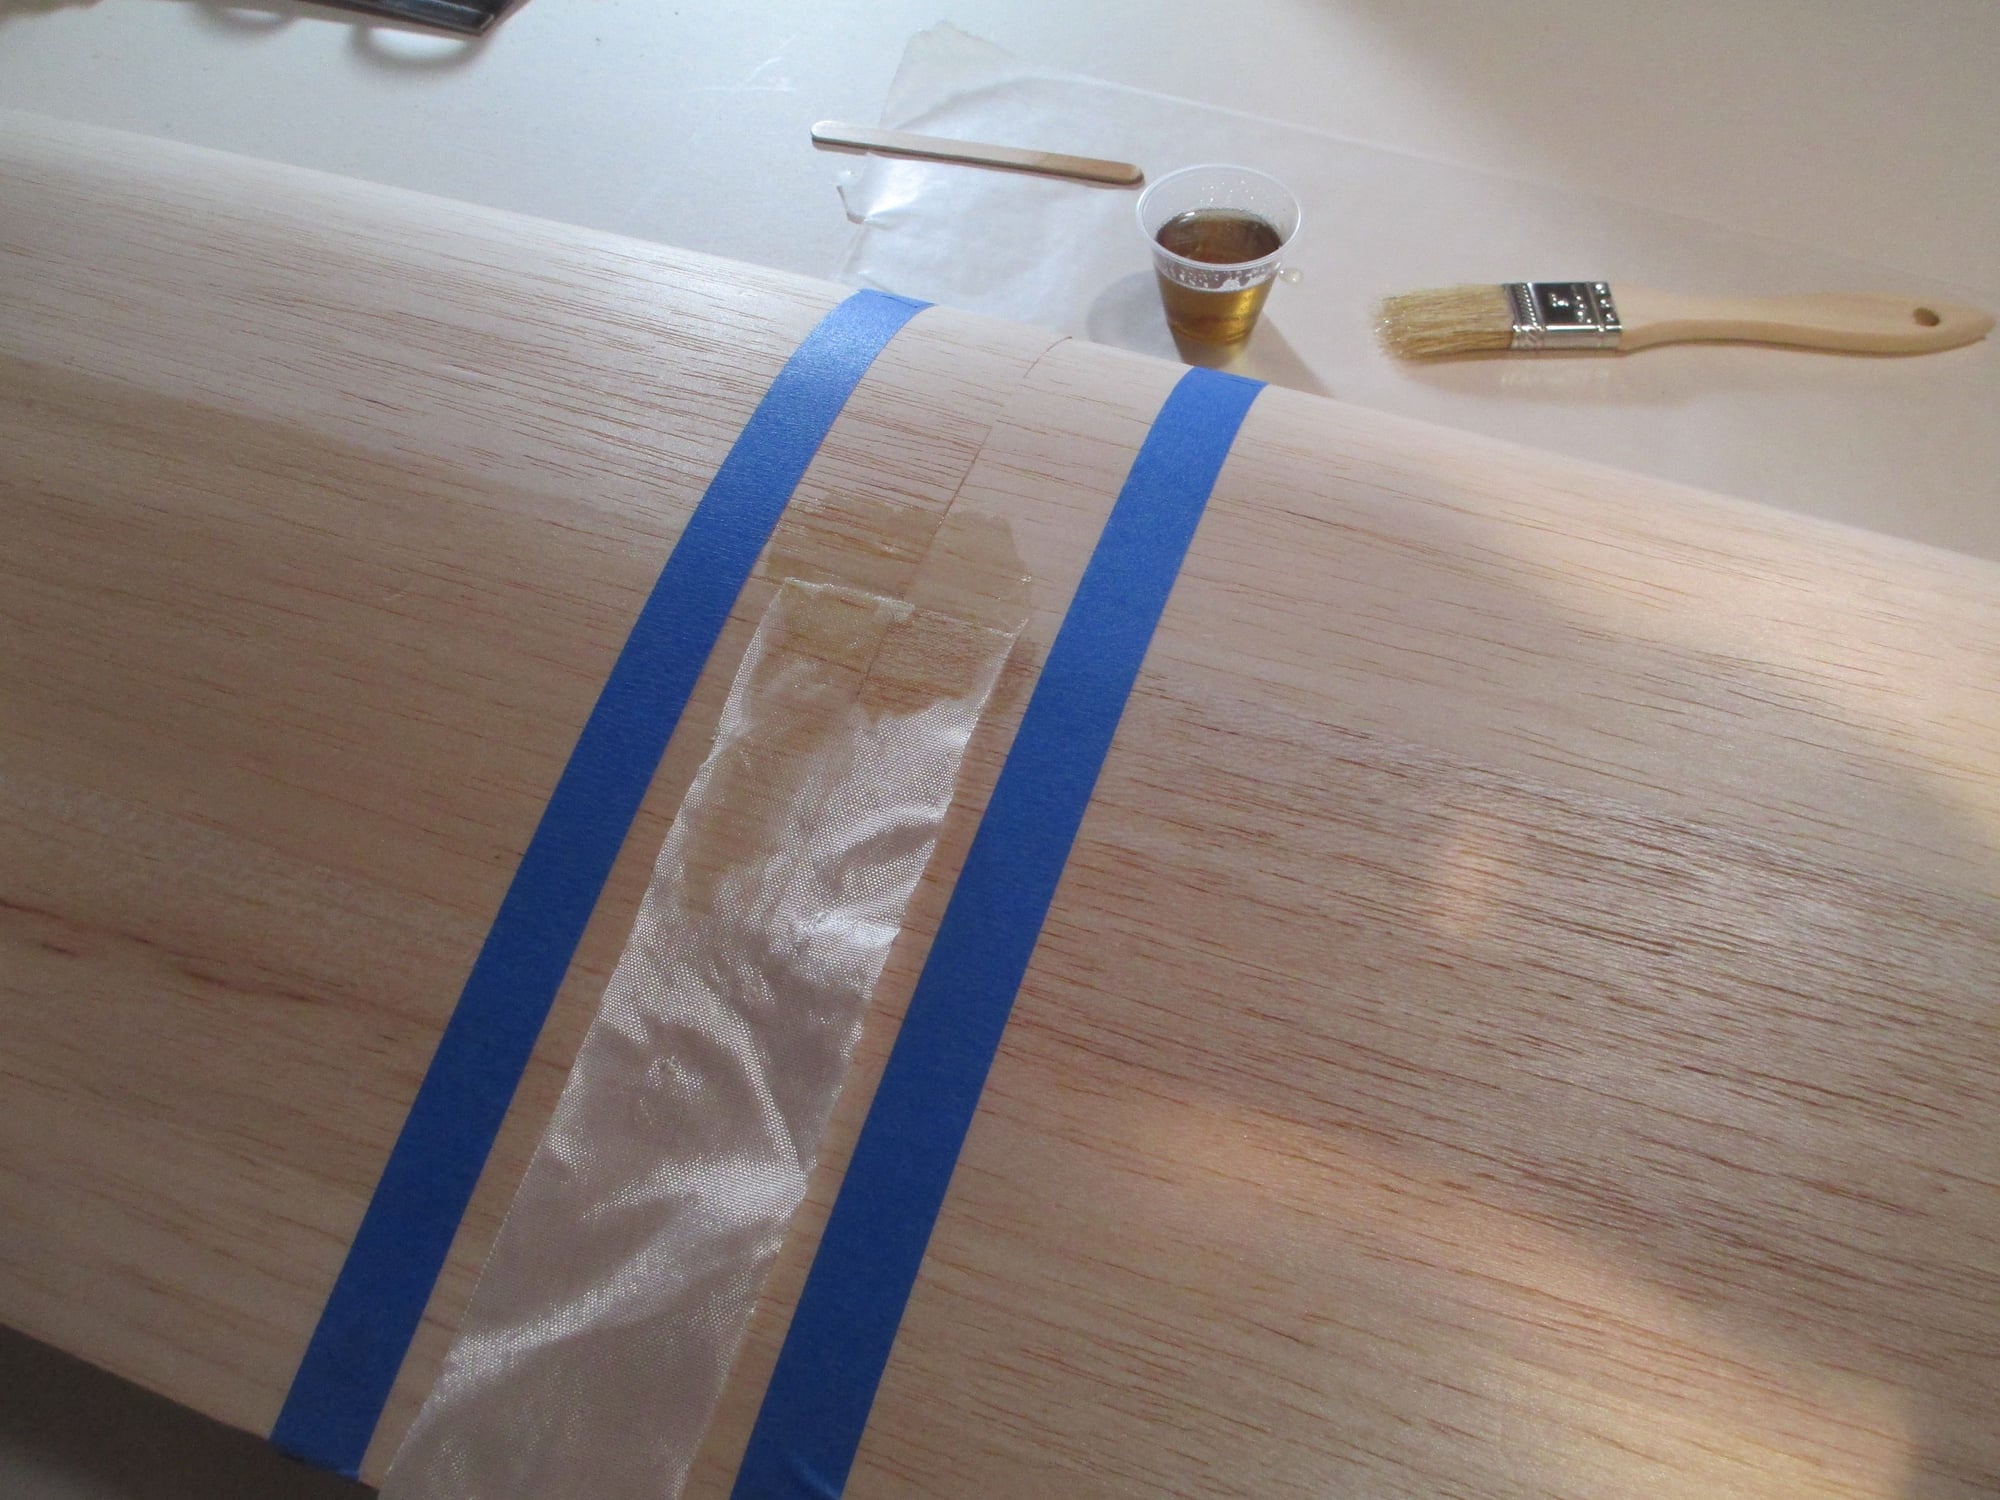
2" fiberglass tape is being applied around the center seam of the wing for strength.
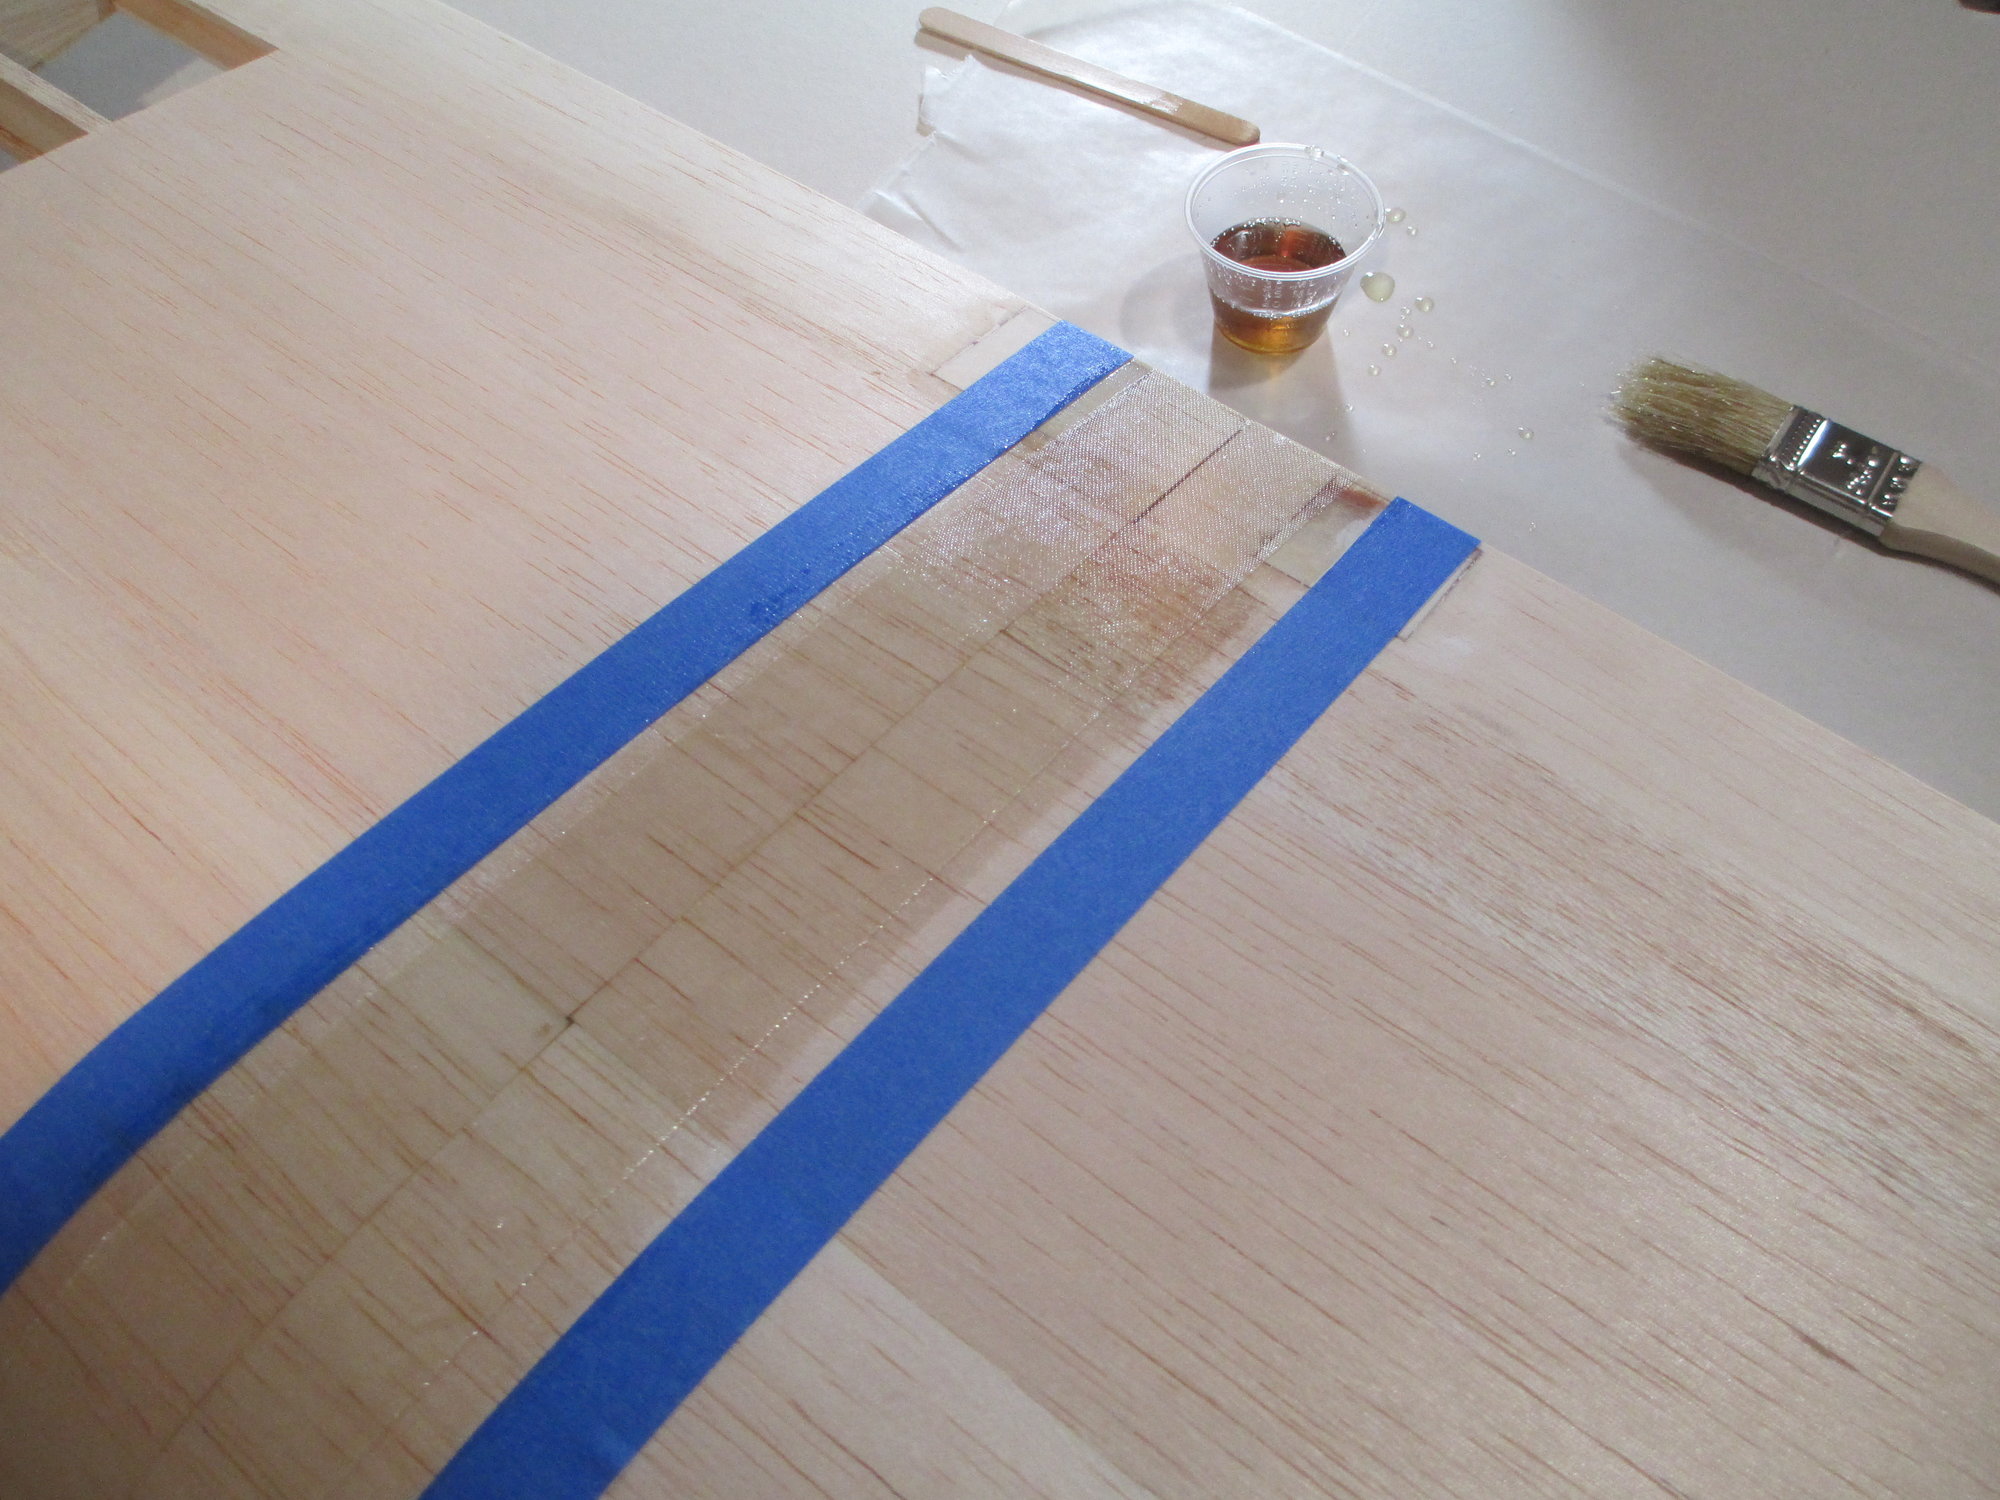
1st coat applied, tomorrow a 2nd coat will be brushed on. You can see how much was left in the mixing cup, next batch I make a smaller amount...
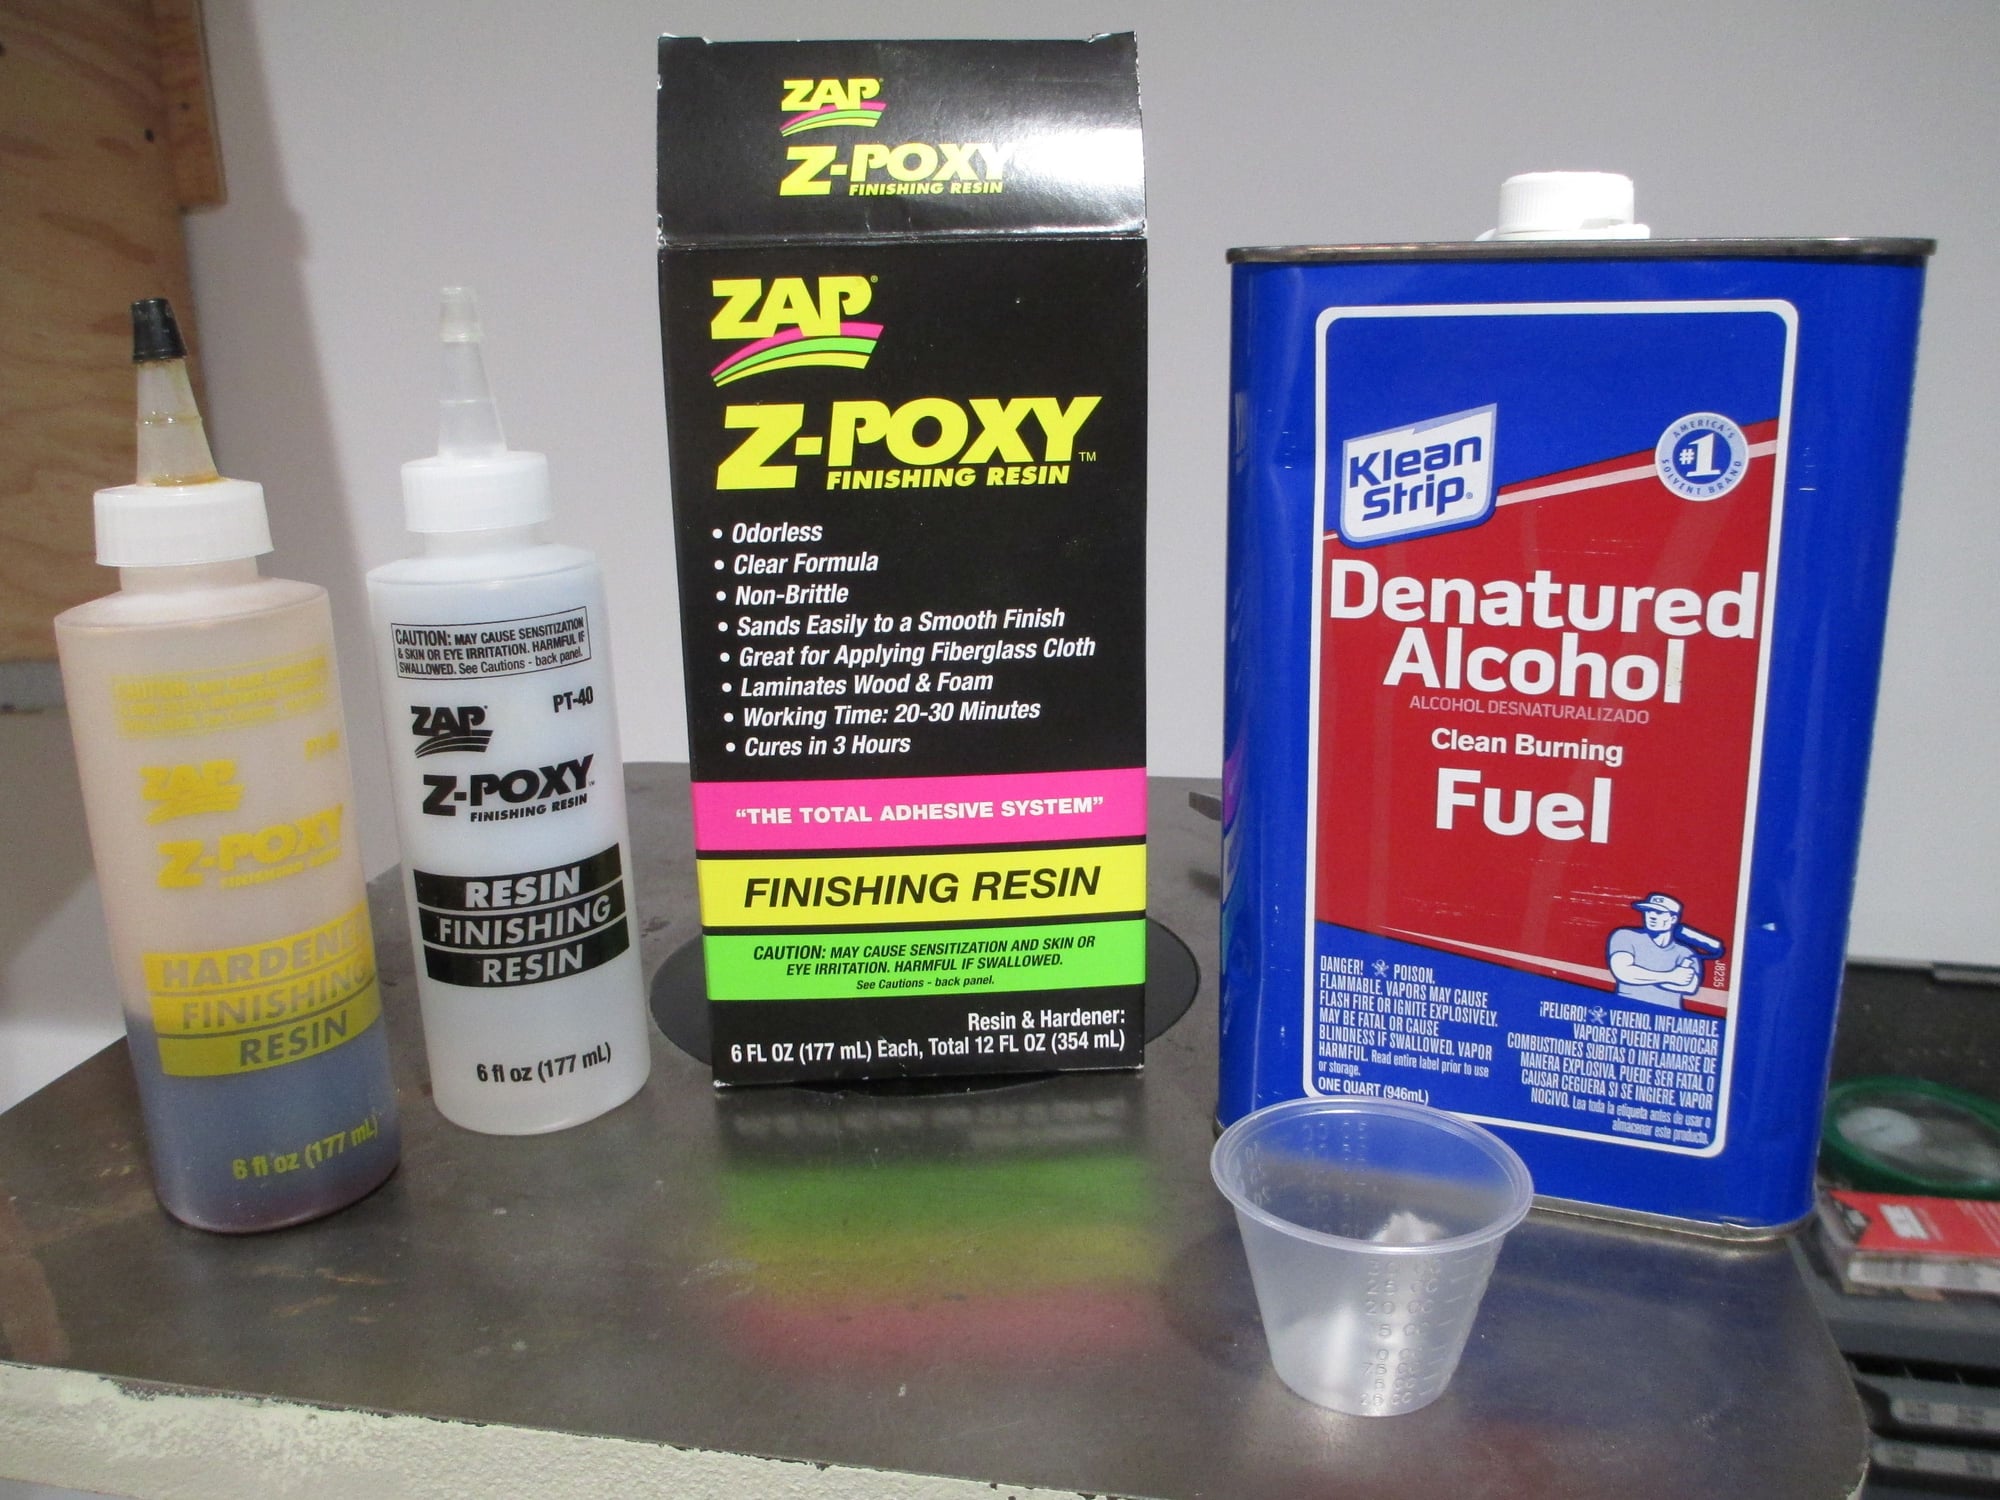
These are the products that I use and highly recommend. Z-Poxy's Finishing Resin flows well, sands easily and has hardly any odor. (In the past I used Polyester Resin that stunk to high heaven.) I always cut my resin/hardener mixture with denatured alcohol. In this small batch I pulled 5cc of resin and another 5cc of hardener into the small mixing cup. A quick stir, then I added 10cc of denatured alcohol to the mix. This gives you a very viscous mixture that will soak into the wood well.
Last edited by VincentJ; 04-09-2019 at 10:36 AM.
04-09-2019, 07:36 AM
#92
Thank you Matt. Did you build both of your 4*? You need to have the 120 now so you'll have them all! I too will be reinforcing the landing gear plate, but I can't install it until my custom CF landing gear arrives. I like to drill the holes in the plate on my drill press rather than chancing them by hand...
I too will be reinforcing the landing gear plate, but I can't install it until my custom CF landing gear arrives. I like to drill the holes in the plate on my drill press rather than chancing them by hand...
04-09-2019, 11:37 PM
#94
Thread Starter
 In my next build, I was thinking that I may try pictures without any text only, though that may prove to be more work...
Last edited by VincentJ; 04-10-2019 at 03:48 AM.
04-10-2019, 04:17 AM
#95
I'd keep the text. Without something to explain the pictures, new builders or, for that matter, some with limited experience wouldn't be able to figure out what you're trying to show. Limiting your text is one thing, removing it I wouldn't recommend
04-10-2019, 05:13 AM
#96
Thread Starter
I do agree with you Hydro, which is why I think it would be more work. Better photographs depicting what's going on would be the challenge. Do you remember the old Henry comic strip? It had very little text, but we knew what was going on... (I know I just dated myself!)
Last edited by VincentJ; 04-10-2019 at 06:16 AM.
04-10-2019, 03:18 PM
#97
Thread Starter
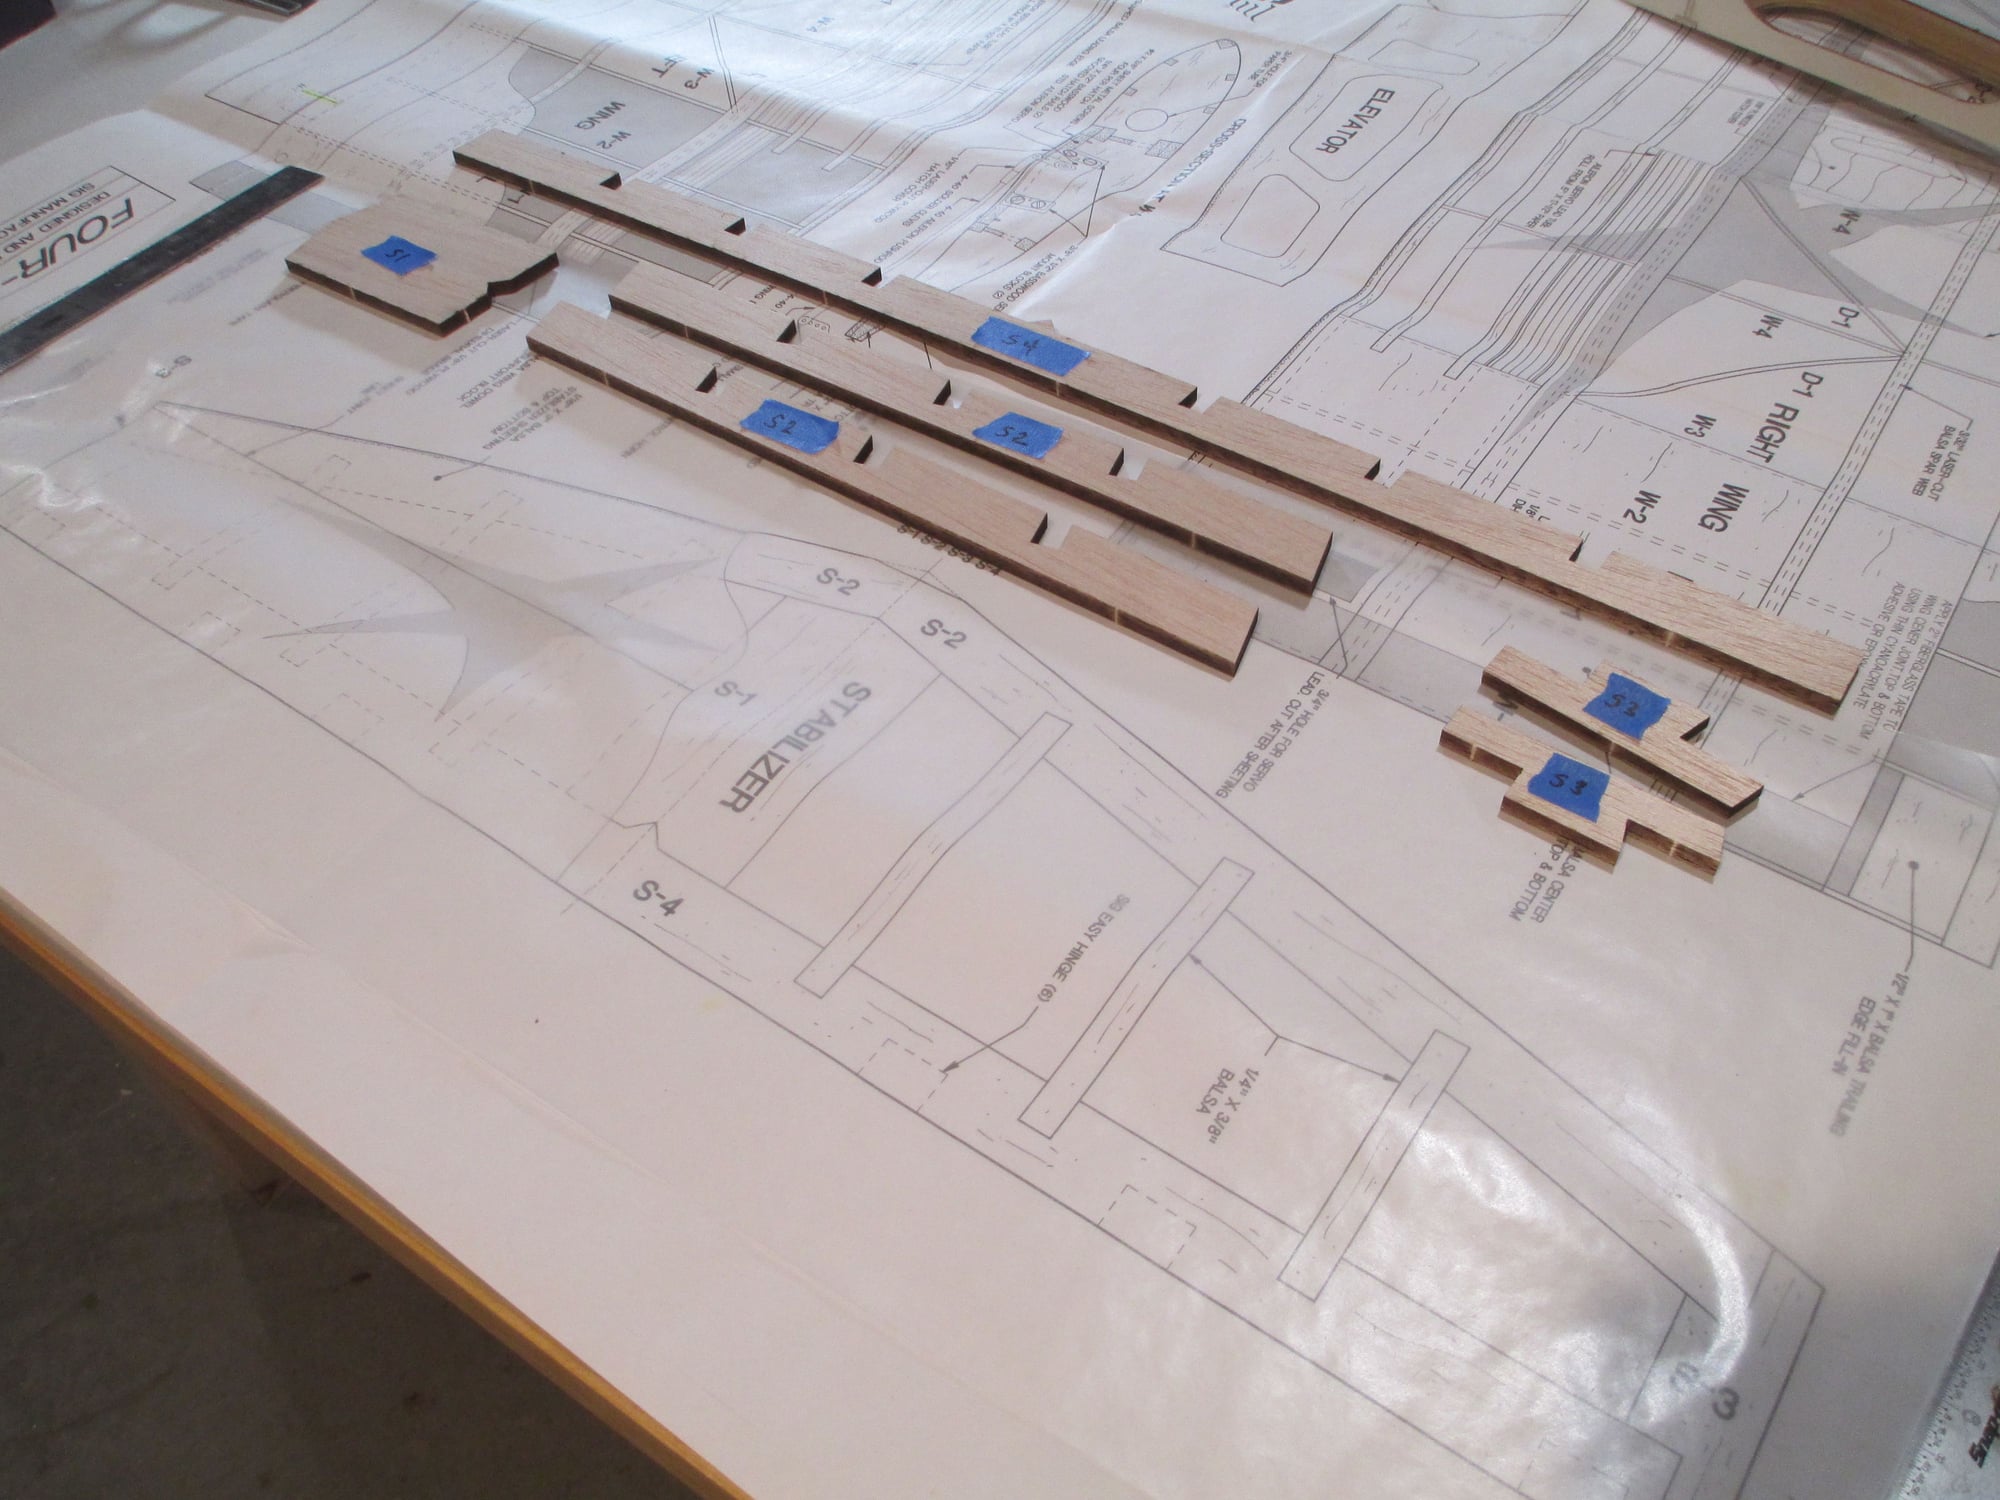
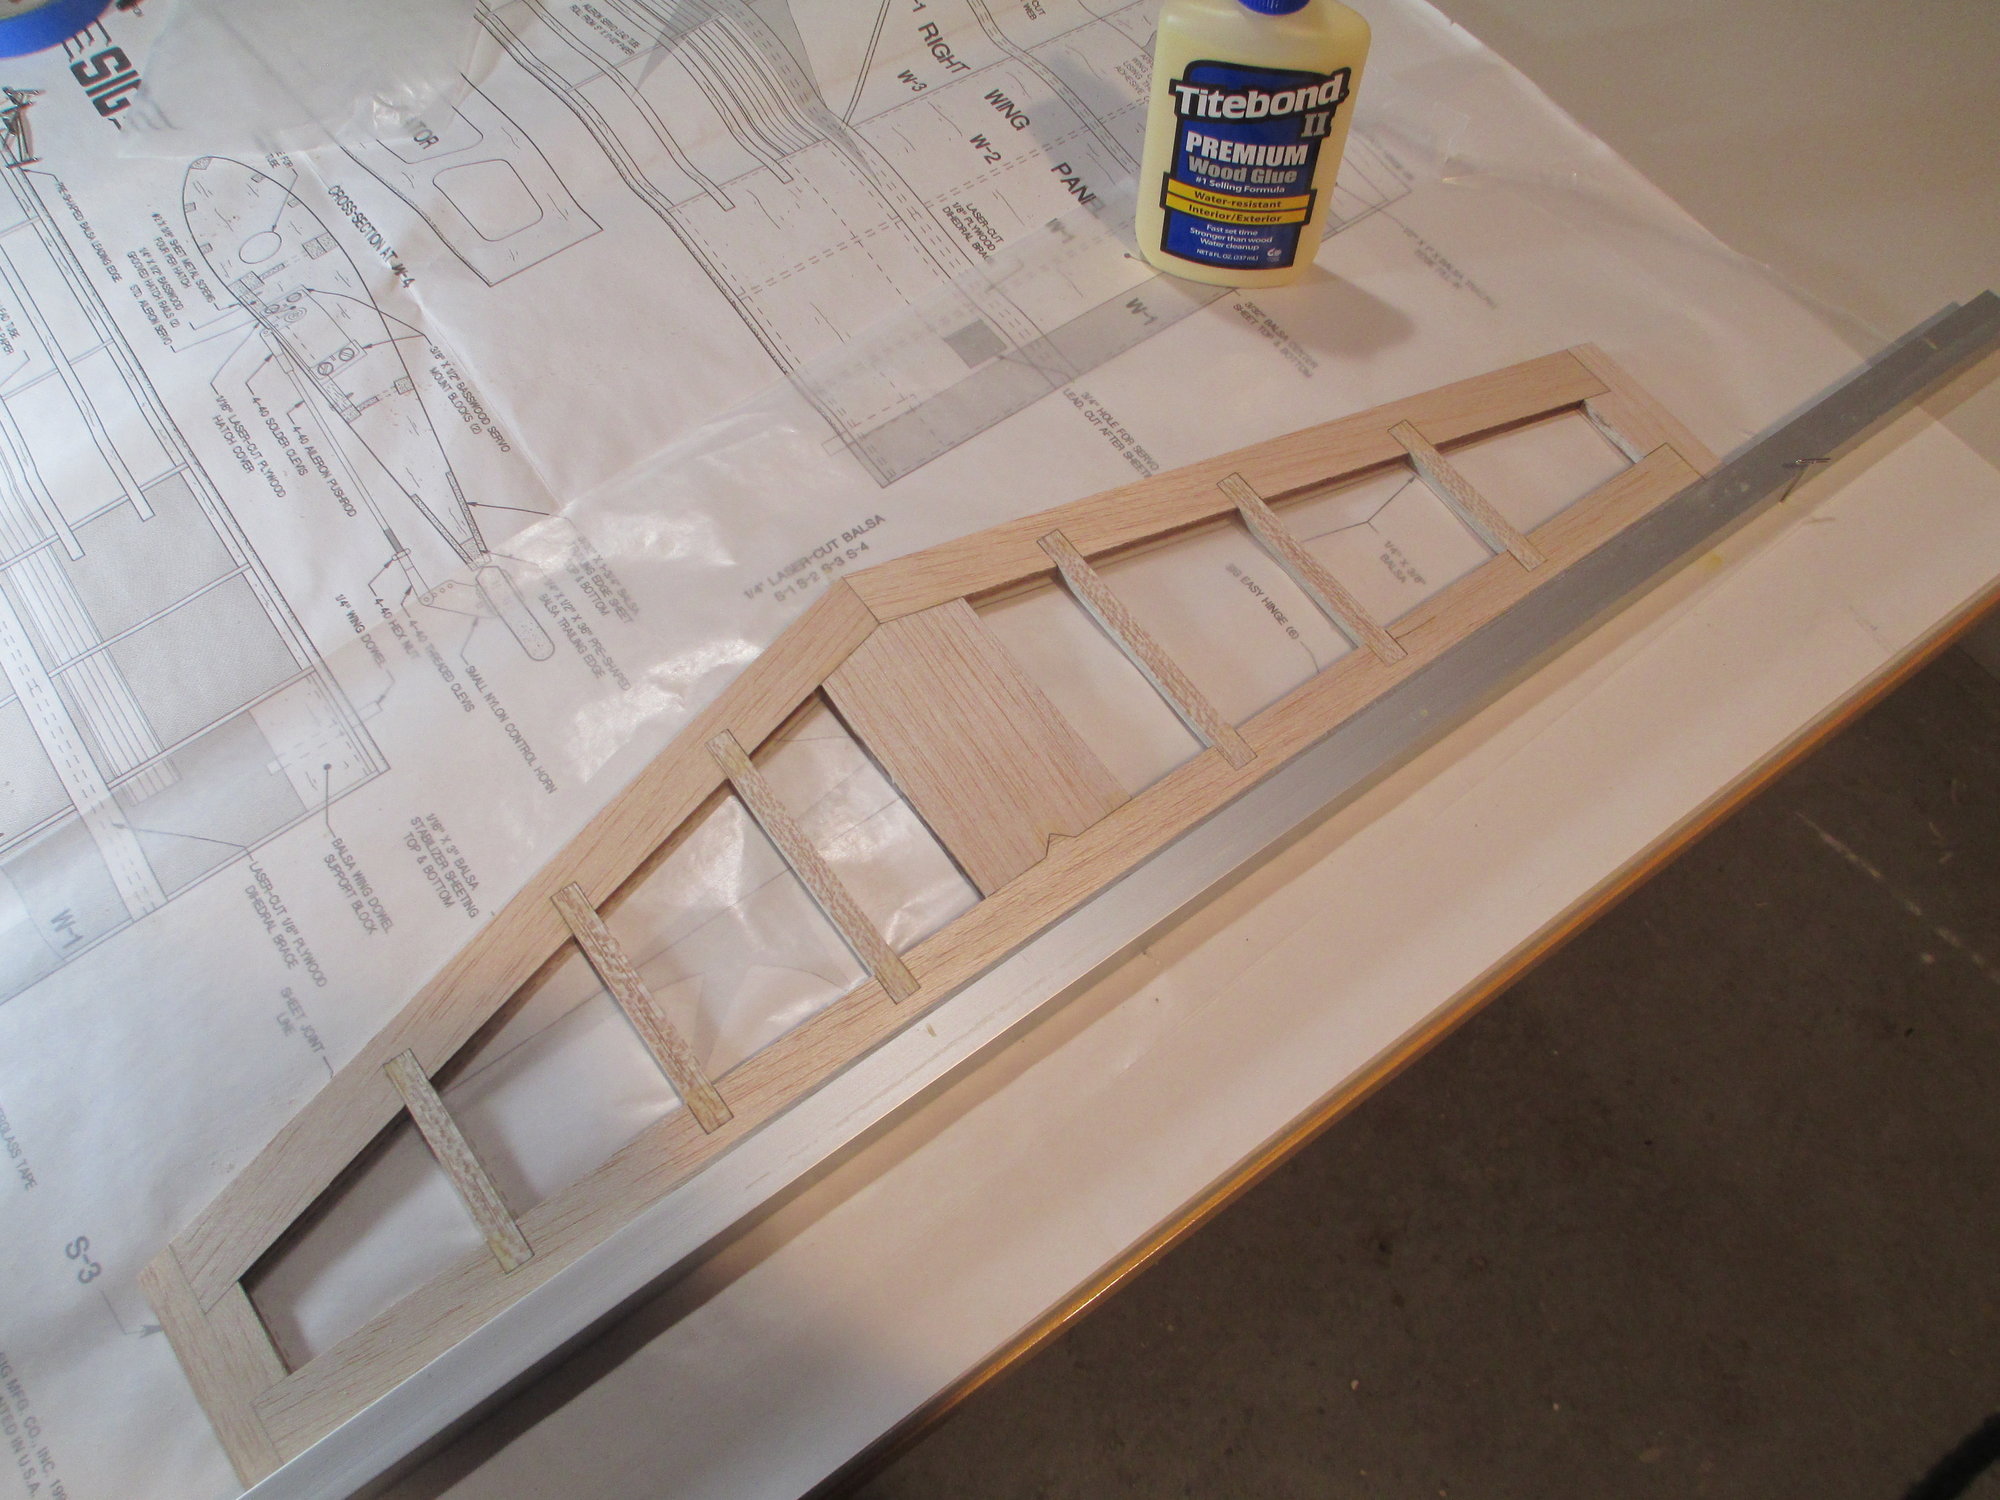
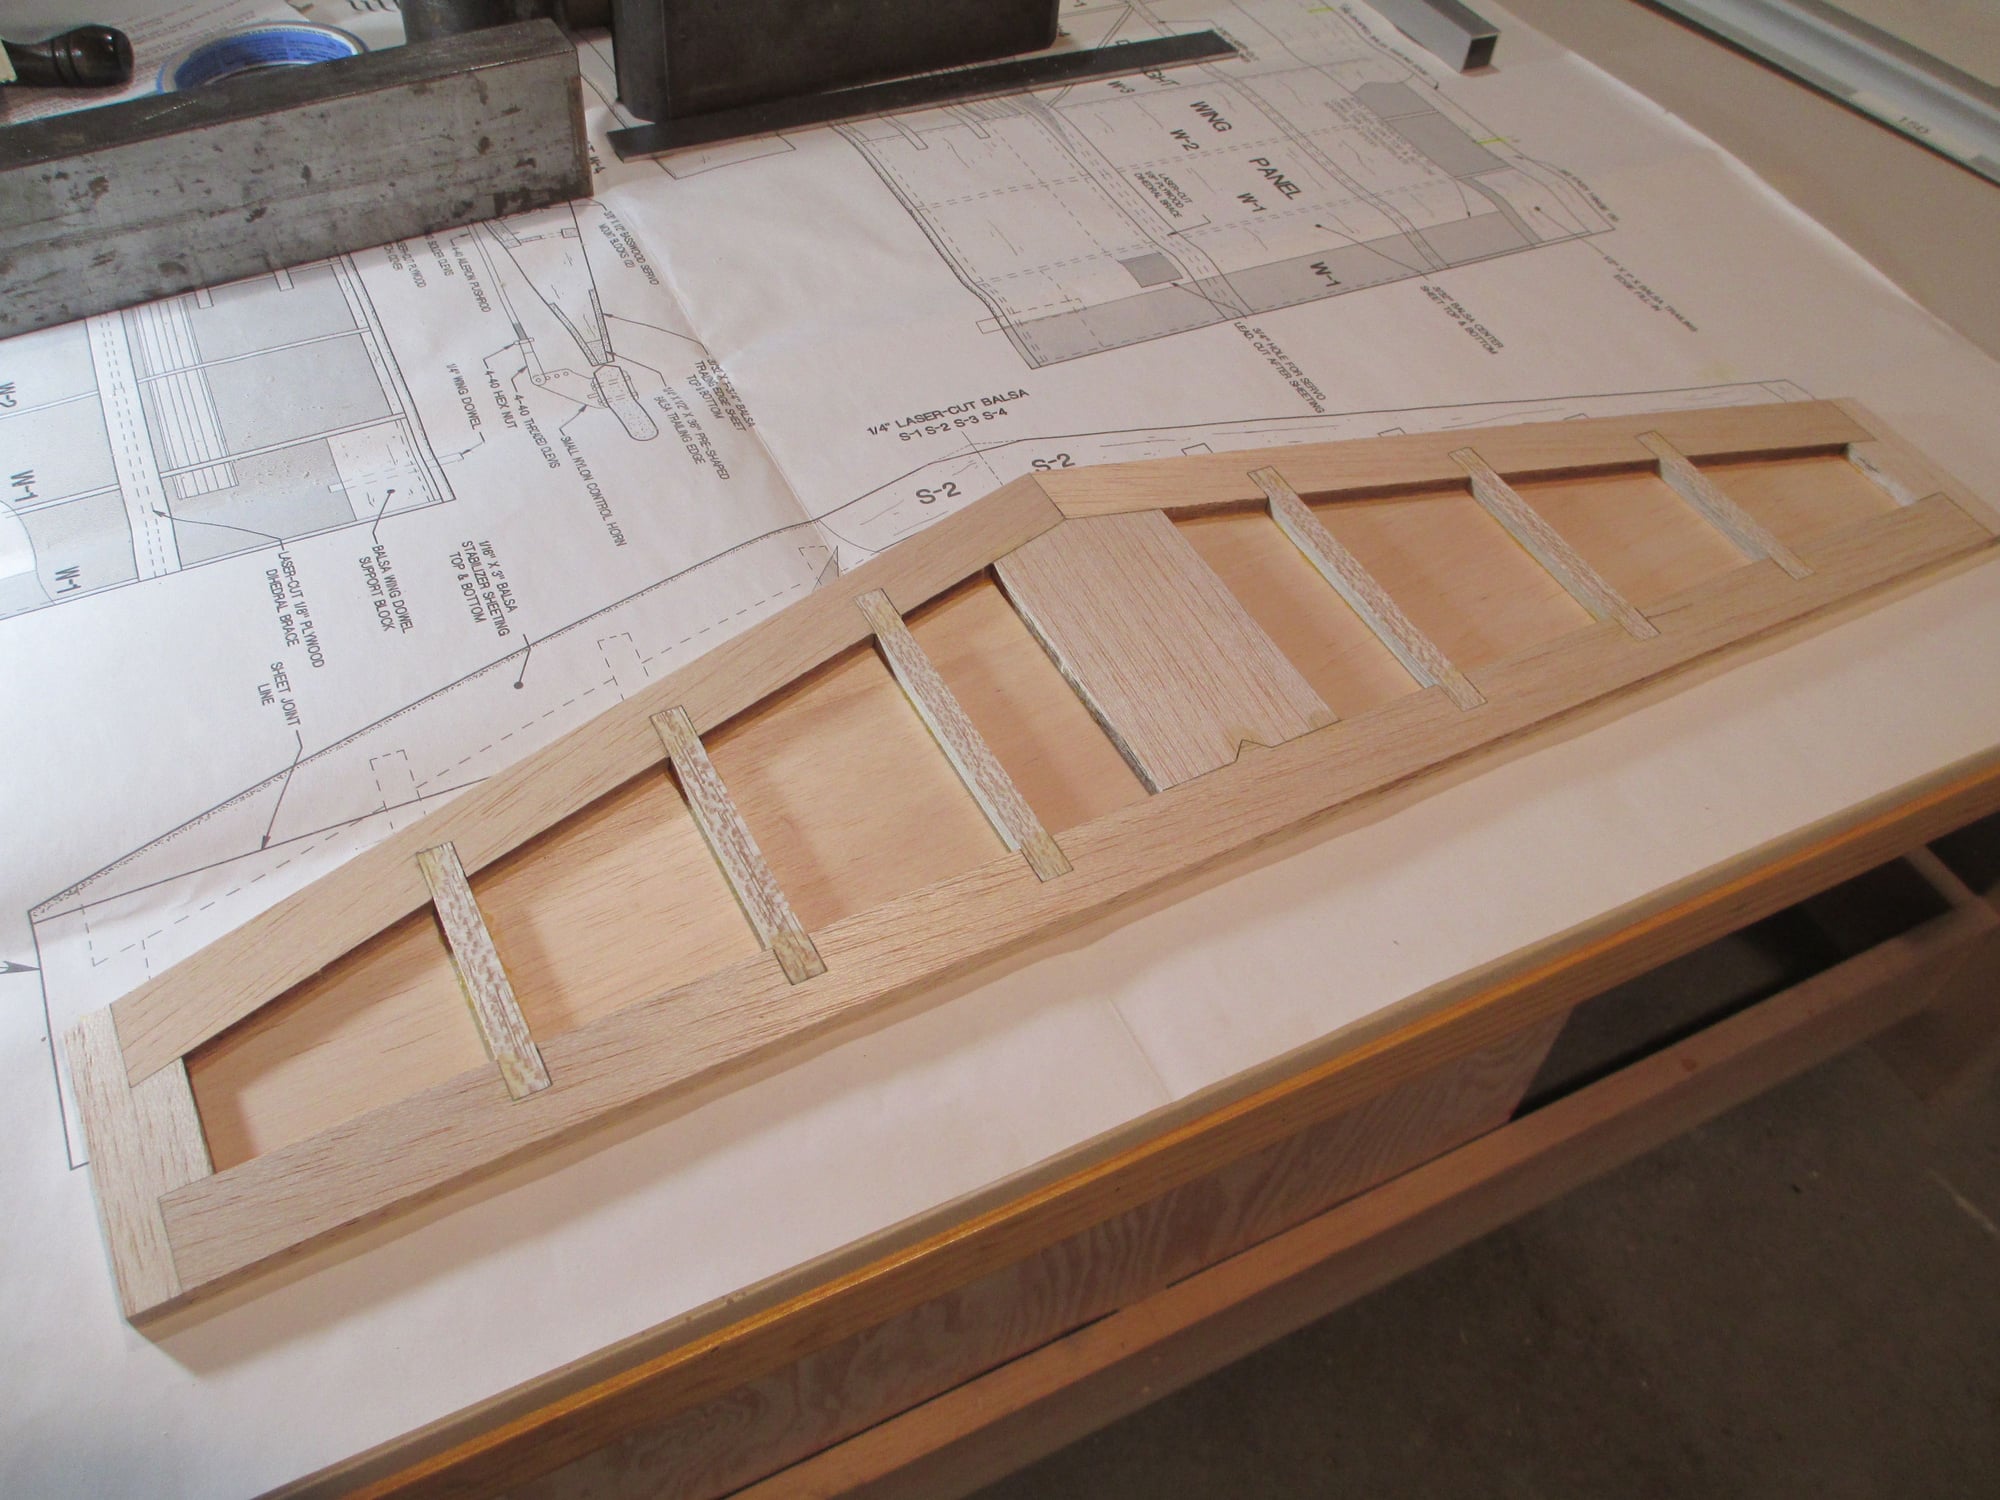
Plans laid out for the horizontal stabilizer. Parts are labeled and ready for a dry fit.
With just some minor sanding, all the parts fit together very nicely.
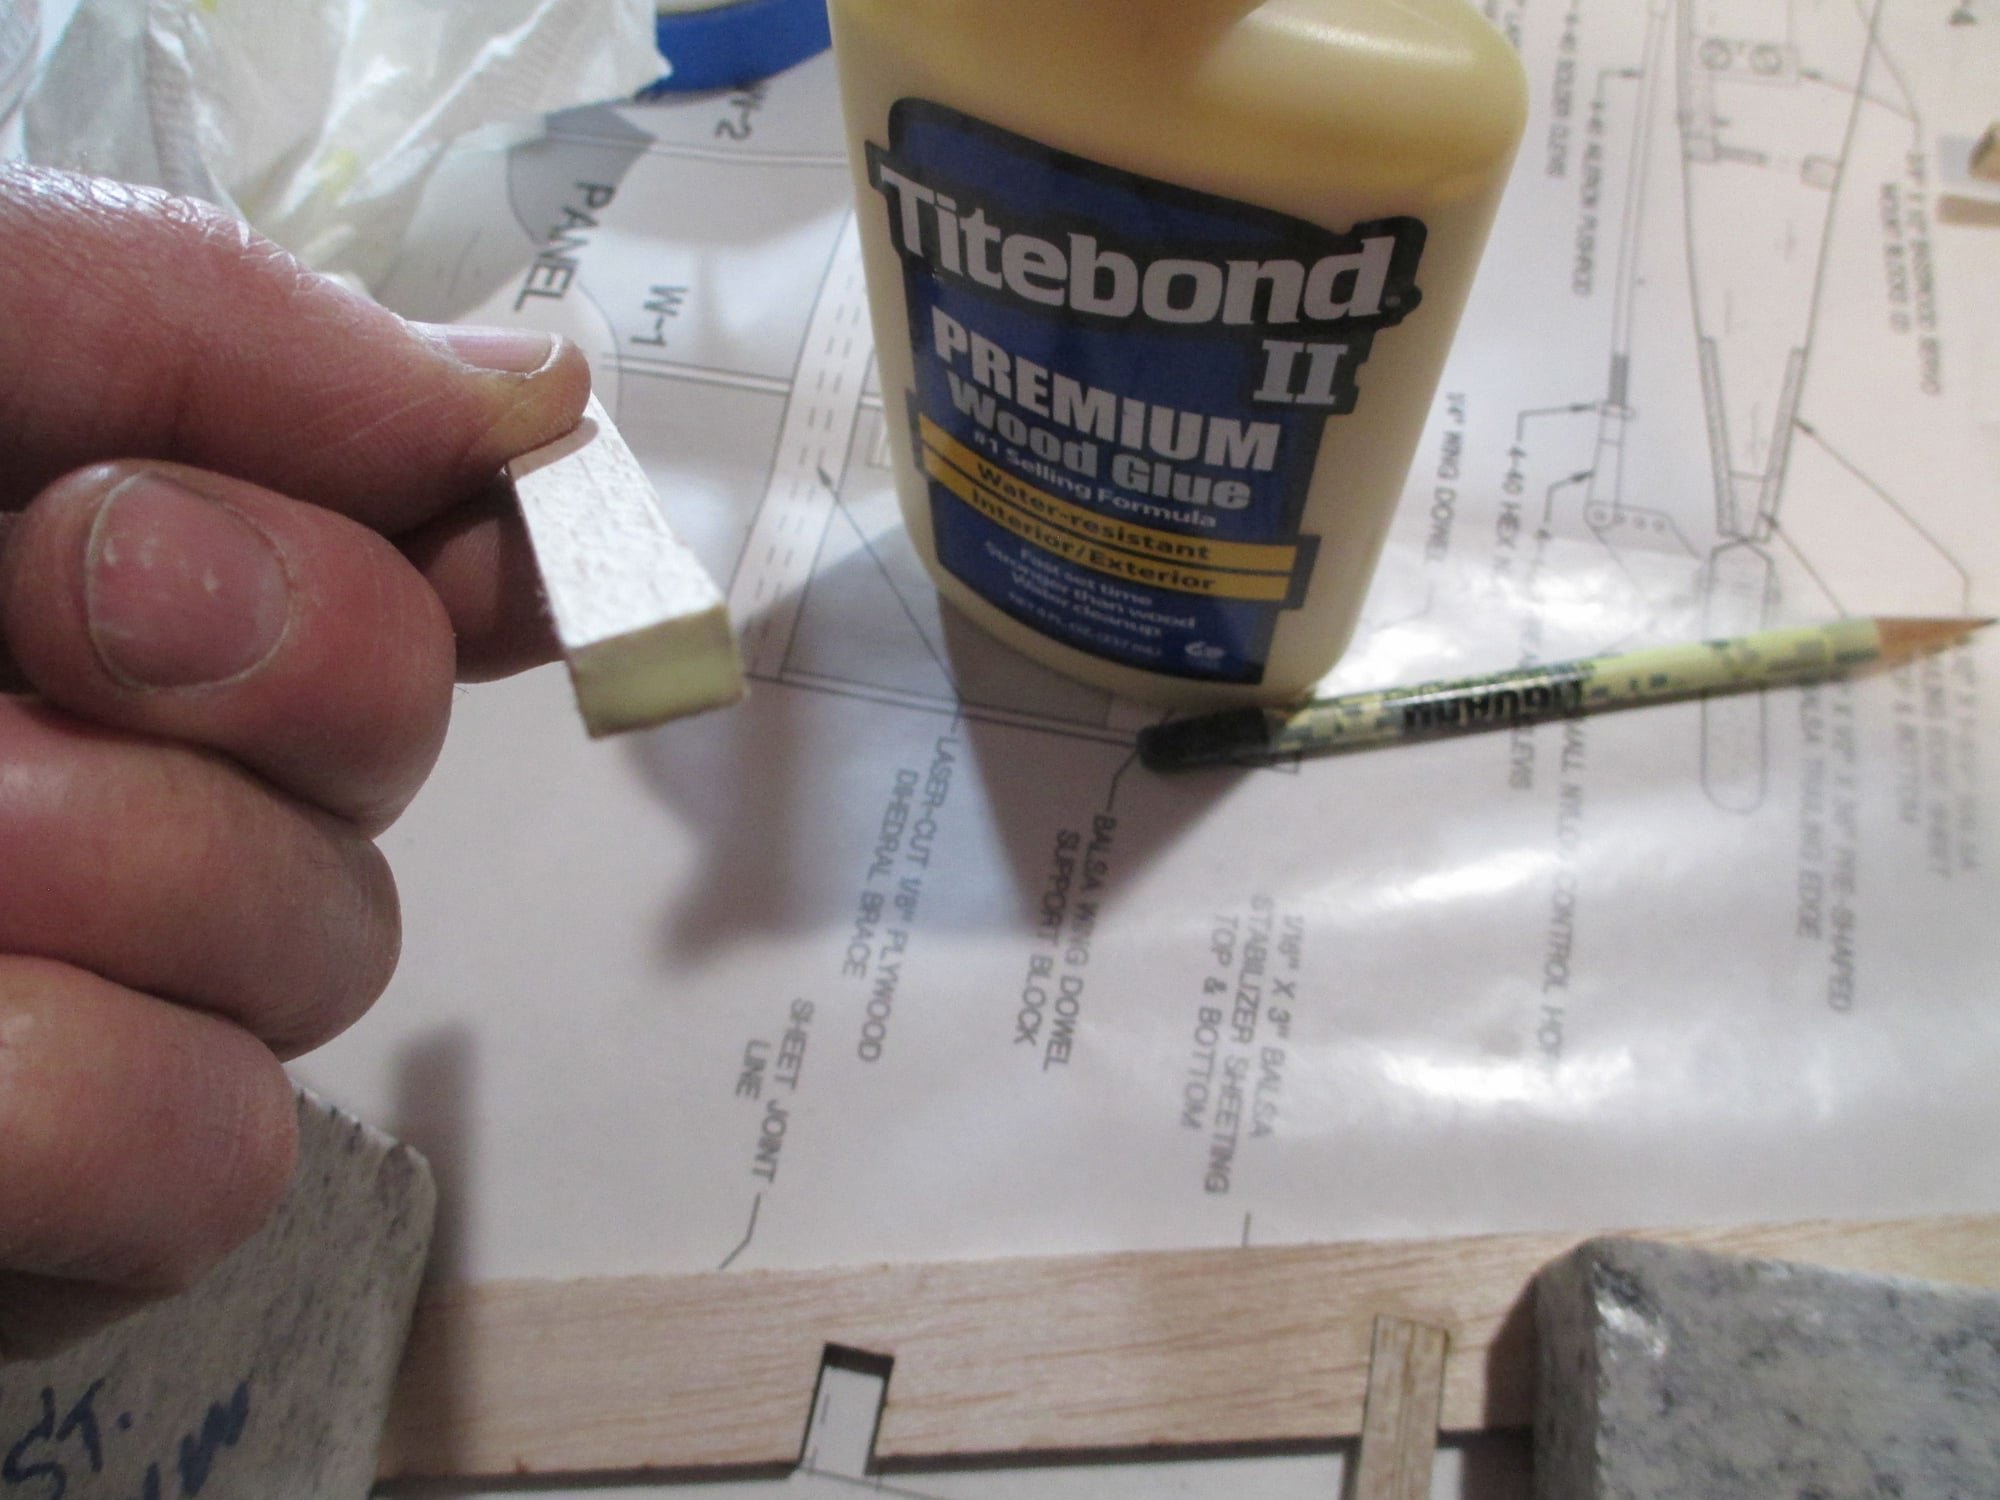
Builder's Tip: When you have to glue up end-grain such as you see here, take the time to coat the end-grain with glue and set it aside for 30 seconds or more. The end-grain will wick up your glue and you will likely have to add more glue before putting the part in place. The result will be a stronger joint.
04-10-2019, 04:47 PM
#98
Thread Starter
After giving the glue a couple of hours to dry, all the weights were removed. Notice the aluminum square stock on the TE of the stabilizer. Always try to build off of something that you know is straight...
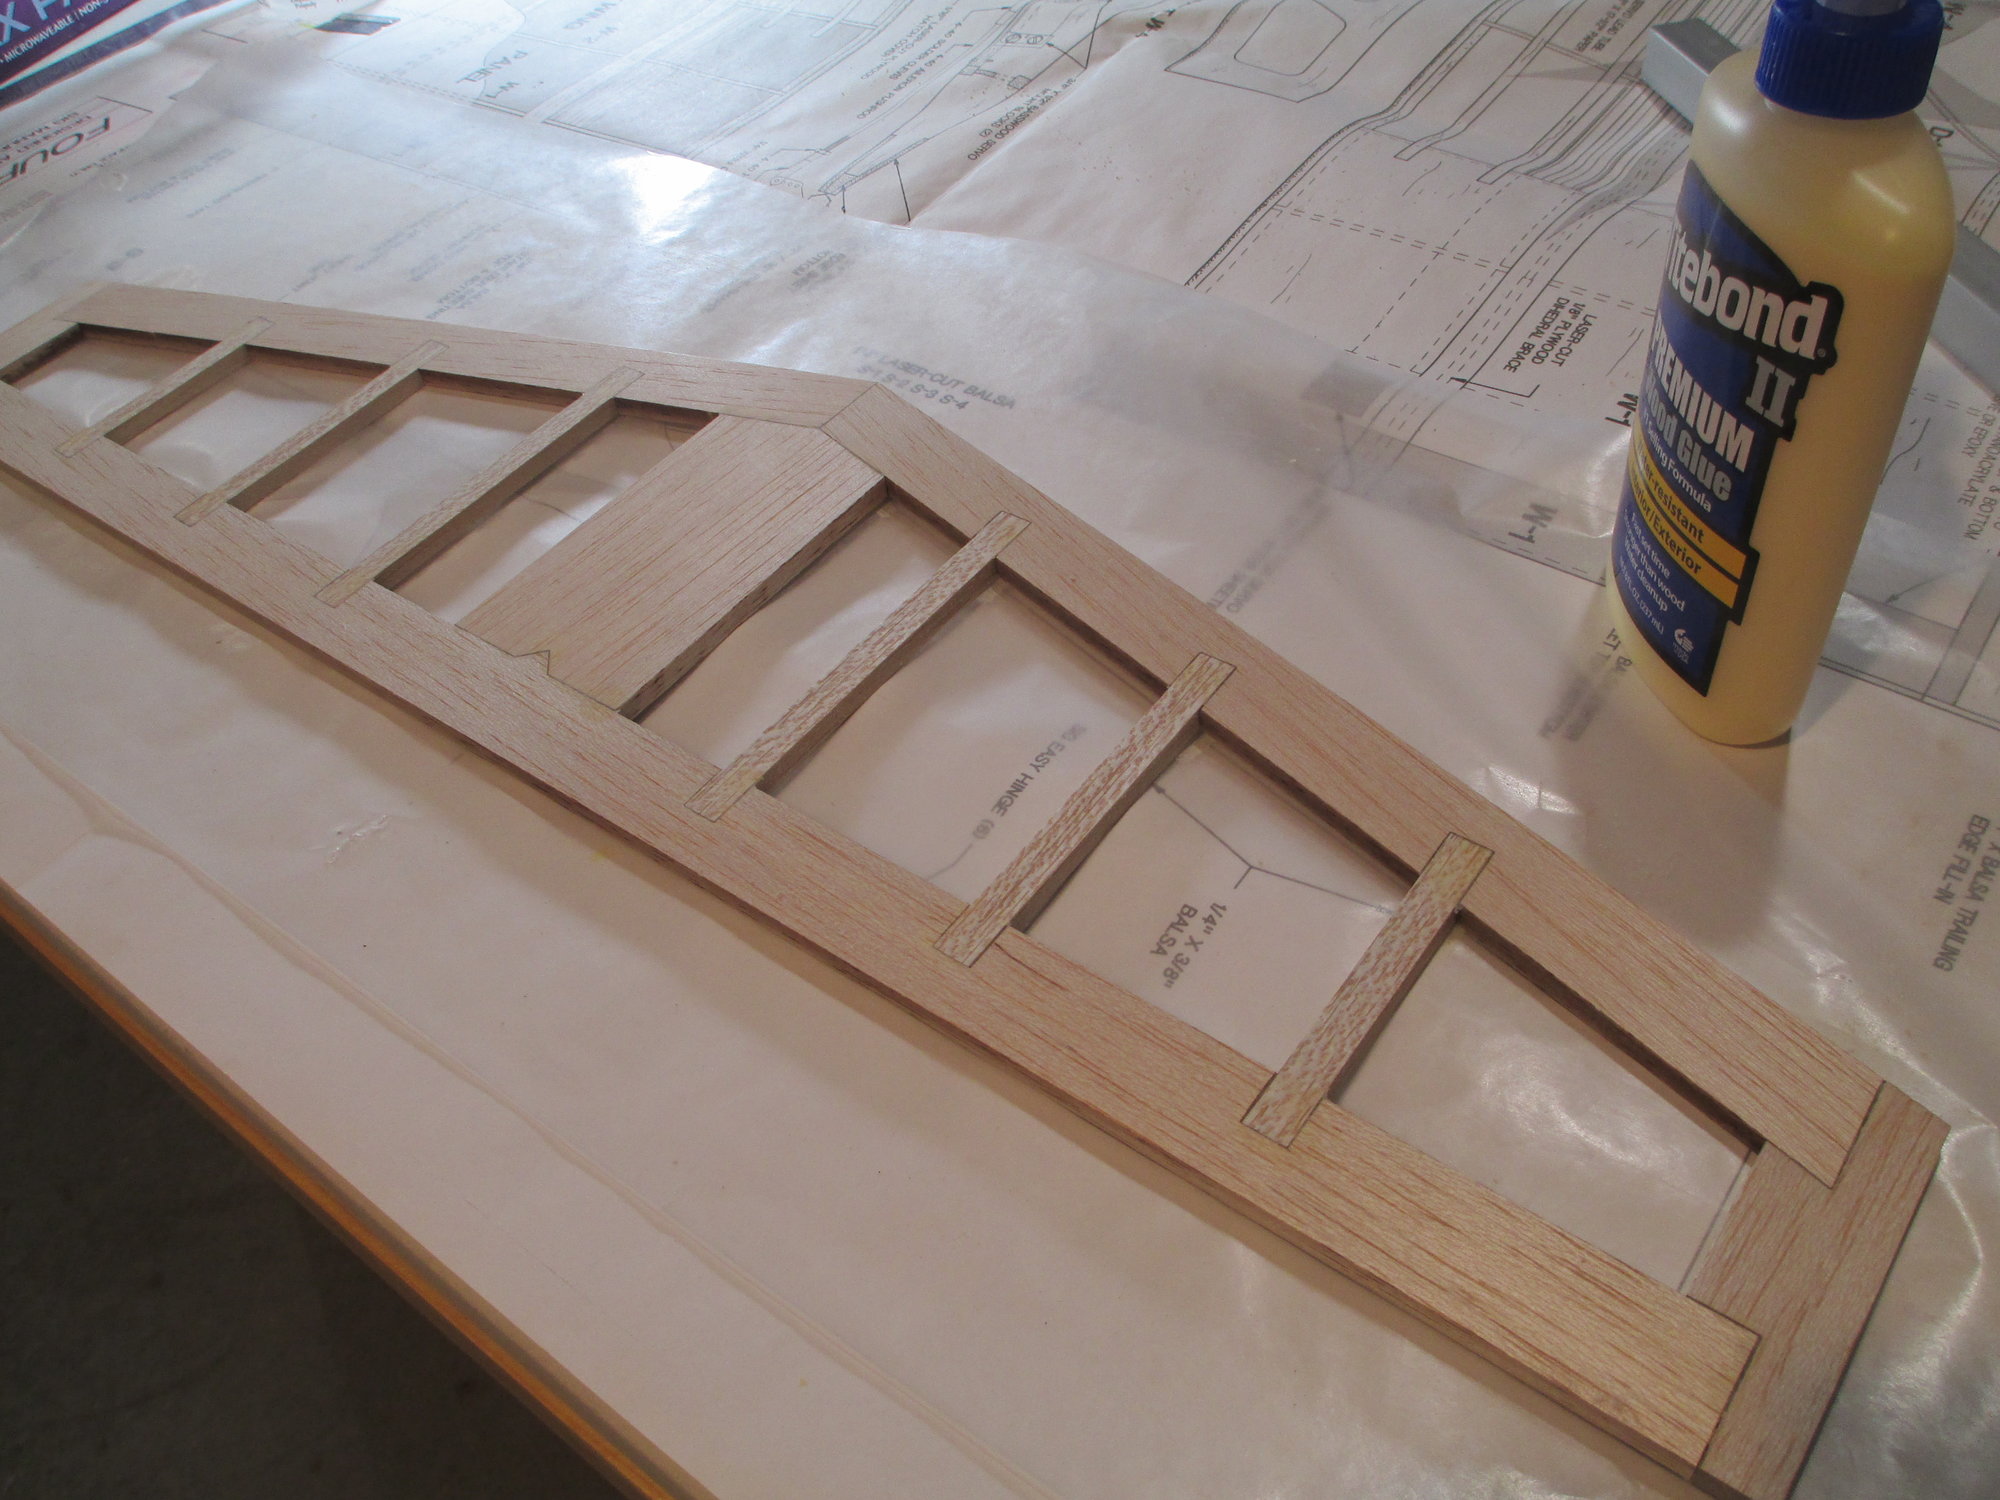
Ready to be clad in sheeting both top and bottom, but that's a job for tomorrow.
 04-12-2019, 03:37 PM
#100
Thread Starter
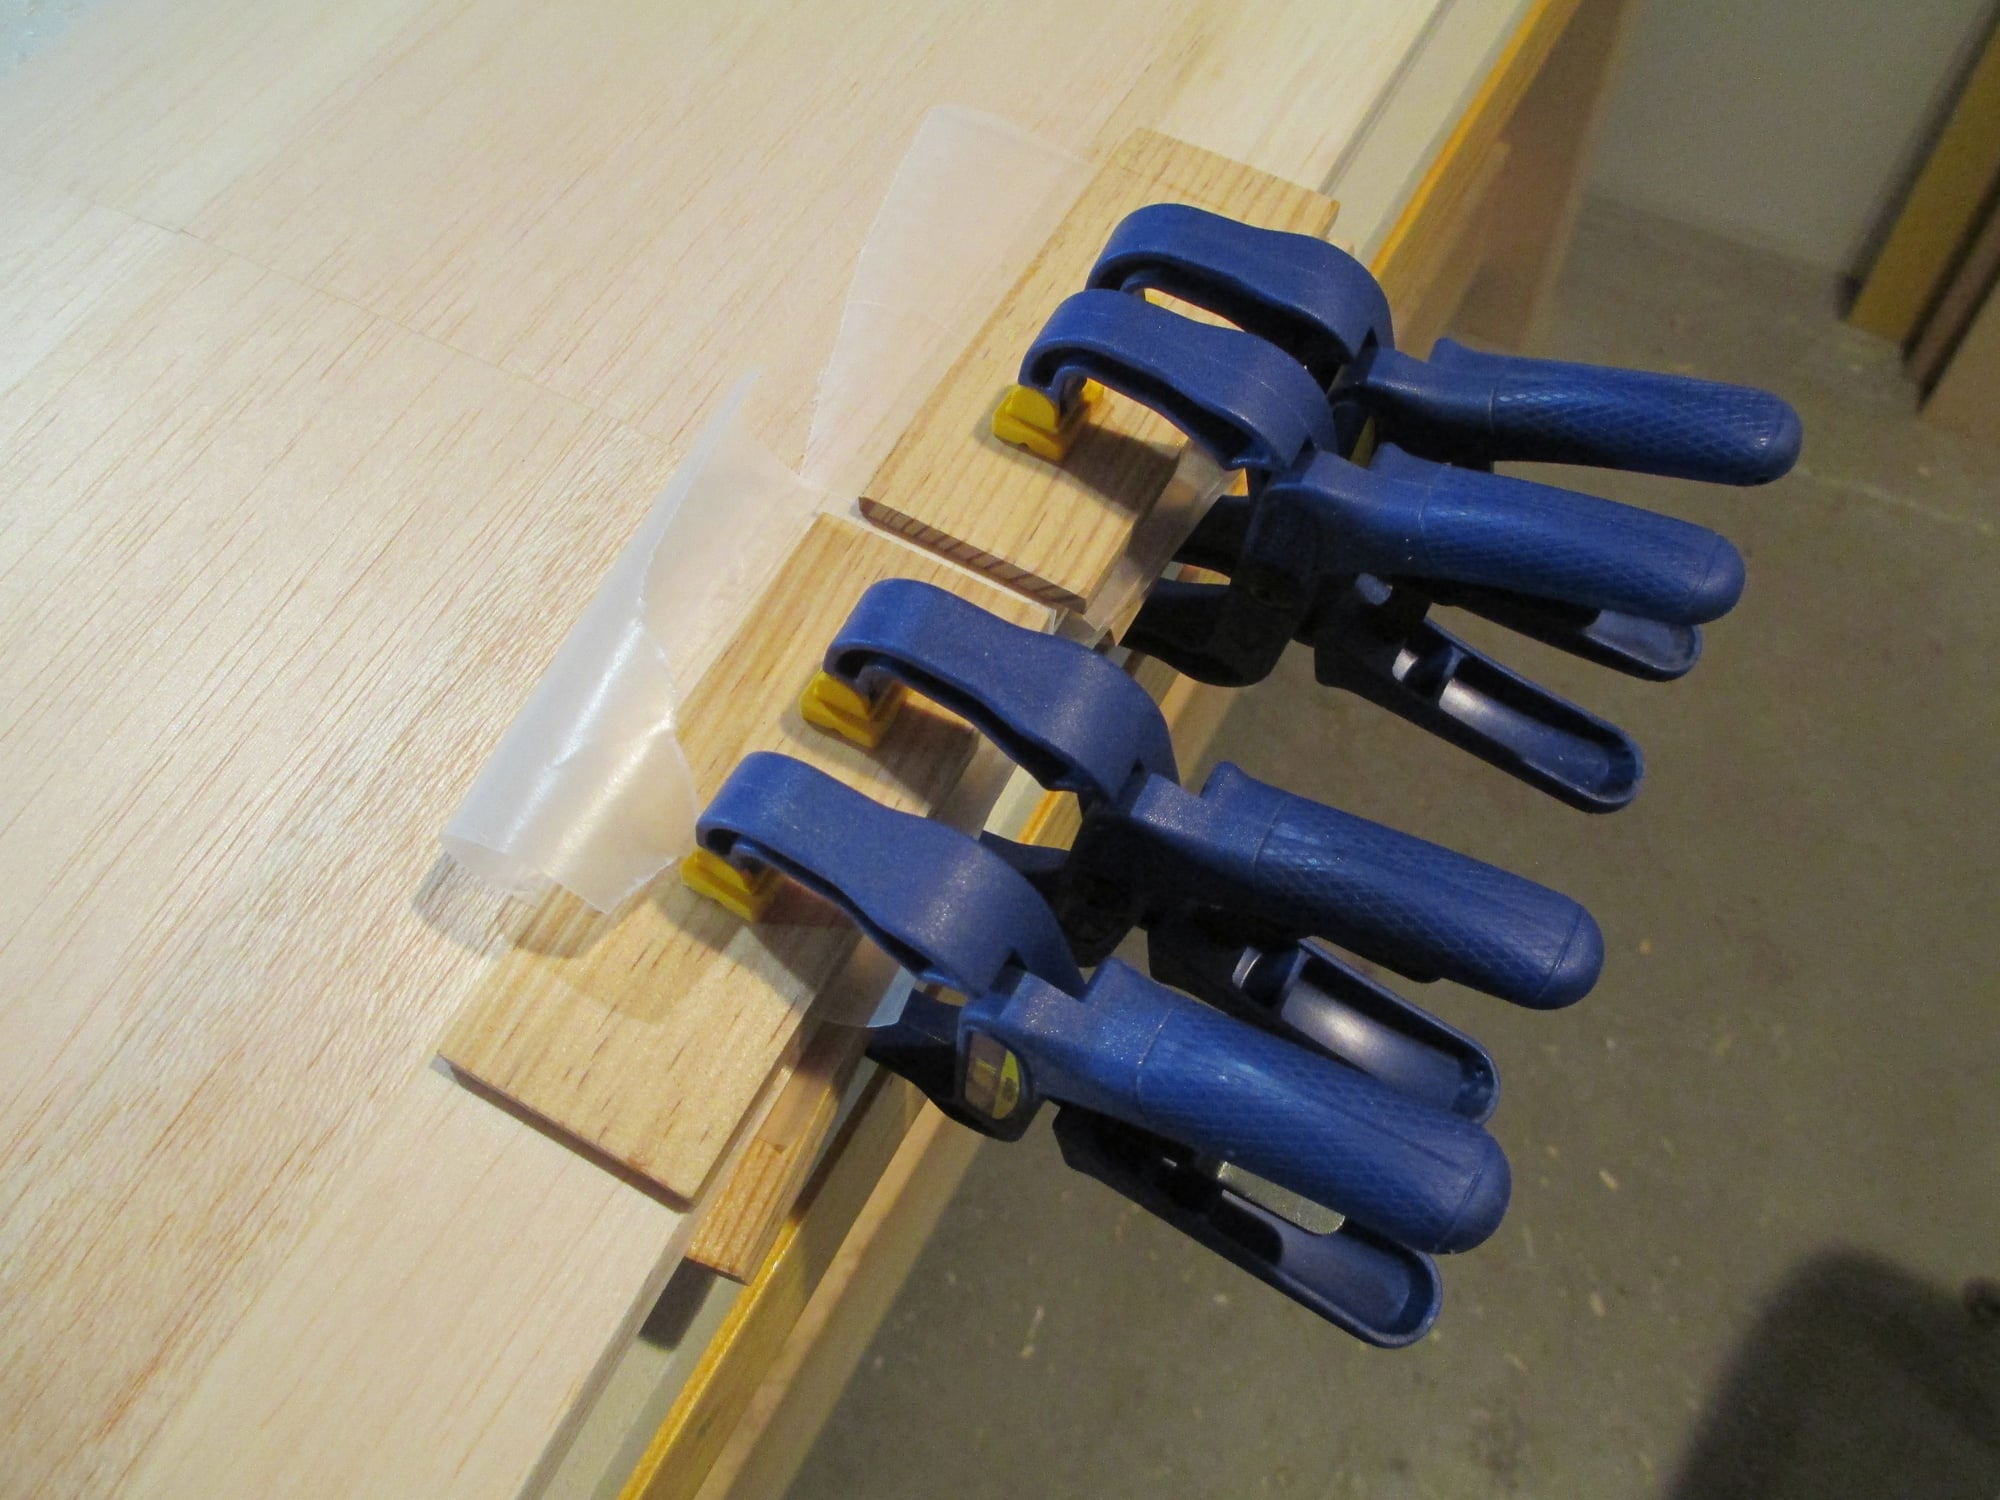
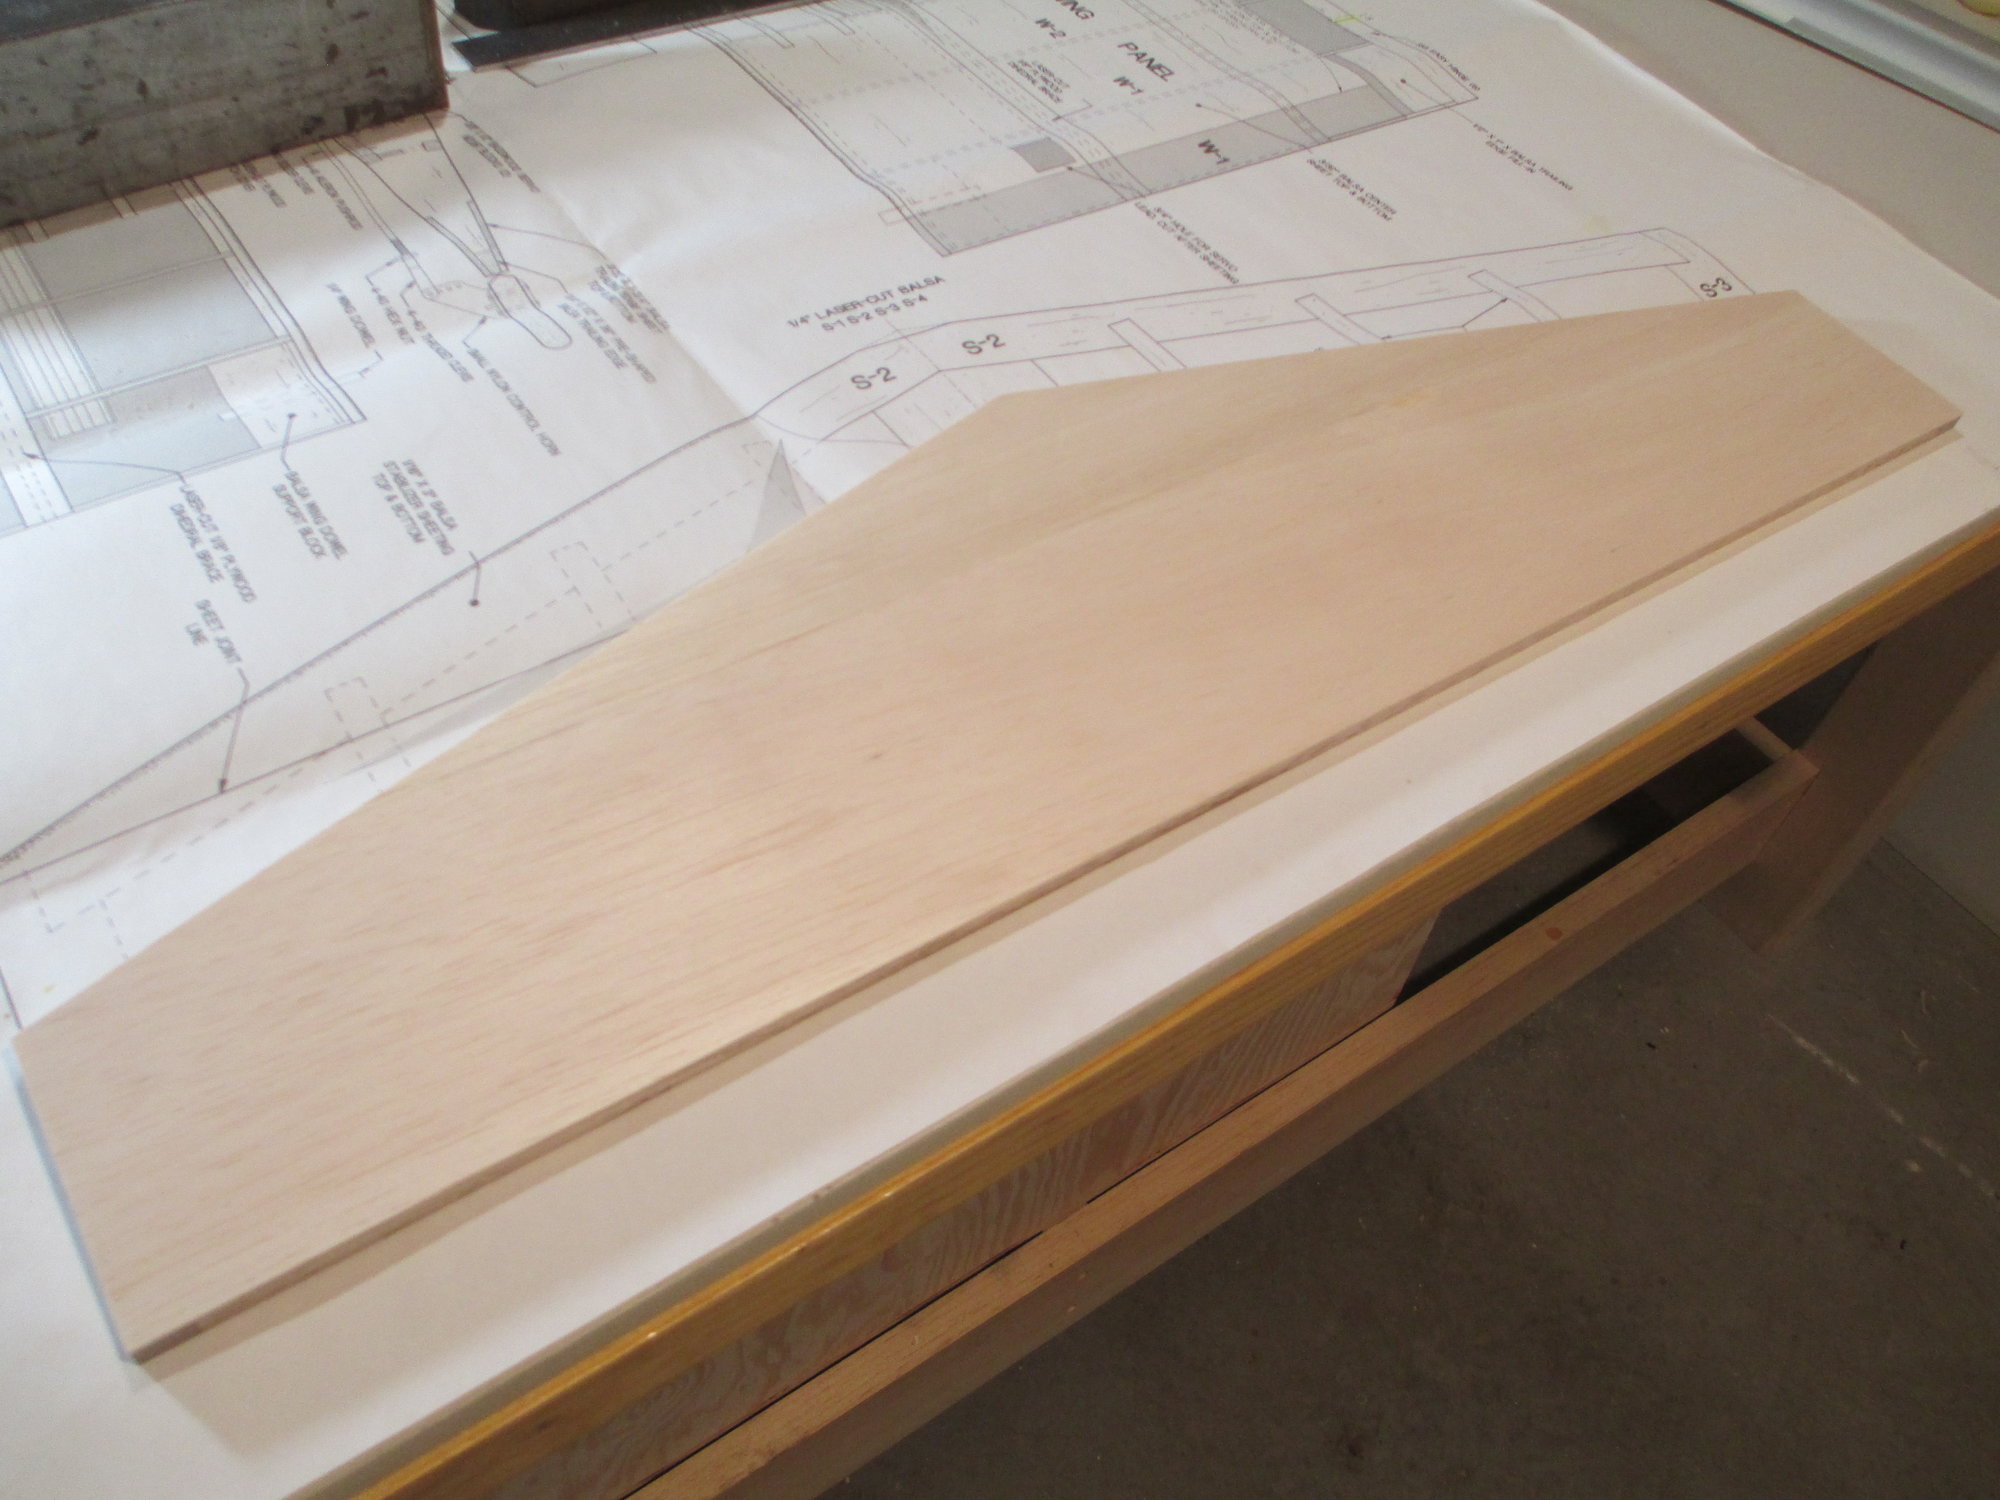
I did sheet the remaining bit on the stabilizer, and with the weight applied to hold it down while the glue dries, I decided to tackle a few other things...
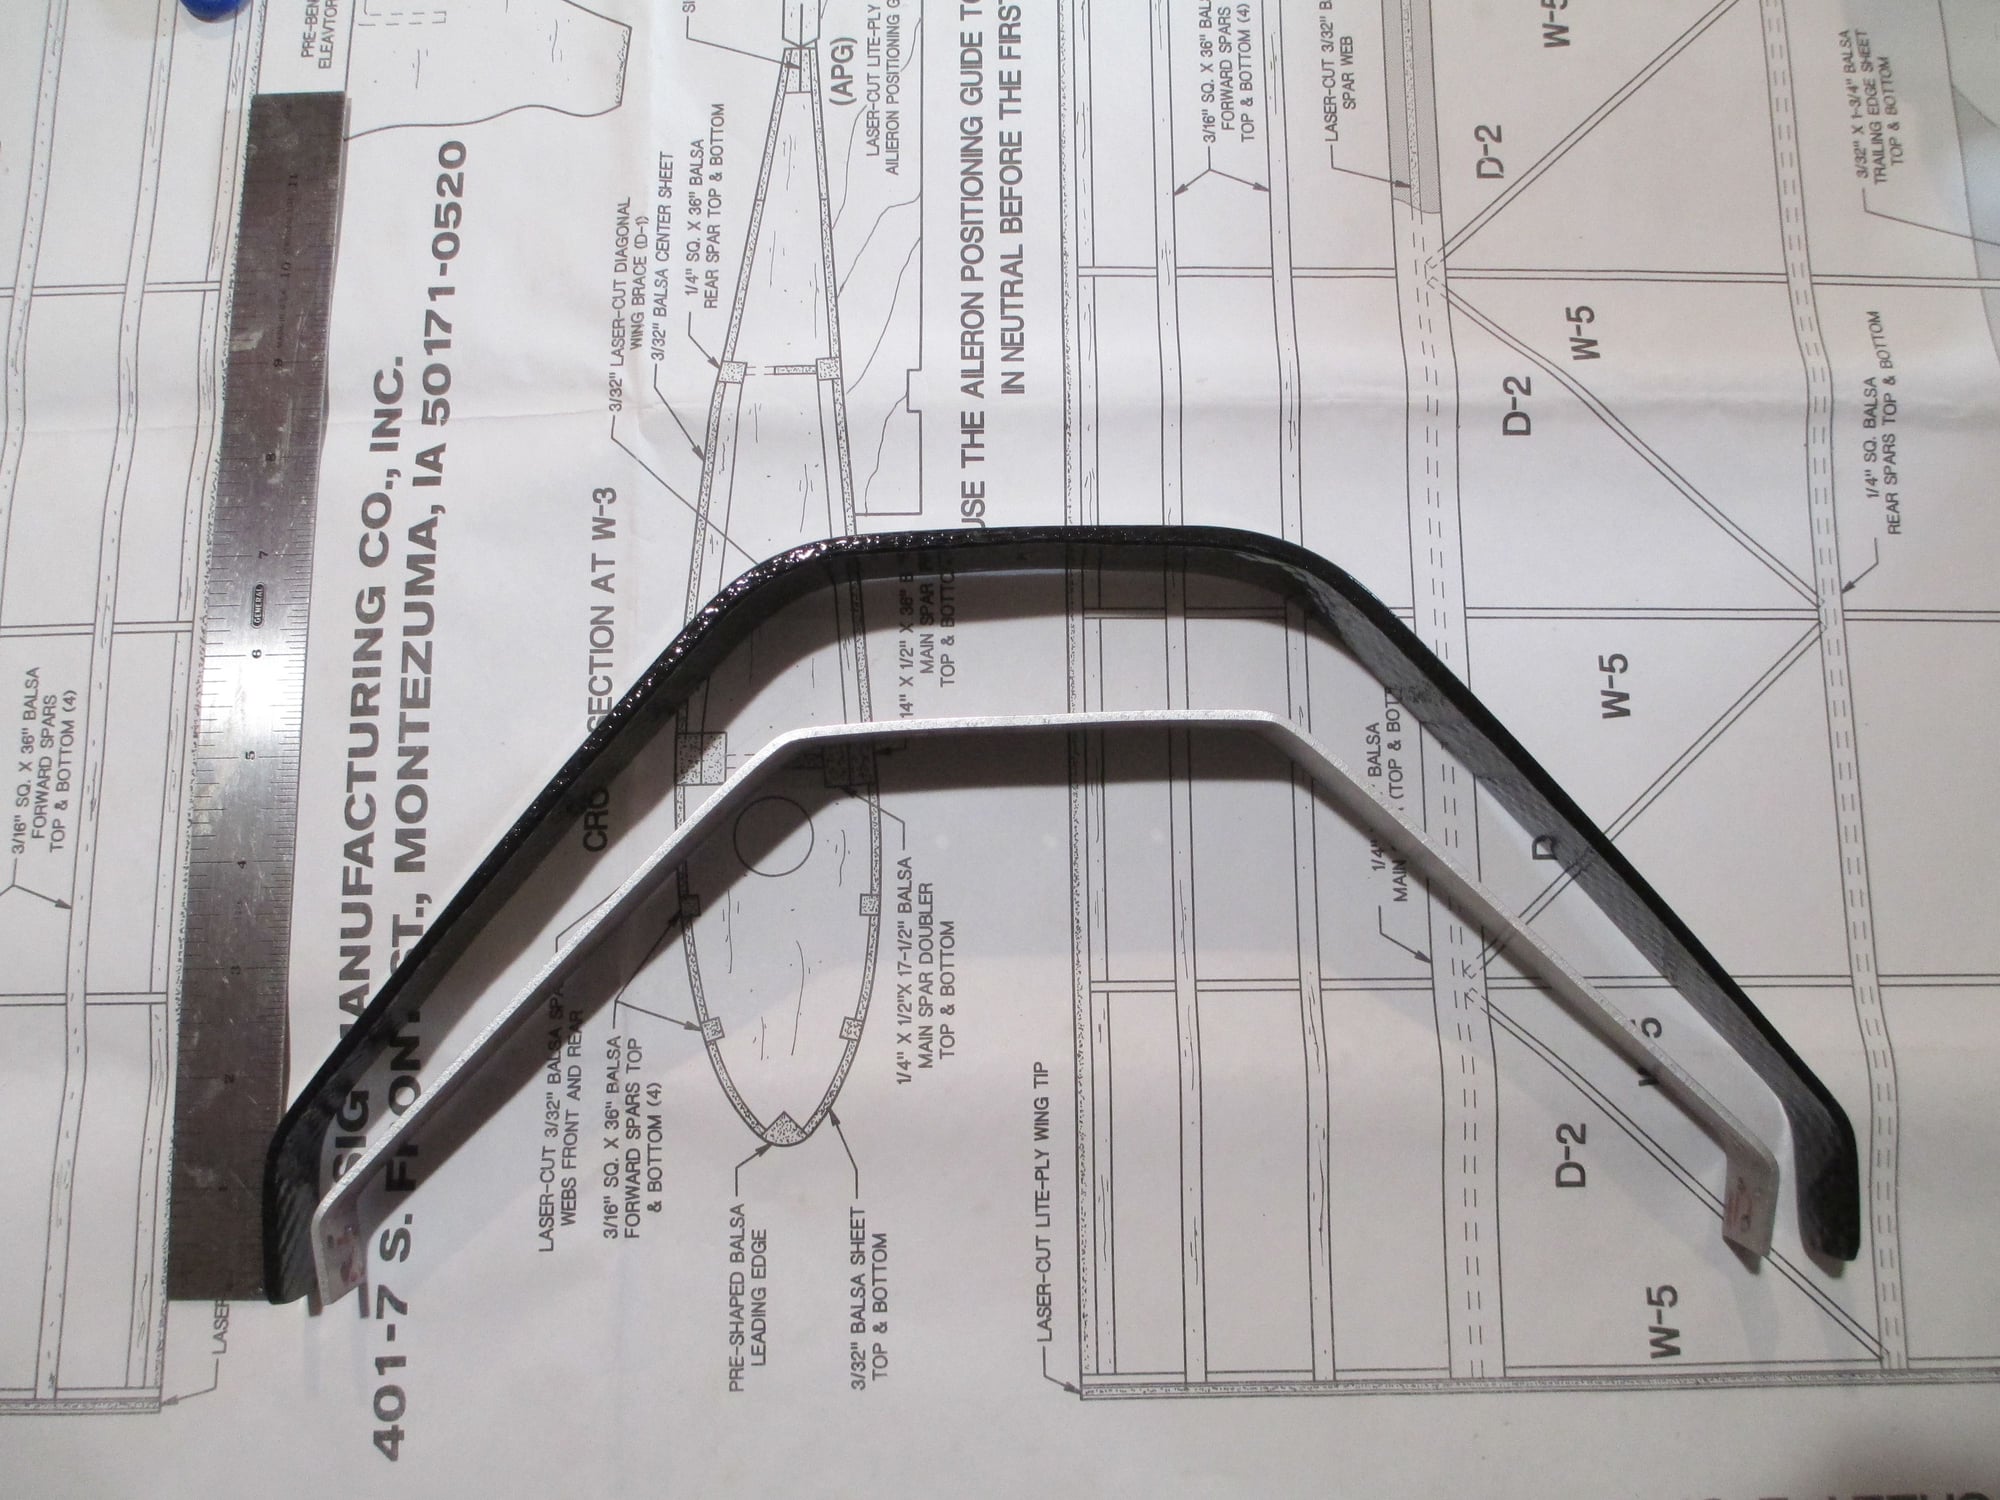
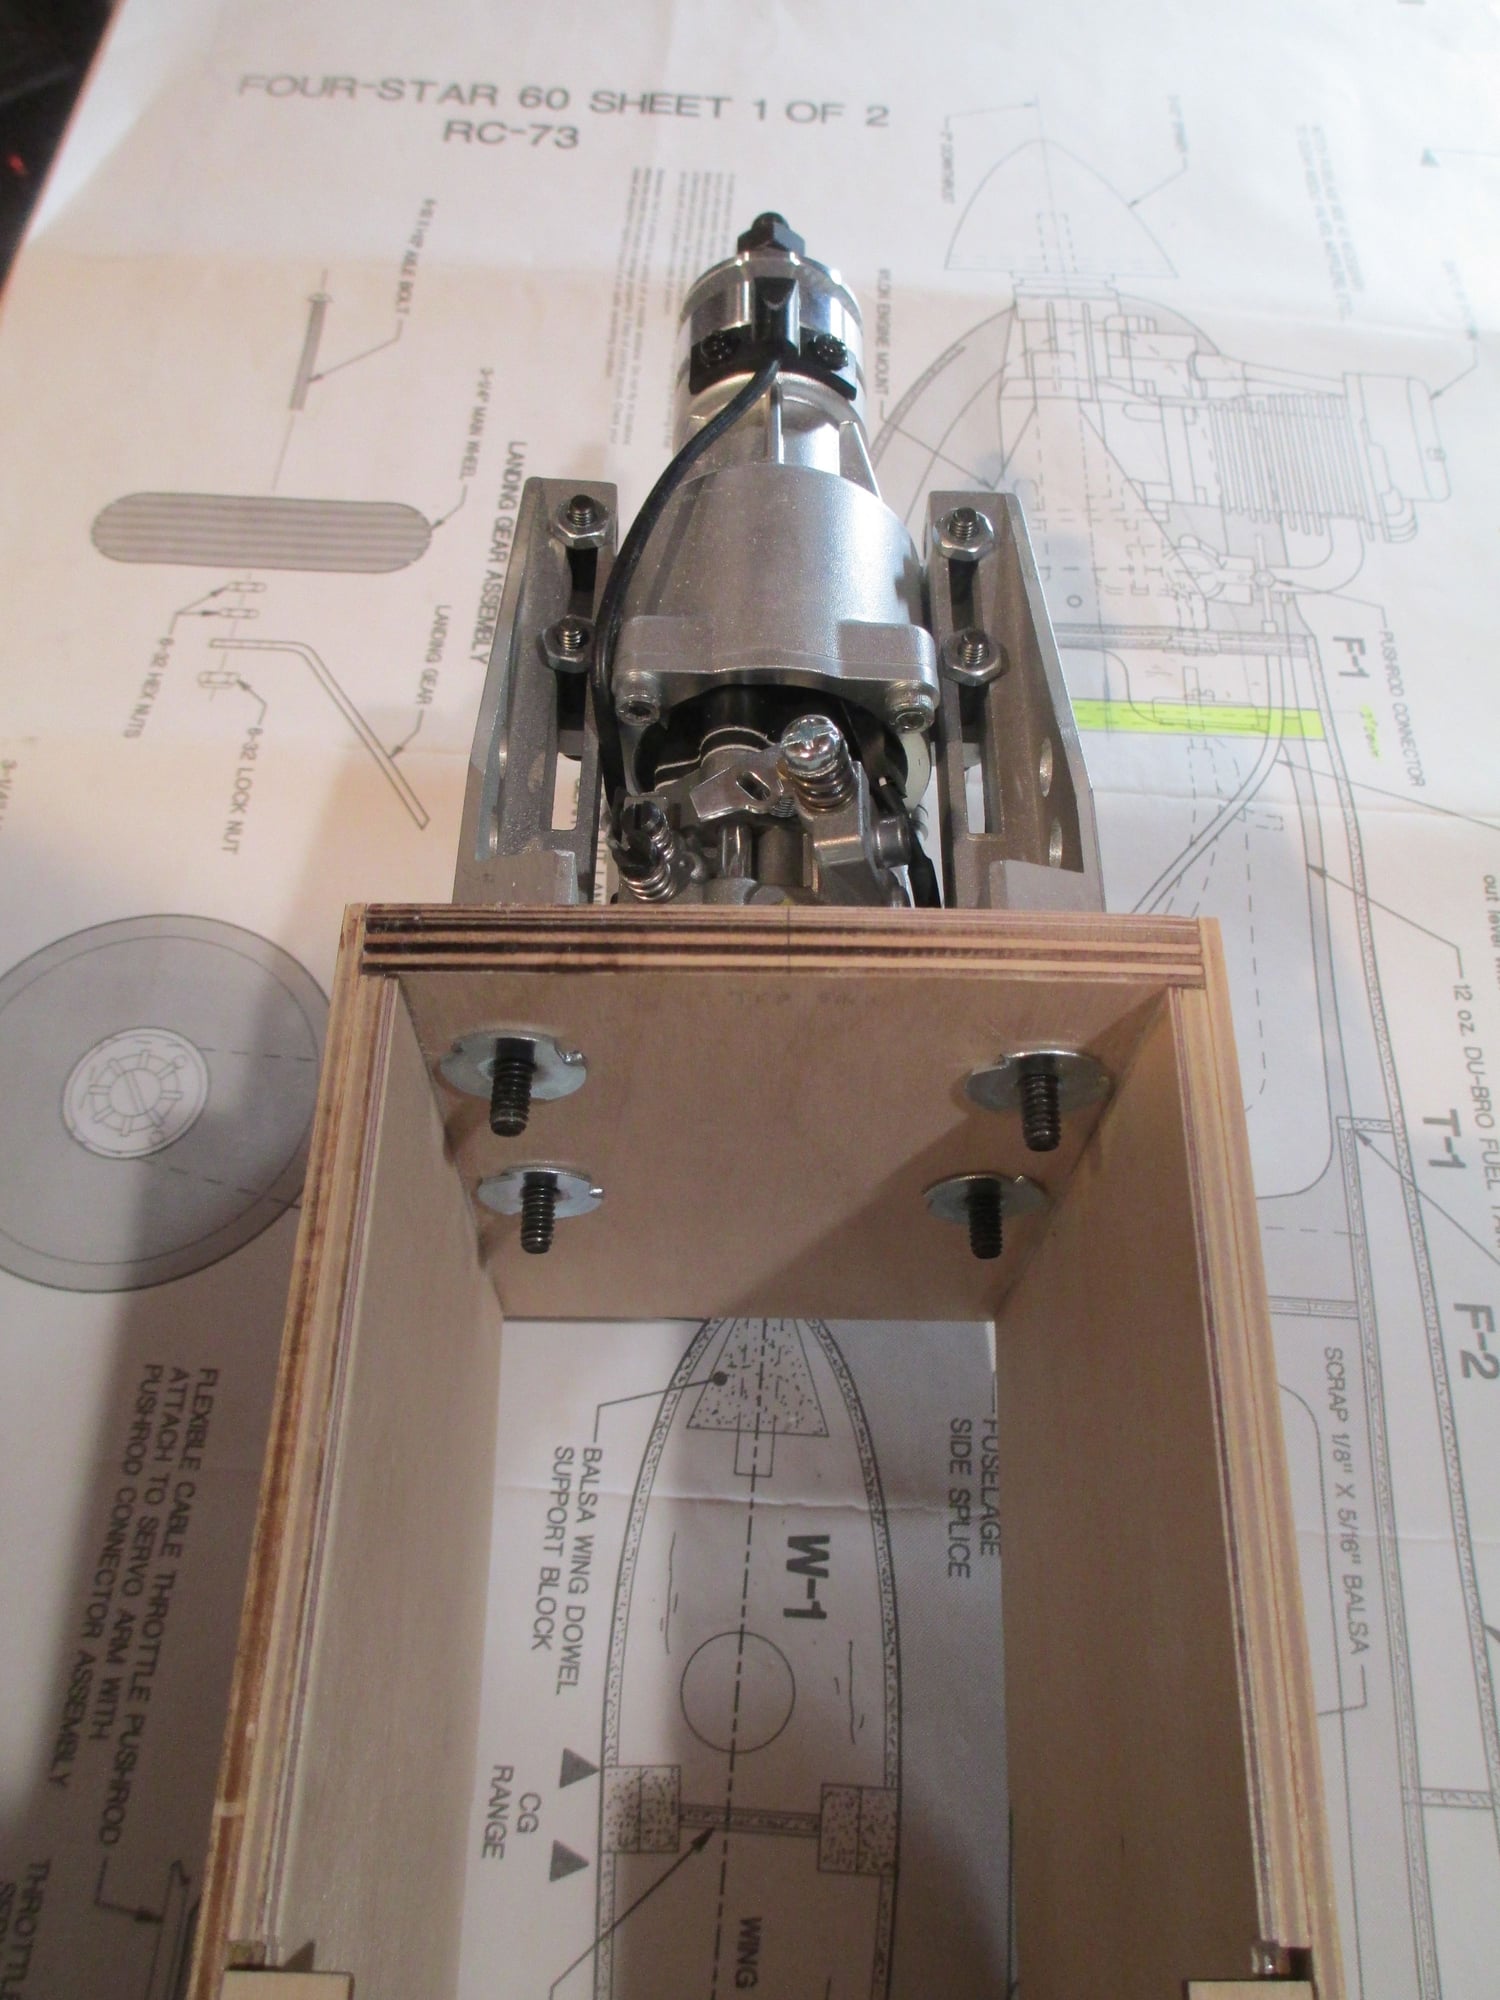
My carbon fiber landing gear came in today. I had it made to my specifications because a) the stock aluminum gear is junk and b) I needed the additional prop clearance to run a 16x8 prop. This should work just fine.
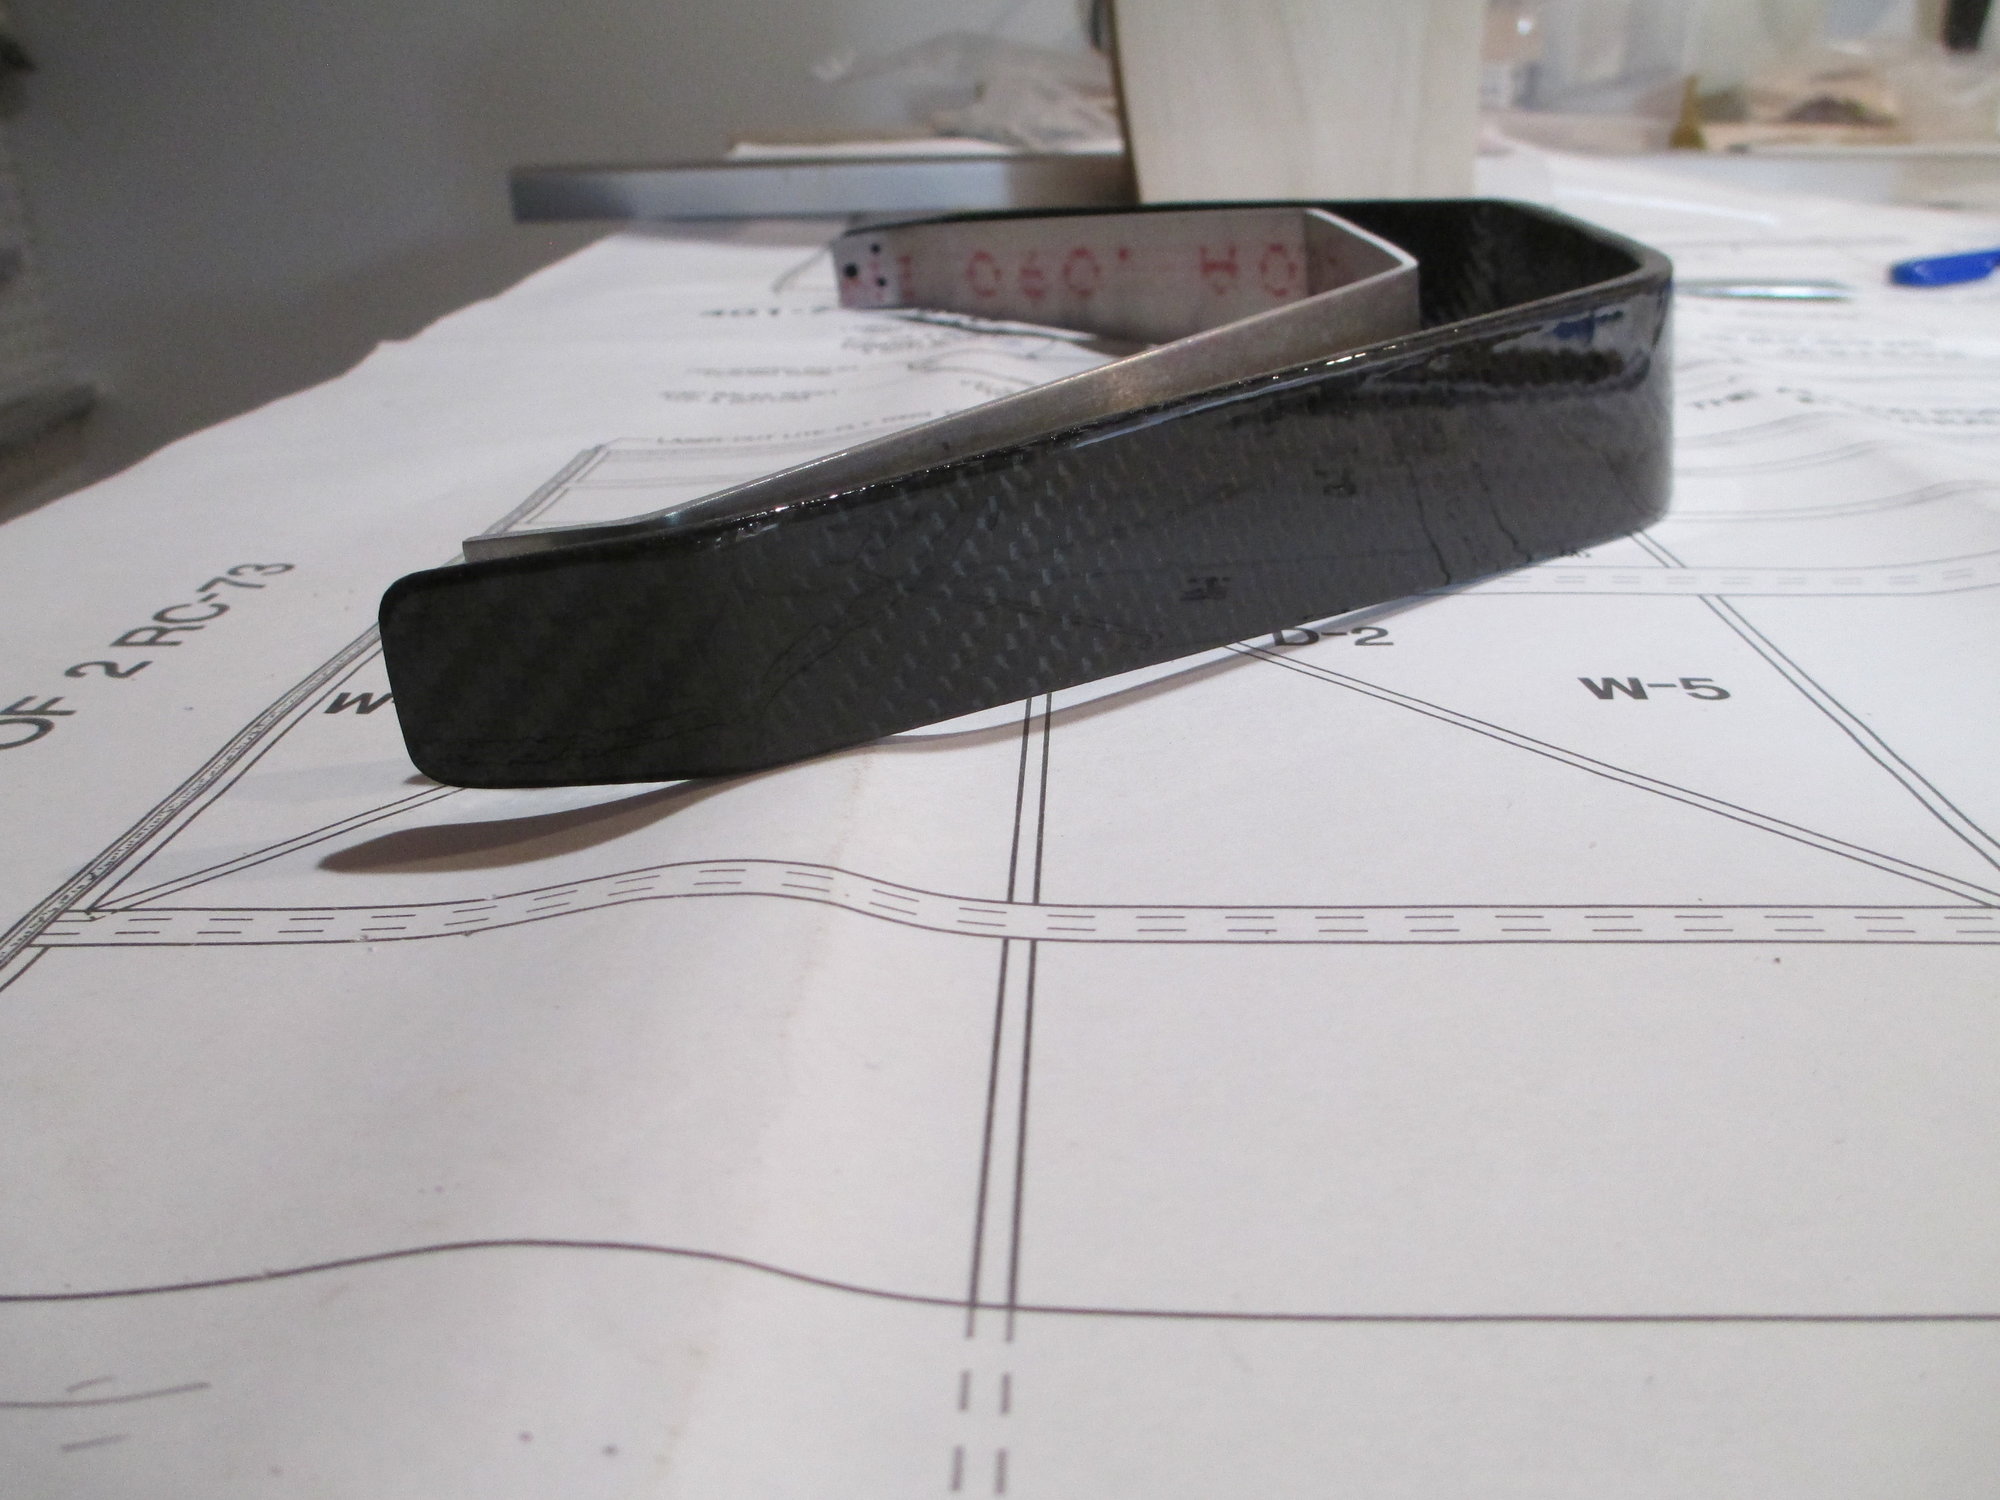
This CF gear is stout. If the aluminum gear was to fit, I'm sure it would bend out of shape quickly...
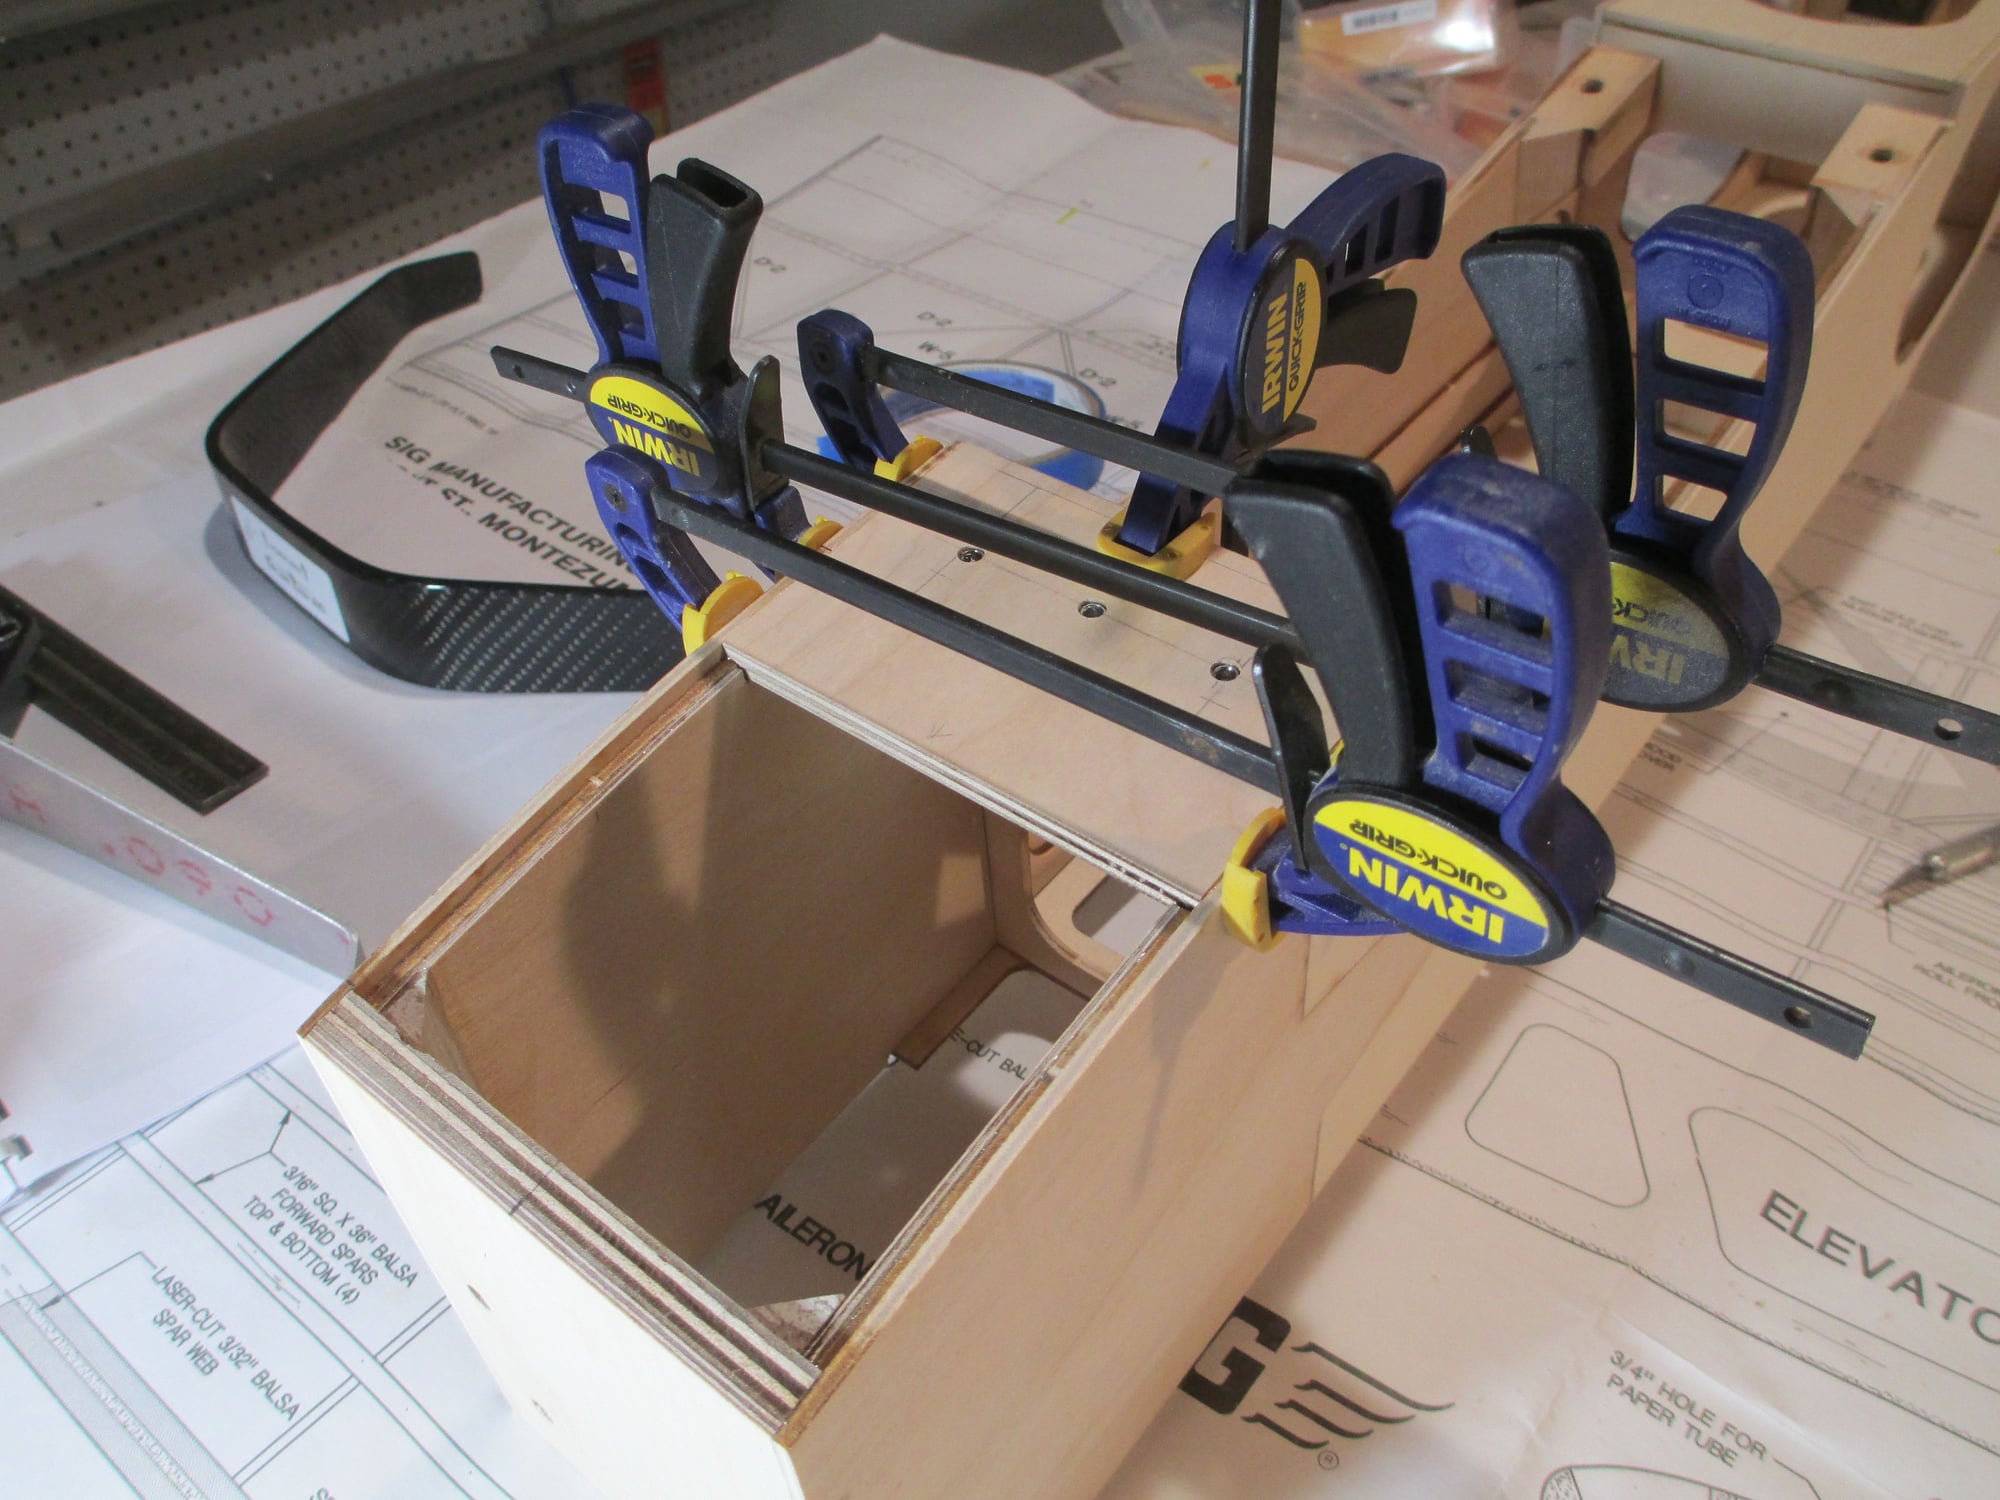
I didn't use the supplied plywood landing gear because I didn't like the fit, so I made myself one that fit tighter. It's epoxied in place and tomorrow I'll add more bracing to the inside.
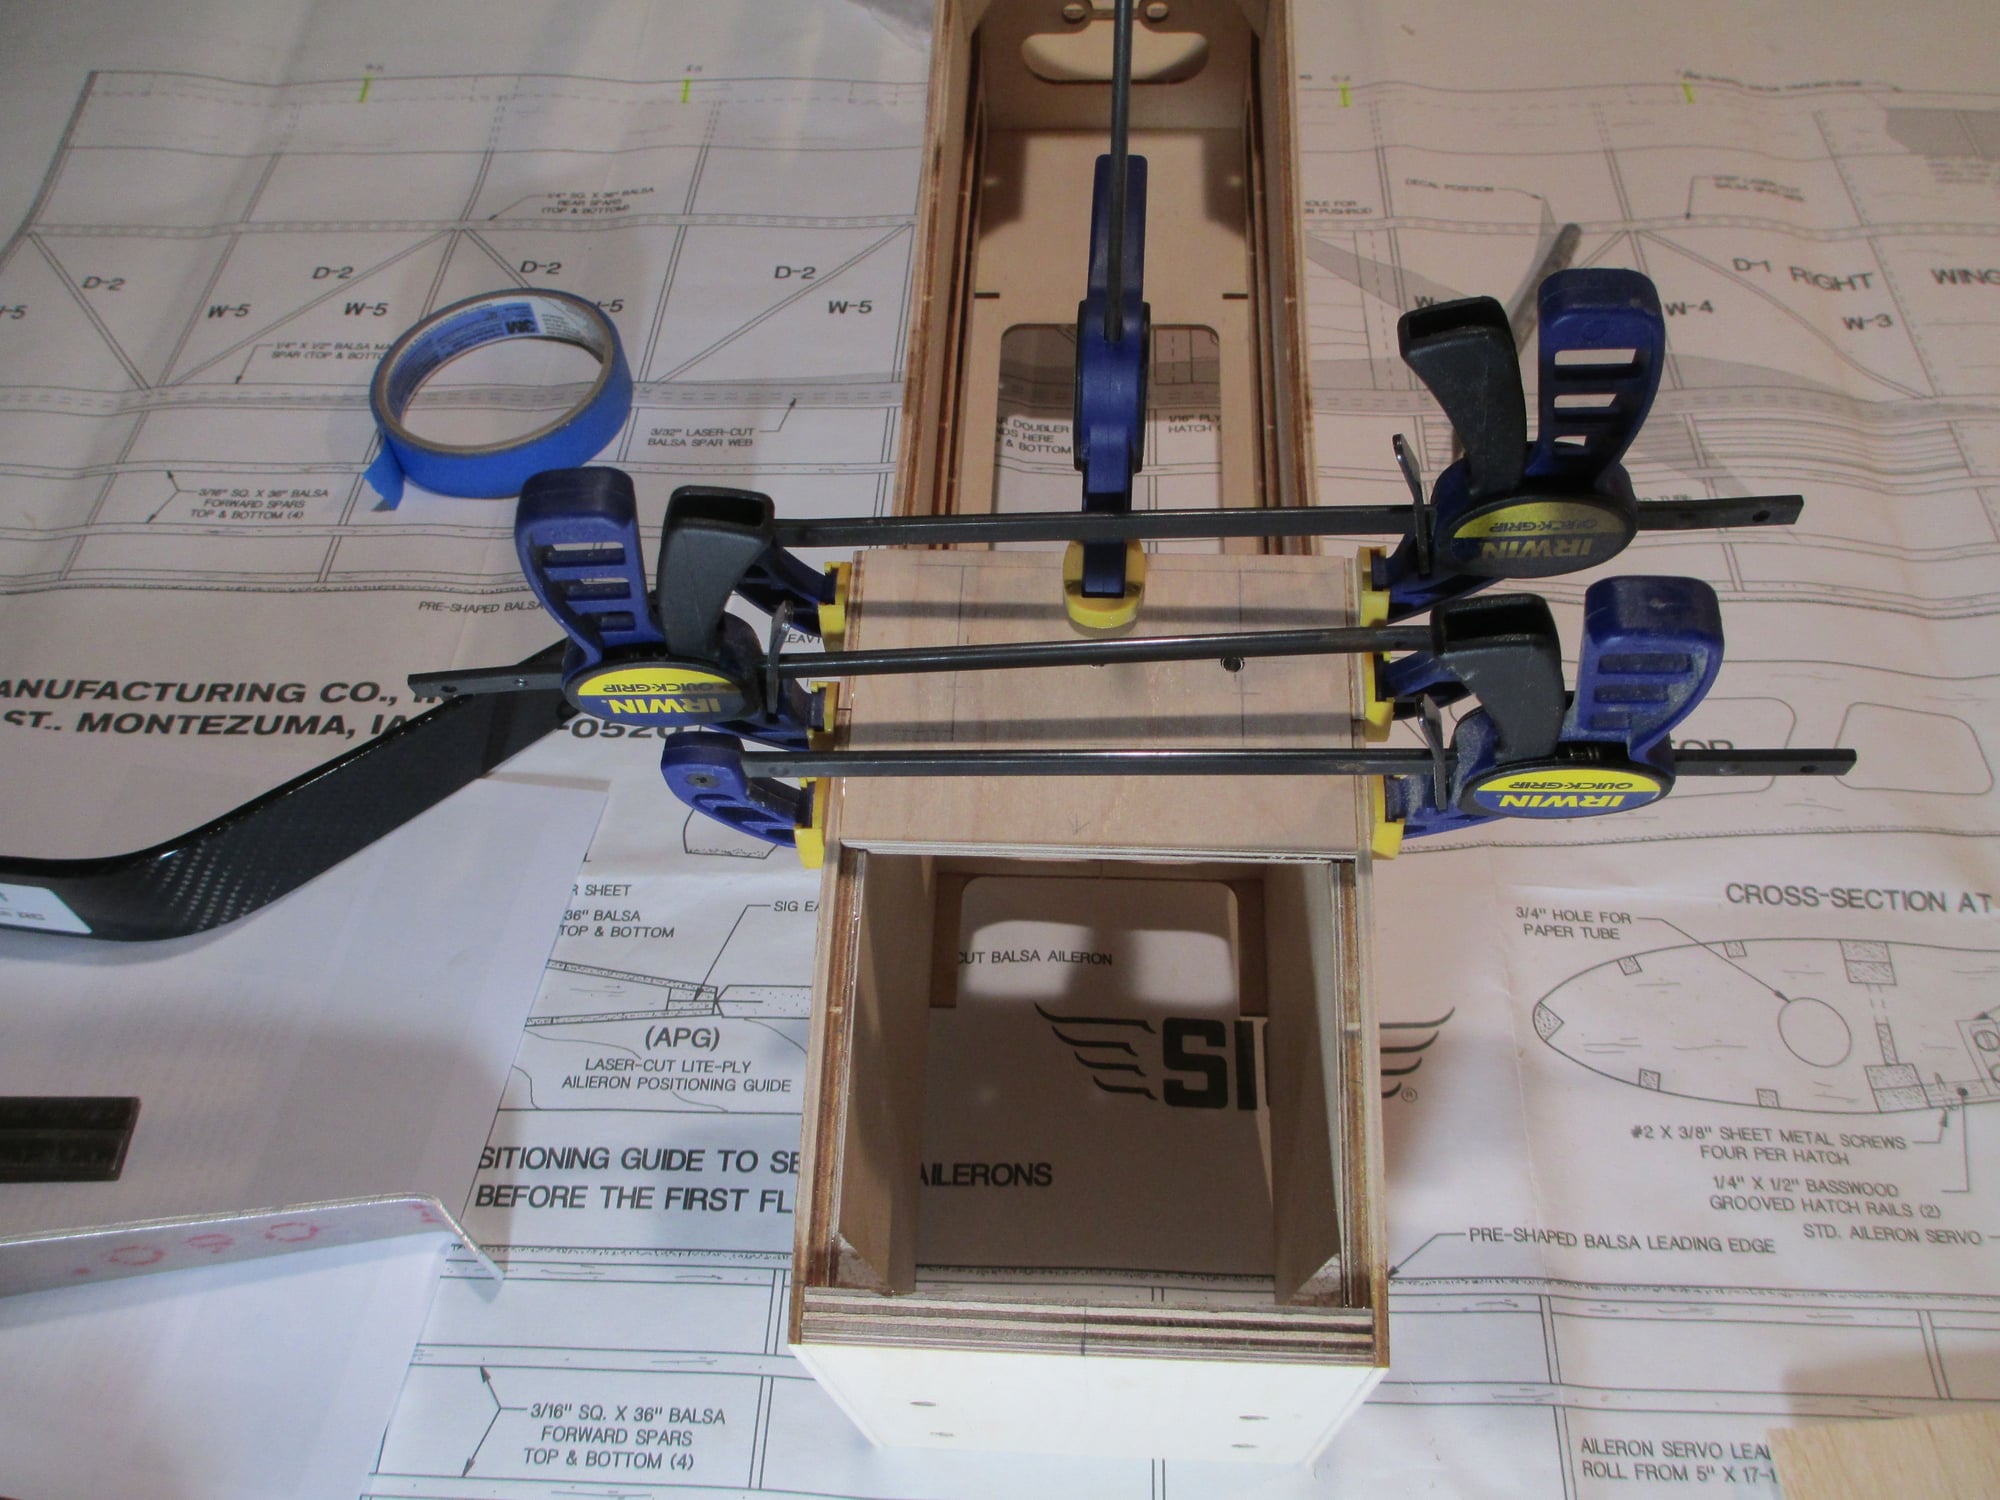
These clamps will hold it into position until the epoxy dries.
My carbon fiber landing gear came in today. I had it made to my specifications because a) the stock aluminum gear is junk and b) I needed the additional prop clearance to run a 16x8 prop. This should work just fine.
This CF gear is stout. If the aluminum gear was to fit, I'm sure it would bend out of shape quickly...
I didn't use the supplied plywood landing gear because I didn't like the fit, so I made myself one that fit tighter. It's epoxied in place and tomorrow I'll add more bracing to the inside.
These clamps will hold it into position until the epoxy dries.
Last edited by VincentJ; 04-12-2019 at 03:39 PM.