


Royal Ki-61 Build
 01-15-2020, 12:50 PM
#1


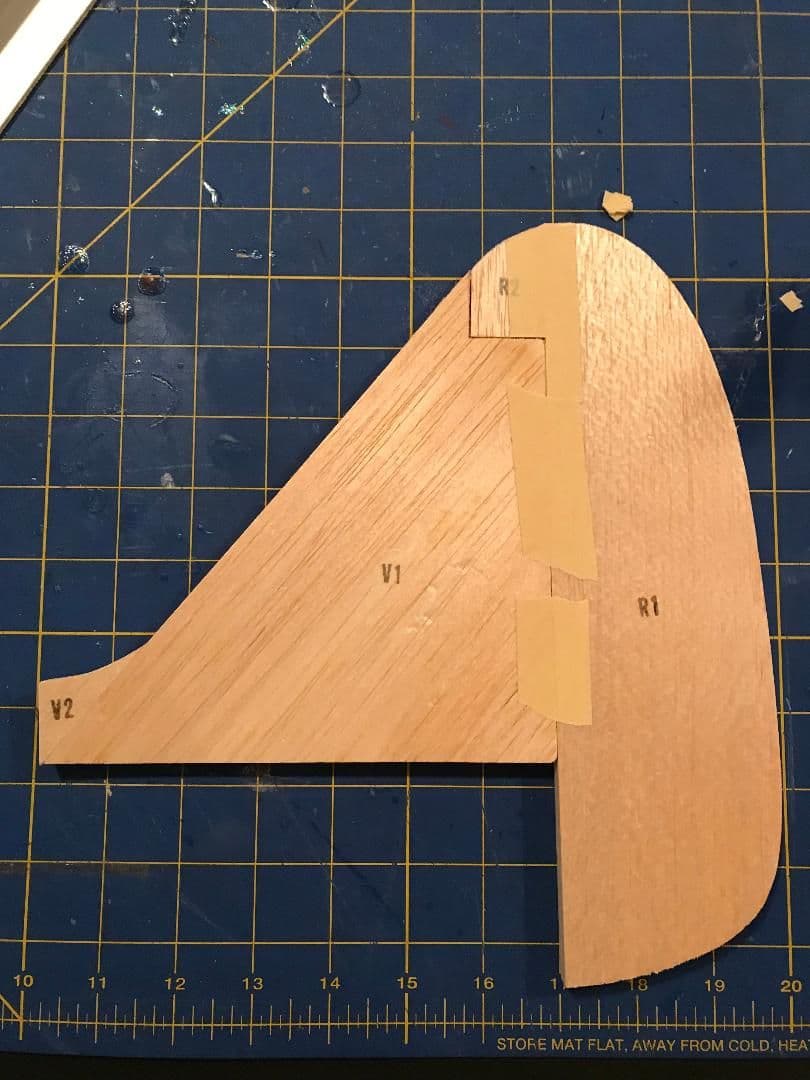
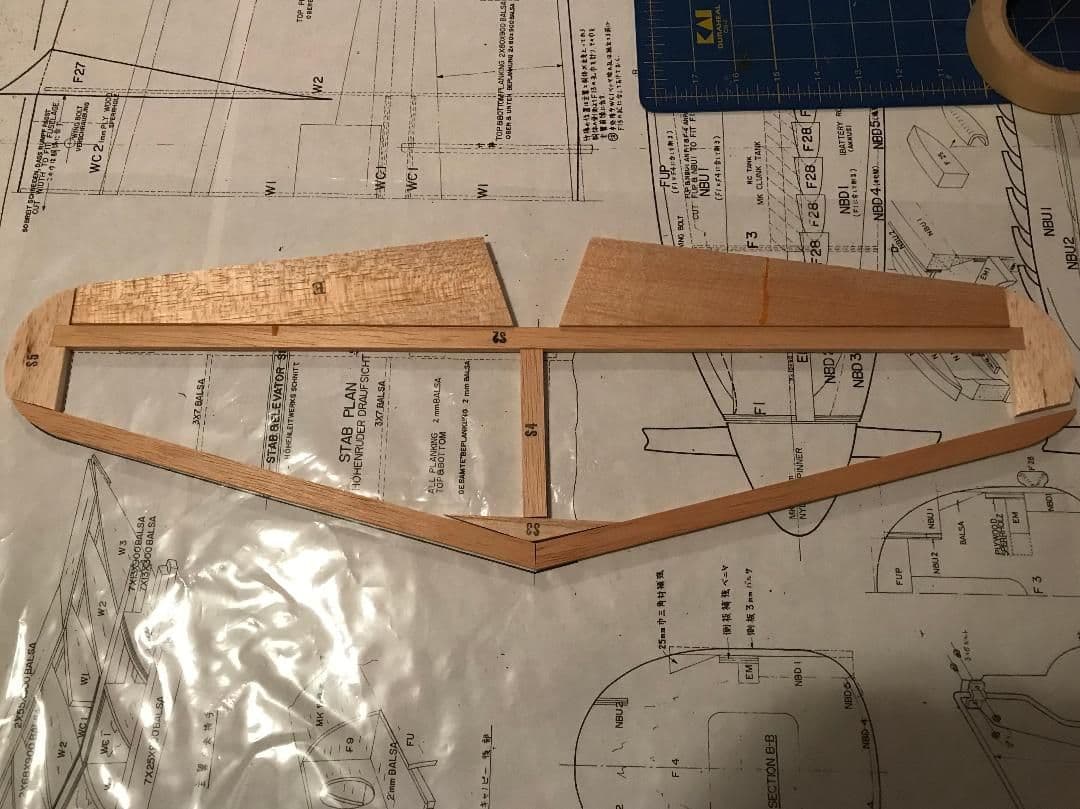
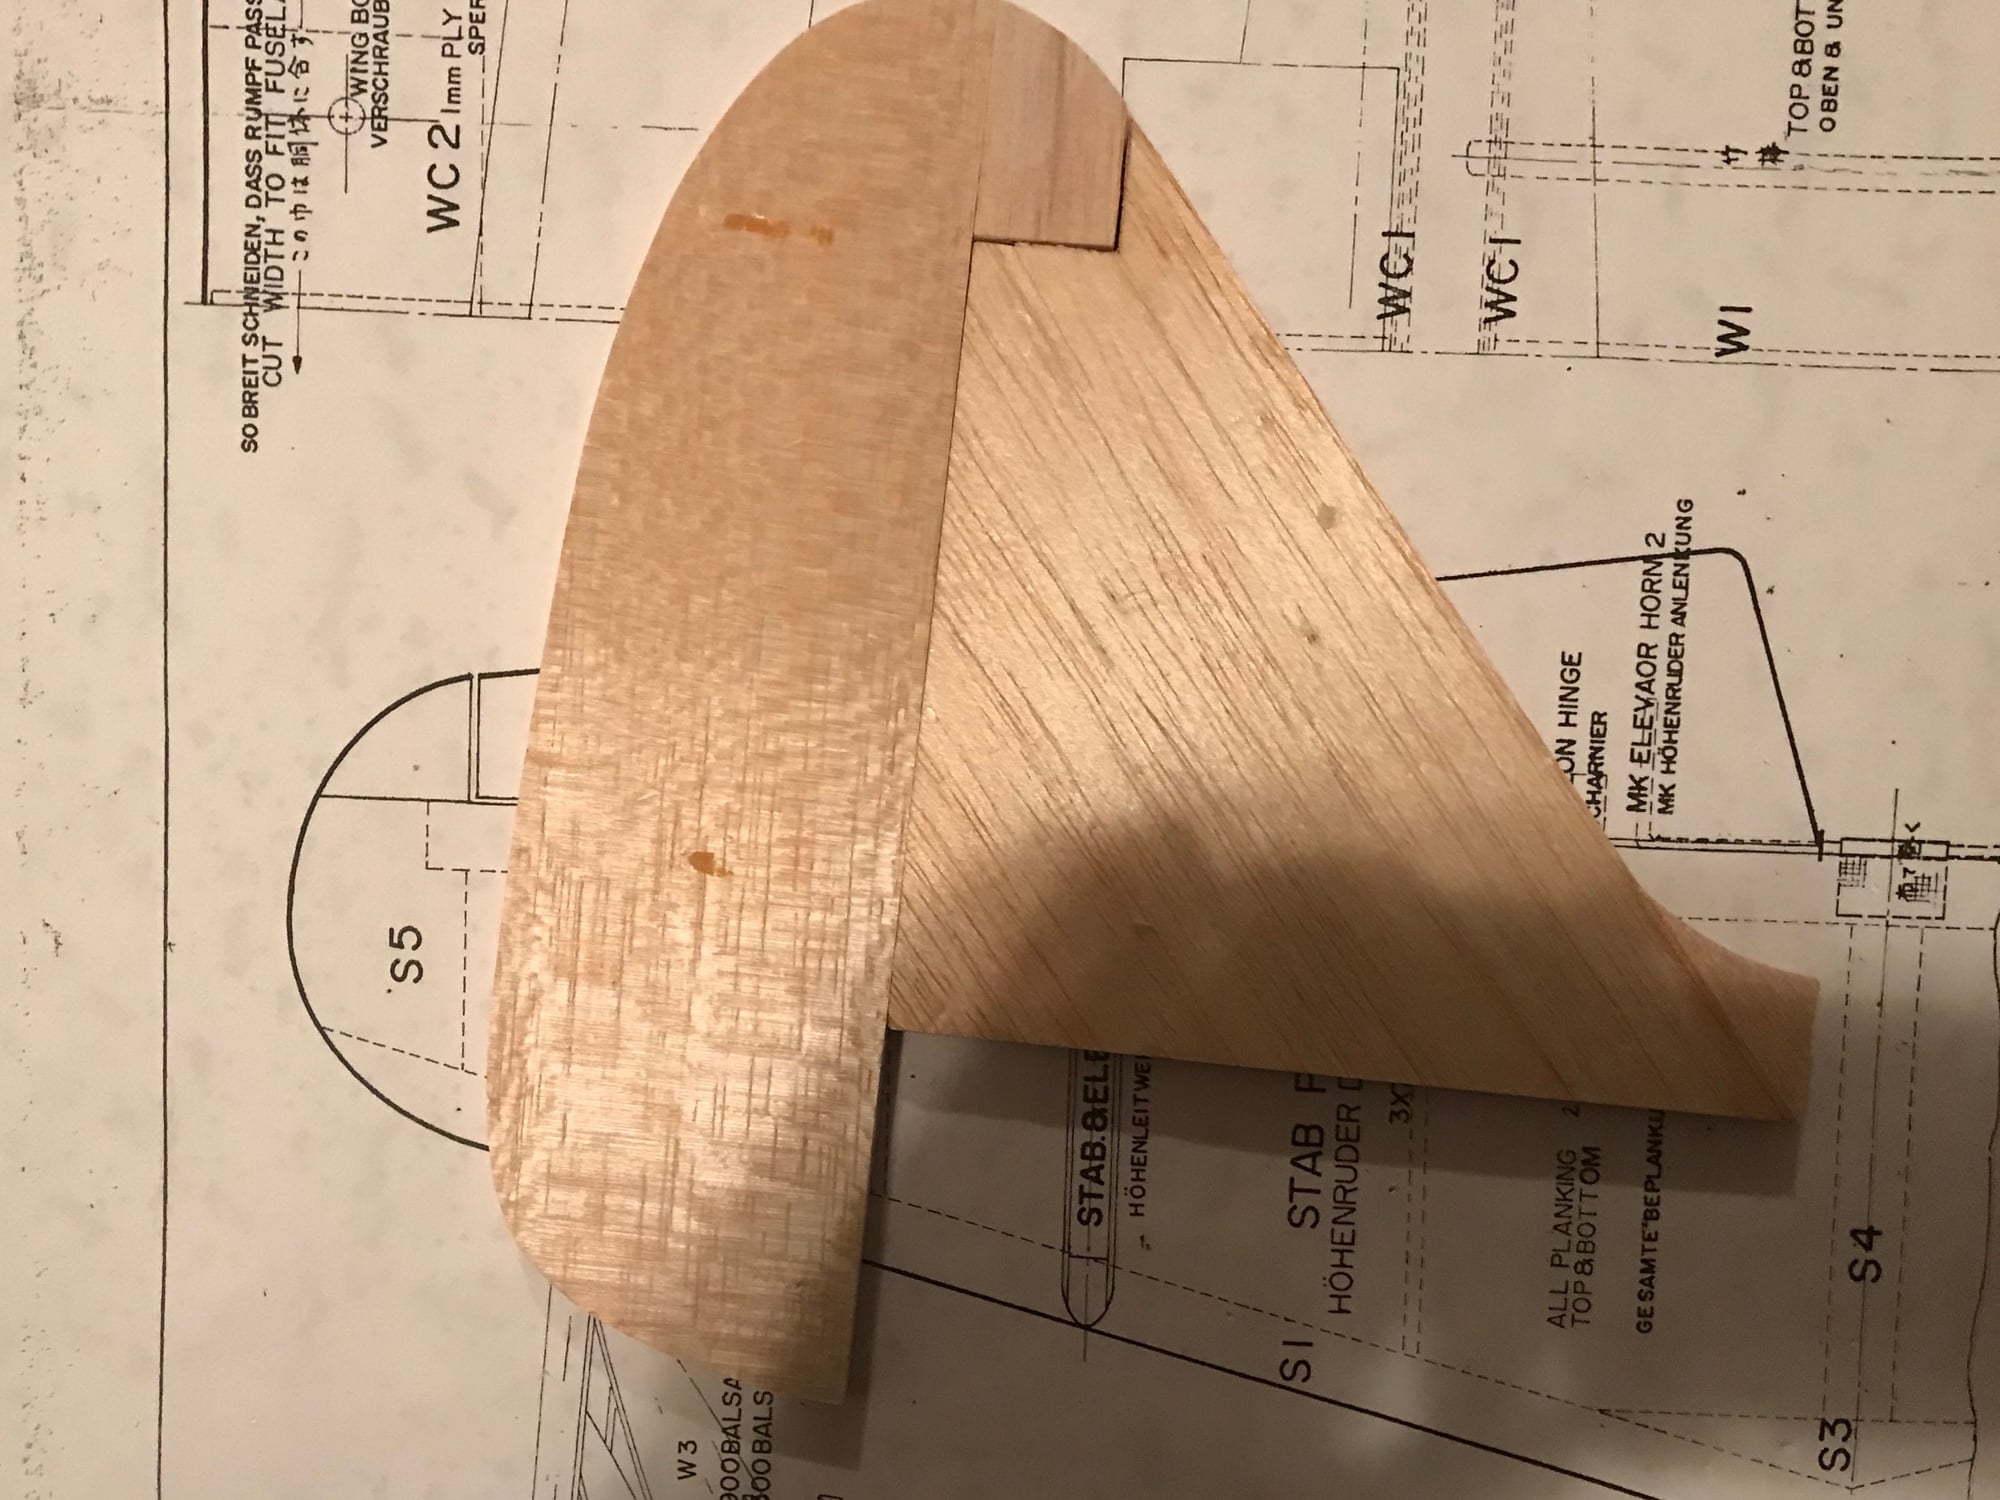
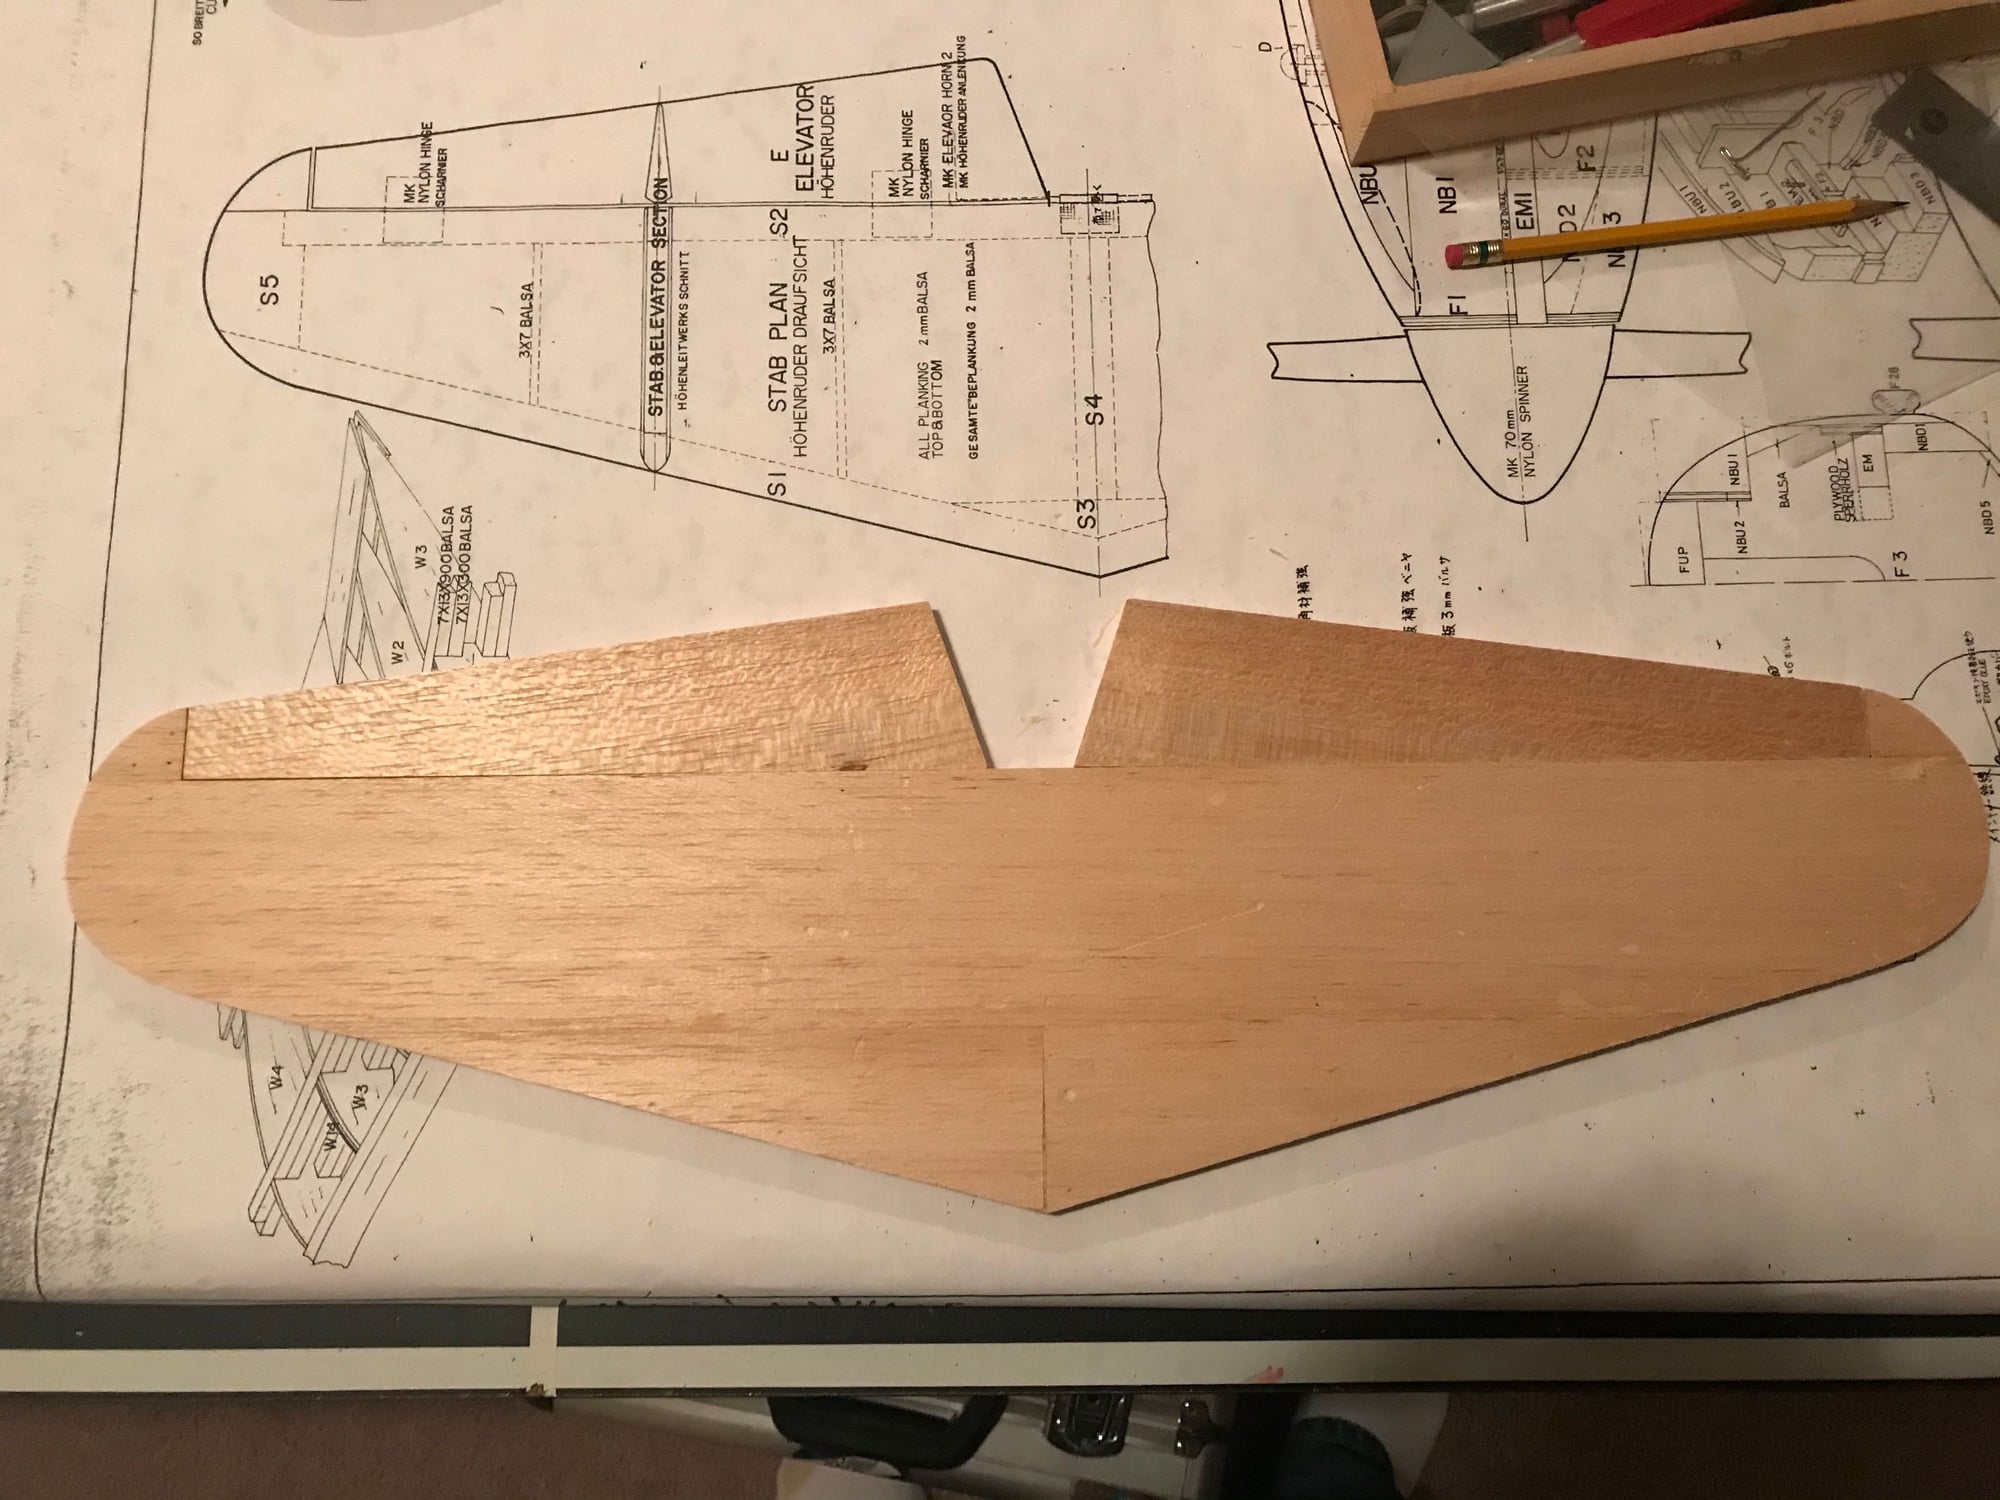
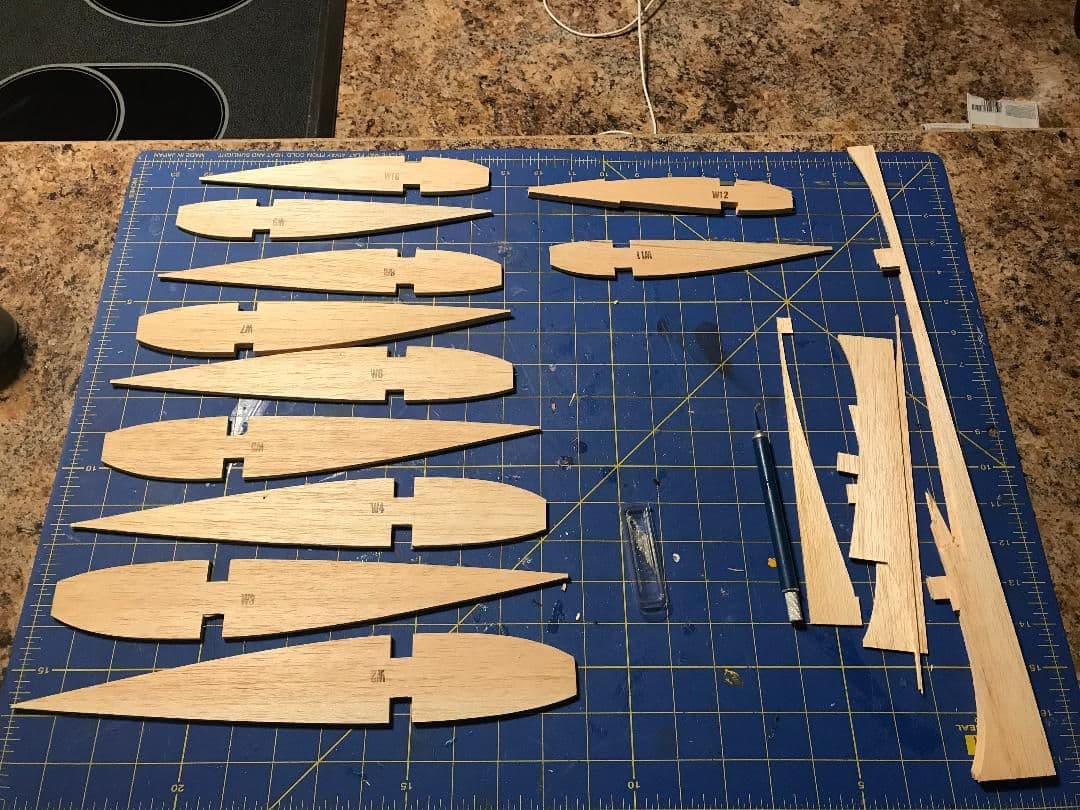
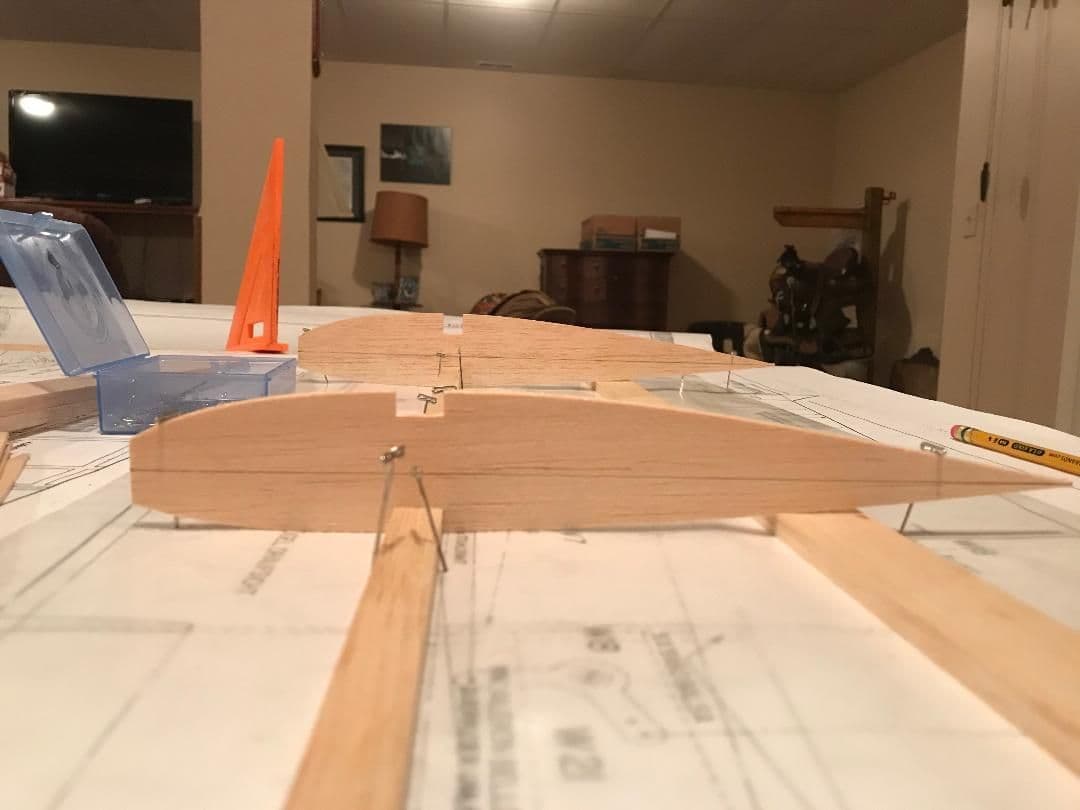
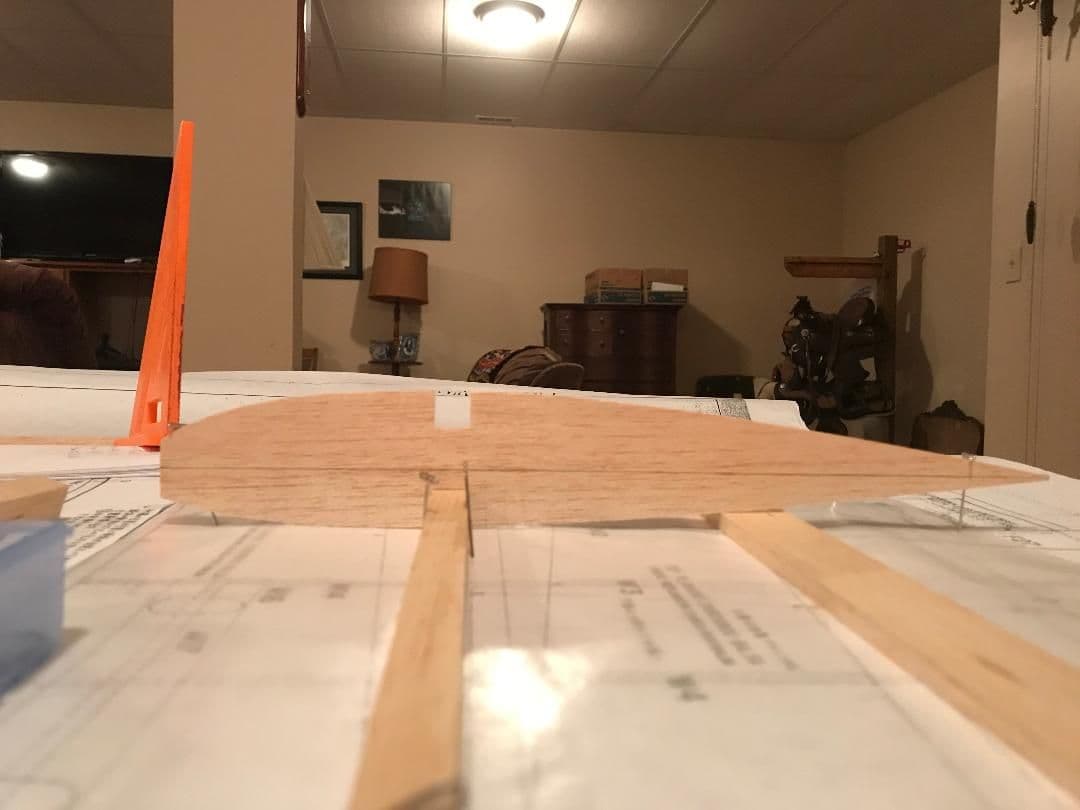
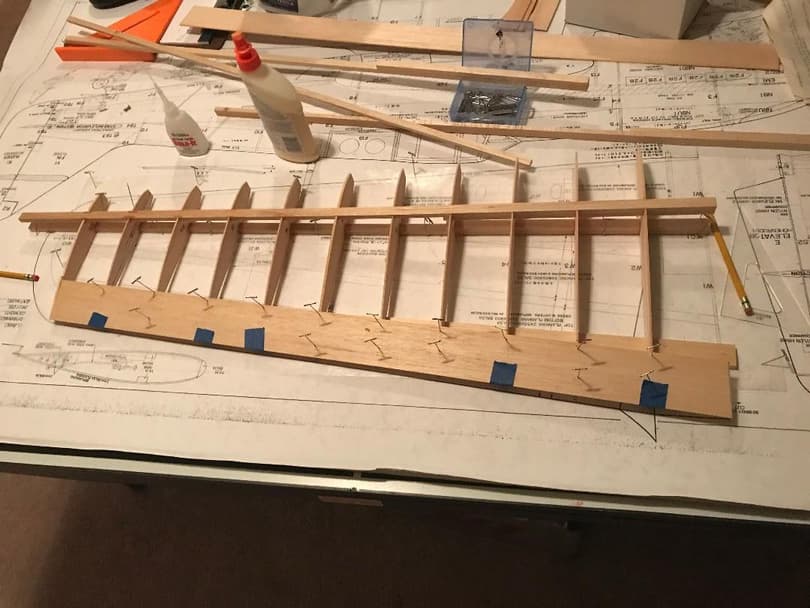
Okay I have started my build. This is going to be along build for me. I am a slow builder on a good day and this Kit is old and there will be a lot of looking and making sure I am doing it right before I glue stuff. first pic shows started and have R2 to R1 and have also glued V2 to V1. I have also spot glued the rudder to the fin so it is ready to sand to shape. I hate sanding and there will be a lot of that on this plane. Pic 2 shows the Horizontal Stab Laid out for glue. More to come on the build
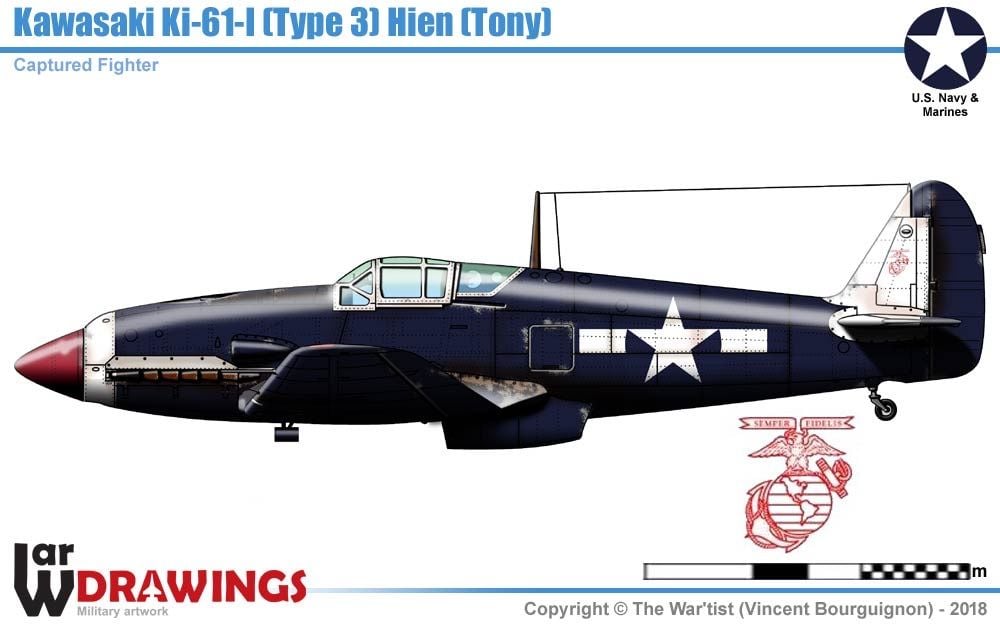
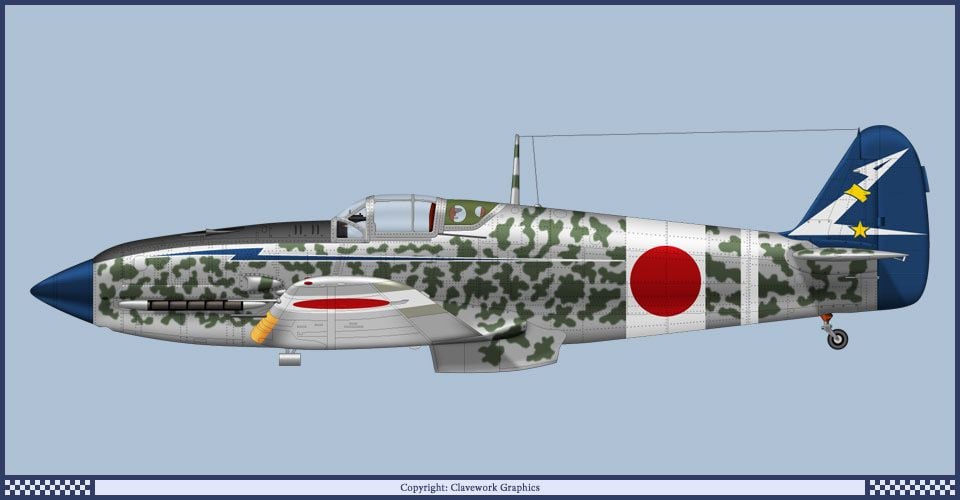
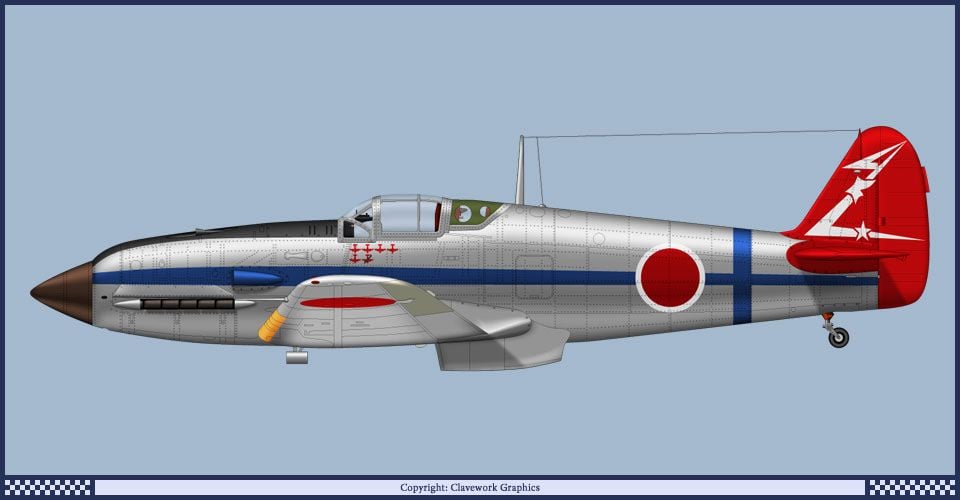
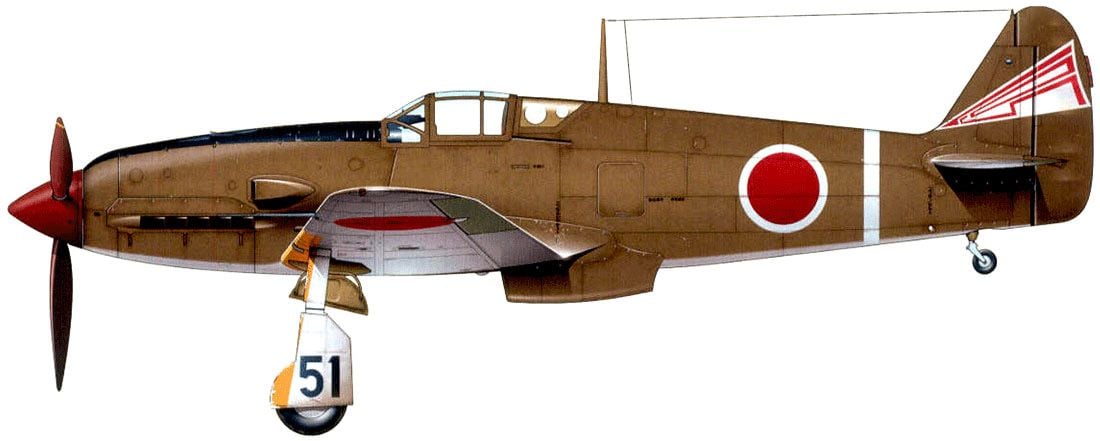
I have also attached accouple of possible color options. Feel free to chime in and let me know what you all think and if you have any tips or suggestions.
I have also attached accouple of possible color options. Feel free to chime in and let me know what you all think and if you have any tips or suggestions.

 01-16-2020, 06:44 AM
#3
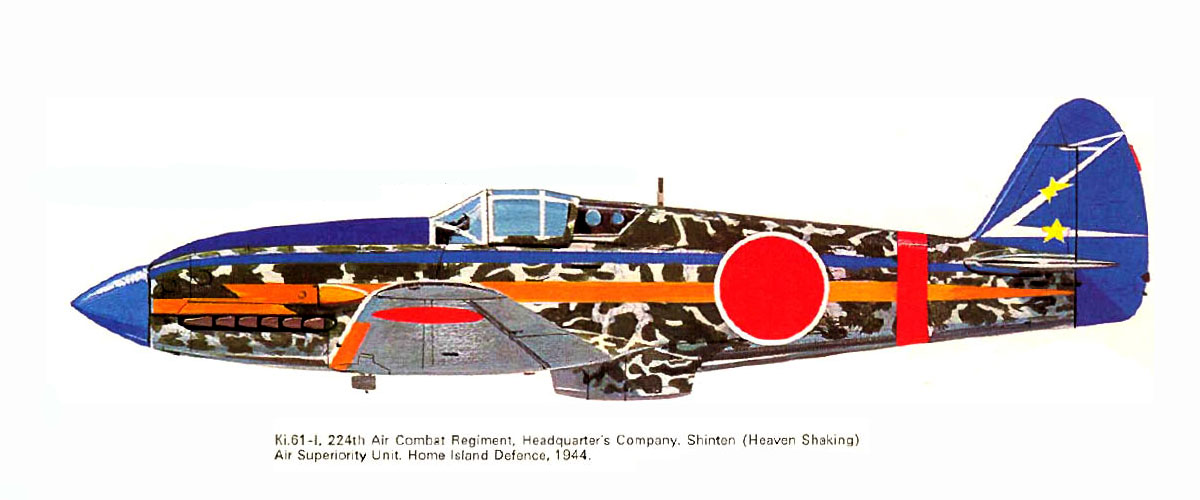
I haven't decided on the color scheme yet. These are two of the ones I am thinking about. I have several others I am considering also. I will post some more from time to time. If anyone has one they like feel free to post for me to check out. here are accouple more.
01-16-2020, 08:43 AM
#5

I always liked the home defense squadron color schemes if you are looking to something colorful.


The following users liked this post:
Mtthwacrss (01-29-2020)
 02-05-2020, 11:45 PM
#10
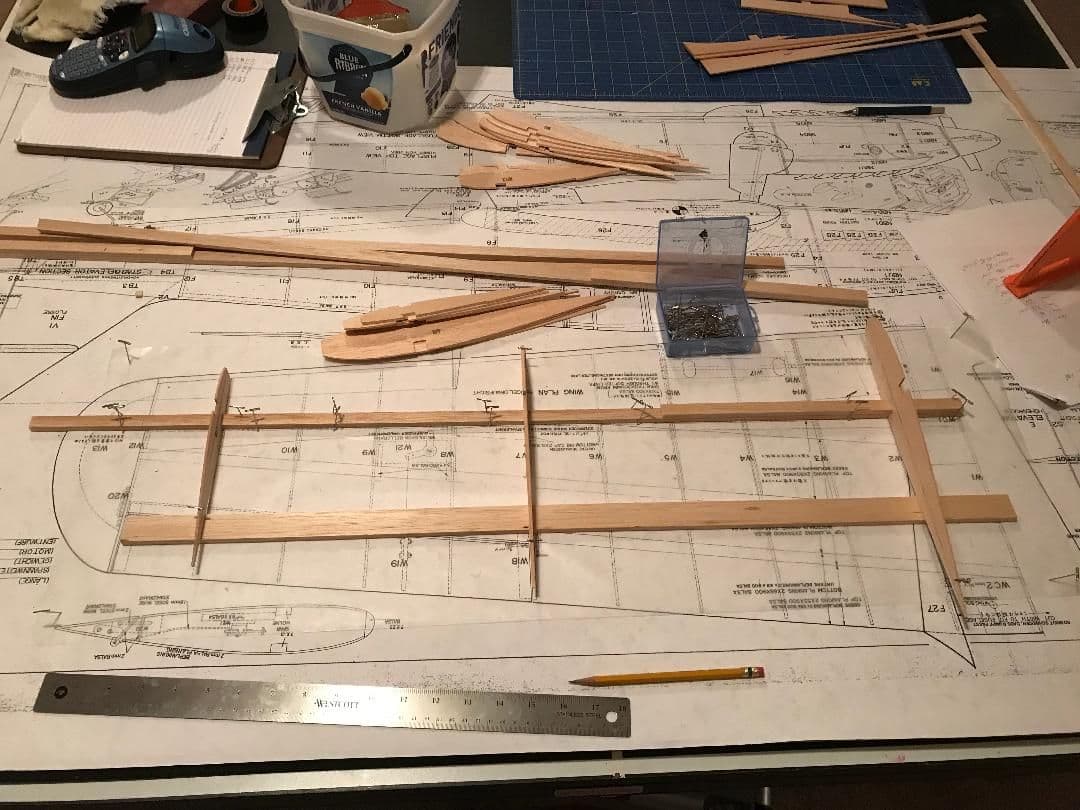
That�s how I would interpret it but from the photo it seems your line on W11 is slightly off center at the TE.
I�d suggest you carefully sand the aft ends of the ribs to a fine point (they have a slight square edge currently due to the cutting process probably) and then ensure the line is very accurate. It�s all in order to avoid building in a twist in the wing.
I�d suggest you carefully sand the aft ends of the ribs to a fine point (they have a slight square edge currently due to the cutting process probably) and then ensure the line is very accurate. It�s all in order to avoid building in a twist in the wing.
02-06-2020, 07:55 AM
#11
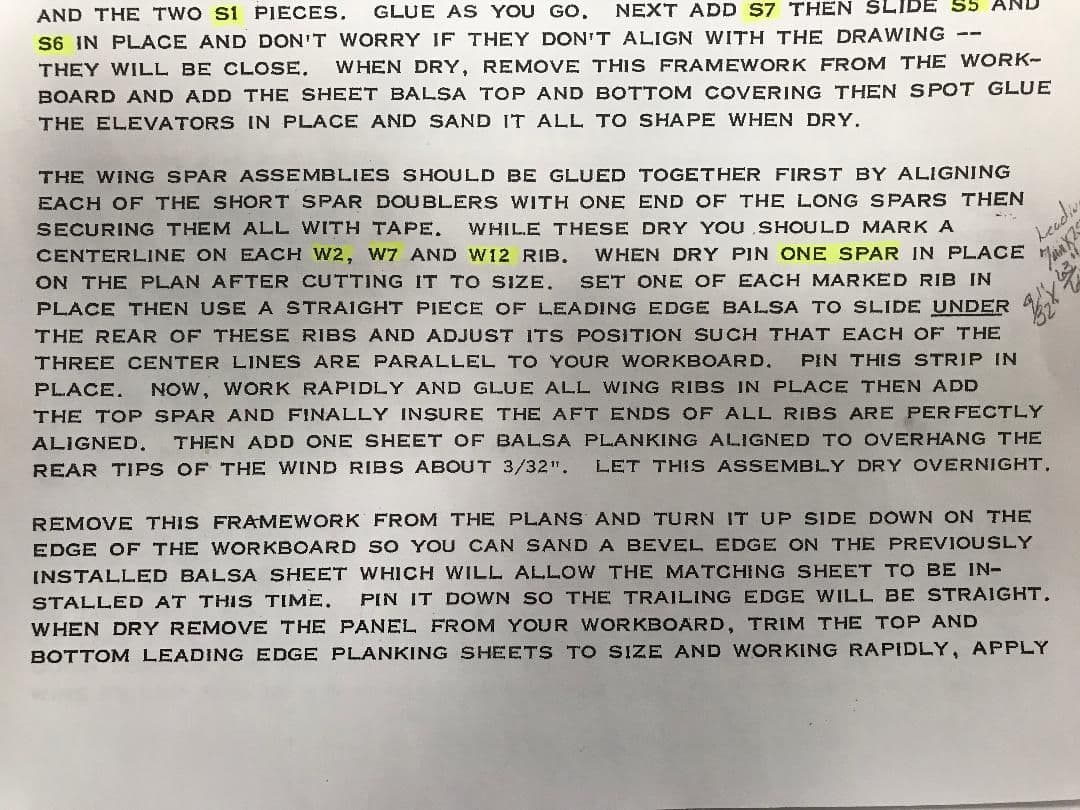
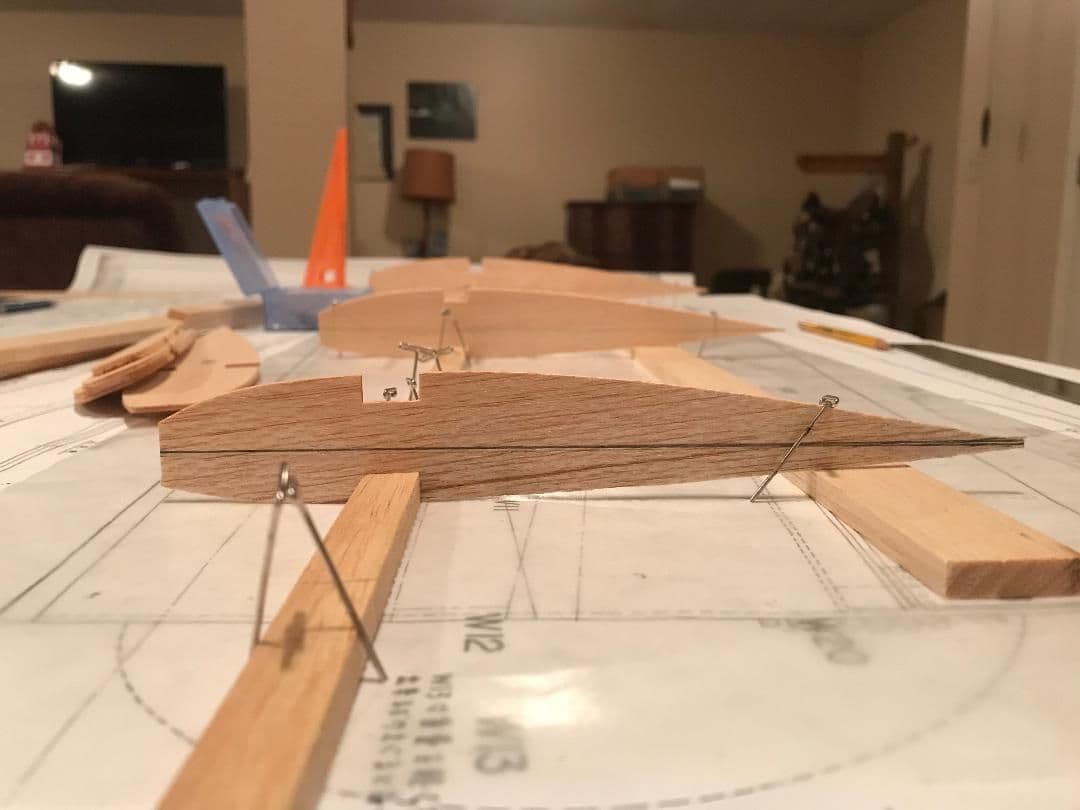
Here is my problem are the trailing edge all suppose to line up? if I put a leading edge under them to keep the line level then all ribs will be a different distance from the building surface. If that is right then I should be good. If I put the leading edge under the trailing edge then they are all at the same height but they are not level. I don't want to glue this until I have it right. The kit has a 68" wing span for those who have asked. I have the plans in PDF. if any one wants a copy.
Last edited by Mtthwacrss; 02-06-2020 at 07:57 AM.
02-06-2020, 08:12 AM
#12
You must think in three dimensions both the cord and the wing thickness is tapered. Your support should be following the angle of the wing taper (parallel with the training edge line) and NOT parallel with the main wing spar. If the support is in the correct spot the center line of each rib will line up in one straight parallel line. Each rib is a difference thickness and therefore for the centerline to be at the same height from the building surface the support must be angled to hit the correct point.
02-06-2020, 08:22 AM
#13
For a wing that tapers in thickness and in planform, yet uses a constant thickness jig spar, you�ll usually find it is not parallel to the main spar nor to the TE.
What I�d suggest is that you determine the position that gives a level root rib, then determine the position that gives a level tip rib, and fix the jig spar to the building board so that it goes through these two points.
All ribs in between root and tip will now be correctly aligned.
Just make sure you have the exact mirror setup for the other wing panel.
02-06-2020, 08:29 AM
#14
So I should be right then as long as the lines are right on the ribs and they are level. I will be following EF's advice on the trailing edge of the ribs and sending them to follow the rib shape to a point. If anyone has something else let me know. Thanks for all the help. hard to believe I have been building as long as I have. this is just a very old kit with very little in the way of direction, and I don't want to ruin it as it is one of my favorite planes. My uncle build this kit back in the 70's but I didn't get to watch that build much and have forgotten to much.
02-06-2020, 09:00 AM
#16
So I should be right then as long as the lines are right on the ribs and they are level. I will be following EF's advice on the trailing edge of the ribs and sending them to follow the rib shape to a point. If anyone has something else let me know. Thanks for all the help. hard to believe I have been building as long as I have. this is just a very old kit with very little in the way of direction, and I don't want to ruin it as it is one of my favorite planes. My uncle build this kit back in the 70's but I didn't get to watch that build much and have forgotten to much.
02-07-2020, 01:05 PM
#17
I know how they looked in the 70's as I helped my uncle back then. just have some trouble making sure I am understanding the instructions that were translated from Japanese to German then to English. I will say most of my recent builds have been 80's or 90's kits and I am a little rusty. I started out building in the late 60's with my Dad and uncle.
02-10-2020, 12:19 PM
#19
Got my ribs laid down and leveled. Bottom and top spar are glued in. Will start the trailing edge sheeting tonight. Thanks for all the help and suggestions, sometimes you just have to hear things in different word to make them make sense. I just couldn�t make myself see it in 3D. When I read the instructions I kept thinking they wanted the leading edge laid down at the end of the ribs which didn�t sound right of course it wasn�t, had to have it at an angle to keep them all level. 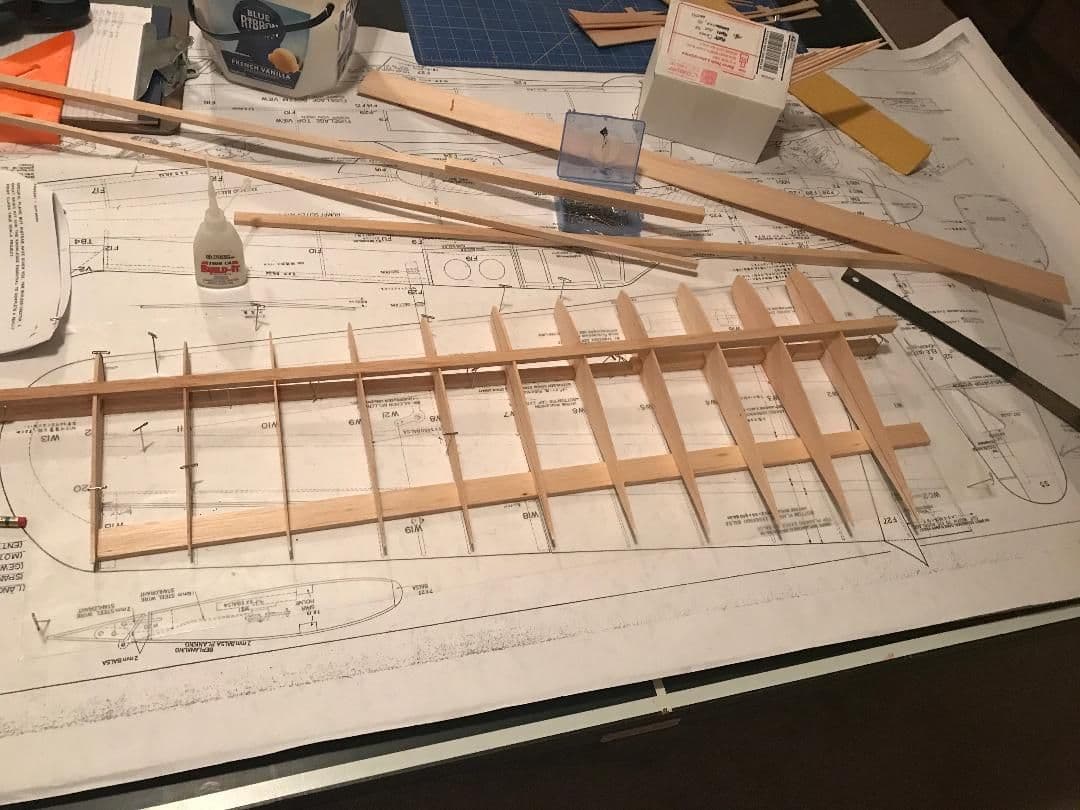
02-10-2020, 12:58 PM
#20
The important thing is you figured it out. I have a habit of collecting kit manuals in electronic form I find when I get stuck I will start by reading a couple of them and review a built or two online. The different points of view give you a better understanding even when its not the same airplane.
 02-11-2020, 09:25 AM
#23
I like the Ki-61 it reminds a bit of the M6A1-K Nanzan (Land based trainer version of the M6A1 Seiran). One of these days I am going to pull the Mike Hawkins' plans and maybe enlarge them a bit and build the Nanzan. Mike designed it to take .19 but it couldn't overcome the drag and take off with floats.
02-11-2020, 09:34 AM
#24
Good advice from FlyerInOKC. Matt, you probably don't need to hear it, but in the spirit of other people following build threads, I feel lit it should be said. When one starts of the second half of the wing, especially where the builder is defining the center line of the rib, it is super important to keep things symmetrical. Looking down onto the plans most people will catch the obvious symmetry of left to right and front to back but not necessarily that of the depth of the wing. I've been bitten by that one. It's not hard for a little wash in or wash out to creep into the second wing half.
02-11-2020, 09:45 AM
#25
I remember building an old SIG Rascal C kit. It had very clear specific instructions on how to build in the washout. Matt is right it is very easy to end up with a little wash in or out when building a wing. The easiest way to fix it is to take all necessary precautions not to build it that way in the first place. I can say from personal experience that is a lot harder to do then to say!