


Scale finishing my BVM Hun


 09-02-2021, 01:55 PM
#227

My Feedback: (13)
Inside of main doors. �Fresh fluid� applied around. Look for gloss red color
Big pic
The areas I hit aft of the main gear doors with fresh fluid. Slight red lines aft of where my fingers point at the fresh red
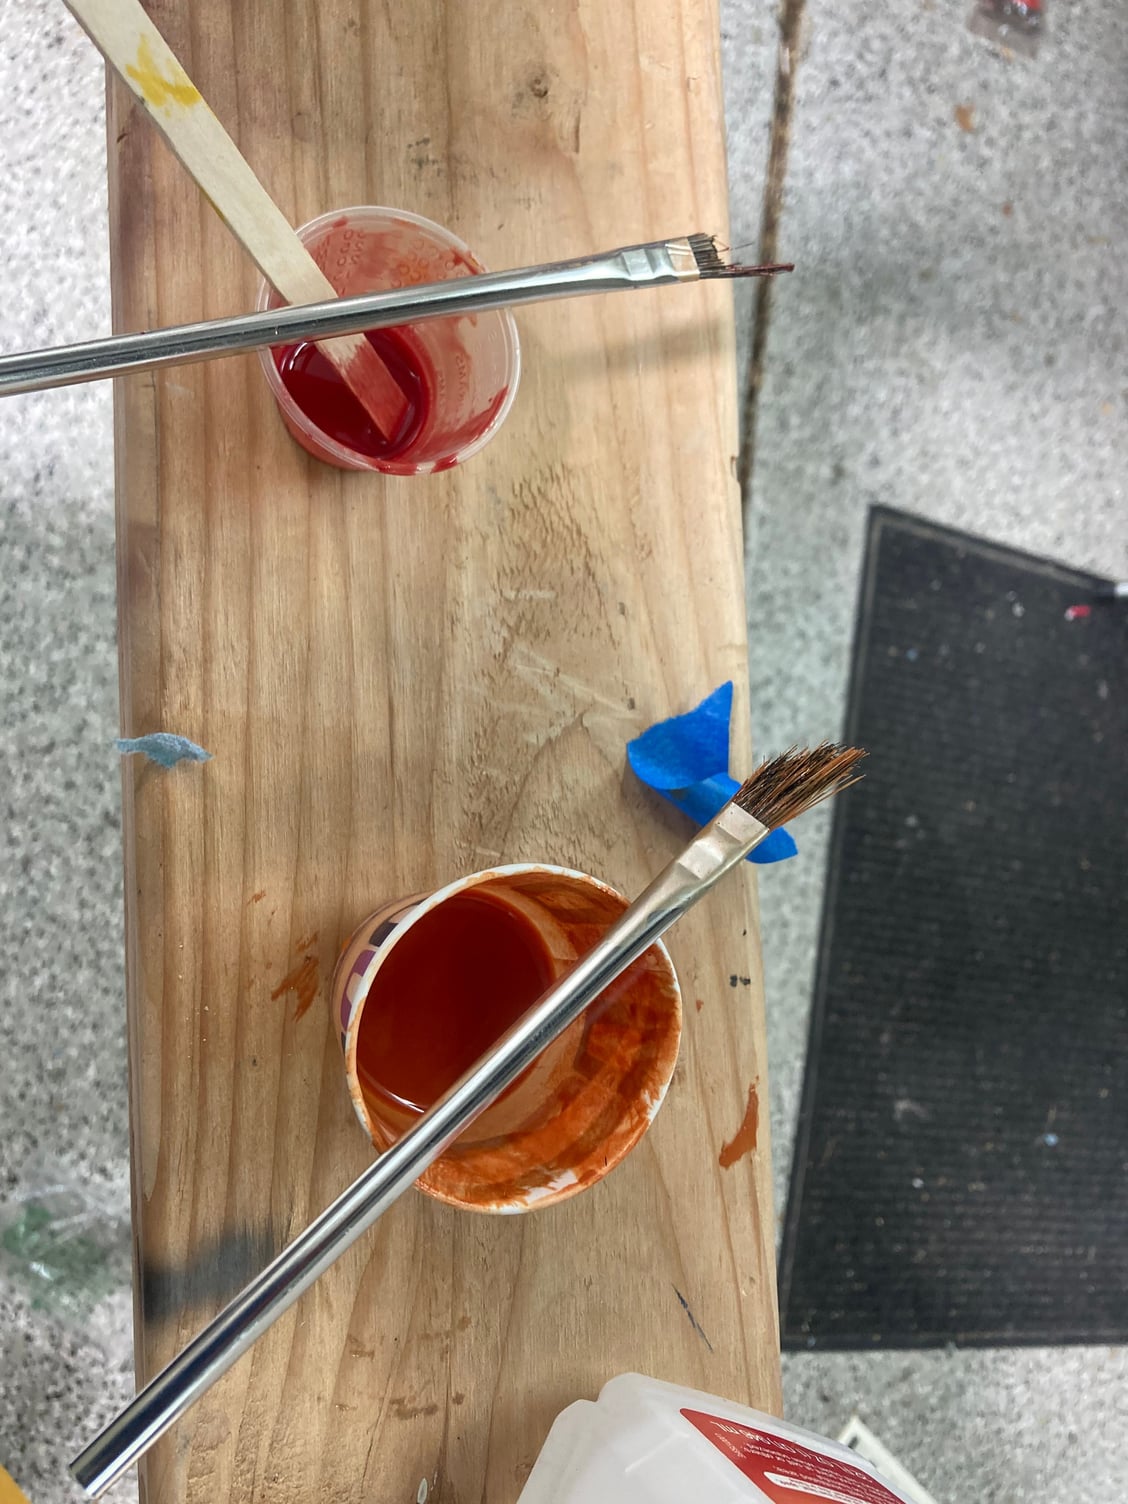
The two colors I used for fresh and old Hyd fluid. You can also see the cut down acid brush I used for smaller applications
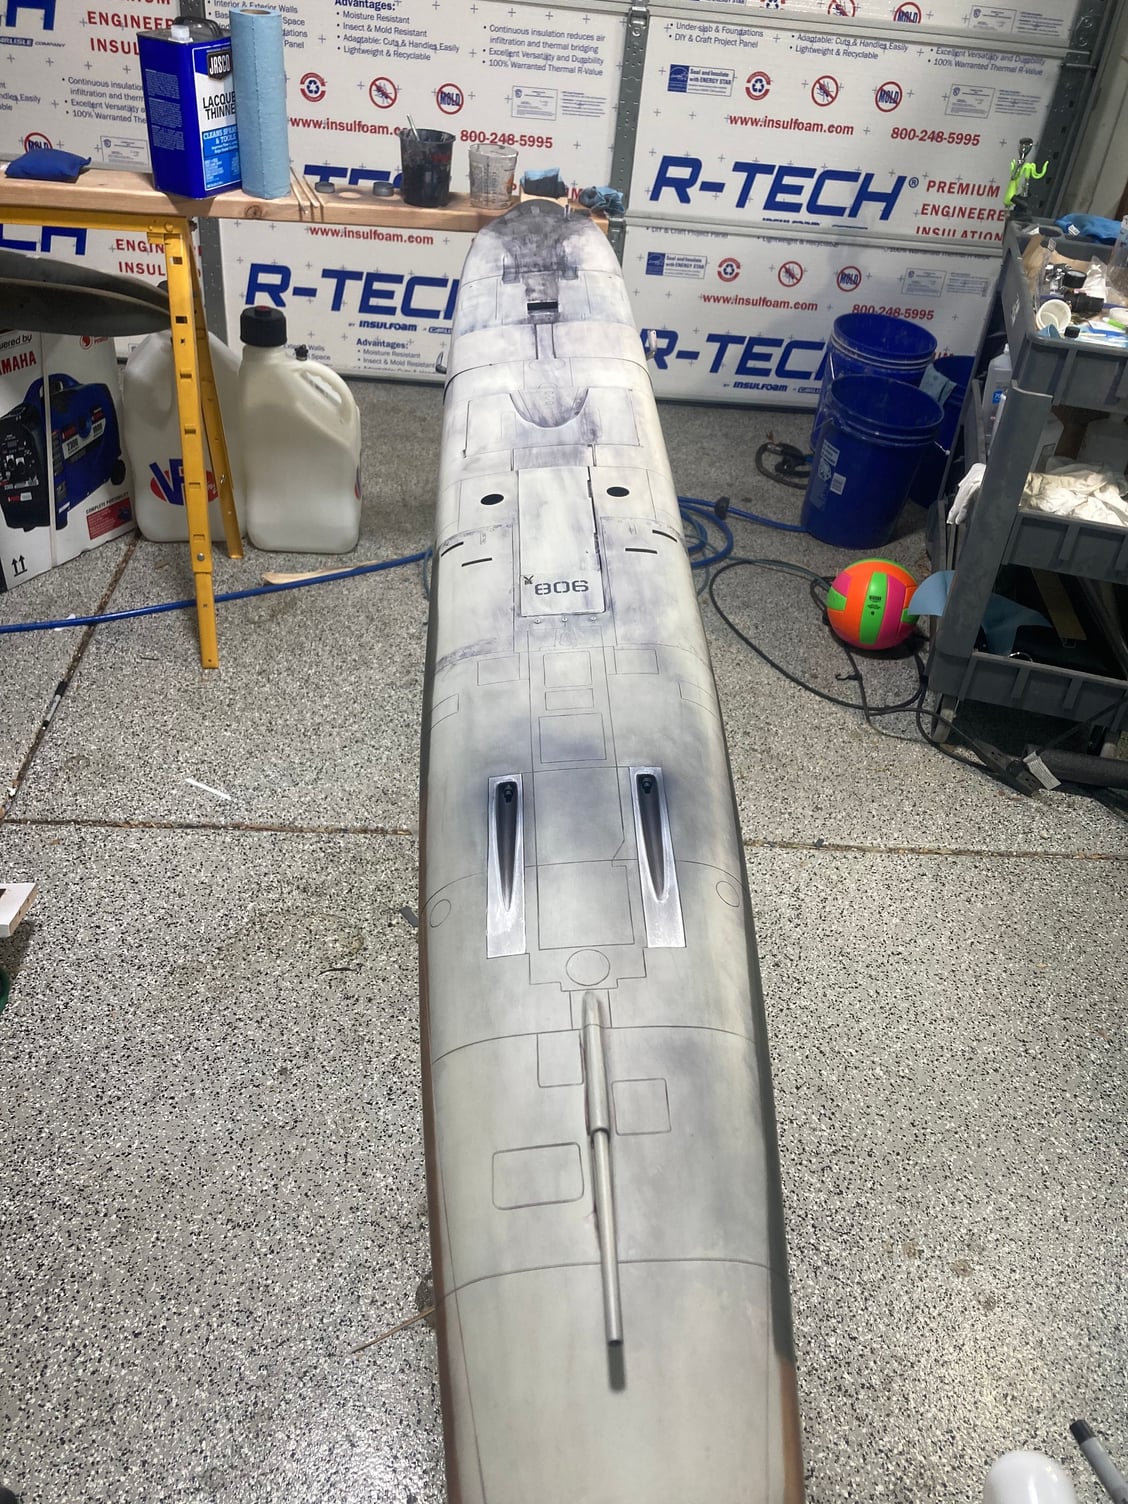
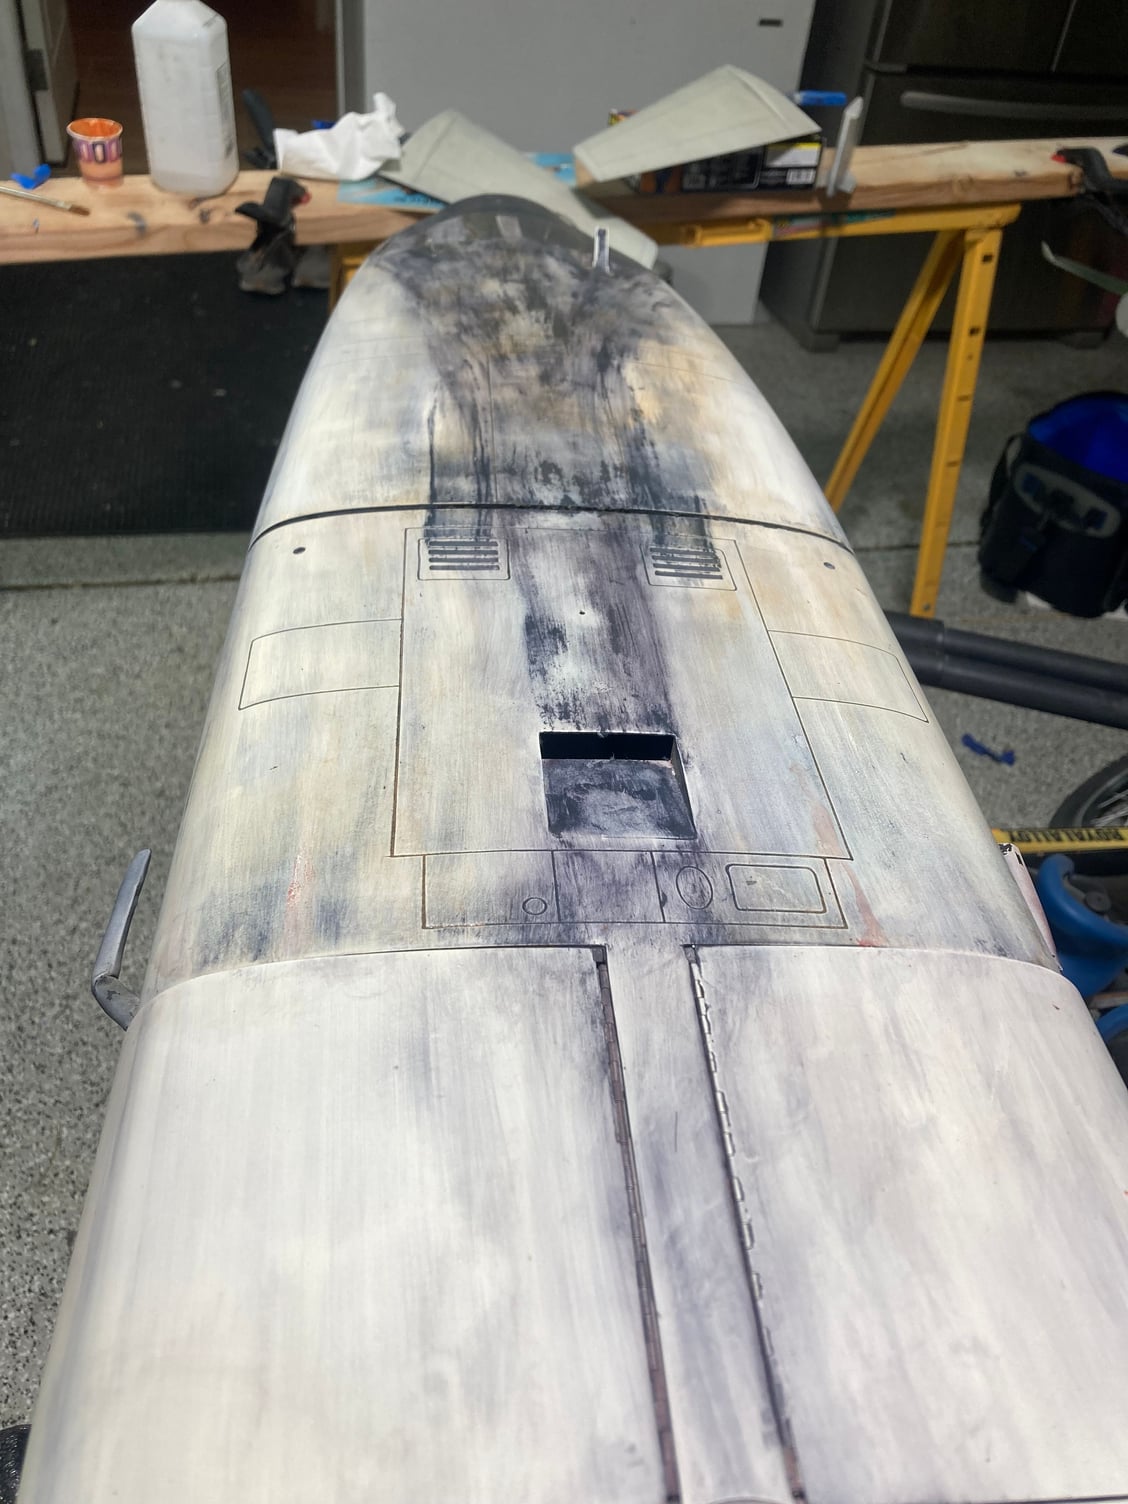
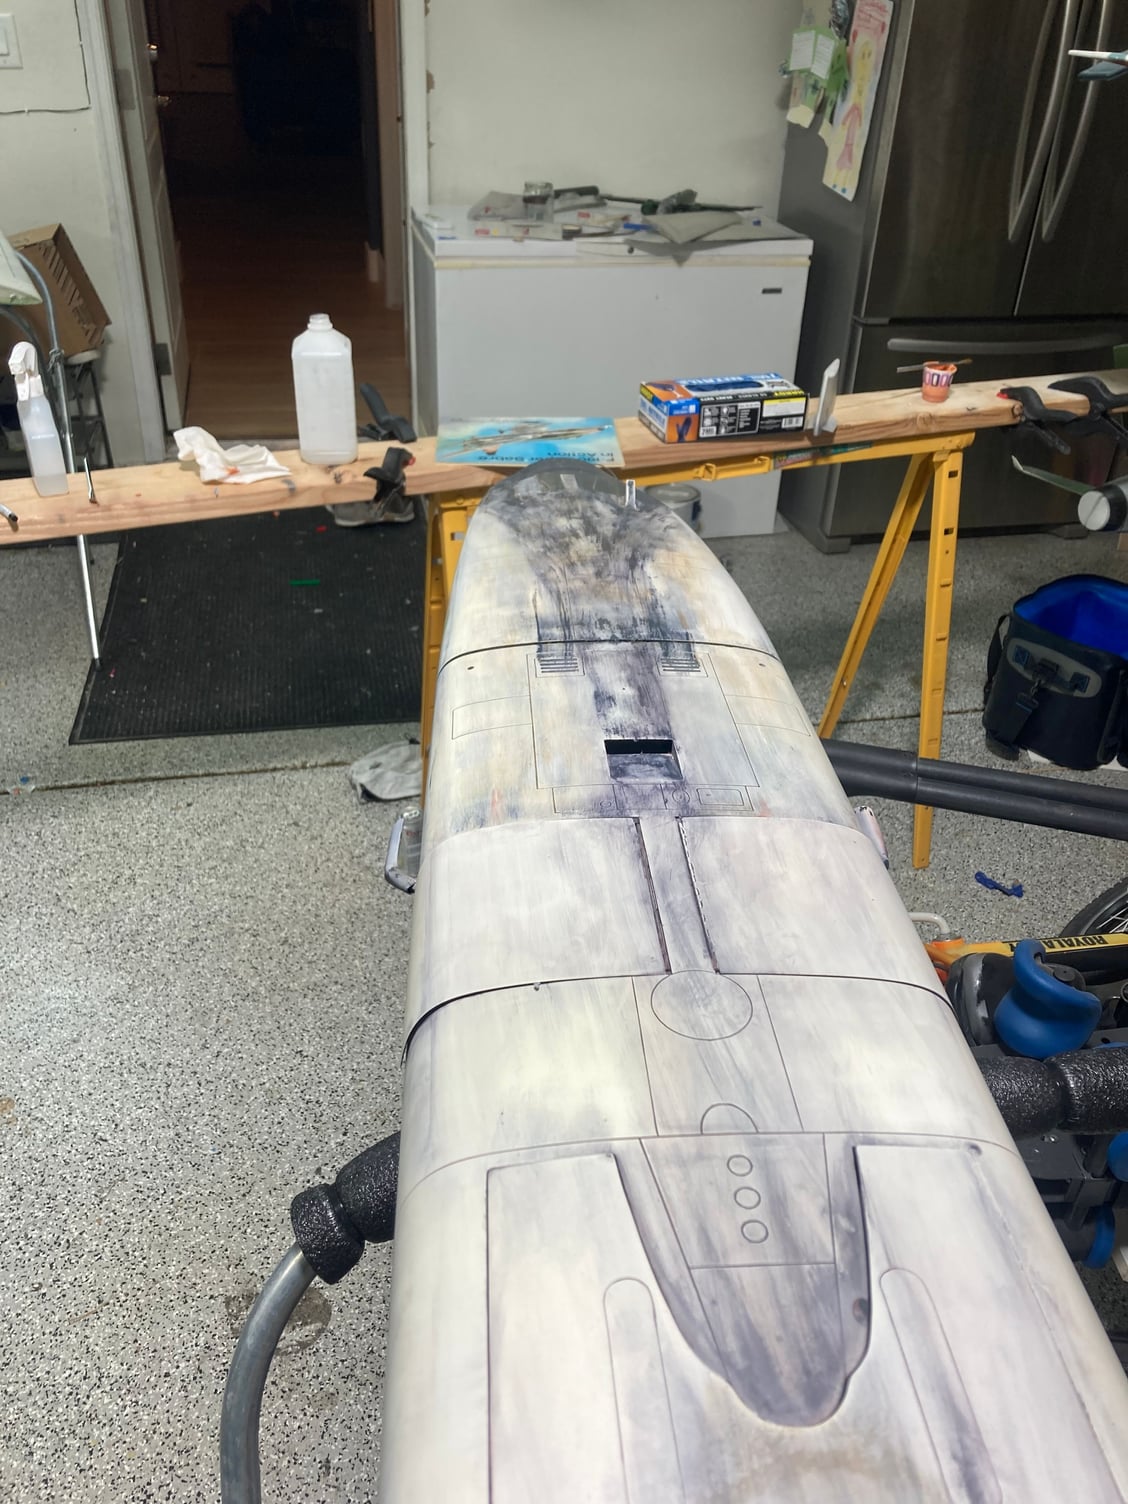
Note the different colors from the front of the fuse to back. I didn�t realize that until I got deep into this project
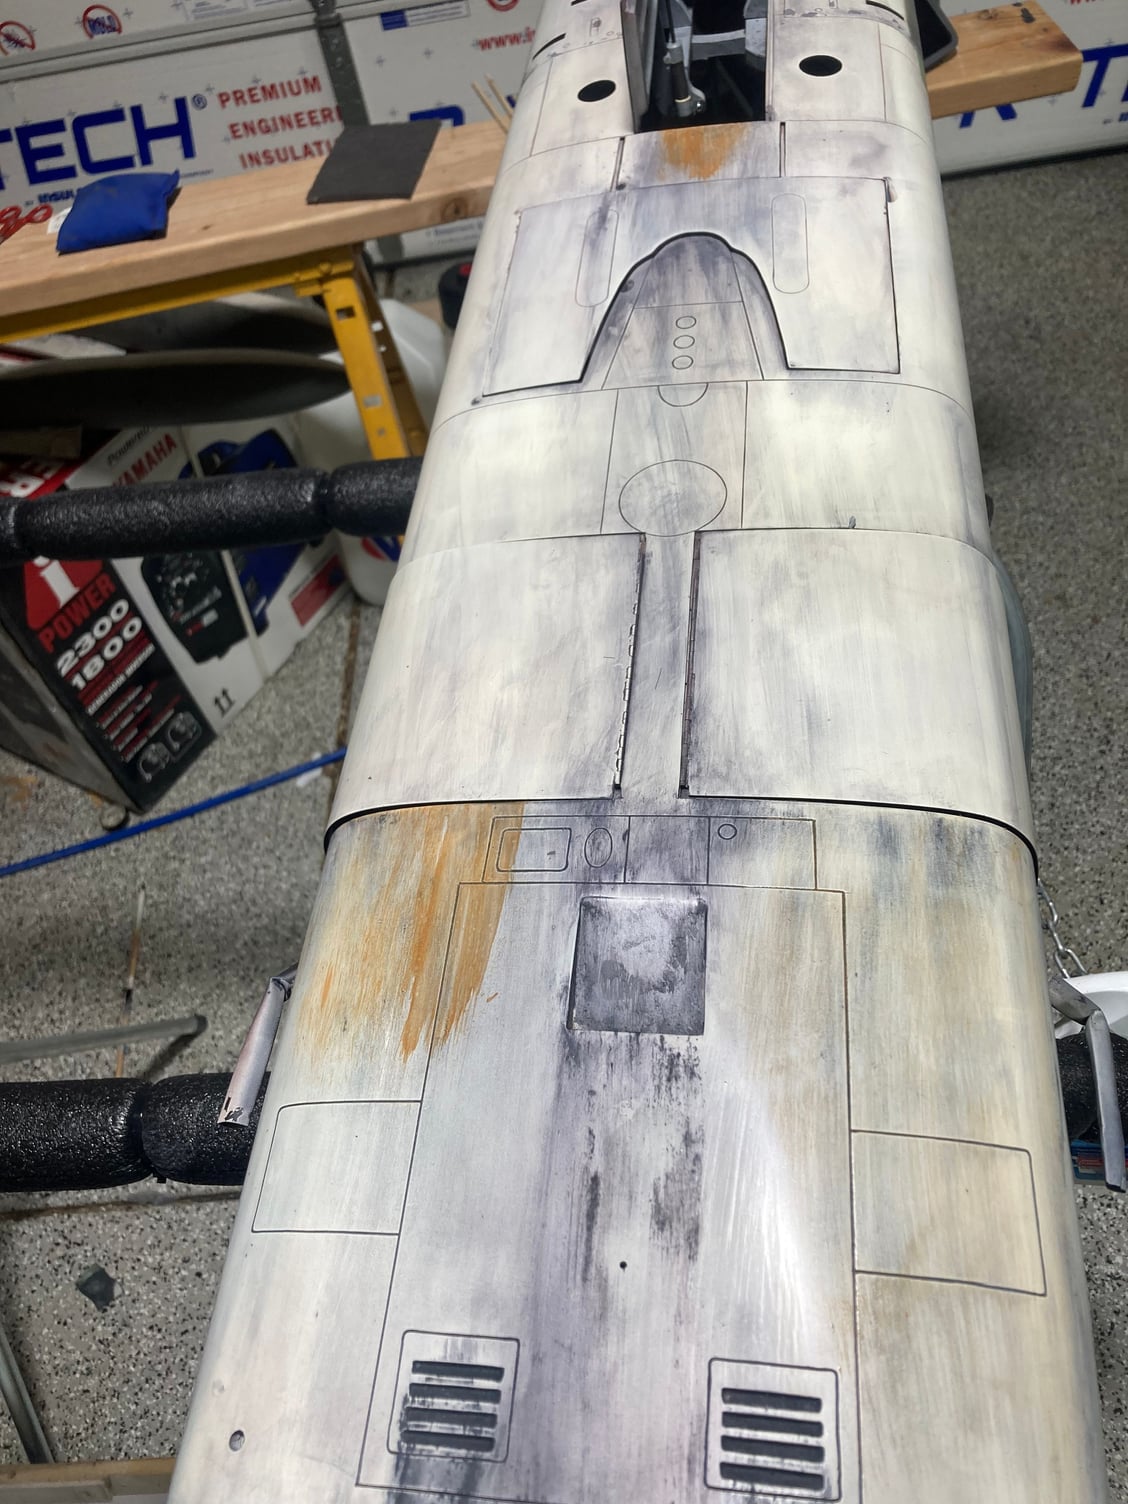
Here is the right side after being blended in, the left obviously hasn�t been done

You can see the subtle orange, especially aft of the fuse split

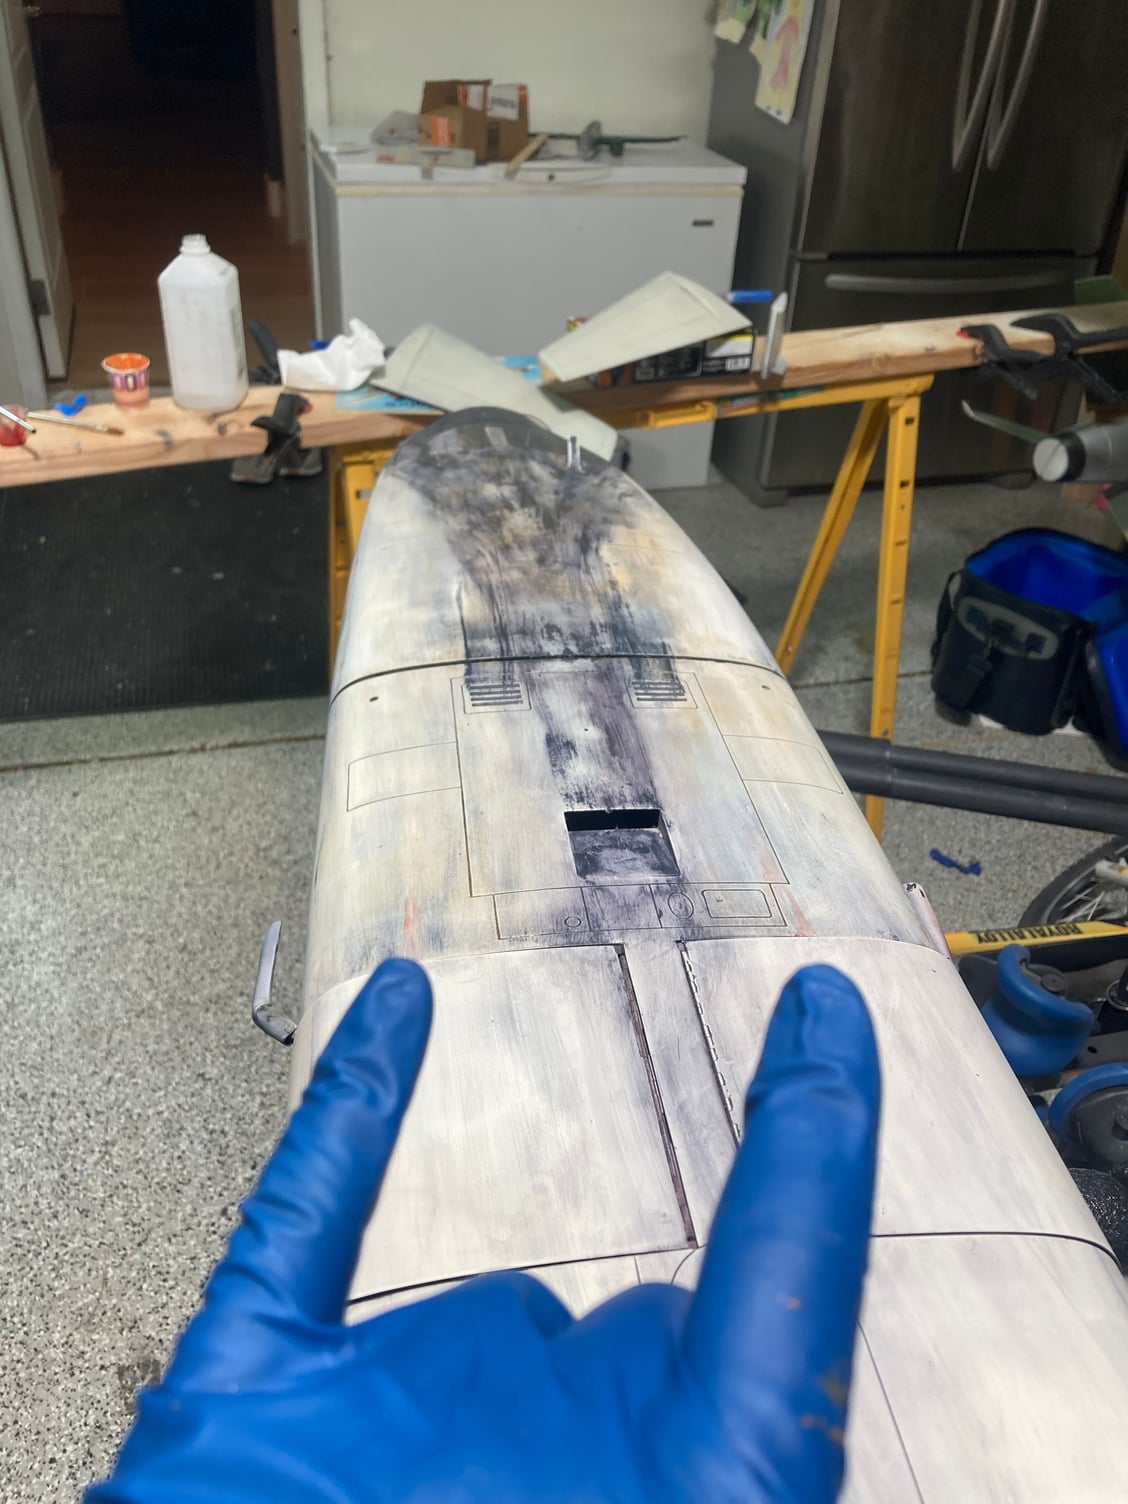
Streaking aft from the nose gear and speed brake area. If you look close you can see some �fresh/red fluid� on the nose gear door
A more detailed shot of the fresh fluid. Note the accumulation in the back corner. That pre-spray technique I describe in the text below really seems to allow the color to follow natural curves/gravity etc like the real stuff would
Starting to install servos
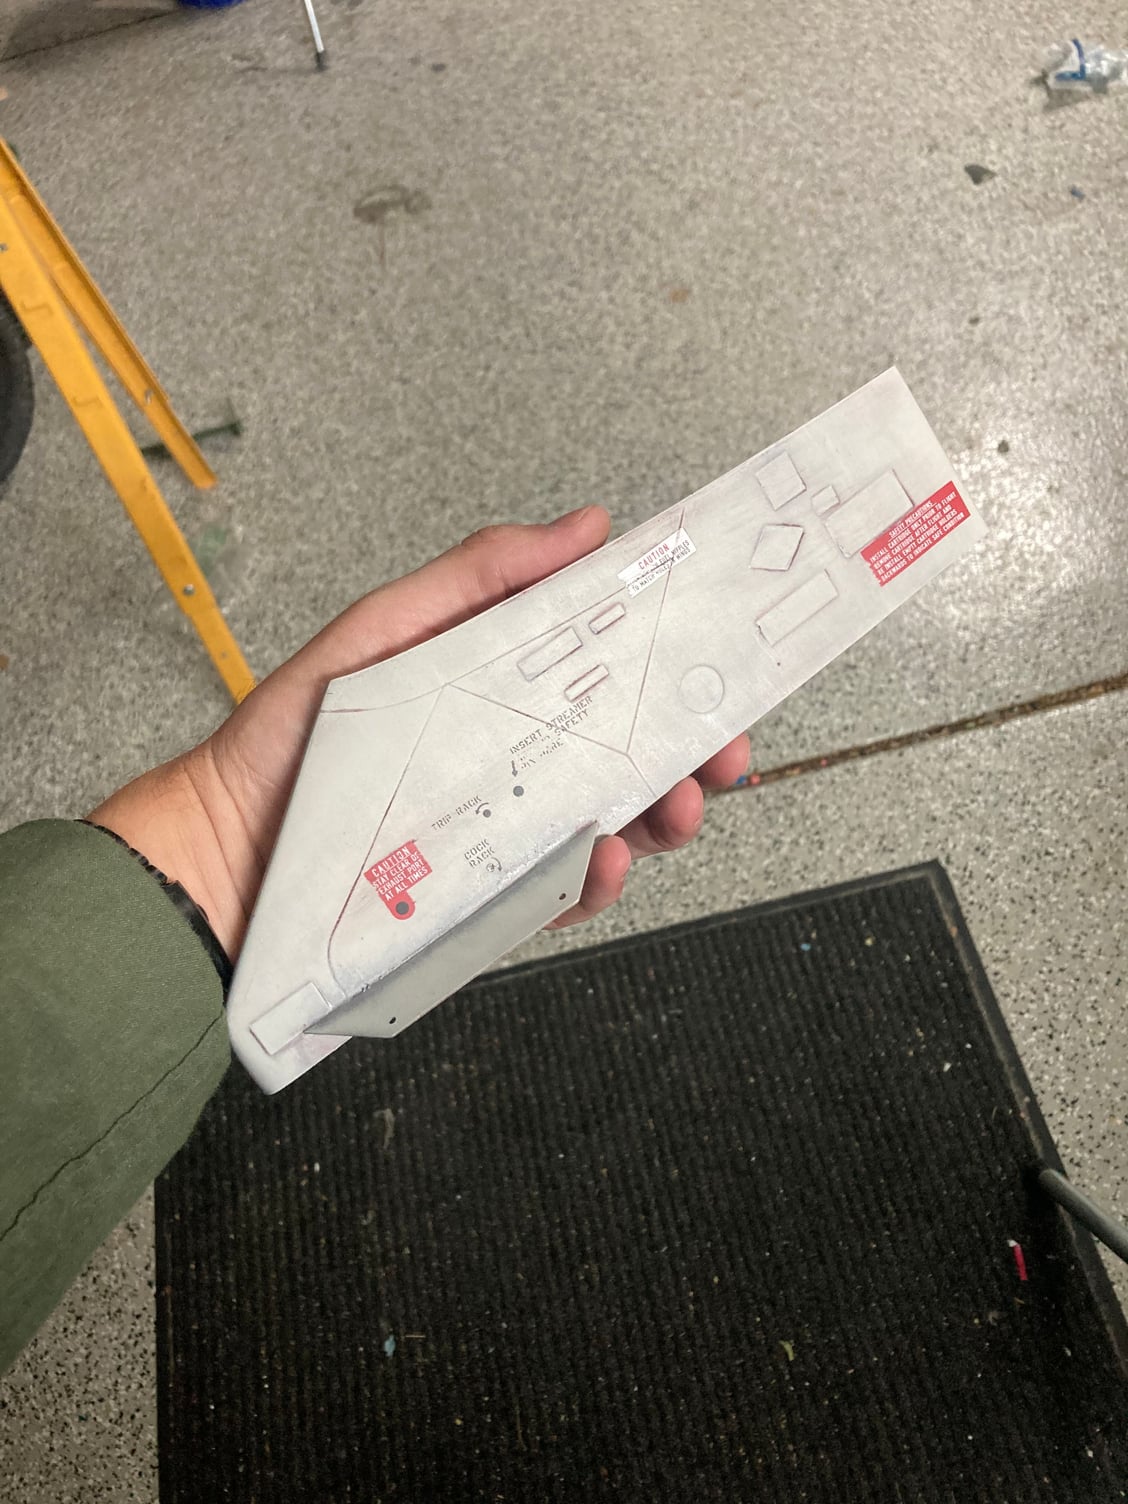
Here�s a pylon I did. The Misty�s didn�t use these inboard pylons much but I figured since I had it I would create and weather it and then could choose to leave it off. These sat forward from under the wing snd would be dirtier than the other two that were fully under the wing
Well, I�m willing to call major paint ops done! I still have a few smaller parts to touch up, to include the refueling probe that Sean McHale 3d printed for me (pics to follow)
For the last step of the weathering I noticed that the FS had a bunch of orange on the bottom of them. So at work I started looking and saw that indeed old hydraulic fluid dries to a sticky orange. Most �modern� planes don�t leak a ton of hydraulic fluid unless something is dramatically wrong but it appears these old ones did. I mixed up the orange color and then used half and half gloss and satin catalyst to give it a slight sheen.
Then of course if you have old Hyd fluid you just have some fresh as well. For that I used a clear base with a couple drops of dark red but then a drop or two of yellow as well. I used gloss catalyst for this part to give it a fresher look and ran it where I thought it was possible to have some.
What I found along the way is that if I wanted something to look like fluids that ran was to hit the plane with a spray of lacquer thinner (just from a squirt bottle) THEN put a little paint on with a brush. It seems to flow out and look like fluid travels much better. Just stumbled onto this along the way�
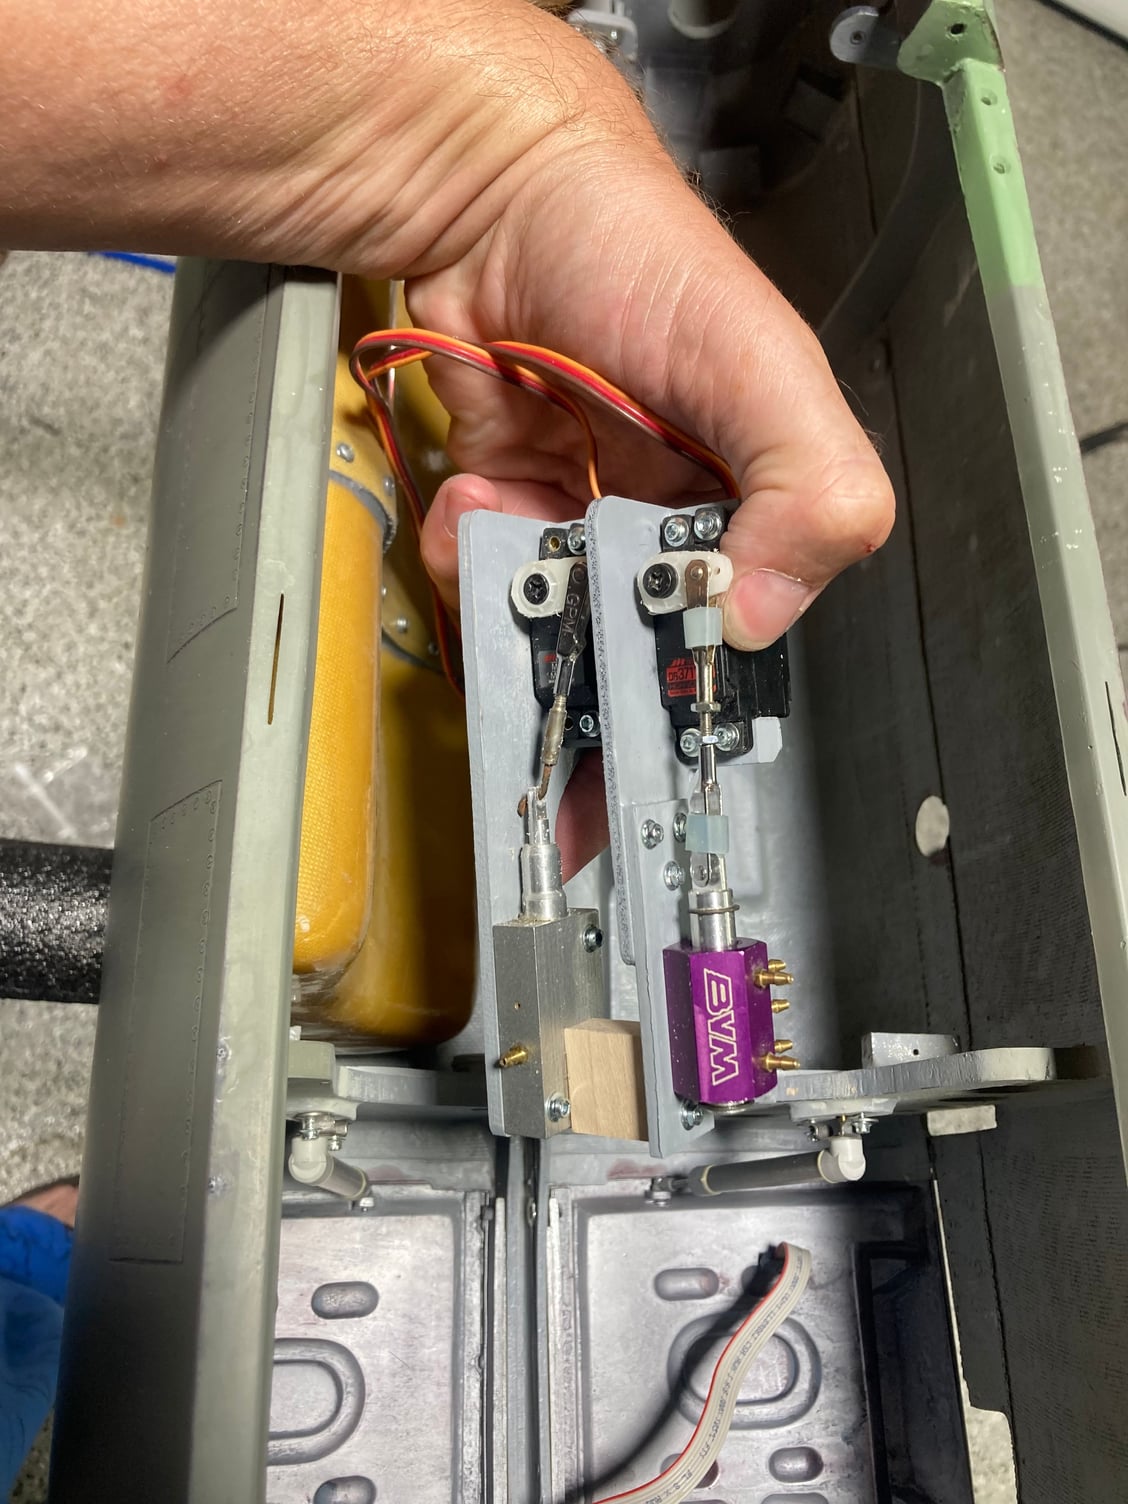
last night I installed the three servos in the left wing (three, not four RAF!
 ) and will do the right wing soon
Last edited by ozief16; 09-02-2021 at 02:33 PM.
09-05-2021, 06:04 PM
#230
My Feedback: (13)
Space is a major premium in this plane. Jack Diaz once told said something like �don�t try to get cute with boards�just Velcro stuff in where you can�. I TOTALLY get where he was coming from! With the gear and brake valves I decided to take the urban approach and build up rather than out. These two will fit down between/under the fuel tanks

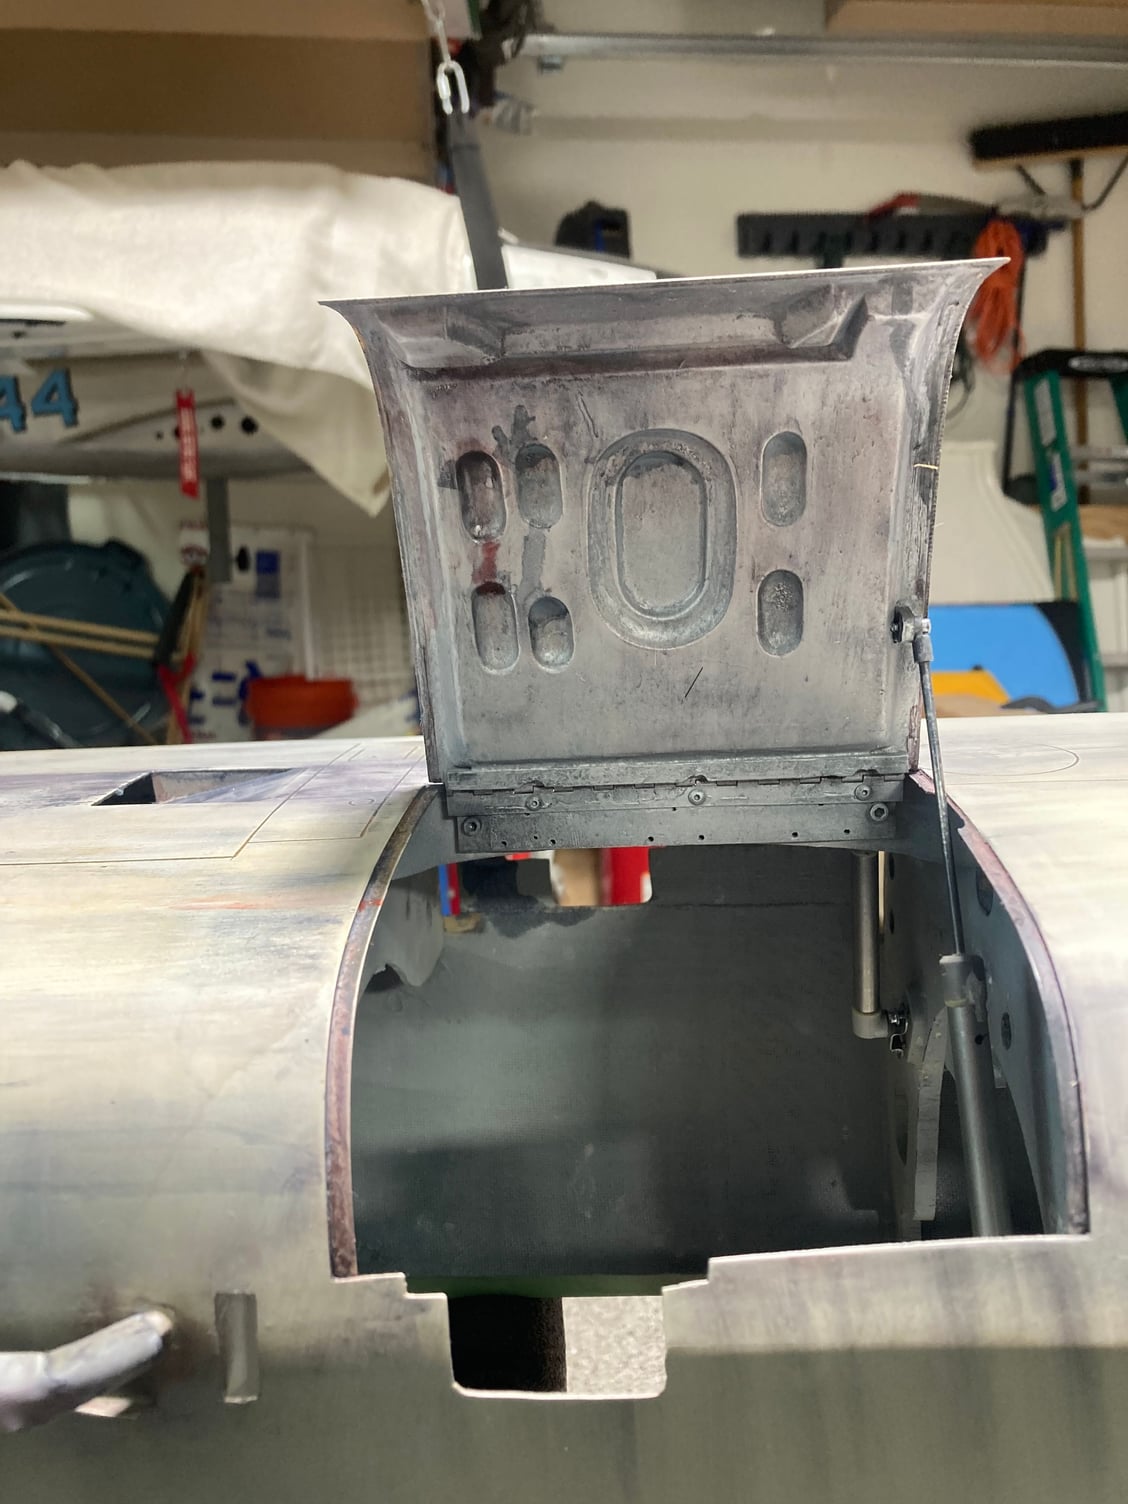
Here you can see them set in place behind the PB Mercury You can also see the retractable lights on either side of the nose gear well
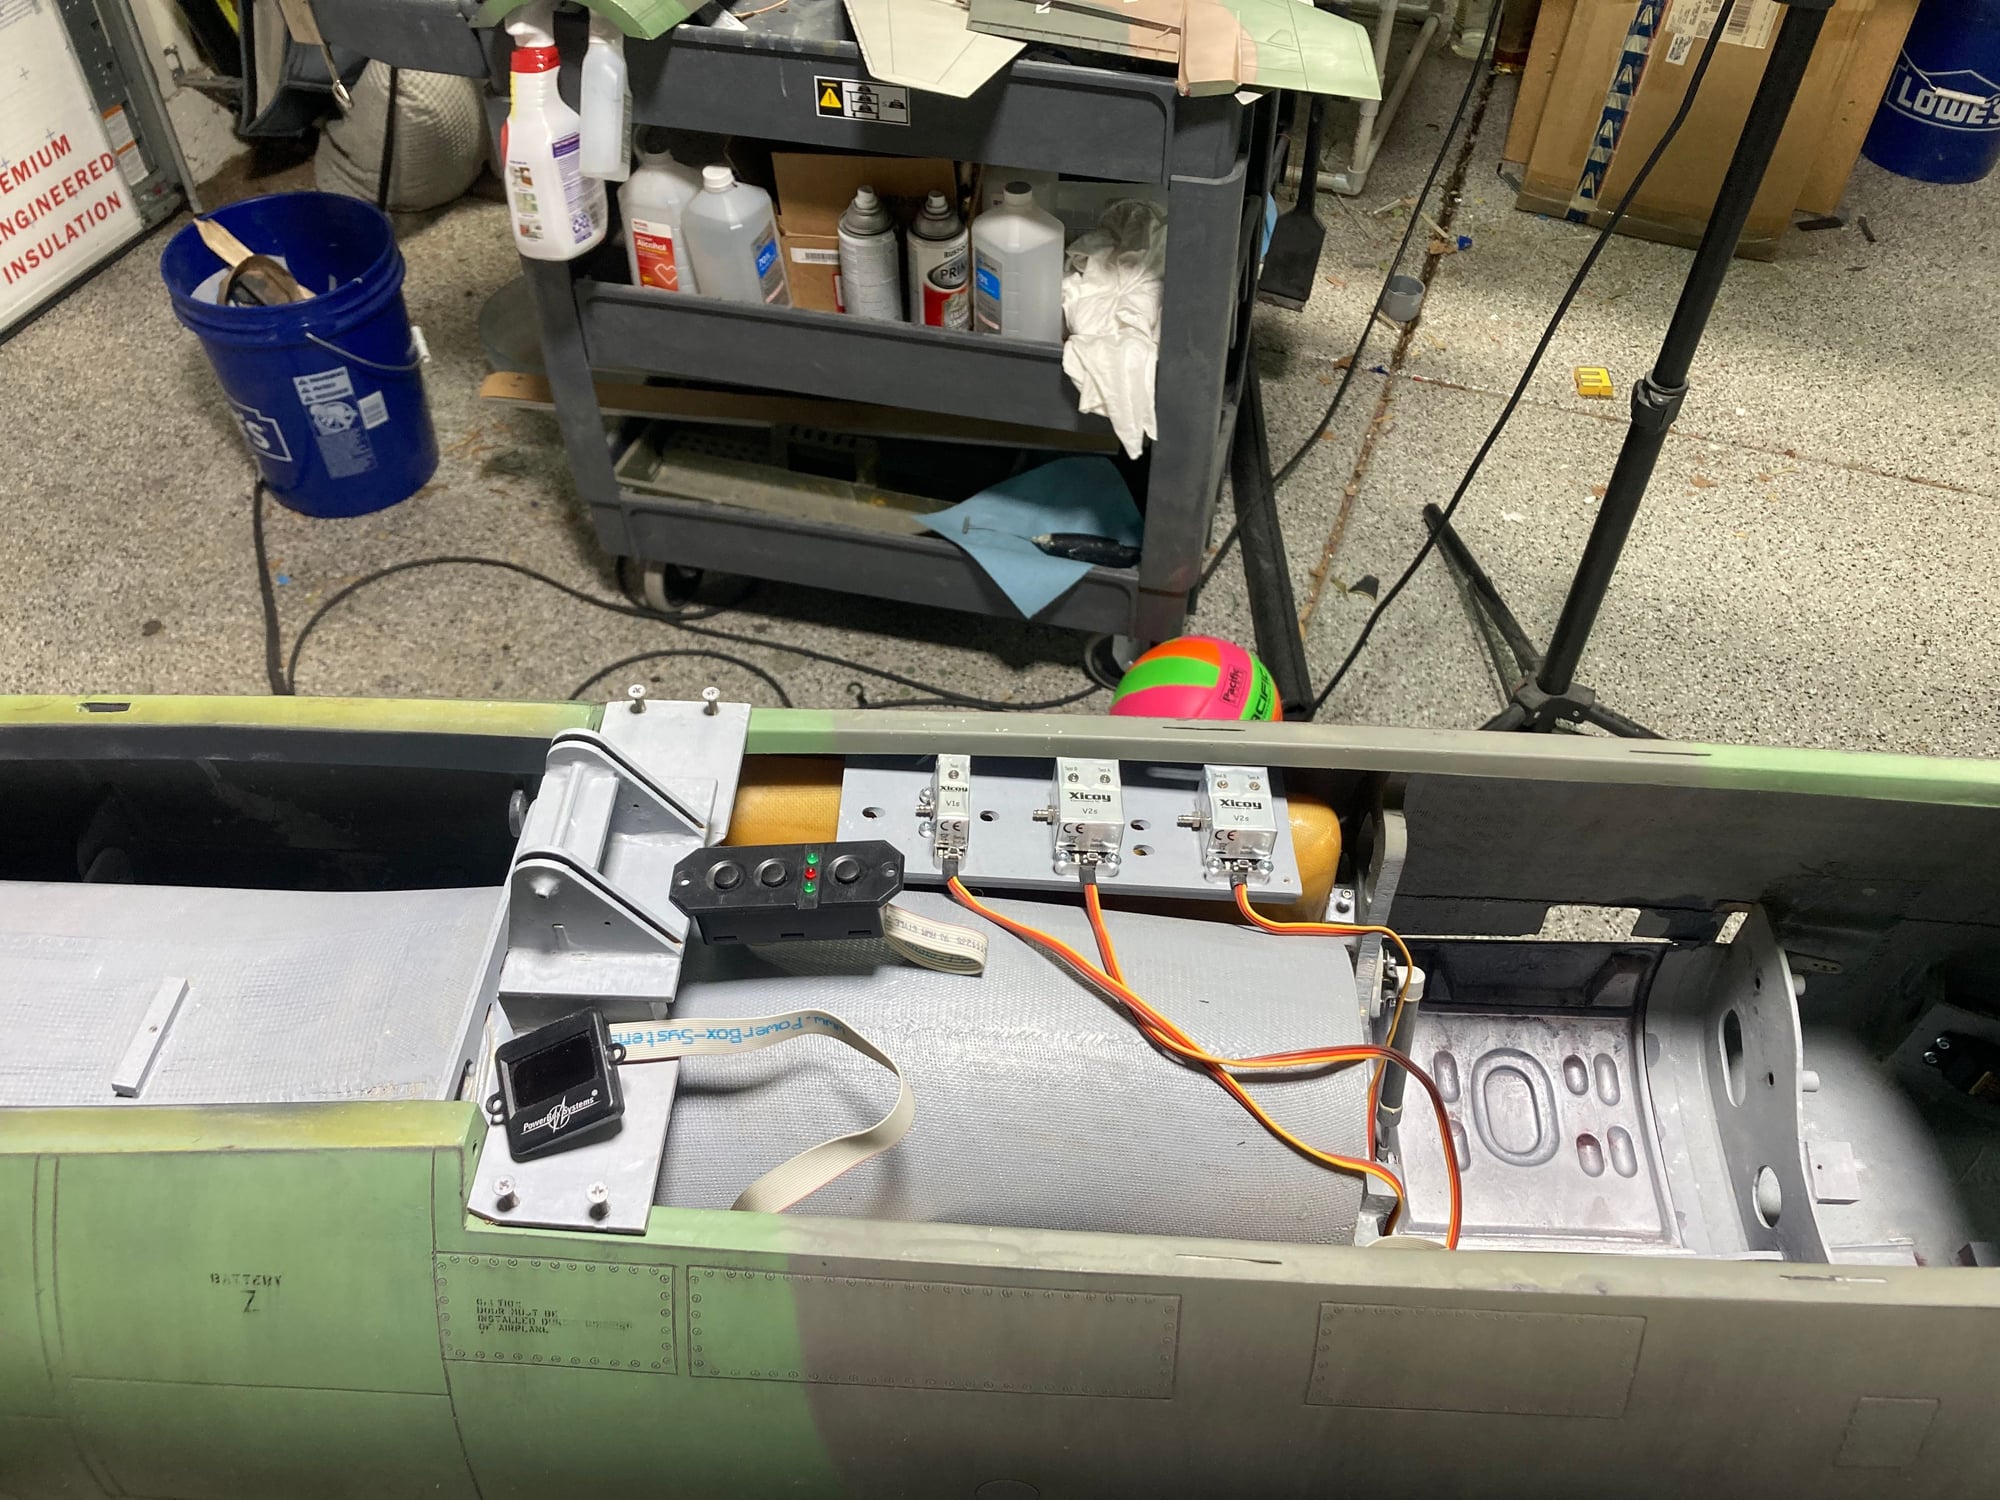
This is a mock-up of how I intend to tackle the installation. Obviously the canopy hinge is set on top of the rails rather than under but it gives the point. I think I�ll screw the forward part of the switch unit to the hinge and the aft part will get a vertically installed piece of hardwood hysoled to the intake. The little display for the PB Mercury will live on the left side of the hing for easy access/visability
The three valves on the board will be velcroed to the top of the intake with long enough airlines/wire runs to be laid out of the fuse to facilitate tank/intake removal/installation
anything forward of the hinge is cockpit area so unuseable for components
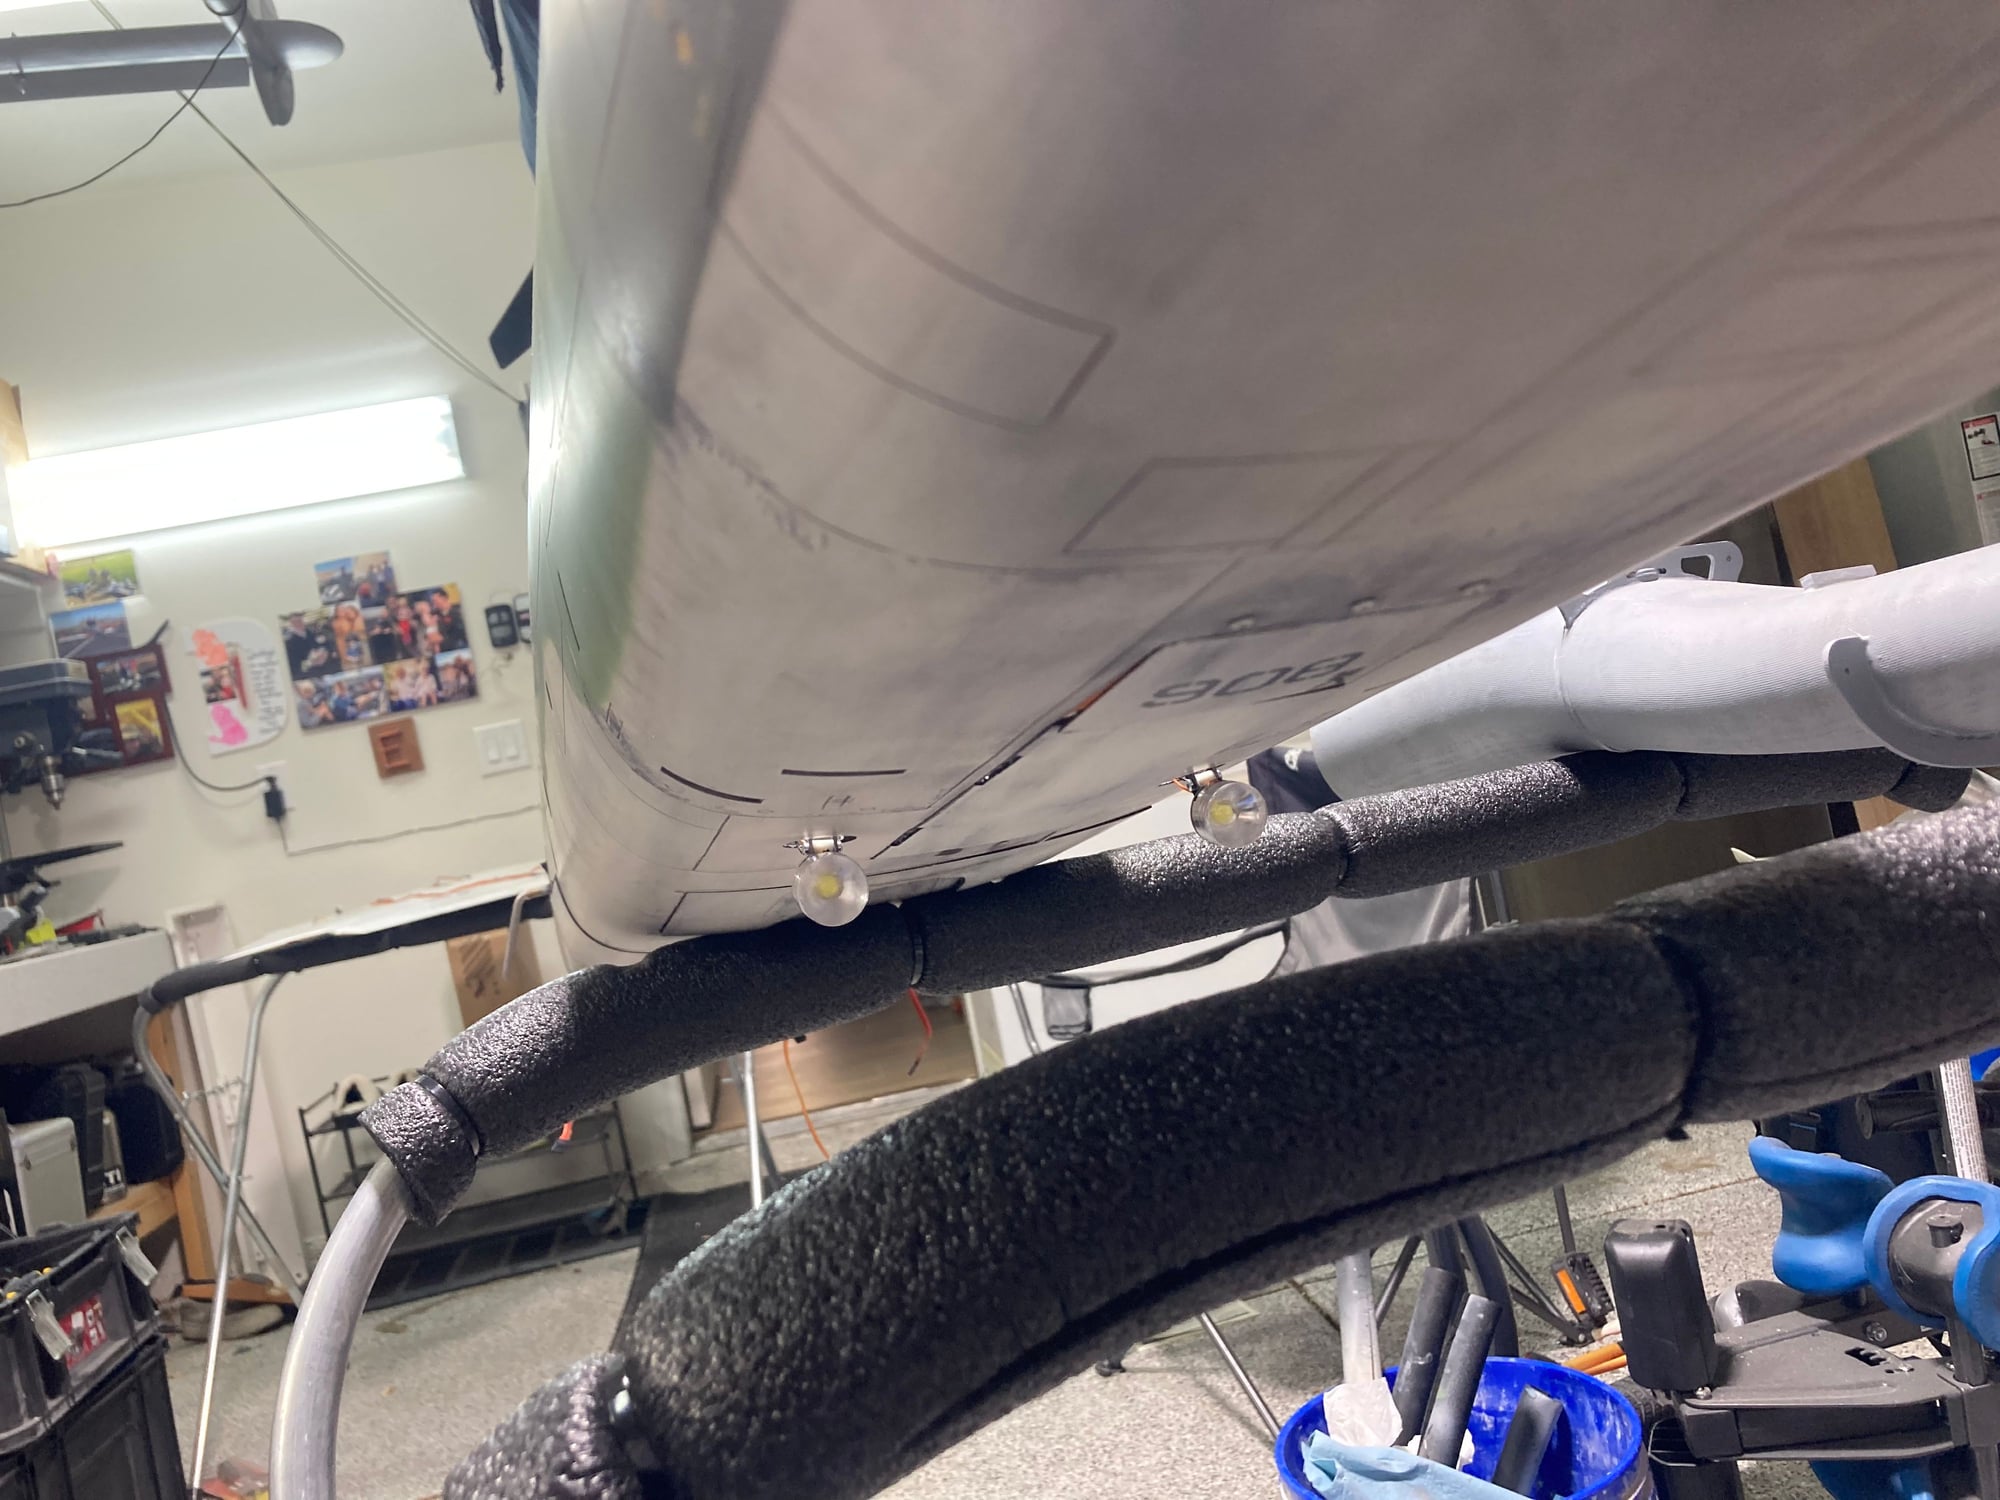
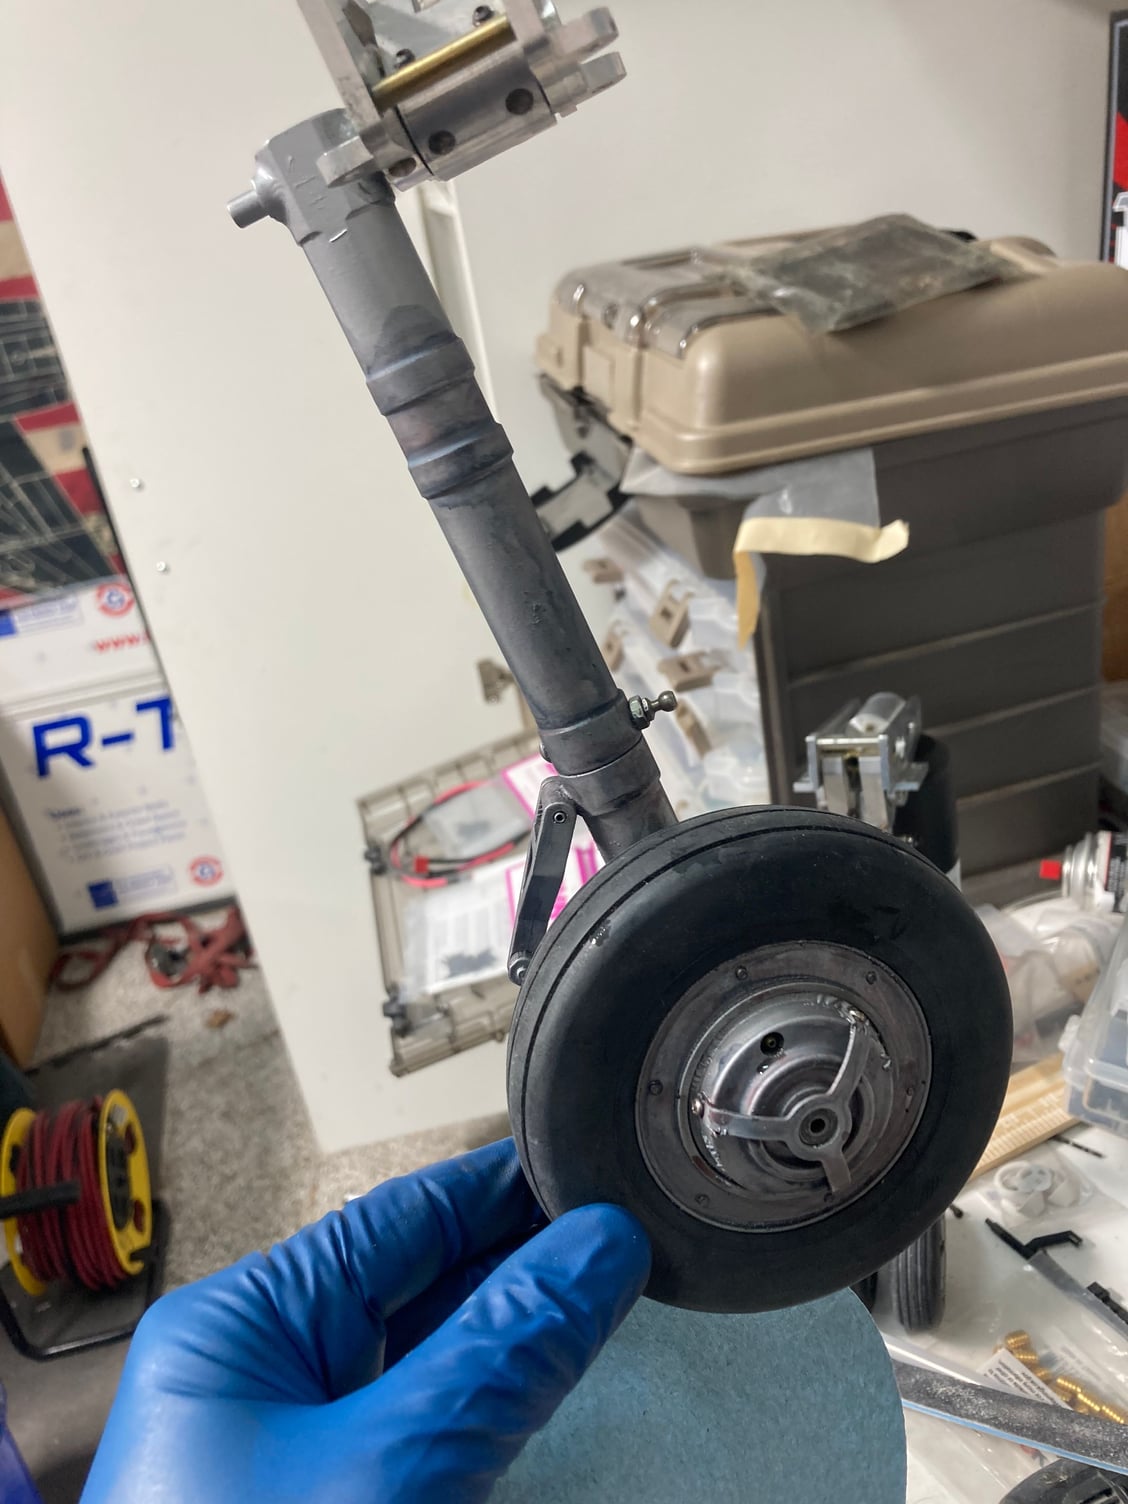
Retractable landing lights
Last edited by ozief16; 09-05-2021 at 06:07 PM.
The following users liked this post:
Viper1GJ (09-05-2021)

 09-17-2021, 09:26 PM
#235
My Feedback: (13)
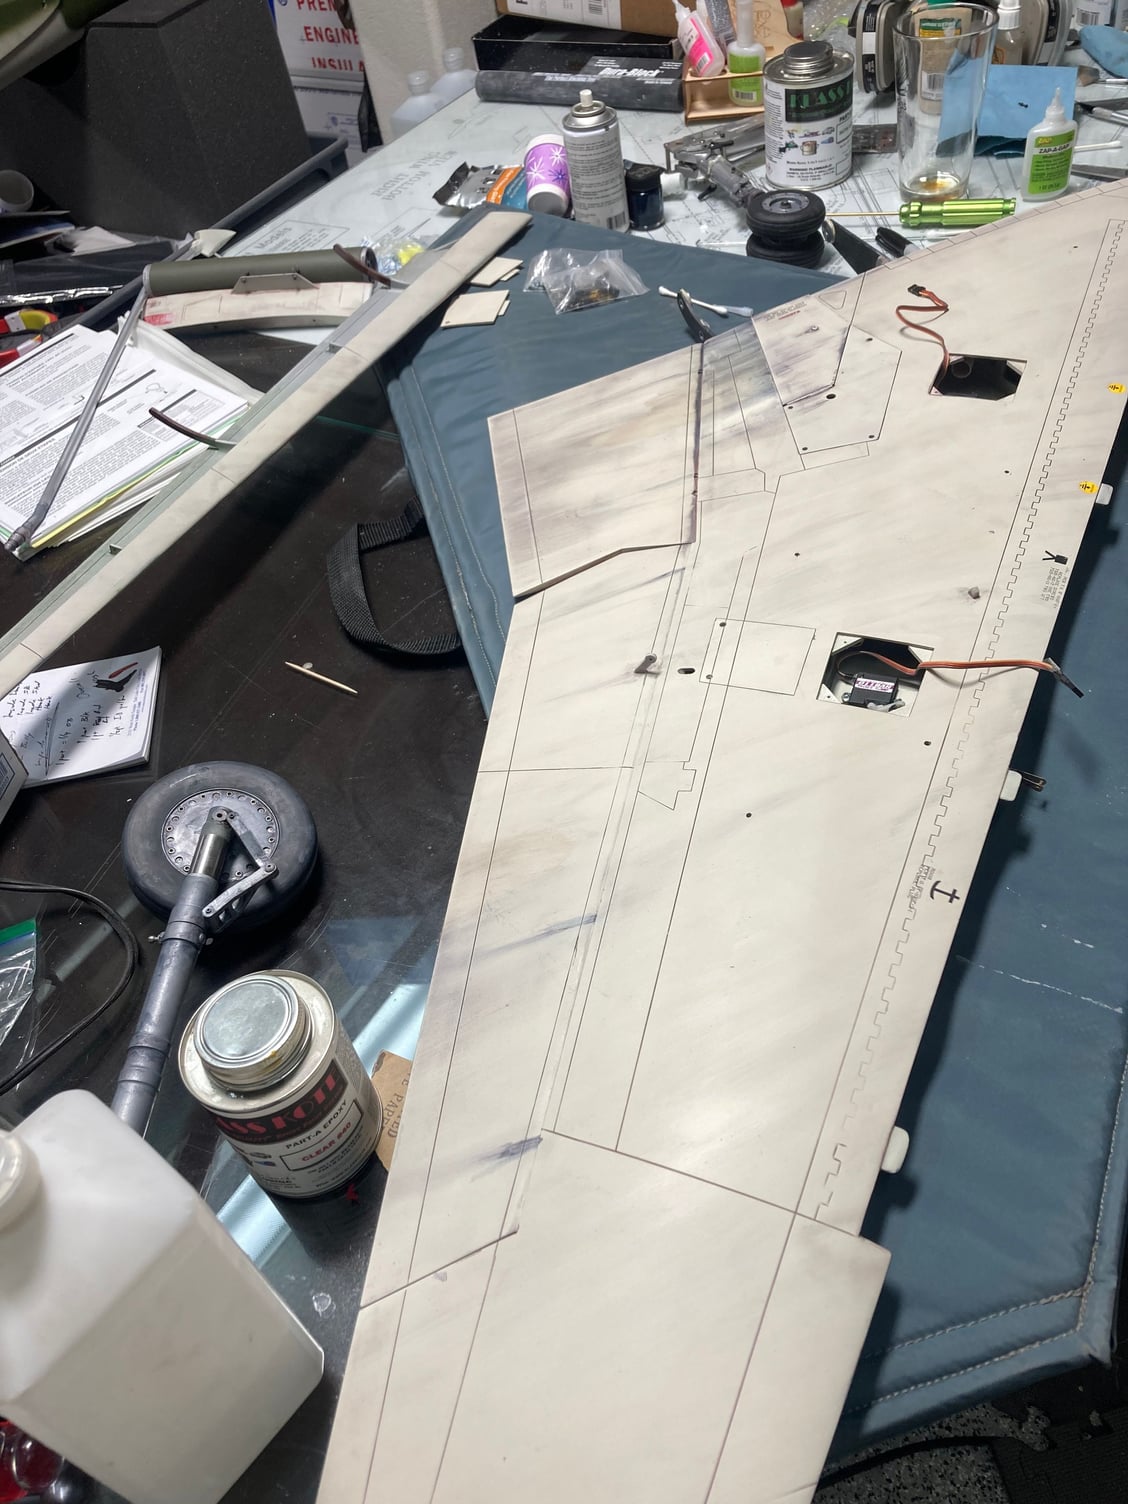
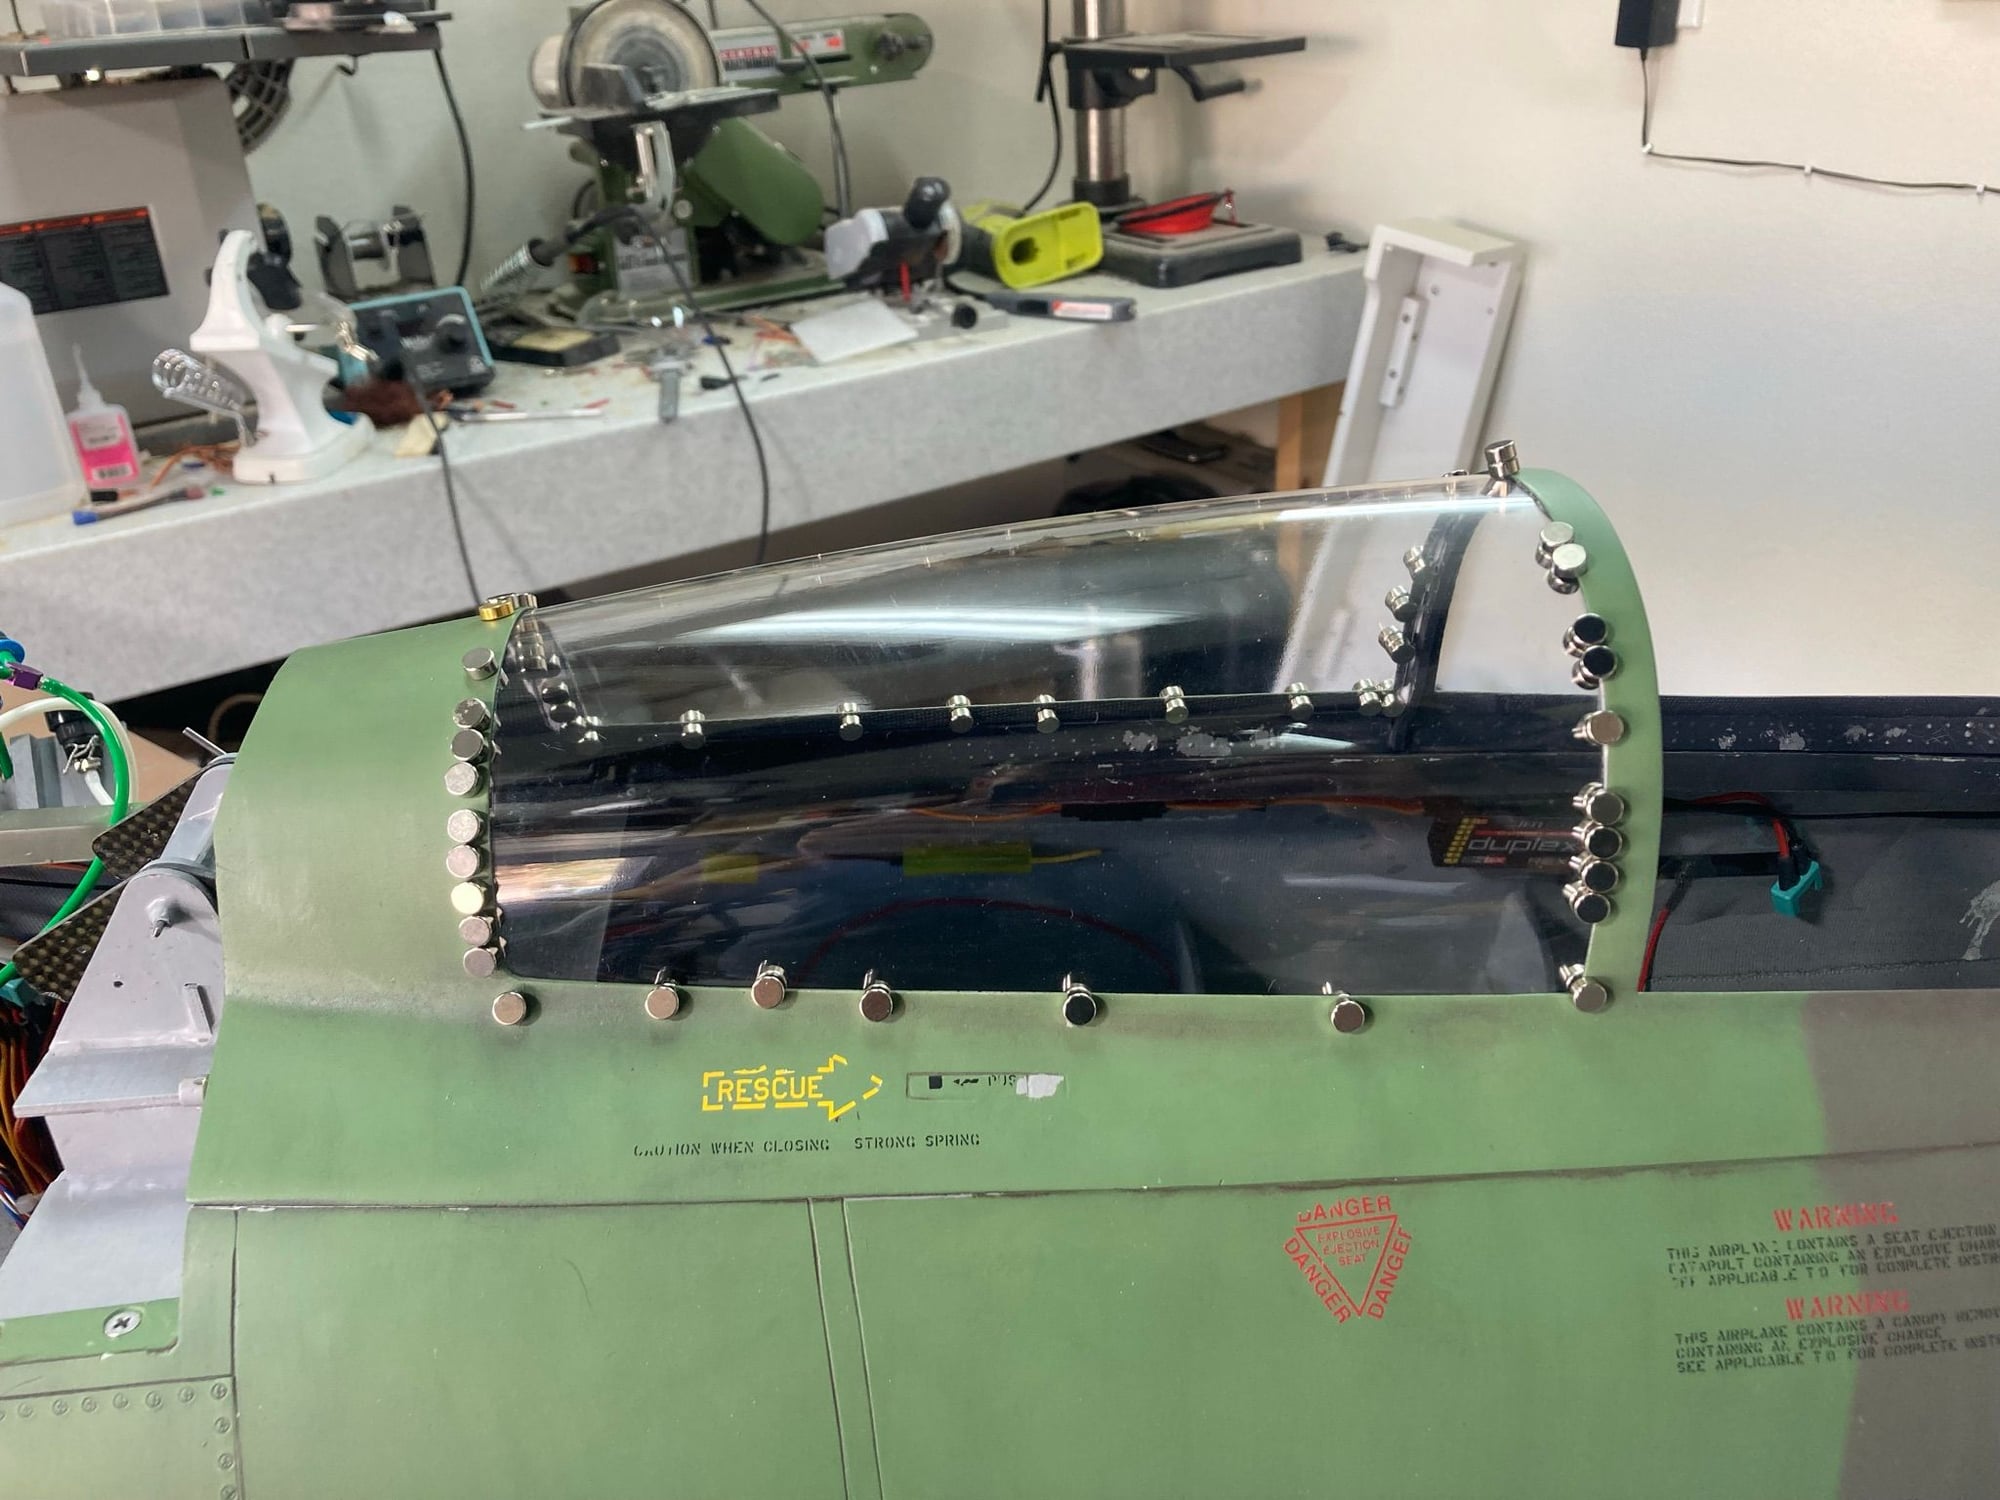
Starting to finish things up. Wings are pretty much done. Servo covers on, lines run, and custom servo leads built.
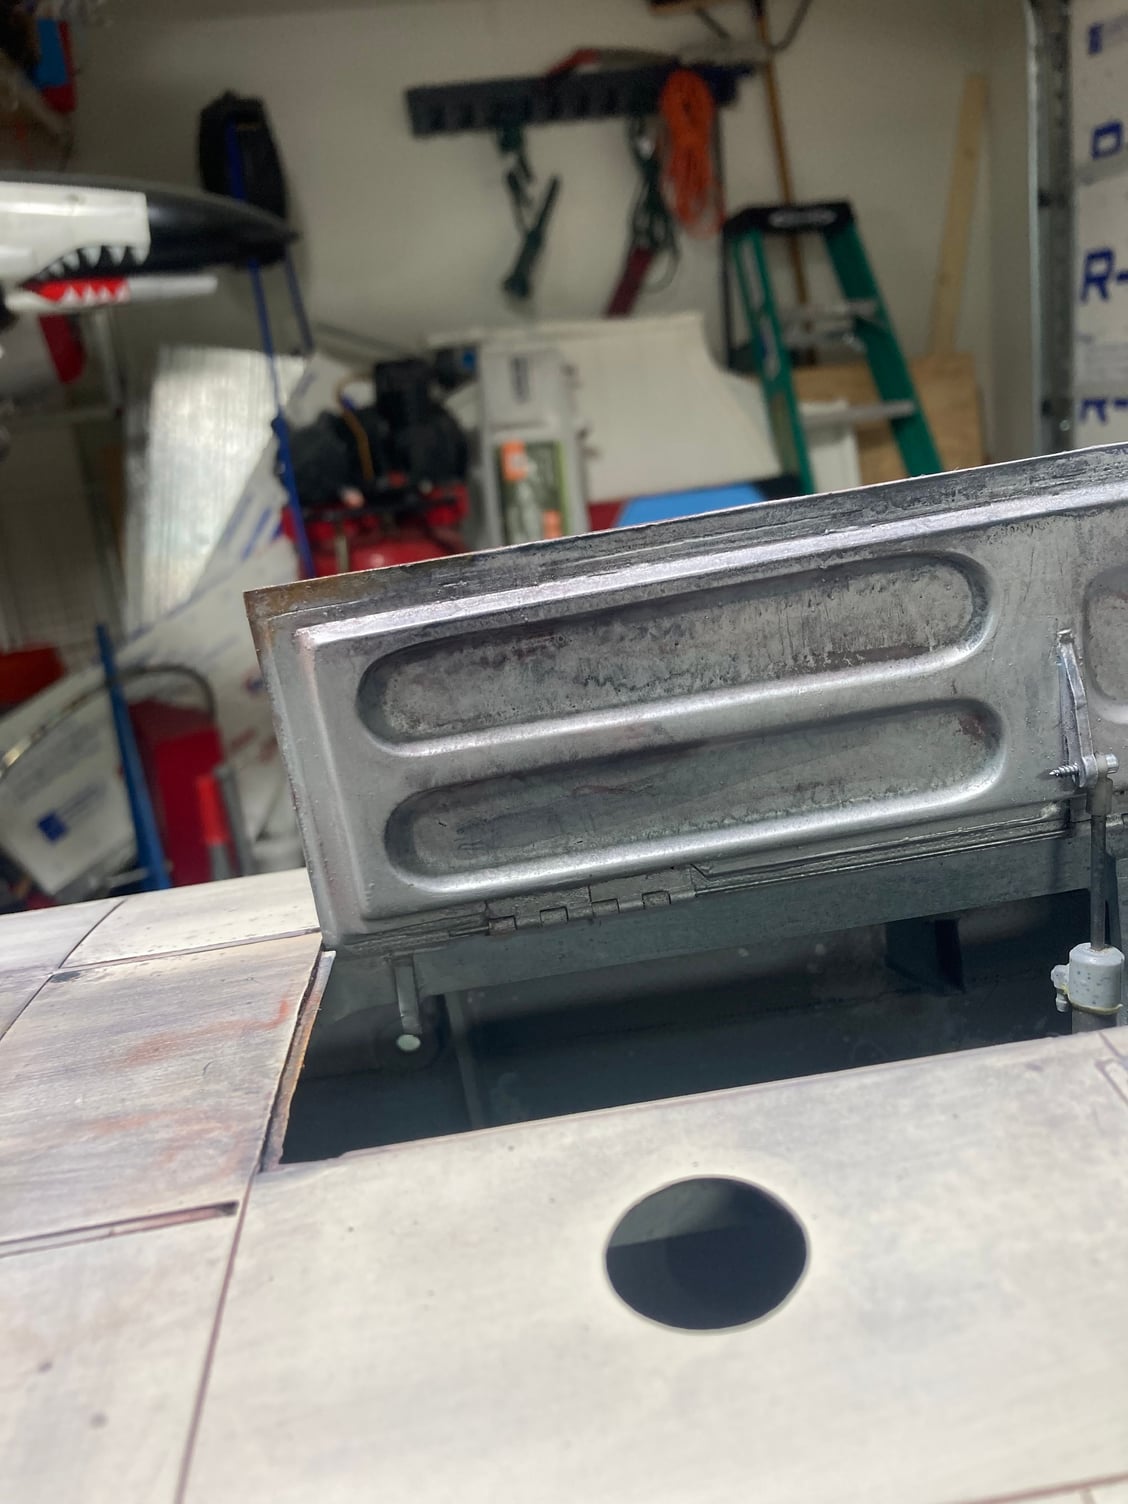
the thing I want to highlight here is the door/gear leg connection. KellyRohrbach gave me the great idea to put a 7/32 aluminum tube over the gear/door pushrod
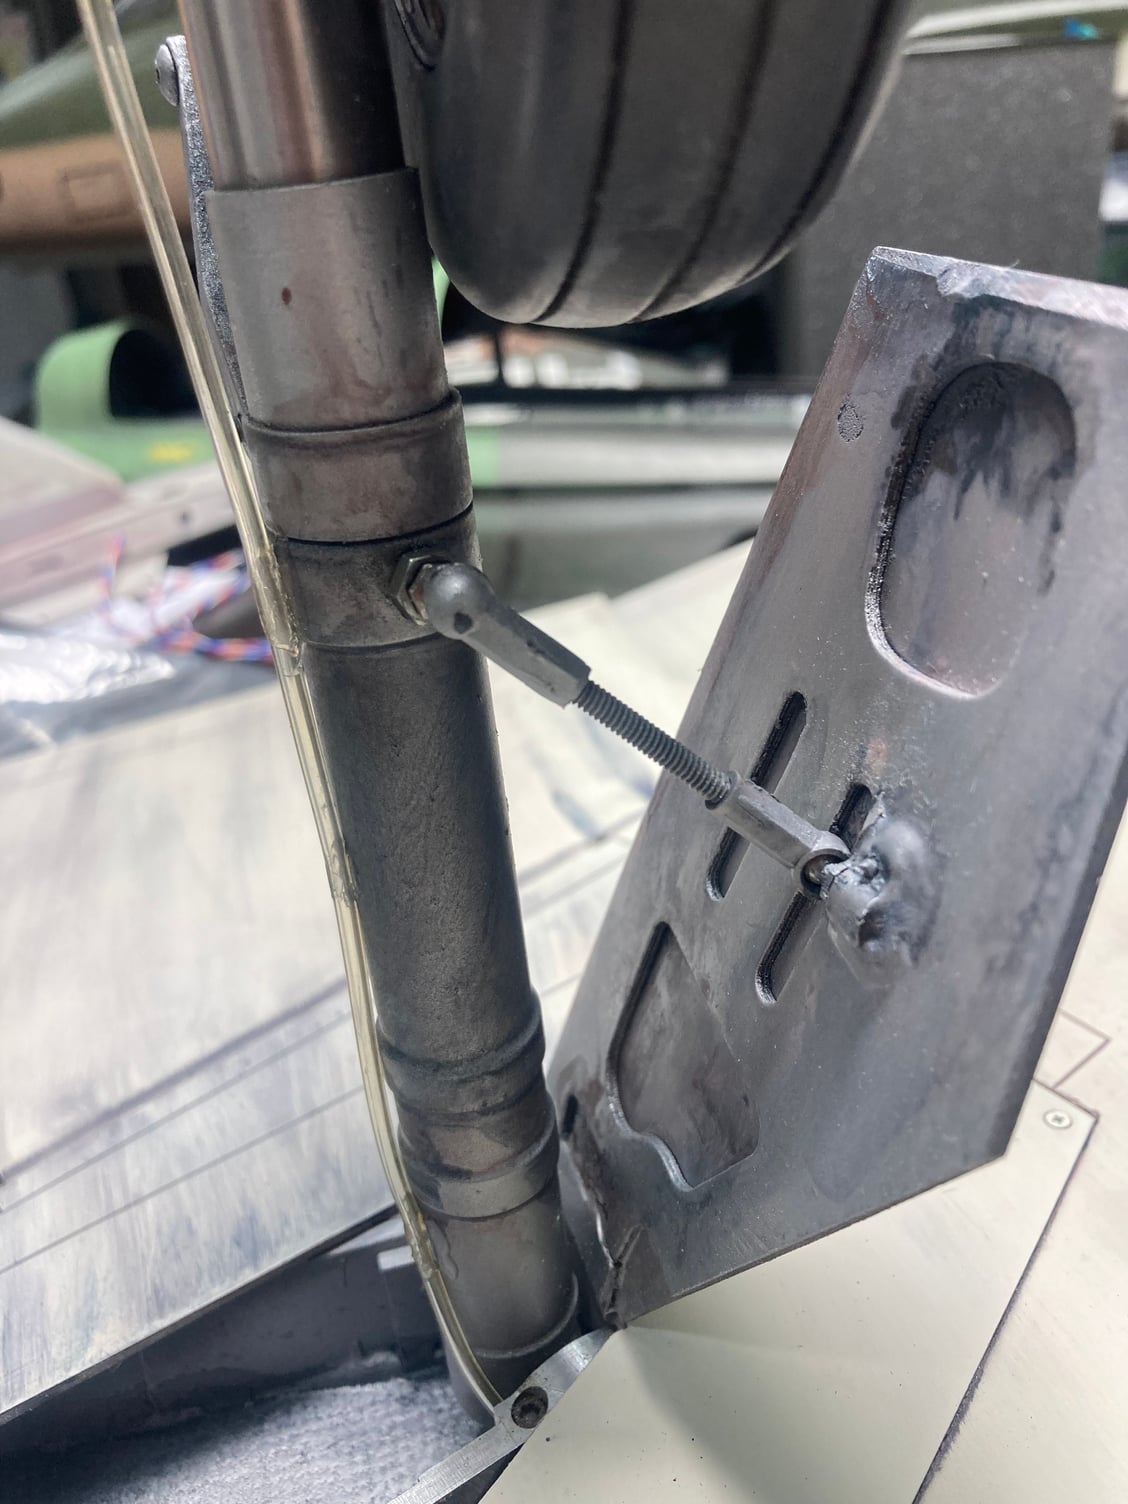
Before the tubing

This is with the aluminum tubing
the thing I want to highlight here is the door/gear leg connection. KellyRohrbach gave me the great idea to put a 7/32 aluminum tube over the gear/door pushrod
Before the tubing
This is with the aluminum tubing
10-02-2021, 06:47 PM
#236
My Feedback: (13)
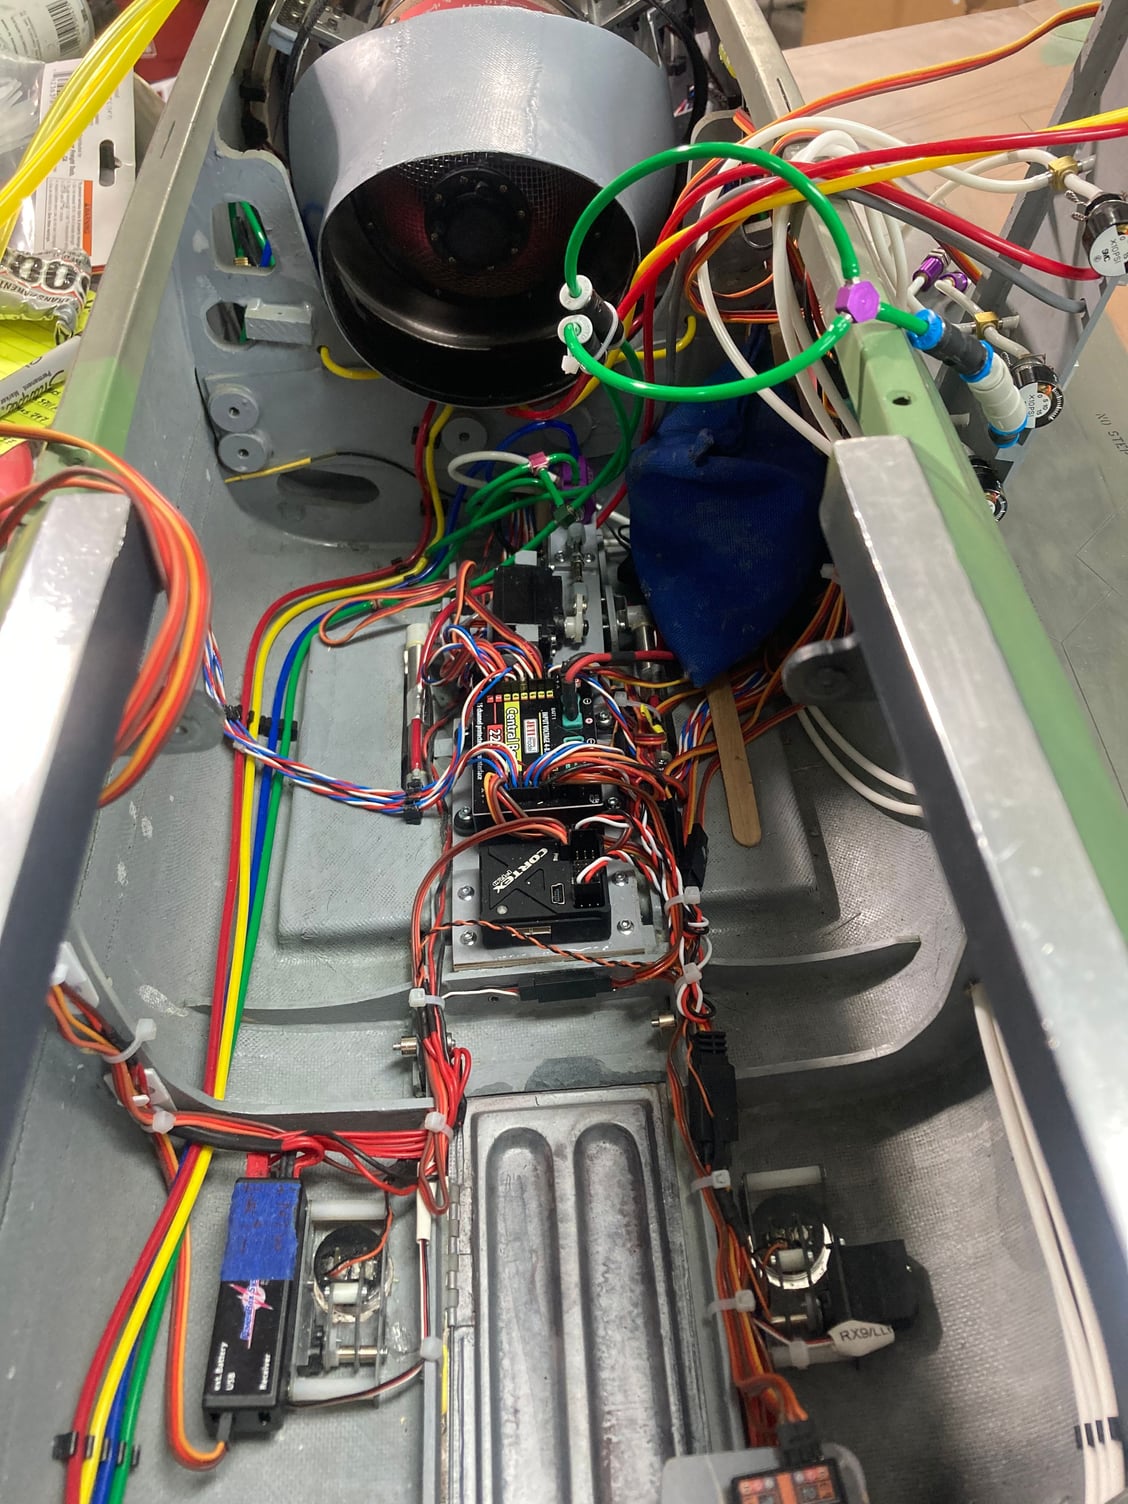
Unfortunately I�m in atlanta for a month of training (with some back and forth). I�m in the ten pounds of crap in a five pound sack stage. So. Much. Stuff. Inside this plane! I�m trying to keep the install as clean as I can while also thinking about future maintainability

Some of the airlines run

Aft portion of the forward fuse. ECU on the right along with UAT (literally the only place I could fit it. Bypass is huge (originalky for an Olympus)). Fuel flow on the left and fuel pump center bottom to be below the bypass

Air tank area
Some of the airlines run
Aft portion of the forward fuse. ECU on the right along with UAT (literally the only place I could fit it. Bypass is huge (originalky for an Olympus)). Fuel flow on the left and fuel pump center bottom to be below the bypass
Air tank area
Last edited by ozief16; 10-02-2021 at 06:49 PM.
 10-04-2021, 07:32 PM
#238
My Feedback: (13)
Matt,
I used Klass Kote clear and satin catalyst
I only did it because the rub on transfers did not stand up to the lacquer thinner so I cleared them in
for the washes I used Klass Kote as well. I custom mixed the colors. Sprayed them on then used lacquer thinner on a rag to start wiping it off/streak it
i painted the base coat (kk), rub on transfers, light clear (kk), then multiple washes of color (burnt umber (super dark brown), dirty grey, then the Orange of old hyd fluid and glossy red for fresh hyd fluid).
If I didn’t answer let me know and I’ll take another swing at it
10-04-2021, 08:10 PM
#239
Matt,
I used Klass Kote clear and satin catalyst
I only did it because the rub on transfers did not stand up to the lacquer thinner so I cleared them in
for the washes I used Klass Kote as well. I custom mixed the colors. Sprayed them on then used lacquer thinner on a rag to start wiping it off/streak it
i painted the base coat (kk), rub on transfers, light clear (kk), then multiple washes of color (burnt umber (super dark brown), dirty grey, then the Orange of old hyd fluid and glossy red for fresh hyd fluid).
If I didn�t answer let me know and I�ll take another swing at it
I have the klasskoat polyurethane clear?
https://www.klasskote.com/urethane-products-and-kits
or
https://www.klasskote.com/product/A040
Is that it? I am scared to spray it on, clear coat can be a killer. I has bad luck with Superpoxy clear, it yellowed on me. It was the first switch I made to catalyzed polyurethane clear (dupont) sprayed over K&B Superpoxy color. very nice.....Back then I needed gloss, but my current project looks fine with the non clear color coats.
10-05-2021, 09:51 AM
#240
My Feedback: (13)
I used the second one listed. Product 40
ive never had it yellow but I put it on VERY thin
Kk is great and doesn’t need to be cleared in. Like I said I only did it because I needed to seal in the decals. In the absence of that I would have skipped clear
Yes, Dave Platt methodology
ive never had it yellow but I put it on VERY thin
Kk is great and doesn’t need to be cleared in. Like I said I only did it because I needed to seal in the decals. In the absence of that I would have skipped clear
Yes, Dave Platt methodology
10-05-2021, 11:27 AM
#241
I used the second one listed. Product 40
ive never had it yellow but I put it on VERY thin
Kk is great and doesn�t need to be cleared in. Like I said I only did it because I needed to seal in the decals. In the absence of that I would have skipped clear
Yes, Dave Platt methodology
ive never had it yellow but I put it on VERY thin
Kk is great and doesn�t need to be cleared in. Like I said I only did it because I needed to seal in the decals. In the absence of that I would have skipped clear
Yes, Dave Platt methodology
THis klasskoat is basically (as best I can tell) the same as superpoxy. But I haven't used superpoxy in 20+ years. I used PPG (deltron) auto paint and now it is basically unobtanium and $$$. At least the klasskoat is available and I found it sprays very nicely.
Did you flatten the "prduct 40" clear or just use the normal satin catalyst?
Are you using the KK reducer? Thanks for the answers, it helps to talk to someone who actually does this.
10-05-2021, 11:51 AM
#242
My Feedback: (13)
The other aspect of ppg I wasn’t happy about is the isocyanides. I don’t have a fresh air respirator anymore so I skip the, Kk is tinted glue for all intents and a charcoal mask works great
its SUPER durable which I love. Once cured it’s woodpecker lips. Prior though you can just wipe errors off with lacquer thinner
i did not flatten it with flattener. I’ve tried it in the past and didn’t care for it (I’m sure it was operator error). I hit the model with gray scotchbrite to flatten paint as well as give effect of weathering. My buddy (full disclosure, he’s way better at this stuff) uses 0000 steel wool but I don’t like having all those metal pieces everywhere after. Steel wool fuzz on/in all magnets etc
i don’t. I use just lacquer thinner from Lowe’s. Works great and saves on shipping
No worries man. I’ve got a buddy that pulled the strings on me early on until confidence allowed me to just roll with it
11-07-2021, 06:01 PM
#243
My Feedback: (13)
Work has continued albeit slowly
I had a problem with the Mercury in the model where it just **** down on the bench so I tore it all out and replaced with Jeti stuff. In hindsight I think it may have been the batts I was using but I�ll send the Mercury in just in case for a checkout before using it in my yellow P38
it now has a cortex pro snd cb220. This brings it into alignment with my other models as well
i cleaned up all the wiring and tubing as best I could. It�s surprising how little space there is when you get the intake in etc
Bypass just set in place. The blue thing in the upper right of the pic is a 4# diver weight to hold something in place while glue dries

 12-11-2021, 03:56 PM
#249
My Feedback: (13)
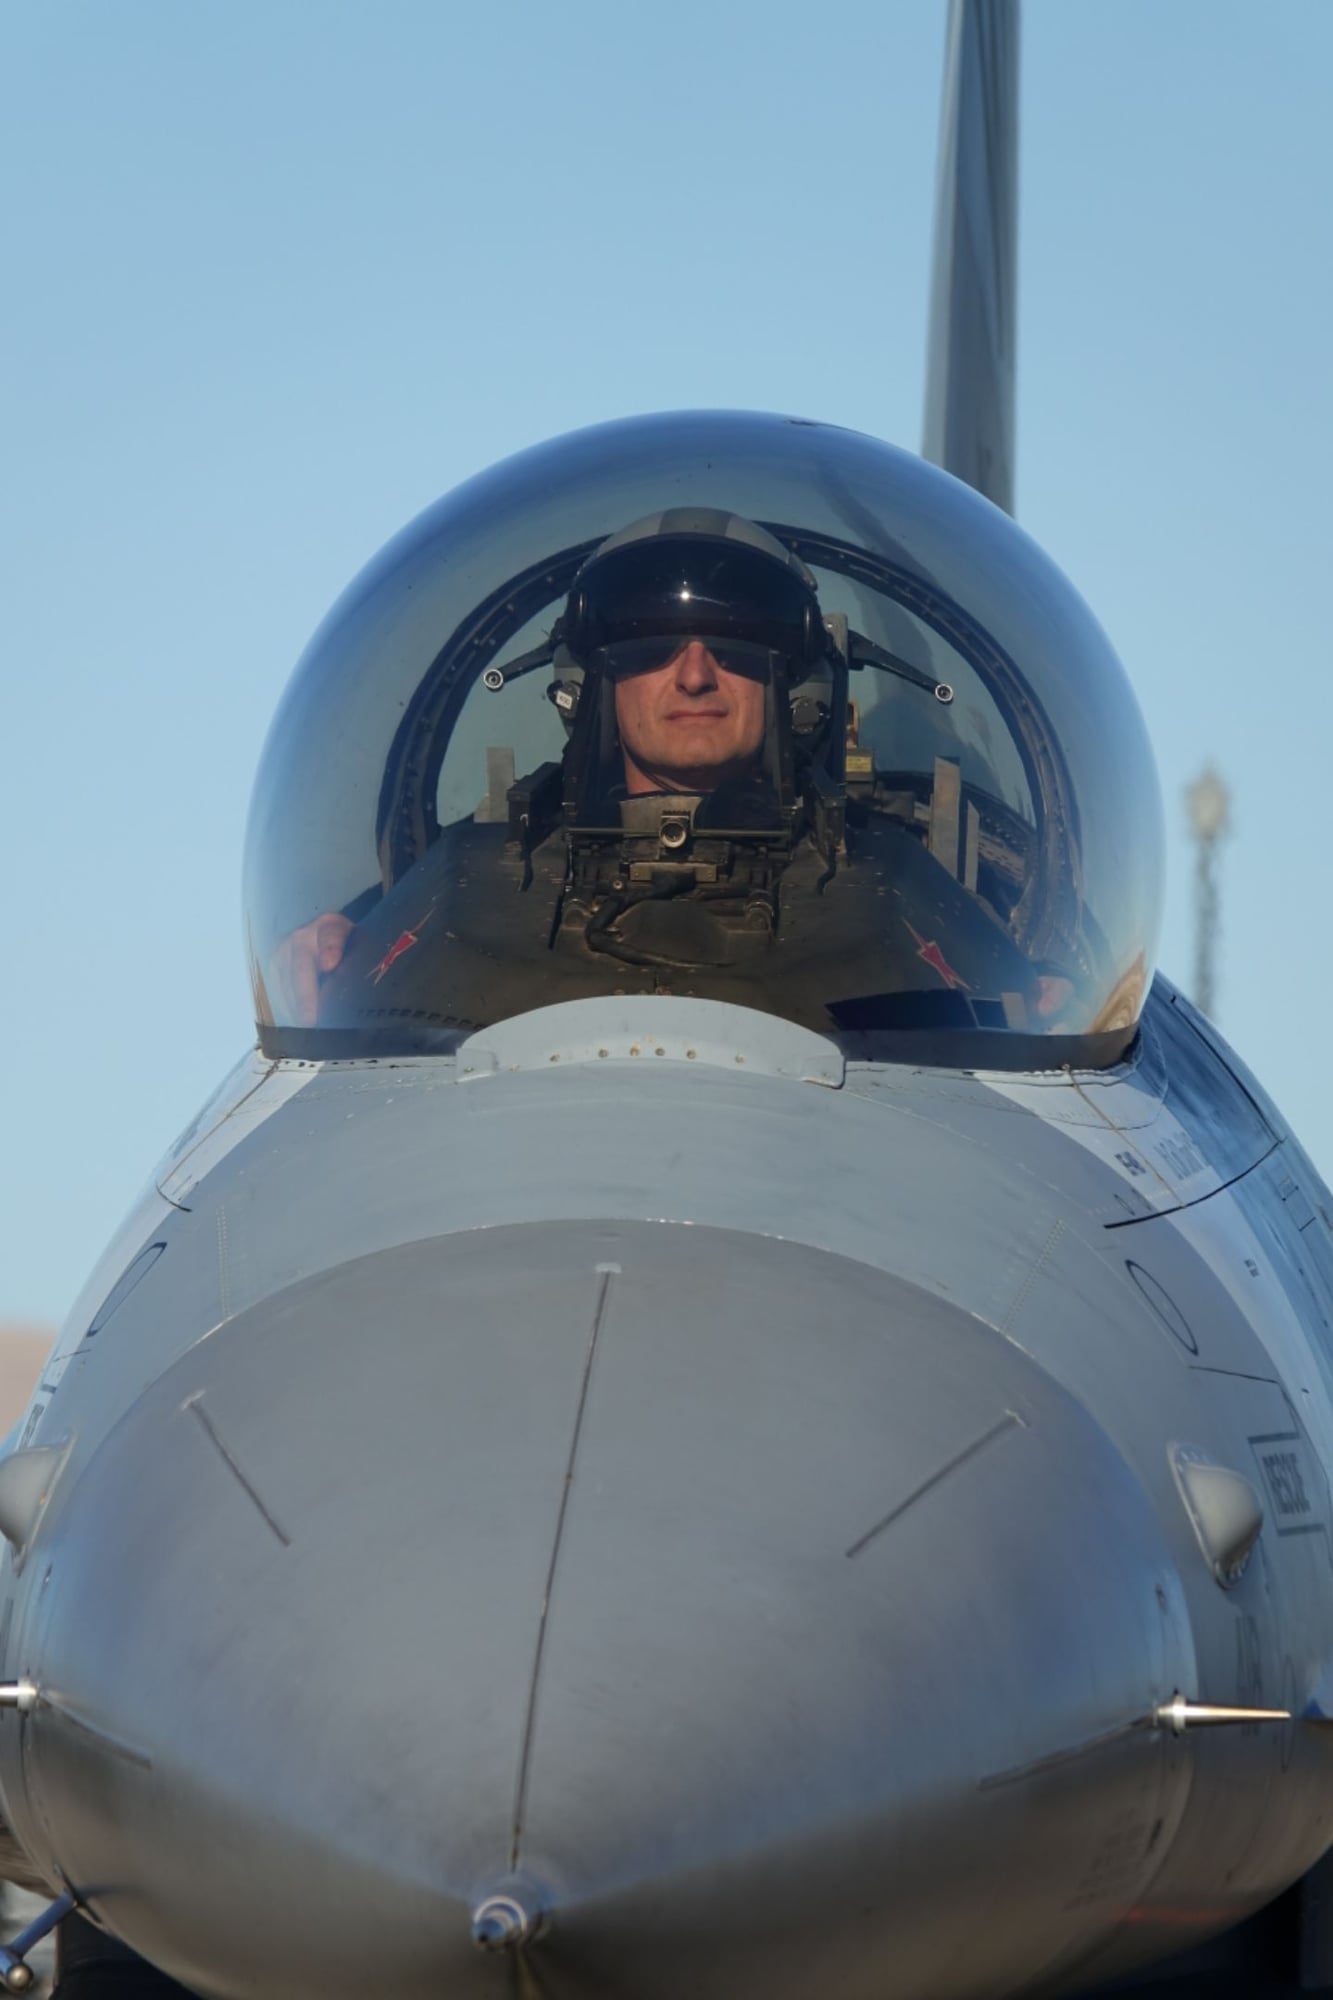
Gary, here�s a few key shots
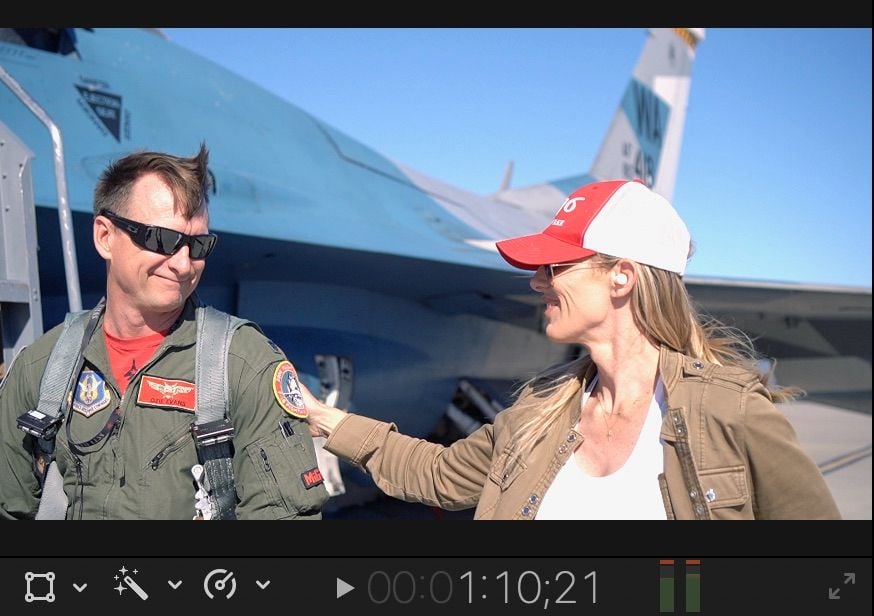

Time to walk away
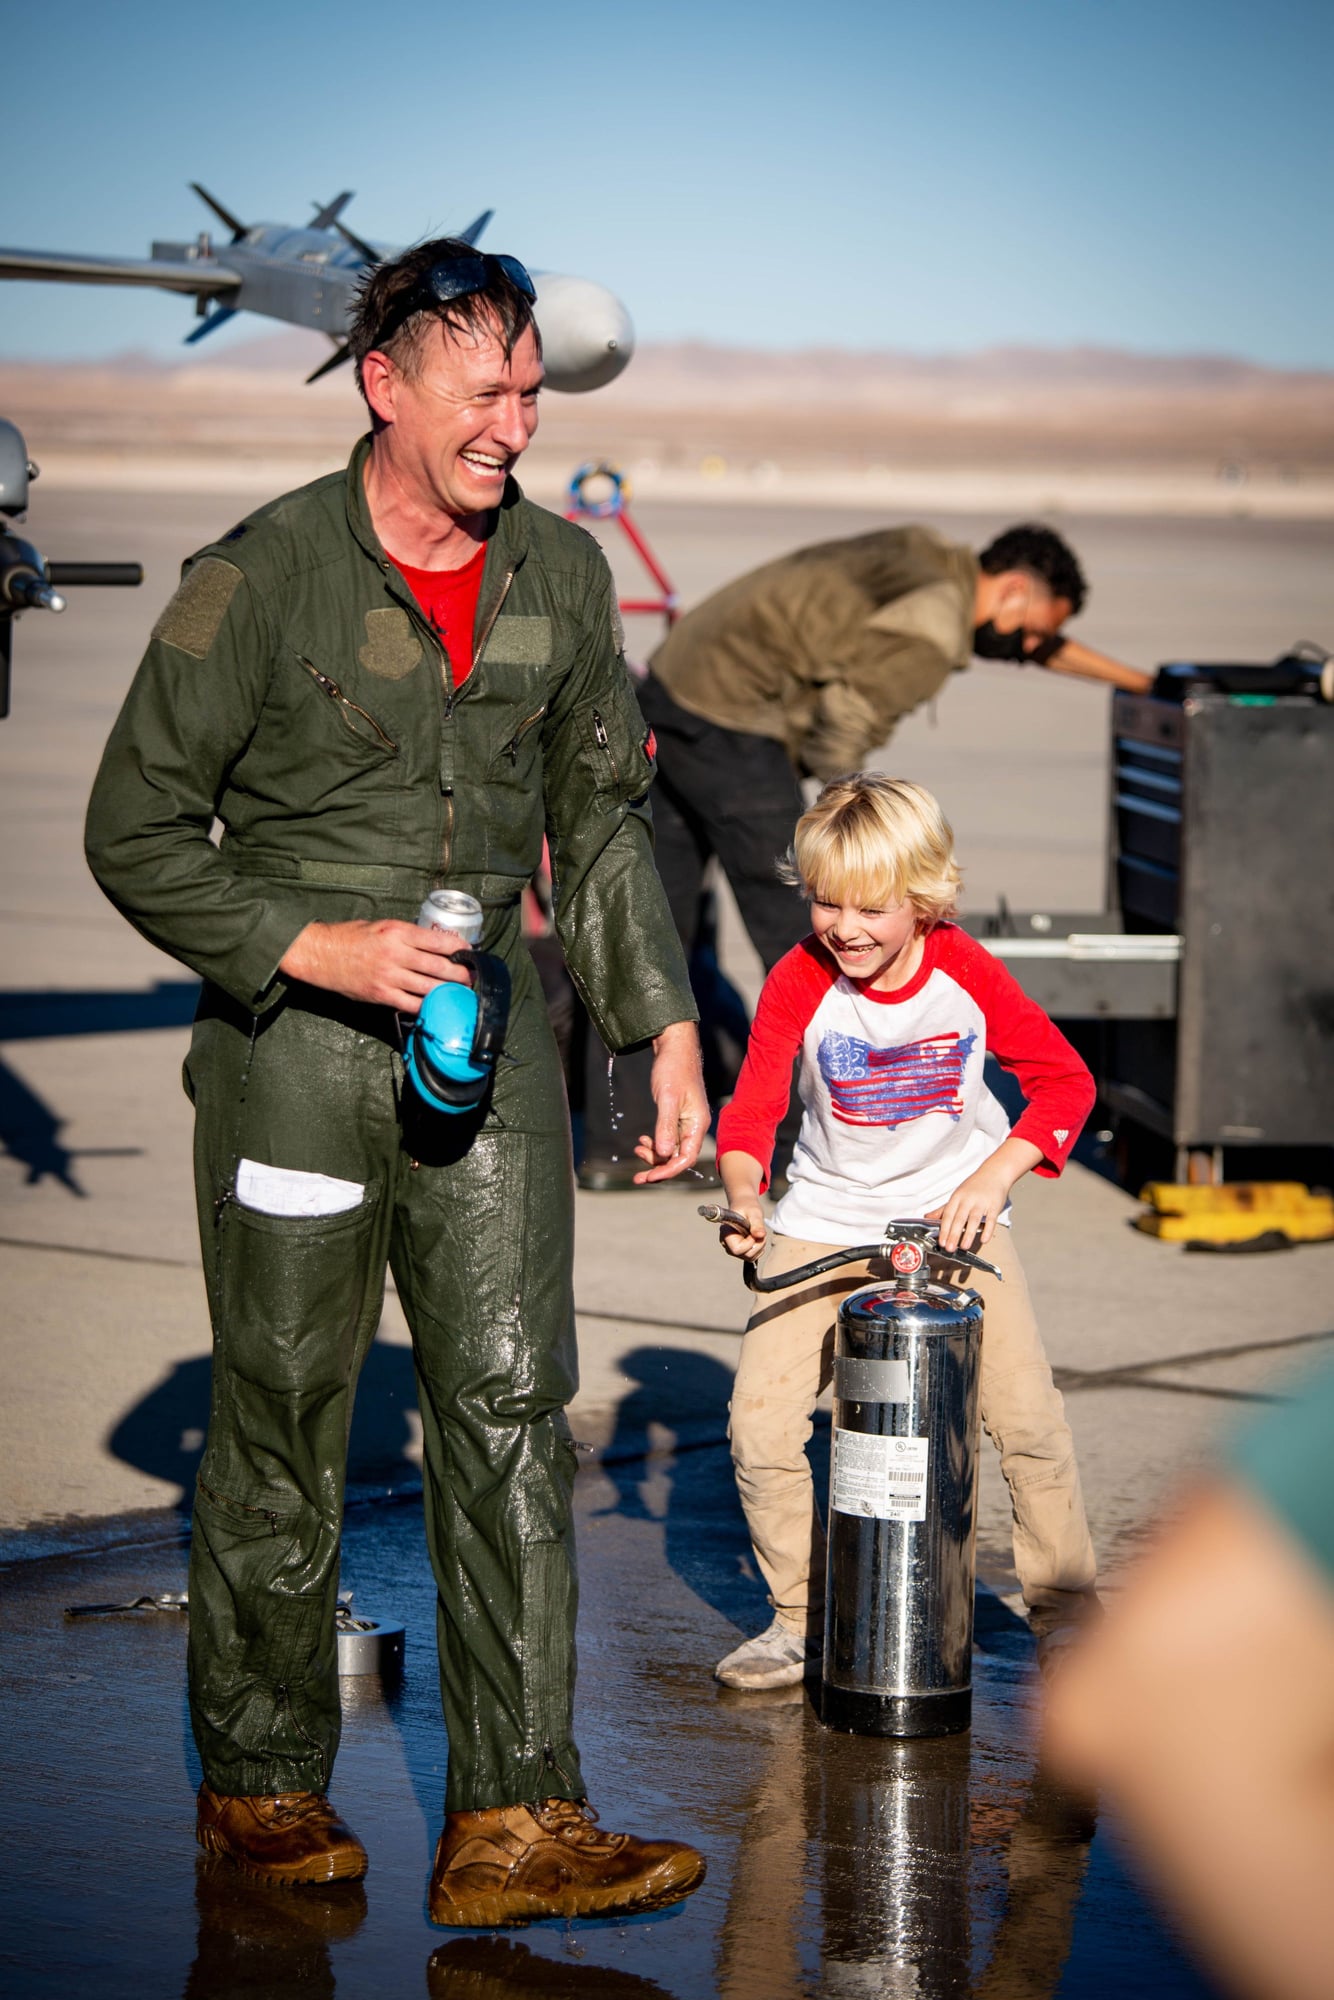
The boy was very excited to use the fire extinguisher
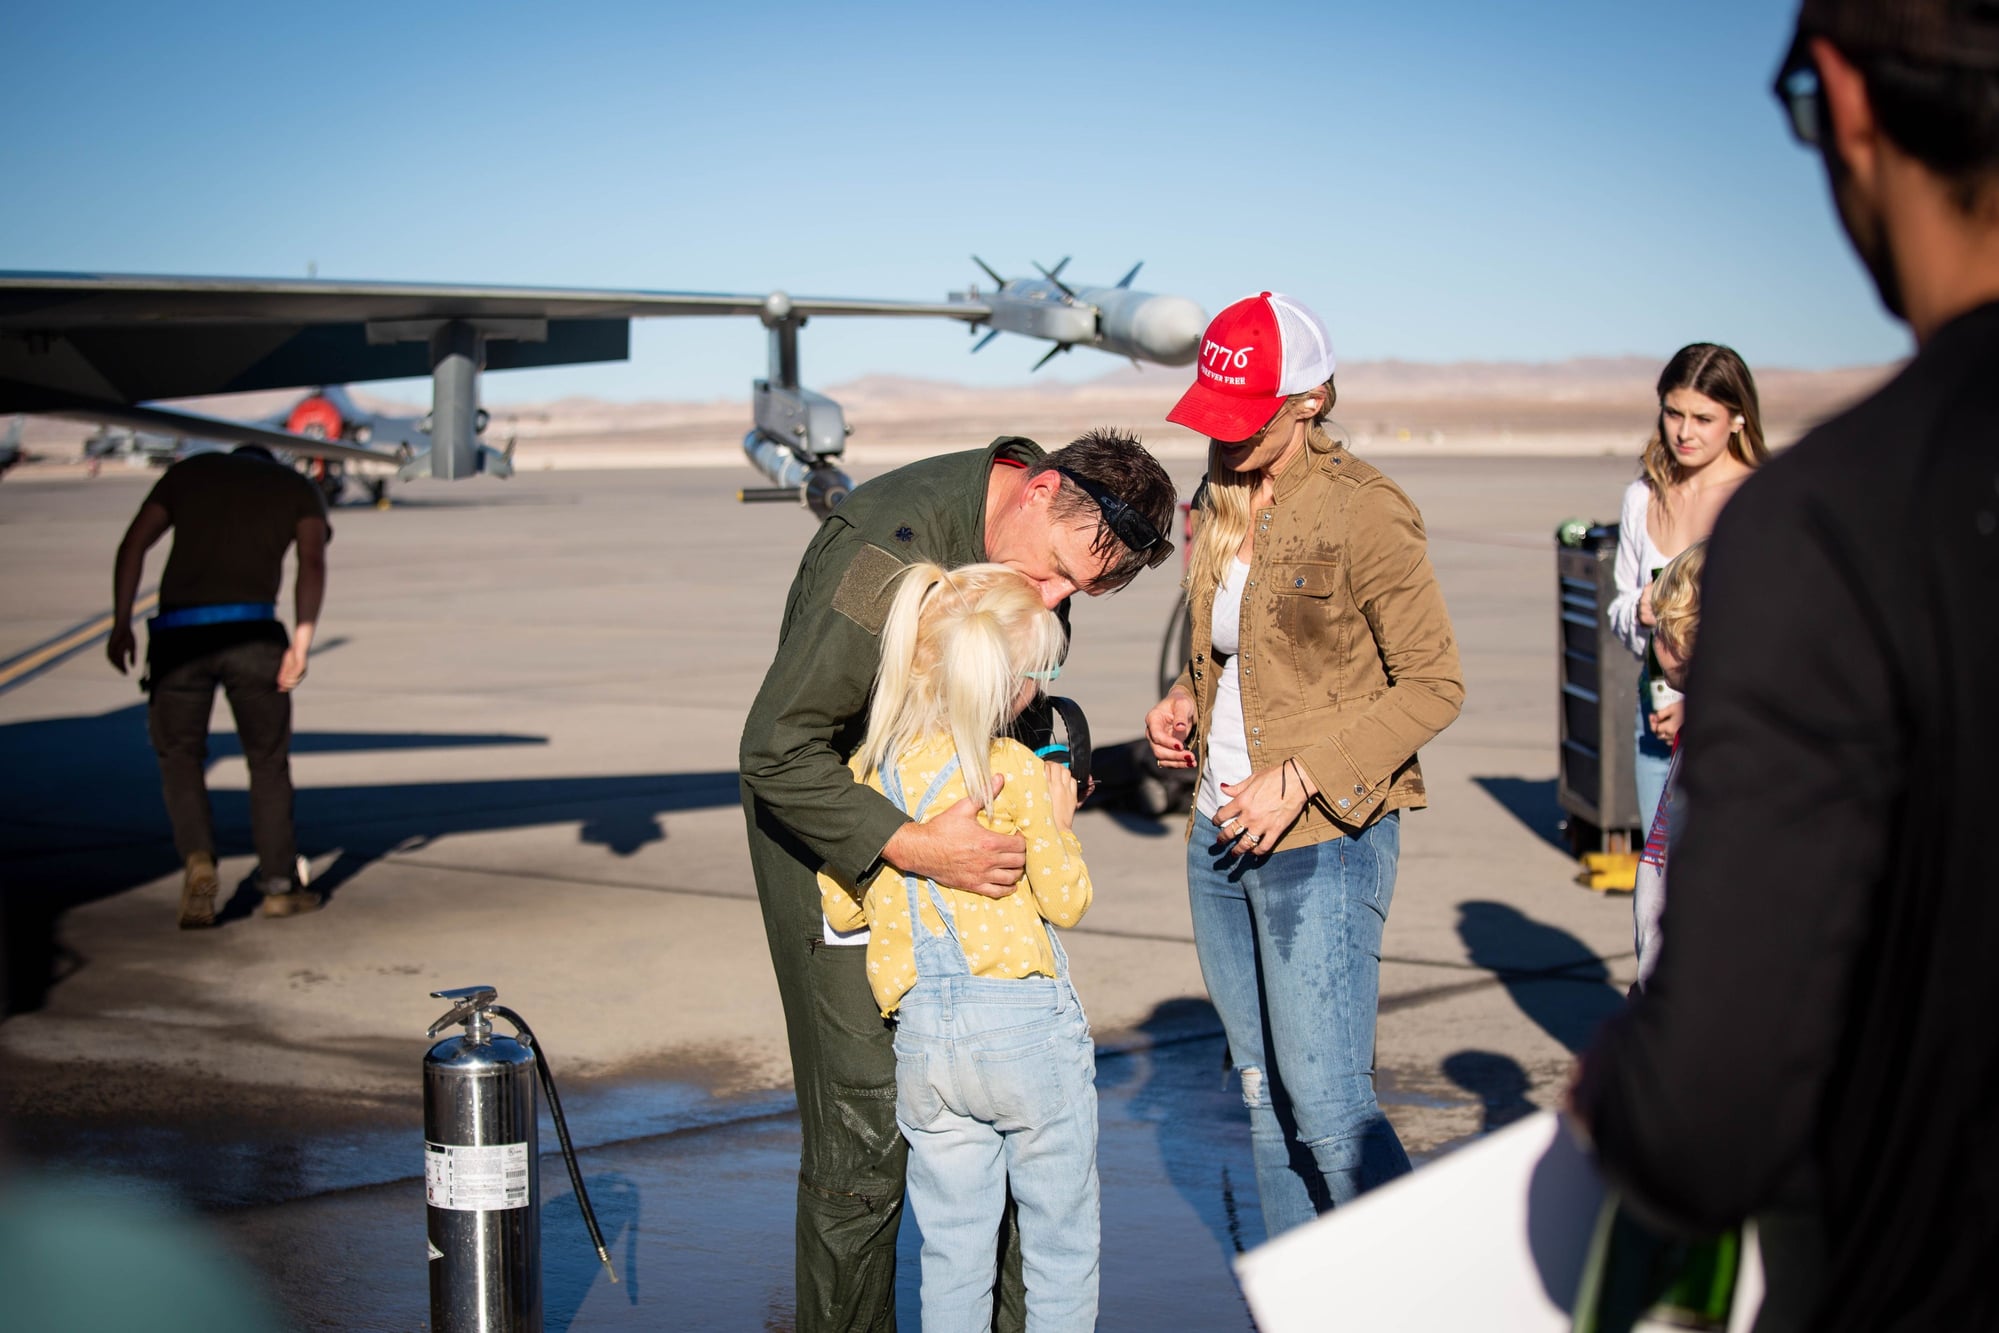
Youngest daughter scares when the LTs tackled me hoping to tape me to the missile rail. They didn�t know I XFit, so I gave at least as much as I got
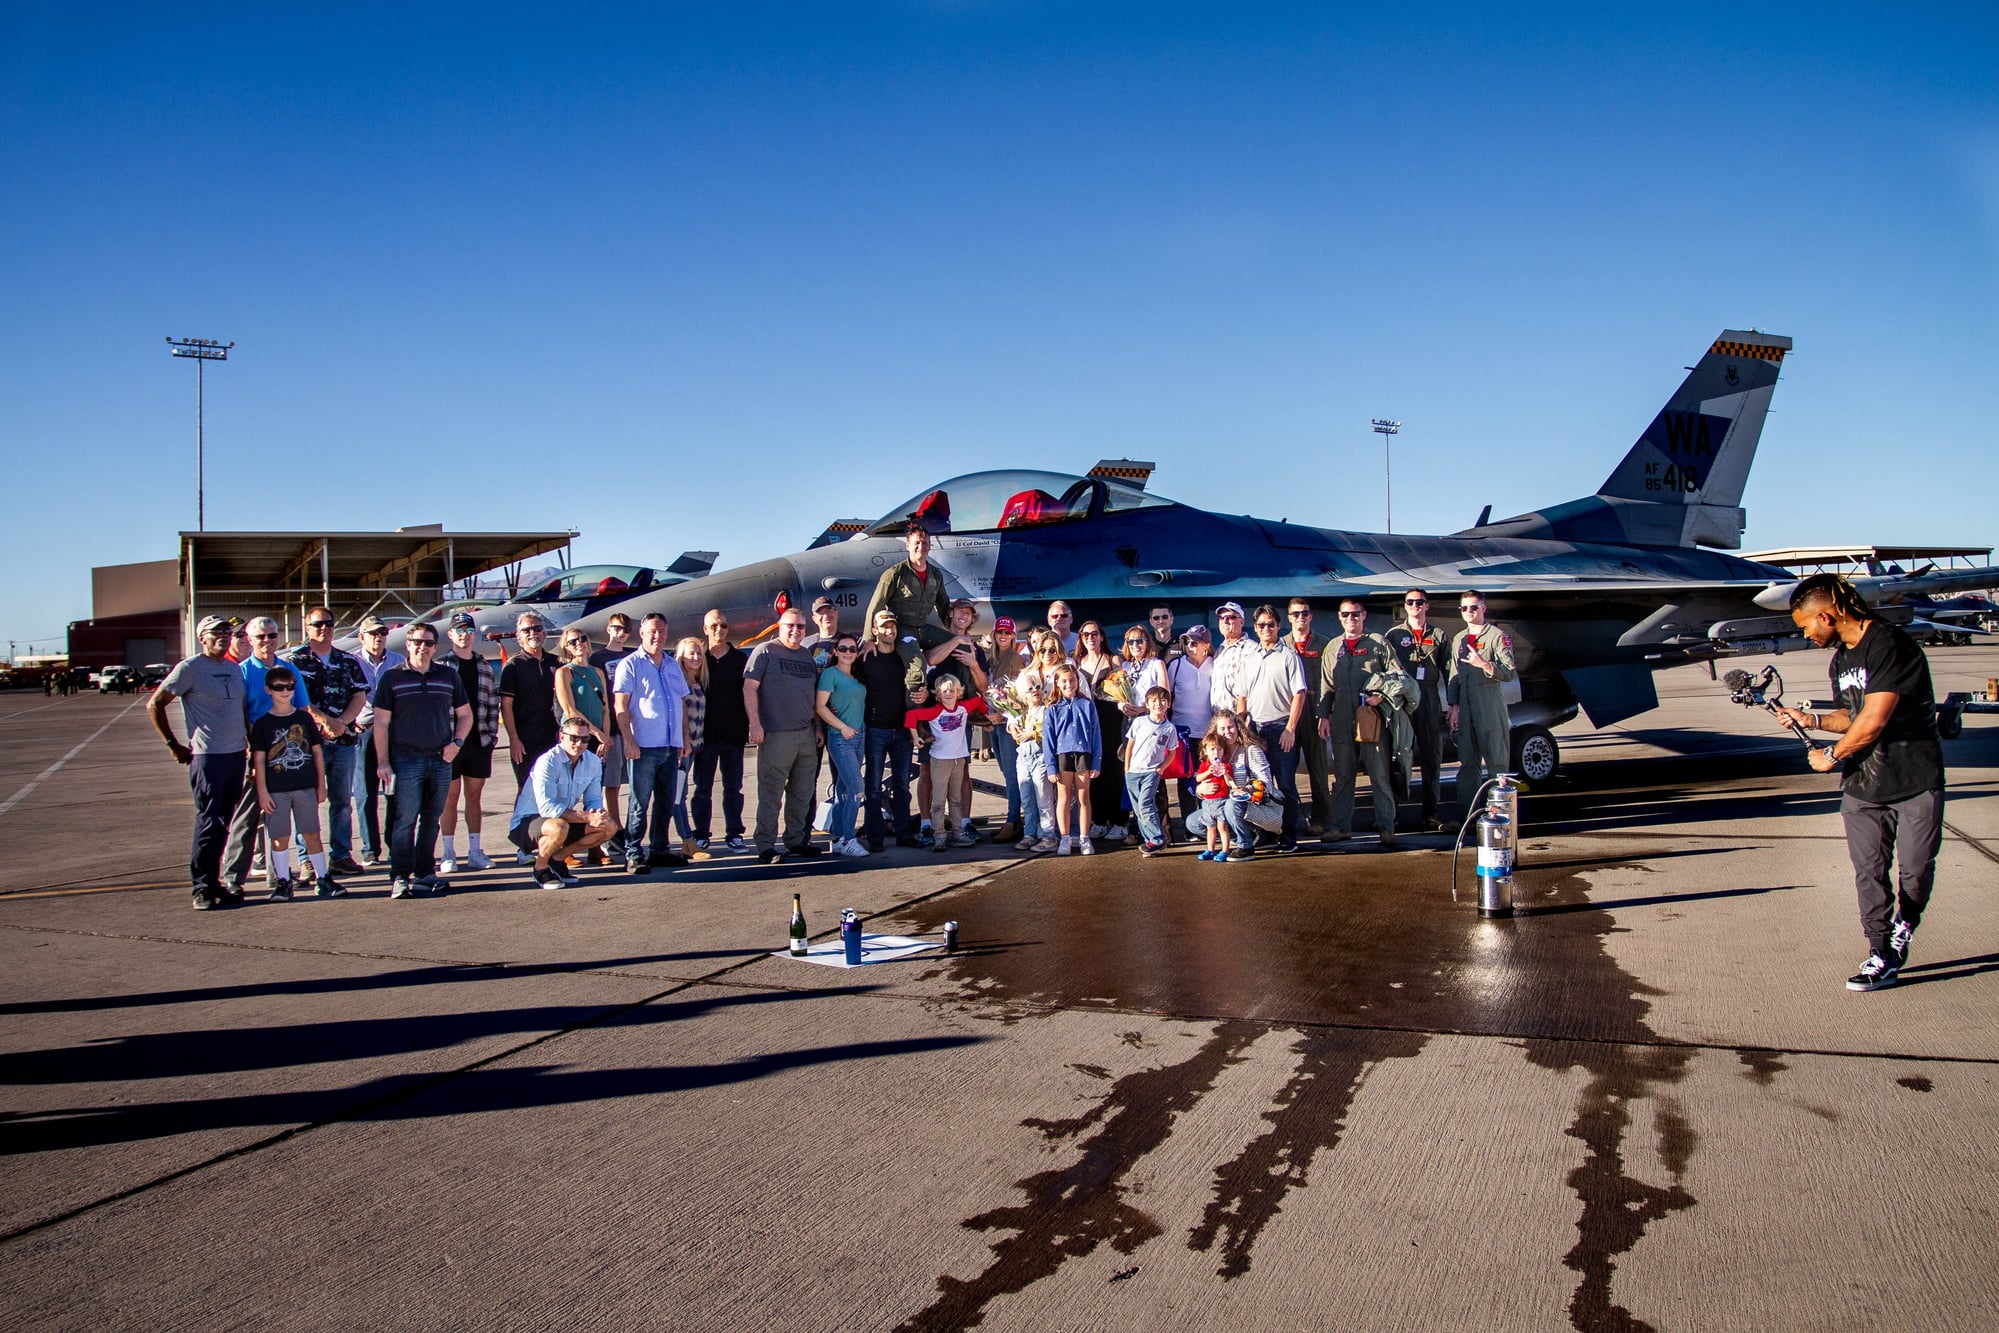
Great group of people


Unrestricted climb to 16K�
Time to walk away
The boy was very excited to use the fire extinguisher
Youngest daughter scares when the LTs tackled me hoping to tape me to the missile rail. They didn�t know I XFit, so I gave at least as much as I got
Great group of people
Unrestricted climb to 16K�
Last edited by ozief16; 12-11-2021 at 04:09 PM.
The following 4 users liked this post by ozief16:
12-11-2021, 04:49 PM
#250

My Feedback: (20)
Congrats Dave!
Looks like it was a perfect day with family and friends to celebrate finishing up the Viper. It's one you won't forget.
Congrats on job well done, surviving, and thanks for your service!
Best wishes for future success,
Gary
Brings back lots of great memories! Thanks for sharing!
Looks like it was a perfect day with family and friends to celebrate finishing up the Viper. It's one you won't forget.
Congrats on job well done, surviving, and thanks for your service!
Best wishes for future success,
Gary
Brings back lots of great memories! Thanks for sharing!