Scale finishing my BVM Hun
#126

My Feedback: (13)
Thanks guys, the compliments mean a lot coming from you three
Iíll keep posting then
the Misty contact has been invaluable from a life perspective and cool for the model building too. Those guys did ďitĒ and did it well. 28% shoot down rate with 4 shot down twice. Crazy
I offered if they were near Nellis to open up the squadron bar and feed them scotch as long as they told stories in return. Iím half afraid theyíll drink us dry . Nobody has told these guys theyíre in their 80s/90s. I think their brains are still 25 and flying combat sorties
Today I worked on the external tanks. If youíve ever seen one in real life you realize the fins are huge! Knowing me Iím likely to kick one of those damn things off so I would like them removeable. My intent is to put the fins on the tanks for events but not daily flying when I cut the aft end of the tank off I was surprised to find a 1/4Ē balsa central keel back there. That actually will make the process of making the aft part of the tank with fins removeable. Iíll put two blade spars on either side of the keel so I can put a bolt through them.
I also got my stickers from warpug for the bypass and they look great!
thanks for letting me post Roger

More pics to follow
Iíll keep posting then
the Misty contact has been invaluable from a life perspective and cool for the model building too. Those guys did ďitĒ and did it well. 28% shoot down rate with 4 shot down twice. Crazy
I offered if they were near Nellis to open up the squadron bar and feed them scotch as long as they told stories in return. Iím half afraid theyíll drink us dry
 . Nobody has told these guys theyíre in their 80s/90s. I think their brains are still 25 and flying combat sorties
Today I worked on the external tanks. If youíve ever seen one in real life you realize the fins are huge! Knowing me Iím likely to kick one of those damn things off so I would like them removeable. My intent is to put the fins on the tanks for events but not daily flying when I cut the aft end of the tank off I was surprised to find a 1/4Ē balsa central keel back there. That actually will make the process of making the aft part of the tank with fins removeable. Iíll put two blade spars on either side of the keel so I can put a bolt through them.
I also got my stickers from warpug for the bypass and they look great!
thanks for letting me post Roger

More pics to follow
#128

My Feedback: (13)
Ps- both the books you mention Roger were written by (or edited/compiled by) Don Sheppard. He has been my primary contact with the guys and has been an absolutely invaluable contact. He suggested ďMistyĒ as a great bathroom read. Itís a series of stories from the various Mistyís compiled in one location and are all 5-10 min reads. I highly recommend it for anyone interested in that era of fighter aviation
#129

Thread Starter
BV put me on to those books. Astonishing stories.
The tanks are a mini build all on their own. As you said the geometry of the fins is a bit funky and care is required to get them lined up with flight direction.
With the tanks fitted to the model, the fins are actually in the space between the wing and the stab, so they are 'kind of' protected in there. The pitot probe on the other hand!! I’ve had a few Ahhhh $%!T moments with that item.
I have never flown mine without tanks.. Apparently they go pretty good.
Like what you have done on the gear doors.
The tanks are a mini build all on their own. As you said the geometry of the fins is a bit funky and care is required to get them lined up with flight direction.
With the tanks fitted to the model, the fins are actually in the space between the wing and the stab, so they are 'kind of' protected in there. The pitot probe on the other hand!! I’ve had a few Ahhhh $%!T moments with that item.
I have never flown mine without tanks.. Apparently they go pretty good.

Like what you have done on the gear doors.
#130

My Feedback: (13)
As Roger said, everything on this plane is a mini-build all its own and the tanks are no exception
My intent is to fly the airplane daily without the tank fins, but for an event Iíll put them on. By doing this I was also able to make the tanks more scale. See pics for details
Heres how I did that:

Here is how the tanks come stock with a straight spine

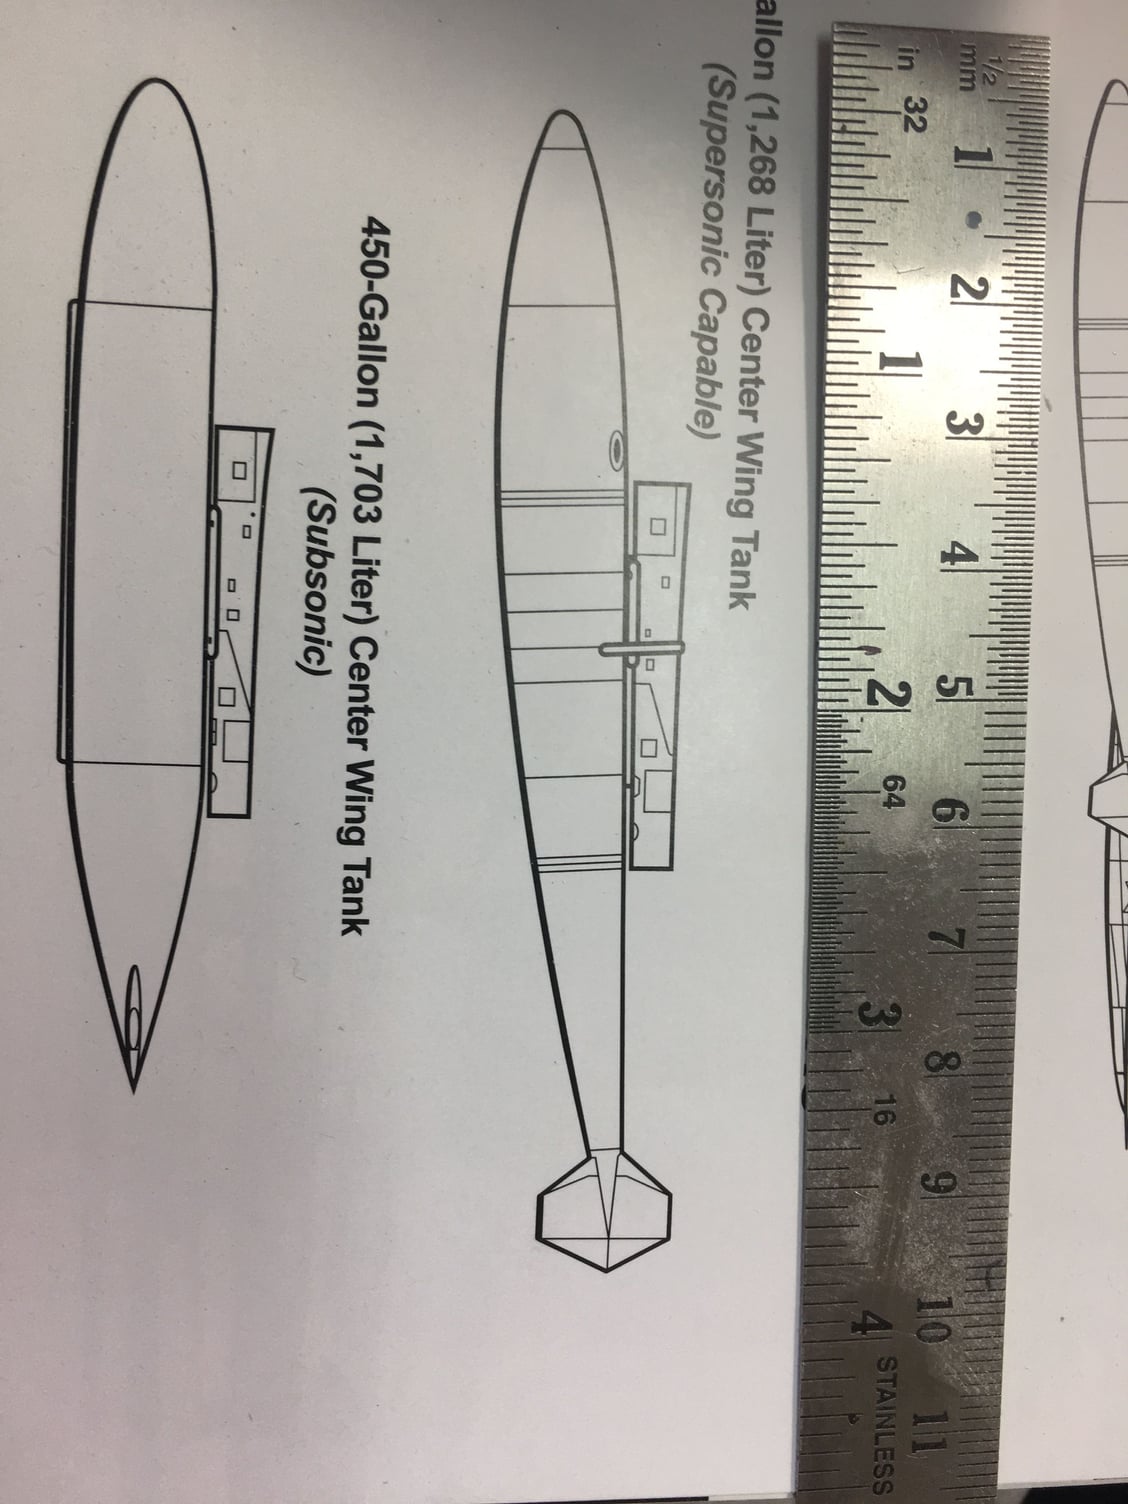
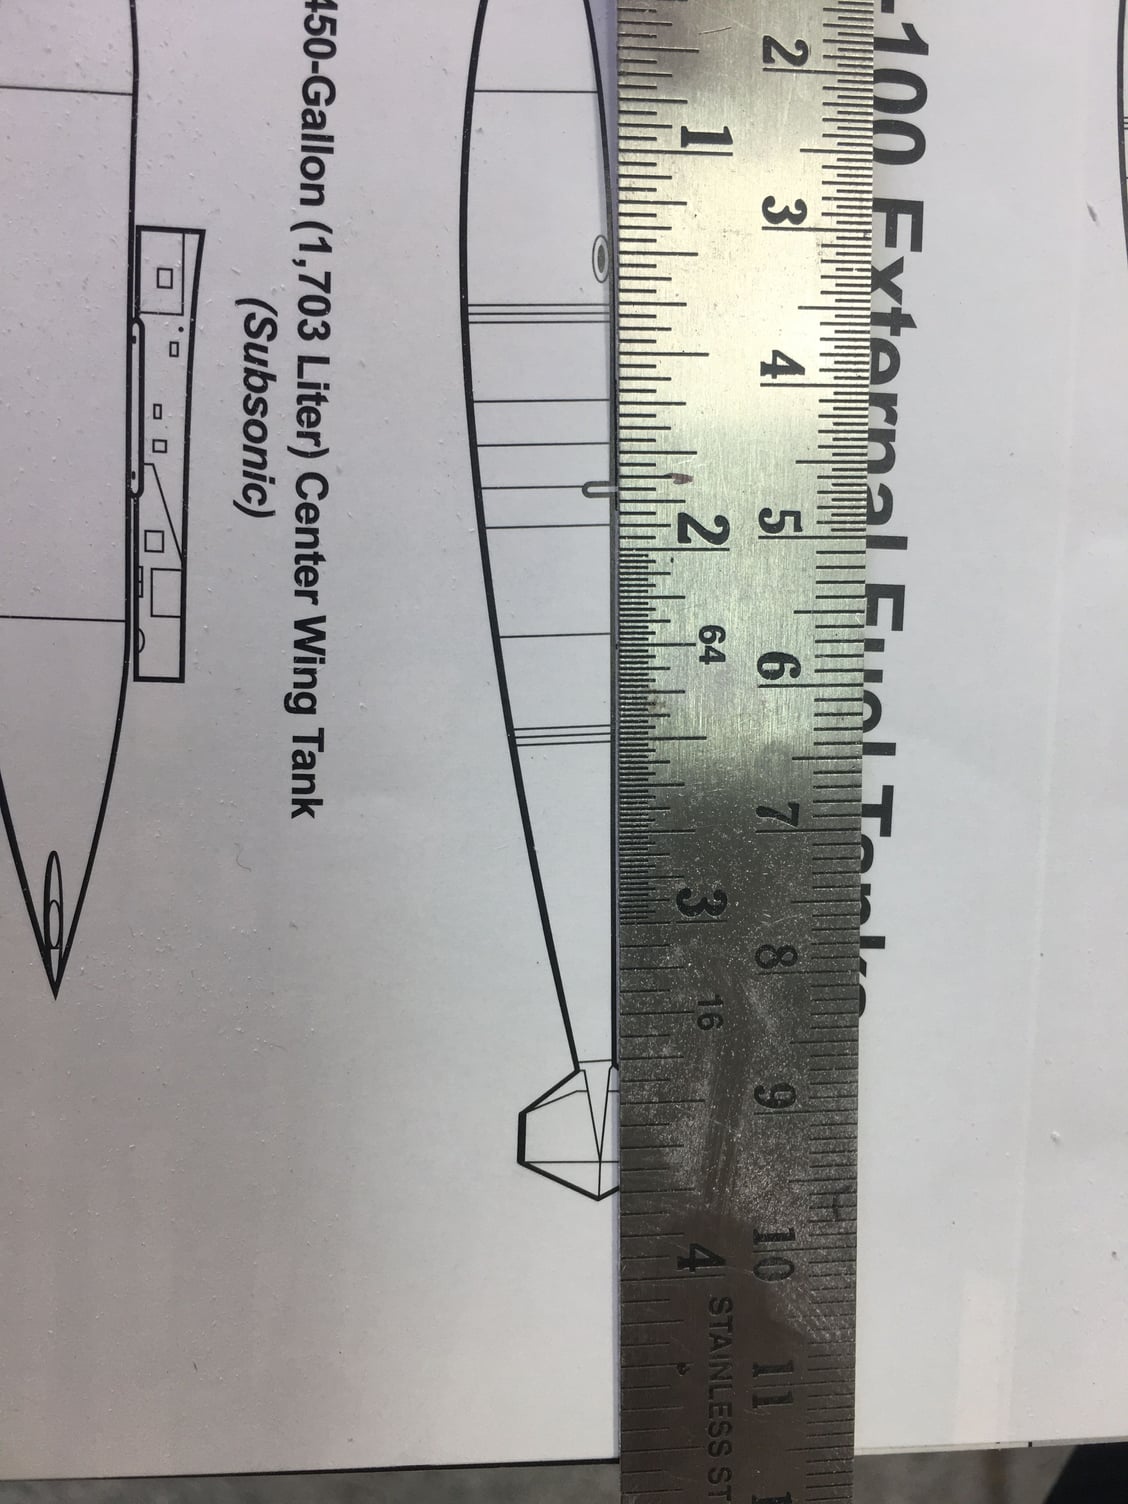
Hereís the three view of the tanks

And the three view with a straight edge applied. Notice the funny little downturn in the very aft turn at the end

This is the end product

I cut the aft part off where that aft panel line is


I installed .030Ē poly ply tabs
My intent is to fly the airplane daily without the tank fins, but for an event Iíll put them on. By doing this I was also able to make the tanks more scale. See pics for details
Heres how I did that:

Here is how the tanks come stock with a straight spine

Hereís the three view of the tanks

And the three view with a straight edge applied. Notice the funny little downturn in the very aft turn at the end

This is the end product

I cut the aft part off where that aft panel line is


I installed .030Ē poly ply tabs
#133

My Feedback: (40)
PS: Nice job on the tank fins.
#134

My Feedback: (13)
Craig,
I know youíre right. Hence all the extra effort. A whole day Ďwastedí to make the aft end of those tanks removeable. Sucks to work all day and say ďand now the tank is at the same it place before I spent the whole dayĒ. That said adding that little kink in the end makes them more scale too

Ps-Here she sits Craig! Starting her 22nd season and still looks amazing. No one can believe itís as old as it is with 250+ flights at this point
I know youíre right. Hence all the extra effort. A whole day Ďwastedí to make the aft end of those tanks removeable. Sucks to work all day and say ďand now the tank is at the same it place before I spent the whole dayĒ. That said adding that little kink in the end makes them more scale too

Ps-Here she sits Craig! Starting her 22nd season and still looks amazing. No one can believe itís as old as it is with 250+ flights at this point
#136

My Feedback: (13)

This is with the piece of wood glued into the leading edge

Rounded edge

Semi-finished product
Stock/manual is to pinch the leading edges and trailing edges together and glue them. With the trailing edges that works and looks good. The leading edges, however, didnít look right. There is very little material forward of the spar so the 3/32 ply sides donít bend all that well. The manual calls for scoring the ply so it bends better. A friend, whoís a heck of a builder, suggested tapering a piece of 1/8x1/8 basswood and inserting it in the LE and then rounding that off...so thatís what I did and love the effect
Last edited by ozief16; 05-07-2020 at 07:21 PM.
#138

My Feedback: (13)
Guys,
Yesterday and today was spent honoring my wife as a mother and working on sealing/priming they fins for the tanks and the rocket pods
The Misty FACs carries two LAU-59 rocket pods with seven each Willie Pete (White Phosphorus) rockets for marking targets
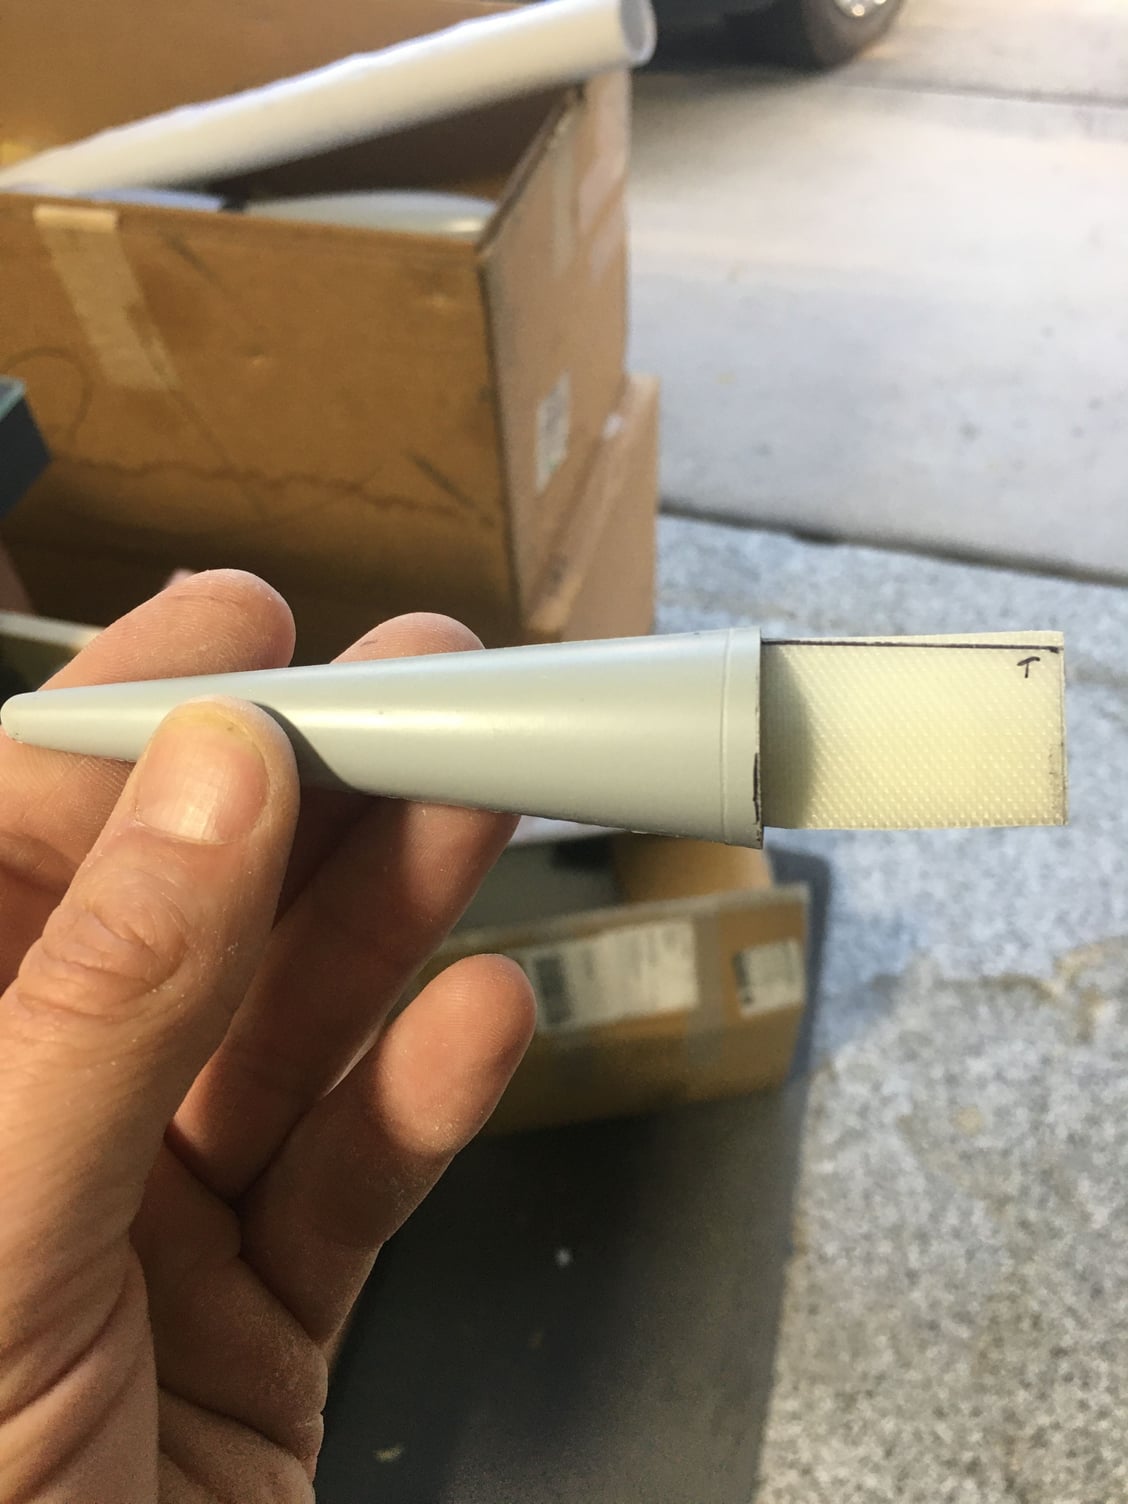
Thankfully I have a buddy thatís great with 3D printer and happens to be a Weapons troop (contractor) for the AF so he knows these pods personally. He printed the front and back end of the LAU-59 pod and I bought the Cardboard tubes from erockets.com. I added BVM hatch latches to attach them to the pylons. Very happy with how this all turned out

Front end of the pod

Back end

Back end again
Yesterday and today was spent honoring my wife as a mother and working on sealing/priming they fins for the tanks and the rocket pods
The Misty FACs carries two LAU-59 rocket pods with seven each Willie Pete (White Phosphorus) rockets for marking targets
Thankfully I have a buddy thatís great with 3D printer and happens to be a Weapons troop (contractor) for the AF so he knows these pods personally. He printed the front and back end of the LAU-59 pod and I bought the Cardboard tubes from erockets.com. I added BVM hatch latches to attach them to the pylons. Very happy with how this all turned out

Front end of the pod

Back end

Back end again
#142

My Feedback: (13)
Thanks Bob!
todays work centered on wet sanding the tank fins and the flaps. Man I hate this process
i was able to glue the fins on one tank. Iíll do the other one tomorrow
Iíll add a hysol filet around the fins once both sides are done
the first couple pics are of the fins slid roughly into place. They were fitted much tighter later as you see in the later photos


This is what the fins look like when removed. Iím very happy with how this part turned out. The removability works just like I want it to


Tank alongside the fuse
todays work centered on wet sanding the tank fins and the flaps. Man I hate this process
i was able to glue the fins on one tank. Iíll do the other one tomorrow
Iíll add a hysol filet around the fins once both sides are done
the first couple pics are of the fins slid roughly into place. They were fitted much tighter later as you see in the later photos


This is what the fins look like when removed. Iím very happy with how this part turned out. The removability works just like I want it to


Tank alongside the fuse
Last edited by ozief16; 05-11-2020 at 08:46 PM.
The following users liked this post:
Halcyon66 (08-02-2021)
#144

Thread Starter
All looks very familiar.  .
.
I like the Willie Pete rocket pods. I searched the internet high and low to find a pic of that weapon but couldn't find any detail photos at all.
This model is going to be stunning.
 .
. I like the Willie Pete rocket pods. I searched the internet high and low to find a pic of that weapon but couldn't find any detail photos at all.
This model is going to be stunning.
#145

My Feedback: (13)
Roger,
Donít hold your breath quite yet! Still plenty of opportunity to F it away!!! Thank you though. Happy to send you a couple pods if you need for yours. My buddy Sean has been amazing for that. The pods I had fromD4S for those pods absolutely did not compare in the least. They were the wrong size by far and the ends didnít look right at all. Very lucky to run into the people I have.
To me it's about the story. My big F-4 was about the story of it being my dads jet. This one is about this group of guys just trying to stop bullets from making it far enough south to kill young Americans and the stuff they got themselves into. Absolutely phenomenal group of guys doing the J. O B.
#146

My Feedback: (13)
Today I got the second rocket pod to the same place as the first. Amazing how much faster the second one goes once the engineering is figured out
i also did some filling and priming on the vents in the hatch
Finally I glasseD the rudder. Hoping that works out. I squeegeed the excess off towards the aft. Hoping there isnít a huge pile of resin that I have to deal with later
Buck asked me how much more there is today. Great question. Itís a lot of filling and sanding to do next. The aft fuse doesnít fit the forward one all rhat well. Probably because it was later to the D model forward fuse and the F was an afterthought that wasnít quite perfect. Iíve used Evercoat for years as a filler. Buck suggested Dolphin Glaze. He says it sands easier and is just as strong. I may give it a whirl because I hate this process...second only to filling and sanding the flaps/rudder
im guessing another month before paint and a month or so of that and then another month or two weathering it and gearing it up. Hoping to fly it NLT the first of October
Last edited by ozief16; 05-14-2020 at 08:13 PM.
#150

[QUOTE=ozief16;12605790]Guys,
Does anyone have the D4Sinstructions for the nose gear hydraulic unit? I have the molded parts but not the instructions. I can piece it together but much time will be saved if anyone has them
Thanks
Dave

Hi,
you would have the website where you bought it. I need one of these.
😃
Does anyone have the D4Sinstructions for the nose gear hydraulic unit? I have the molded parts but not the instructions. I can piece it together but much time will be saved if anyone has them
Thanks
Dave

Hi,
you would have the website where you bought it. I need one of these.
😃


