Go Back  RCU Forums > RC Airplanes > RC Jets
Reload this Page >

Foamie jet for X45/K45 ?

Community
Search
Notices
RC Jets Discuss RC jets in this forum plus rc turbines and ducted fan power systems

Foamie jet for X45/K45 ?

Thread Tools
 
Search this Thread
 
Old 08-22-2023, 07:51 PM
  #251  
Boomerang1
 
Boomerang1's Avatar
 
Join Date: Jun 2005
Location: Sydney, AUSTRALIA
Posts: 2,963
Received 21 Likes on 11 Posts
Default

Recently inspected (for Australian certification) a Freewing A-10 with two K-45's fitted.

Flew great but the paperwork is noted as speed limited as the factory servos, linkages & horns are probably adequate at best.
Old 08-23-2023, 07:22 AM
  #252  
oachidori
 
Join Date: Sep 2010
Location: bucuresti, ROMANIA
Posts: 17
Received 1 Like on 1 Post
Default

Originally Posted by Aussie1
I made my own custom pipe for the F22, detailed earlier in this thread. The pipe is in two parts, forming a oval on the exit, this allows it to fit within the foam thrust cavity. I also found that I had a slight increase in thrust with my pipe from the X45, I'm guessing that this is due to the convergent to divergent design. This style of pipe was pioneered by Mike Wren many years ago, when he proved that the right pipe design could increase a turbine thrust level slightly, and in my case I measured just under 11lbs of thrust.


can you tell me the length of the circular section? I assume that the total length as i measured for the F22 is around 260 mm, starting from the turbine con.
Old 08-23-2023, 07:29 AM
  #253  
oachidori
 
Join Date: Sep 2010
Location: bucuresti, ROMANIA
Posts: 17
Received 1 Like on 1 Post
Default

Aussie1 i used what you gave me regarding the transformation from circle to ellipse and that is the output..

Old 08-23-2023, 02:29 PM
  #254  
Aussie1
 
Join Date: Jul 2008
Location: AdelaideSth Australia, AUSTRALIA
Posts: 305
Received 8 Likes on 7 Posts
Default

Originally Posted by oachidori
can you tell me the length of the circular section? I assume that the total length as i measured for the F22 is around 260 mm, starting from the turbine con.
The circular section can be any length that makes the pipe fit the installation. With my pipe, the circular section is about the same length as the X45 main body, including the shroud covering the electronics on the front. The inlet funnel is a aluminium McDonalds Coke cup, which conveniently is 50mm in its parallel section. Please understand that no scientific design went into this, I made the pipe to fit the F22 using a previous

My F22 taking off with the centre burner lights at full power.

I'm not sure whose photo this is, but I copied them when doing my research on the turbine conversion. Thanks to the original owner of the photo.

Another type of engine installation, no need for a pipe.

Another home made pipe for my FW L39 conversion.


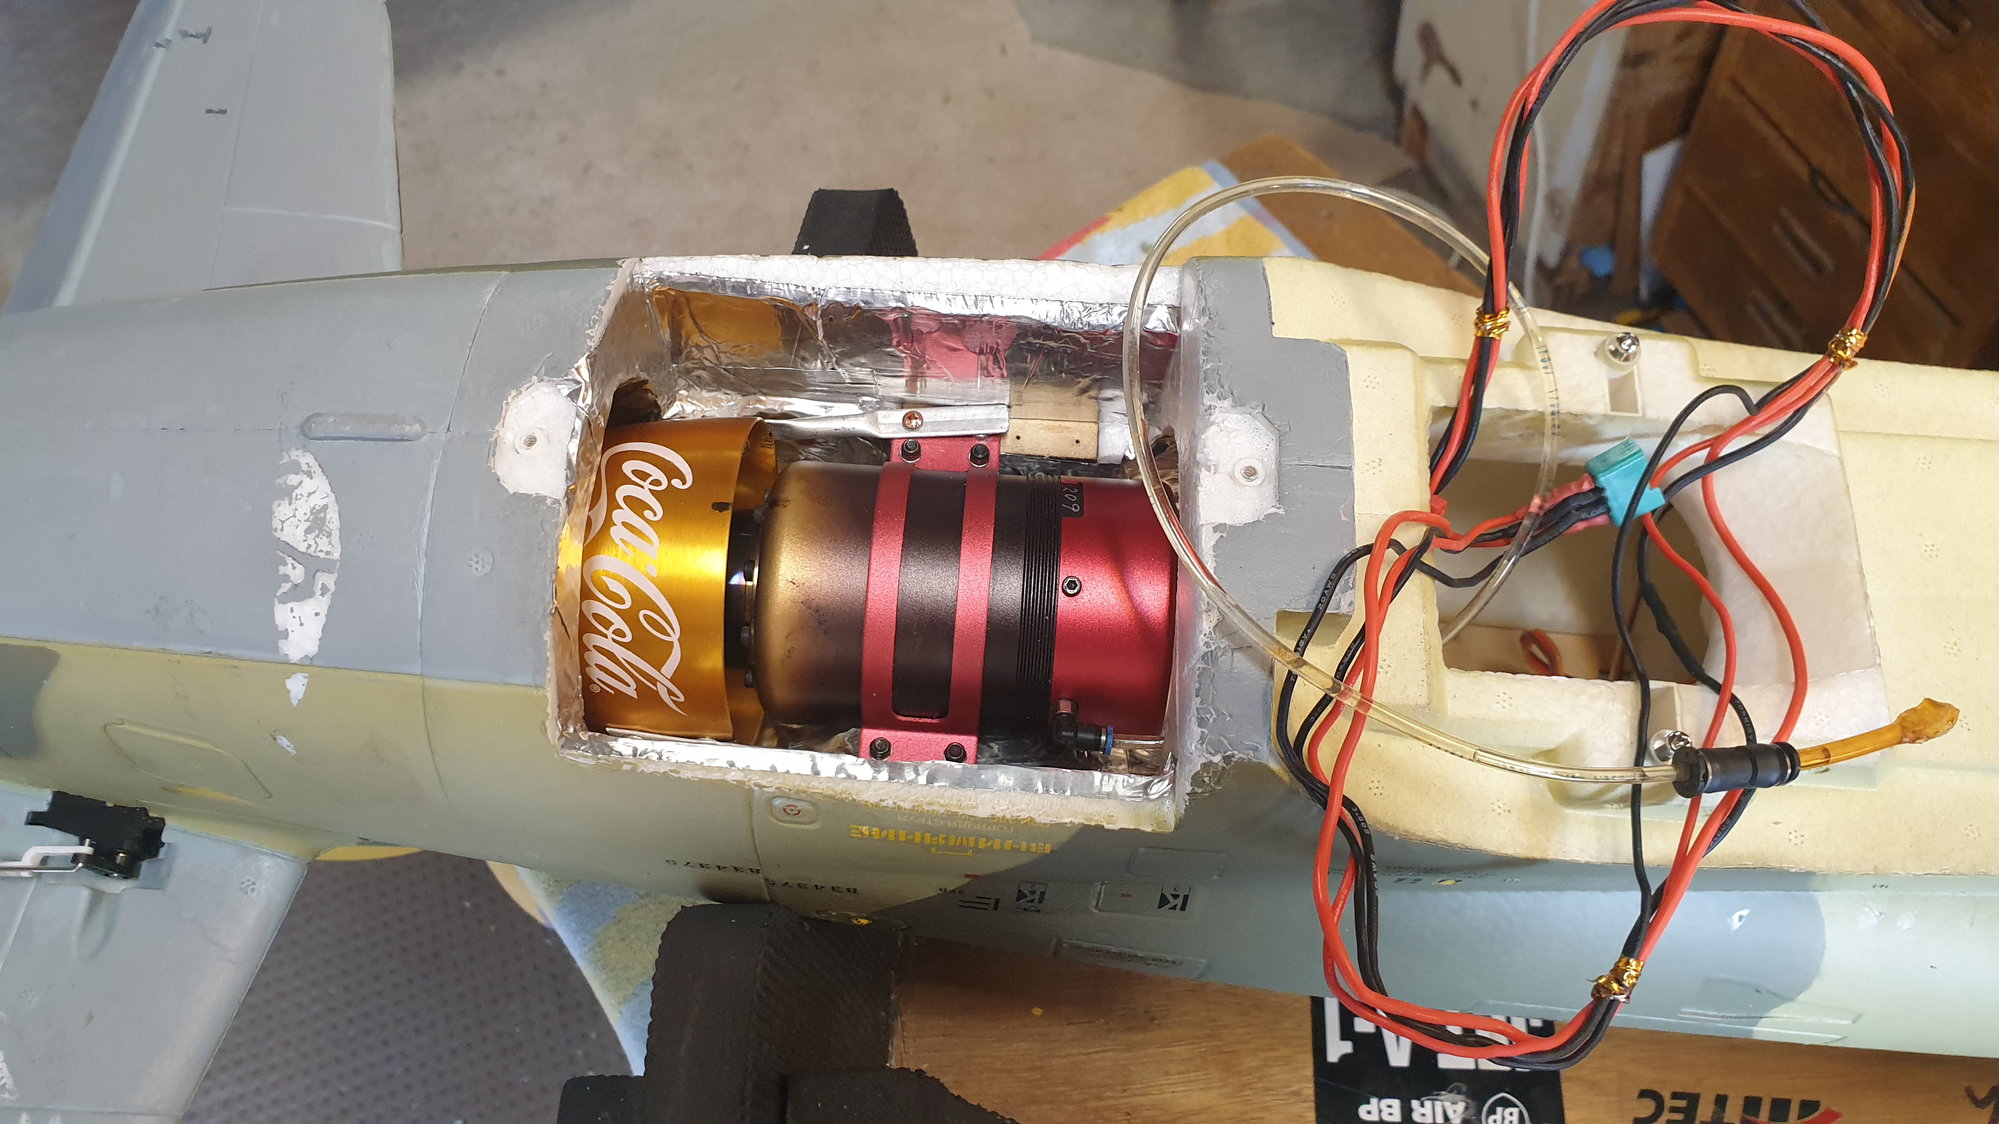
The Coke cup makes a perfect inlet funnel, cheap at $5 each!
concept, and to my surprise, it worked extremely well, plus gave me the advantage of being able to put centre burner lights either side of the thrust tube.
Old 08-23-2023, 05:19 PM
  #255  
Viper1GJ
My Feedback: (20)
 
Viper1GJ's Avatar
 
Join Date: Oct 2003
Location: Saint George , SC
Posts: 2,428
Received 331 Likes on 218 Posts
Default

Originally Posted by Aussie1

I'm not sure whose photo this is, but I copied them when doing my research on the turbine conversion. Thanks to the original owner of the photo.

Another type of engine installation, no need for a pipe.
Aussie1, that's my F-22 conversion. It starts at Post #14 above in this thread. Feel free to use any time!
Gary
Old 08-23-2023, 07:27 PM
  #256  
Aussie1
 
Join Date: Jul 2008
Location: AdelaideSth Australia, AUSTRALIA
Posts: 305
Received 8 Likes on 7 Posts
Default

Originally Posted by Viper1GJ
Aussie1, that's my F-22 conversion. It starts at Post #14 above in this thread. Feel free to use any time!
Gary
Wow, thanks Gary, I should have known it was yours by the high quality of the installation!! I was just trying to show that there are multiple ways of converting this amazing jet to turbine.
Old 09-14-2023, 07:35 AM
  #257  
oachidori
 
Join Date: Sep 2010
Location: bucuresti, ROMANIA
Posts: 17
Received 1 Like on 1 Post
Default

I want to repair and after that to paint the plane. Can you suggest me what i need for that? I never did that, so i need some link with what i have to buy.
tks,
Old 09-14-2023, 08:24 AM
  #258  
Viper1GJ
My Feedback: (20)
 
Viper1GJ's Avatar
 
Join Date: Oct 2003
Location: Saint George , SC
Posts: 2,428
Received 331 Likes on 218 Posts
Default

Originally Posted by oachidori
I want to repair and after that to paint the plane. Can you suggest me what i need for that? I never did that, so i need some link with what i have to buy.
tks,
What are you repairing? Show us some photos of our project.

Foam glue, epoxy, craft glues, and wood glues will all work on the foam.

I use light weight water base wall spackle for filler. Spread it on cracks and let dry and sand smooth.

Almost any kind of paint will work on the foam. I use latex house paint tinted to match in sample size jars. Craft paint will work also. I usually coat the whole plane with water base polyurethane to seal and protect the foam surface. It makes cleaning easier.
Old 09-14-2023, 10:08 AM
  #259  
oachidori
 
Join Date: Sep 2010
Location: bucuresti, ROMANIA
Posts: 17
Received 1 Like on 1 Post
Default

Originally Posted by Viper1GJ
What are you repairing? Show us some photos of our project.

Foam glue, epoxy, craft glues, and wood glues will all work on the foam.

I use light weight water base wall spackle for filler. Spread it on cracks and let dry and sand smooth.

Almost any kind of paint will work on the foam. I use latex house paint tinted to match in sample size jars. Craft paint will work also. I usually coat the whole plane with water base polyurethane to seal and protect the foam surface. It makes cleaning easier.
It is about my F22 with x45, i had some bad landings and i need to fill some small holes. I want to keep this until i will be ready for another F22 this time with straight pipe, but i like to have a good looking plane. I still have some parts from the old one when was electric and i want to practice on them. For that i asked exactly what the people use for the foamies. For other plane from balsa it is easier.. for fill the holes, for painting, for preparing the surfaces..
Old 09-14-2023, 11:49 AM
  #260  
Viper1GJ
My Feedback: (20)
 
Viper1GJ's Avatar
 
Join Date: Oct 2003
Location: Saint George , SC
Posts: 2,428
Received 331 Likes on 218 Posts
Default

All the items I mentioned above will work well on the F-22. I've used them all on many Freewing foamies. Here we can take a part of the plane to the paint stores and get a latex paint color match mixed in a small jar. It is perfect for painting foamies. The light weight spackle is not the heavy plaster stuff but much lighter and sands easy. Just glue, patch, sand, and paint. I also recommend the water base polyurethane top coat.
Old 03-12-2024, 11:35 AM
  #261  
oachidori
 
Join Date: Sep 2010
Location: bucuresti, ROMANIA
Posts: 17
Received 1 Like on 1 Post
Default

Finally because i crashed my plane, i ordered a new one but also i made a new pipe.I respected what said one of you regarding transformation from circle to oval to have the same area, and this is how it looks. I have to say that before ending pipe i will use a carbon fiber support. At the moment the pipe, and soon the entire new plane.


Old 03-12-2024, 02:55 PM
  #262  
Viper1GJ
My Feedback: (20)
 
Viper1GJ's Avatar
 
Join Date: Oct 2003
Location: Saint George , SC
Posts: 2,428
Received 331 Likes on 218 Posts
Default

Nice pipe. How did you make the bell mouth?
Old 03-13-2024, 02:11 AM
  #263  
oachidori
 
Join Date: Sep 2010
Location: bucuresti, ROMANIA
Posts: 17
Received 1 Like on 1 Post
Default

I just kept the bell from the kit ordered from bigboyrc, so the bifurcated kit, and i had a friend who sold me this.
Old 03-23-2024, 05:07 AM
  #264  
oachidori
 
Join Date: Sep 2010
Location: bucuresti, ROMANIA
Posts: 17
Received 1 Like on 1 Post
Default


So i almost finished the plane. I put the pipe an i didn't need to cut the plane, only the inside parts ..That pipe is lighter that the bifurcated with 50 gr. Inside the plane i put some ceramic paper(2 mm thickness), resist at 1200 gr heat and also aluminum tape. I have to cut the support for the pipe(carbon fiber), to remains fixe and that's all. I also painted in black to see the difference between the two faces and be more visible as a pilot.
Old 04-29-2024, 07:50 AM
  #265  
oachidori
 
Join Date: Sep 2010
Location: bucuresti, ROMANIA
Posts: 17
Received 1 Like on 1 Post
Default

And the movie with one of the flights..it is a big difference in matter of power and consumption, with this pipe and 1 l tank, i flew around 10 min..
The following users liked this post:
Viper1GJ (04-29-2024)
Old 04-29-2024, 11:36 AM
  #266  
Viper1GJ
My Feedback: (20)
 
Viper1GJ's Avatar
 
Join Date: Oct 2003
Location: Saint George , SC
Posts: 2,428
Received 331 Likes on 218 Posts
Default

New pipe and paint looks great. I think the F-22 was one of my all time favorites. Great job. Thanks for sharing the pics!
Gary
Old 04-29-2024, 02:45 PM
  #267  
Aussie1
 
Join Date: Jul 2008
Location: AdelaideSth Australia, AUSTRALIA
Posts: 305
Received 8 Likes on 7 Posts
Default

Originally Posted by oachidori
And the movie with one of the flights..it is a big difference in matter of power and consumption, with this pipe and 1 l tank, i flew around 10 min..
https://www.youtube.com/watch?v=ya6k1HyNVHk
Great video! I have very similar flight times and almost unlimited vertical performance with my oval single pipe, plus it allows the use of centre burner lights either side, which looks very cool!
The following 2 users liked this post by Aussie1:
oachidori (05-04-2024), Viper1GJ (04-29-2024)

Posting Rules
You may not post new threads
You may not post replies
You may not post attachments
You may not edit your posts

BB code is On
Smilies are On
[IMG] code is On
HTML code is Off


Contact Us - Manage Preferences - Archive - Advertising - Cookie Policy - Privacy Statement - Terms of Service -

Copyright © 2024 MH Sub I, LLC dba Internet Brands. All rights reserved. Use of this site indicates your consent to the Terms of Use.