


Foamie jet for X45/K45 ?

 05-28-2020, 09:27 AM
#80

My Feedback: (2)
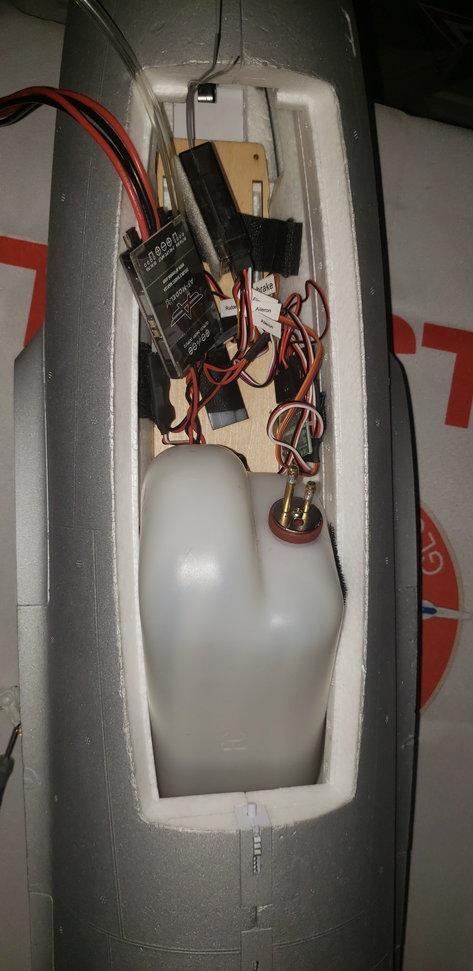
Finally got the maiden done on the F22. Kind of a pig, what with the 6 cell setup and the extra half pound added with the JP brakes system. But the goal was to get it trimed out and flying straight before starting the turbine conversion. So that's done. A couple of pics to show the JP brakes set up.

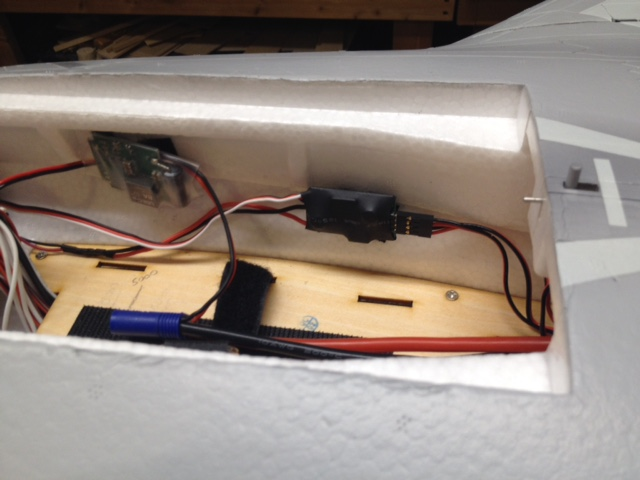
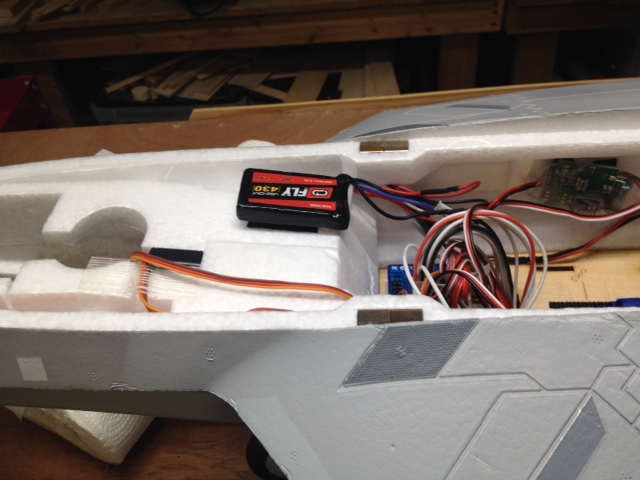
The canopy fits right over this battery location.
The canopy fits right over this battery location.
05-29-2020, 06:13 PM
#83
My Feedback: (20)
I use a single 3s LiFe 2200 battery. I've been using a Castle Pro BEC set for 5.7 volts. I run the RX and Freewing airplanes at 5.7 off the BEC and the JP brakes and ECU direct off of the 9.9v LIFe battery. So far everything works great.
Gary
Gary
06-03-2020, 04:05 AM
#85

Join Date: Nov 2005
Location: Easley,
SC
Posts: 145
Likes: 0
Received 0 Likes
on
0 Posts
Sorry for the slow reply. The UAT can be printed in PETG or ABS. If printed in clear it is just translucent enough to see bubbles and fuel. I use a SIX10 resin epoxy to coat inside and out. Then epoxy the lines in place and seal tank together. It is not serviceable but for 50 cents you can just replace it. I bought a bag of 10 felt pickup a couple years ago which are used in an ATV or lawn mower type application. Will try to find the part number but any of them will work. Here is the link to the Thingiverse file.
https://www.thingiverse.com/thing:4305344
I used Fusion360 hobbiest software to create the model so legally I can't sell them.
https://www.thingiverse.com/thing:4305344
I used Fusion360 hobbiest software to create the model so legally I can't sell them.
06-03-2020, 01:52 PM
#86
I have the same felt clunk and it was 5 bucks from a lawnmower shop. I think that it fits into a brush cutter tank.
https://www.amazon.com.au/HIPA-Repla.../dp/B00X43DH0K
https://www.amazon.com.au/HIPA-Repla.../dp/B00X43DH0K
06-03-2020, 02:31 PM
#87
Join Date: Nov 2005
Location: Easley,
SC
Posts: 145
Likes: 0
Received 0 Likes
on
0 Posts
These are the ones I'm using but there are many options including metal rock type filters. Many have just used an open tube pick up in the middle of the tank and it seems to work well.
https://www.ebay.com/itm/391897099736
https://www.ebay.com/itm/391897099736
06-05-2020, 02:45 PM
#88
My Feedback: (2)
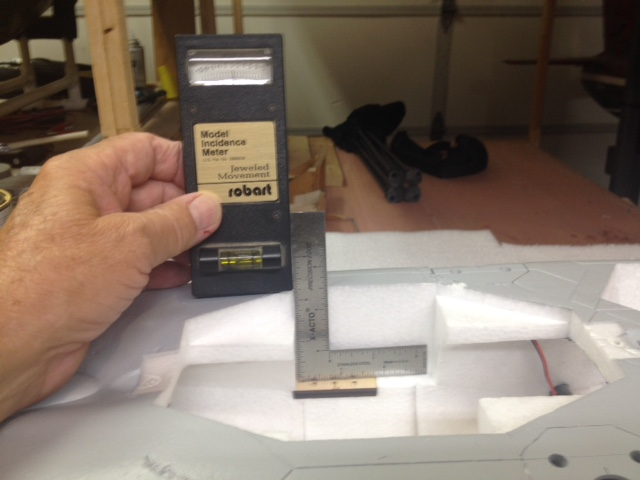
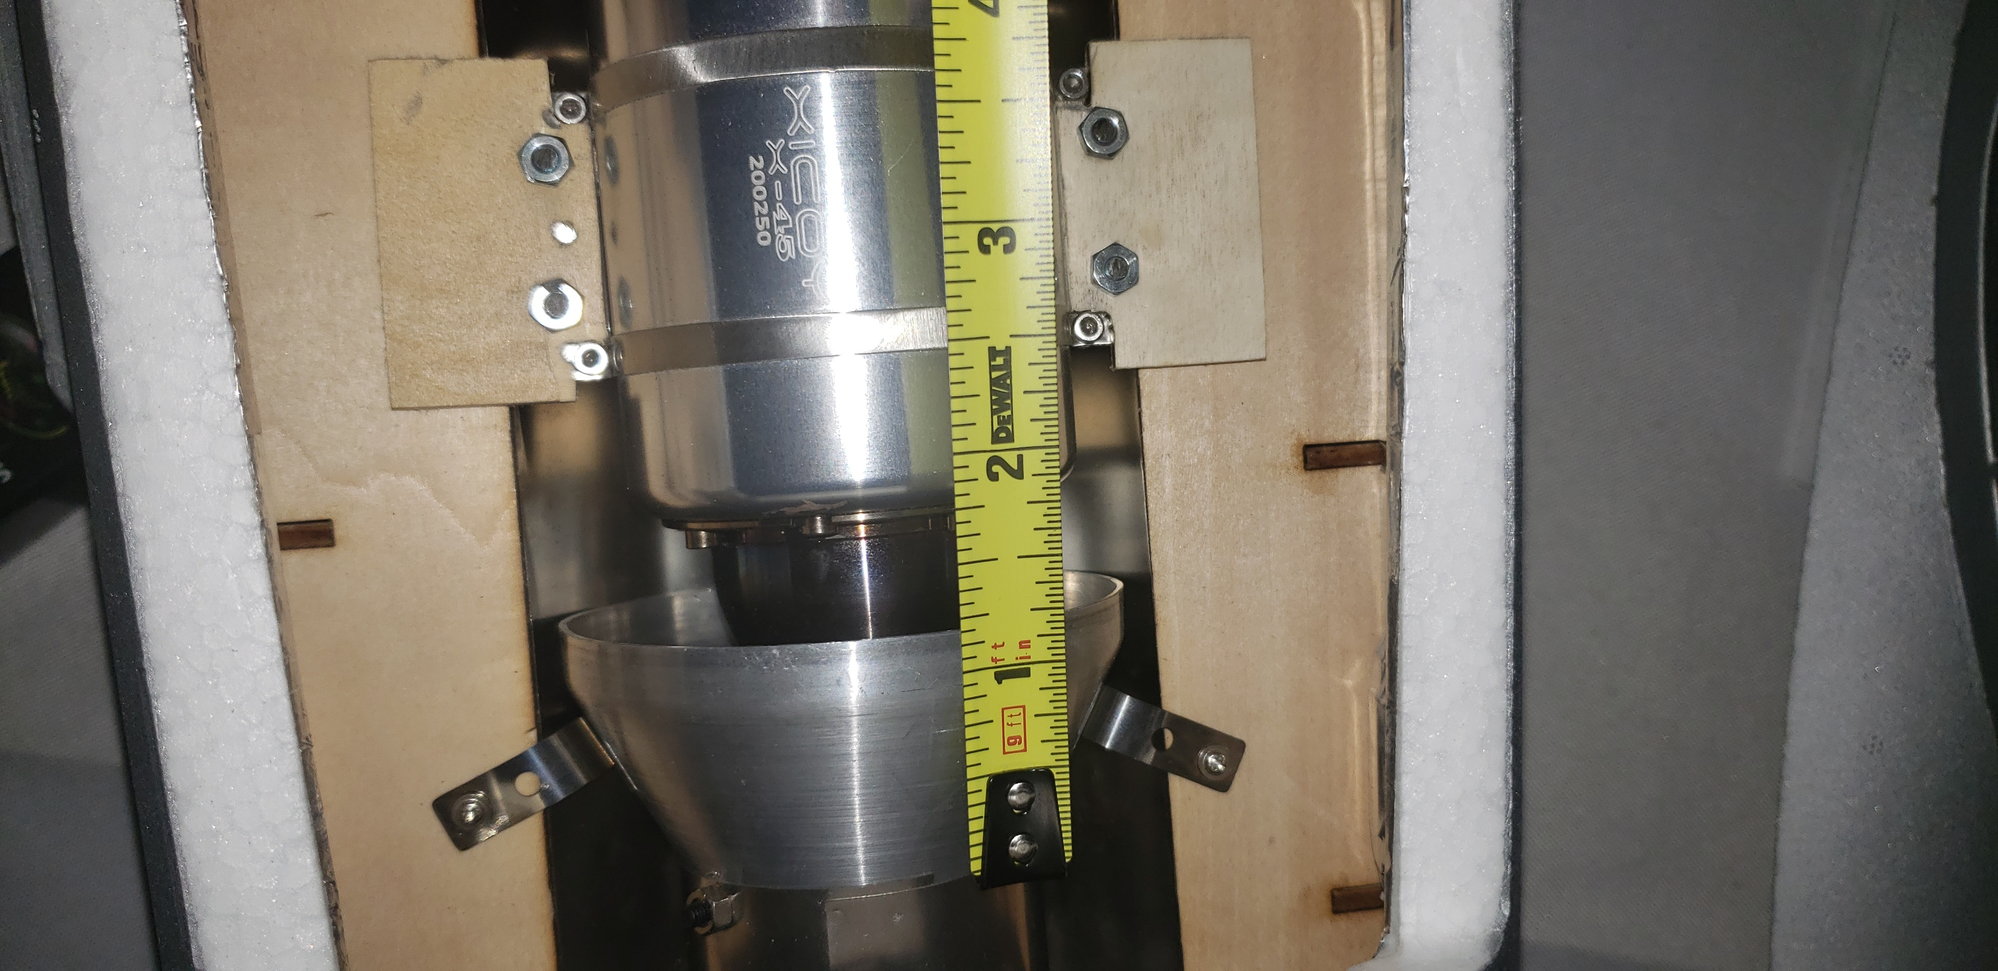
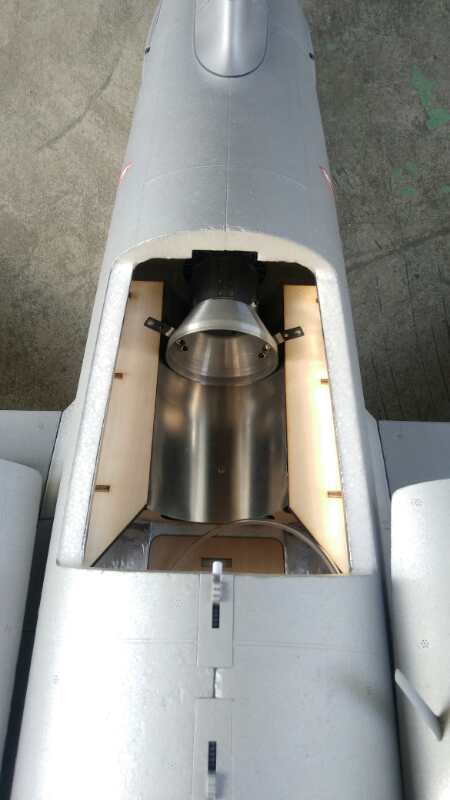
While waiting for the turbine for the Freewing F22 project I have lots of time to think about stuff like how to get the turbine at the same thrust angle as the EDF fan. Not many straight lines for reference on the F22 fuse. Took the indicator off my incidence meter and set it on the fan mount. If I match the reading at the exhaust nozzle on the turbine I should be good.


 06-07-2020, 07:31 AM
#92
My Feedback: (2)
These are the ones I'm using but there are many options including metal rock type filters. Many have just used an open tube pick up in the middle of the tank and it seems to work well.
https://www.ebay.com/itm/391897099736
https://www.ebay.com/itm/391897099736
Thanks, I use Fusion for model projects also.
06-07-2020, 07:41 AM
#93
Hey Ralph
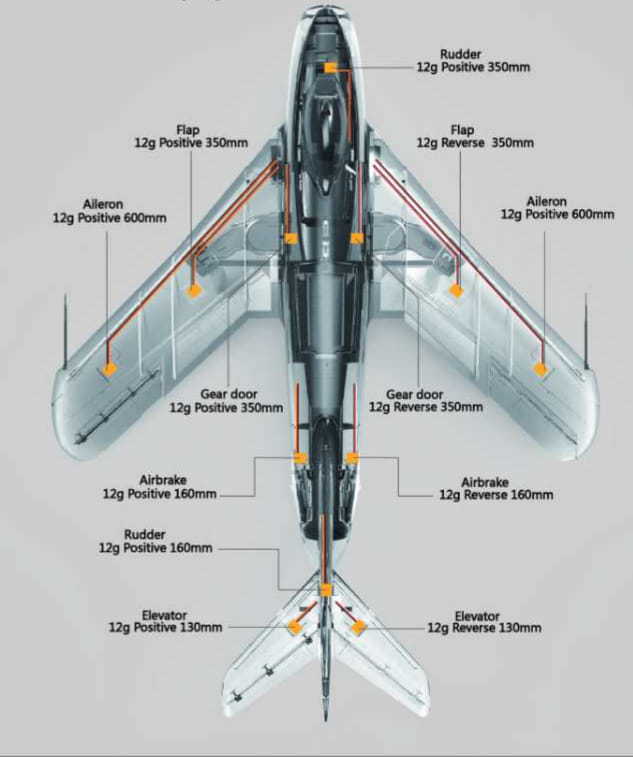
If I could make some suggestions based on my Avios Mig 17 / X45 experience.
- Limit the fuel size to around 35-40 oz max. The Mig only needs around 30N to fly very, very well. The flight time
will easy 8:00 with mixed throttle on 35 oz.
- Cut back on all that turbine mounting wood. Its just added weight. Nix the aluminum heat shield. Add some aluminum tape
if you makes you feel better.
Otherwise I like the easy turbine access. I would buy one if the price is right. I really enjoy flying my Avios version
DW
06-12-2020, 01:00 PM
#94
My Feedback: (2)
Gary, I wonder about your weight and balance on the F22 after you added the JP brake set. I saw about an 8 ounce increase when switching to the JP's. and that is aft of the CG of course. When I did a check on mine with the X45 sitting where you put your K45, with the 32 oz. dubro tank sitting 2 inches forward of the book cg, and battery at the nose, plus pump and uat along with a couple ounces of weight to allow for uat fuel weight placed up front it still said add one pound to get book CG! That would would give me approximately 9 lbs dry.
Last edited by dwr302; 06-12-2020 at 01:05 PM.
06-12-2020, 03:09 PM
#95
My Feedback: (20)
I think that would be about right. I remember the empty weight was 8.4 lbs with out the JP brakes. That was also before I added the MAP 2 oz air trap tank. I think I remember the brakes were 6-8 oz so that's about .5 lb. So about 9 lbs would be correct. I'm away from home till next week. I can put the F-22 on the Xicoy CG machine again and give you the current weight and CG. I'm sure my CG is aft of the book recommendation but not sure by how much.
 06-16-2020, 03:06 PM
#100
My Feedback: (2)
The 32 oz. Dubro tank fits pretty well. Back of the tank sits against the spar and the front against the aft end of the cockpit area. A quarter inch shim/bracket above the tank makes for a snug fit for the hatch below. A lug on either side of the hatch will keep it from moving from side to side. The passages down the sides of the tank are greater than the minimum 60mmm diameter area that Gaspar recommends for the X45.

