


2008 the year of the Turbinator

 01-31-2017, 09:06 AM
#427
Nice!
If you do let me know, there are a few steps that will challenge your reasoning and after reading through the instructions a few times you get the idea how Nick builds ( first time for me )
I was thinking of doing a bit of editing to the instructions to make them a little friendlier to the user, to add mostly to the building steps, some of the steps don't tell you how to complete the part, the idea of posting all the pictures is to help visualize the building process, the pictures on Nick's site are good but more details will be nice to have.
I was told just yesterday what the jet looked like on the picture just 10 days ago.
Last edited by CARS II; 02-25-2017 at 12:06 PM.
 02-01-2017, 07:28 PM
#435
On the pictures above you can see that I've been preparing the ribs, since I'm going to make a mod on the main gear mount the ribs W4-5 have been reassembled and the doublers modified, also added an extra doubler rib made out of 1/8 aircraft ply ( more change there later )
I have also made sure that the dowel that goes in between rib one and the cross plate is going to fit just fine when the time comes to glue it.
This part is what takes the most time, to make sure the first steps on building are carefully done so the rest will follow without any stress.
Notice the rib shim across W1 to W 11-12 this is to build a washout on the tip of the wing, I've never done this before, it's interesting how it works, with that W2 was falling into it because of the cut out for the spar, the solution to prevent that is on the picture.
With this build I've been remainded to read/confirm/test the next two steps to make sure the build doesn't encounter any hick ups that I may have to fix later.
Last edited by CARS II; 02-08-2017 at 08:59 AM.
02-03-2017, 12:30 AM
#437
I'm now enjoying building the wings, very clean but you have to study the plans carefully so you don't miss a step also I found two different notes on the wings's drawings regarding a small spar, it tells you balsa in one and hard wood on the other.
There is also no mention of a small joiner in-between the flap and ailerons.


There is also no mention of a small joiner in-between the flap and ailerons.
Last edited by CARS II; 02-03-2017 at 01:16 PM.
02-04-2017, 12:21 AM
#438
The wing is on its way, I made me a set of much needed sanding blocks, this is the new and improved gear mount, it took a bit of time to get to the right pattern but is done, tomorrow I will cut another plate and will make the cutouts smaller.


Last edited by CARS II; 02-04-2017 at 02:51 AM.
02-04-2017, 05:51 PM
#439
I just spend a few hours making the new parts for the main gear, it takes timed when a mod this important is made, after this the build should go as per the instructions ( really? )  the gear mount is where I spend time making sure it's going to hold on a hard or off runway landing.
I will have to add that I don't have any power tools except for my Dremel like rotory tool, anything that needs to be cut I do it by hand with my small saw, that is a reason why it takes me time to cut a part of two.
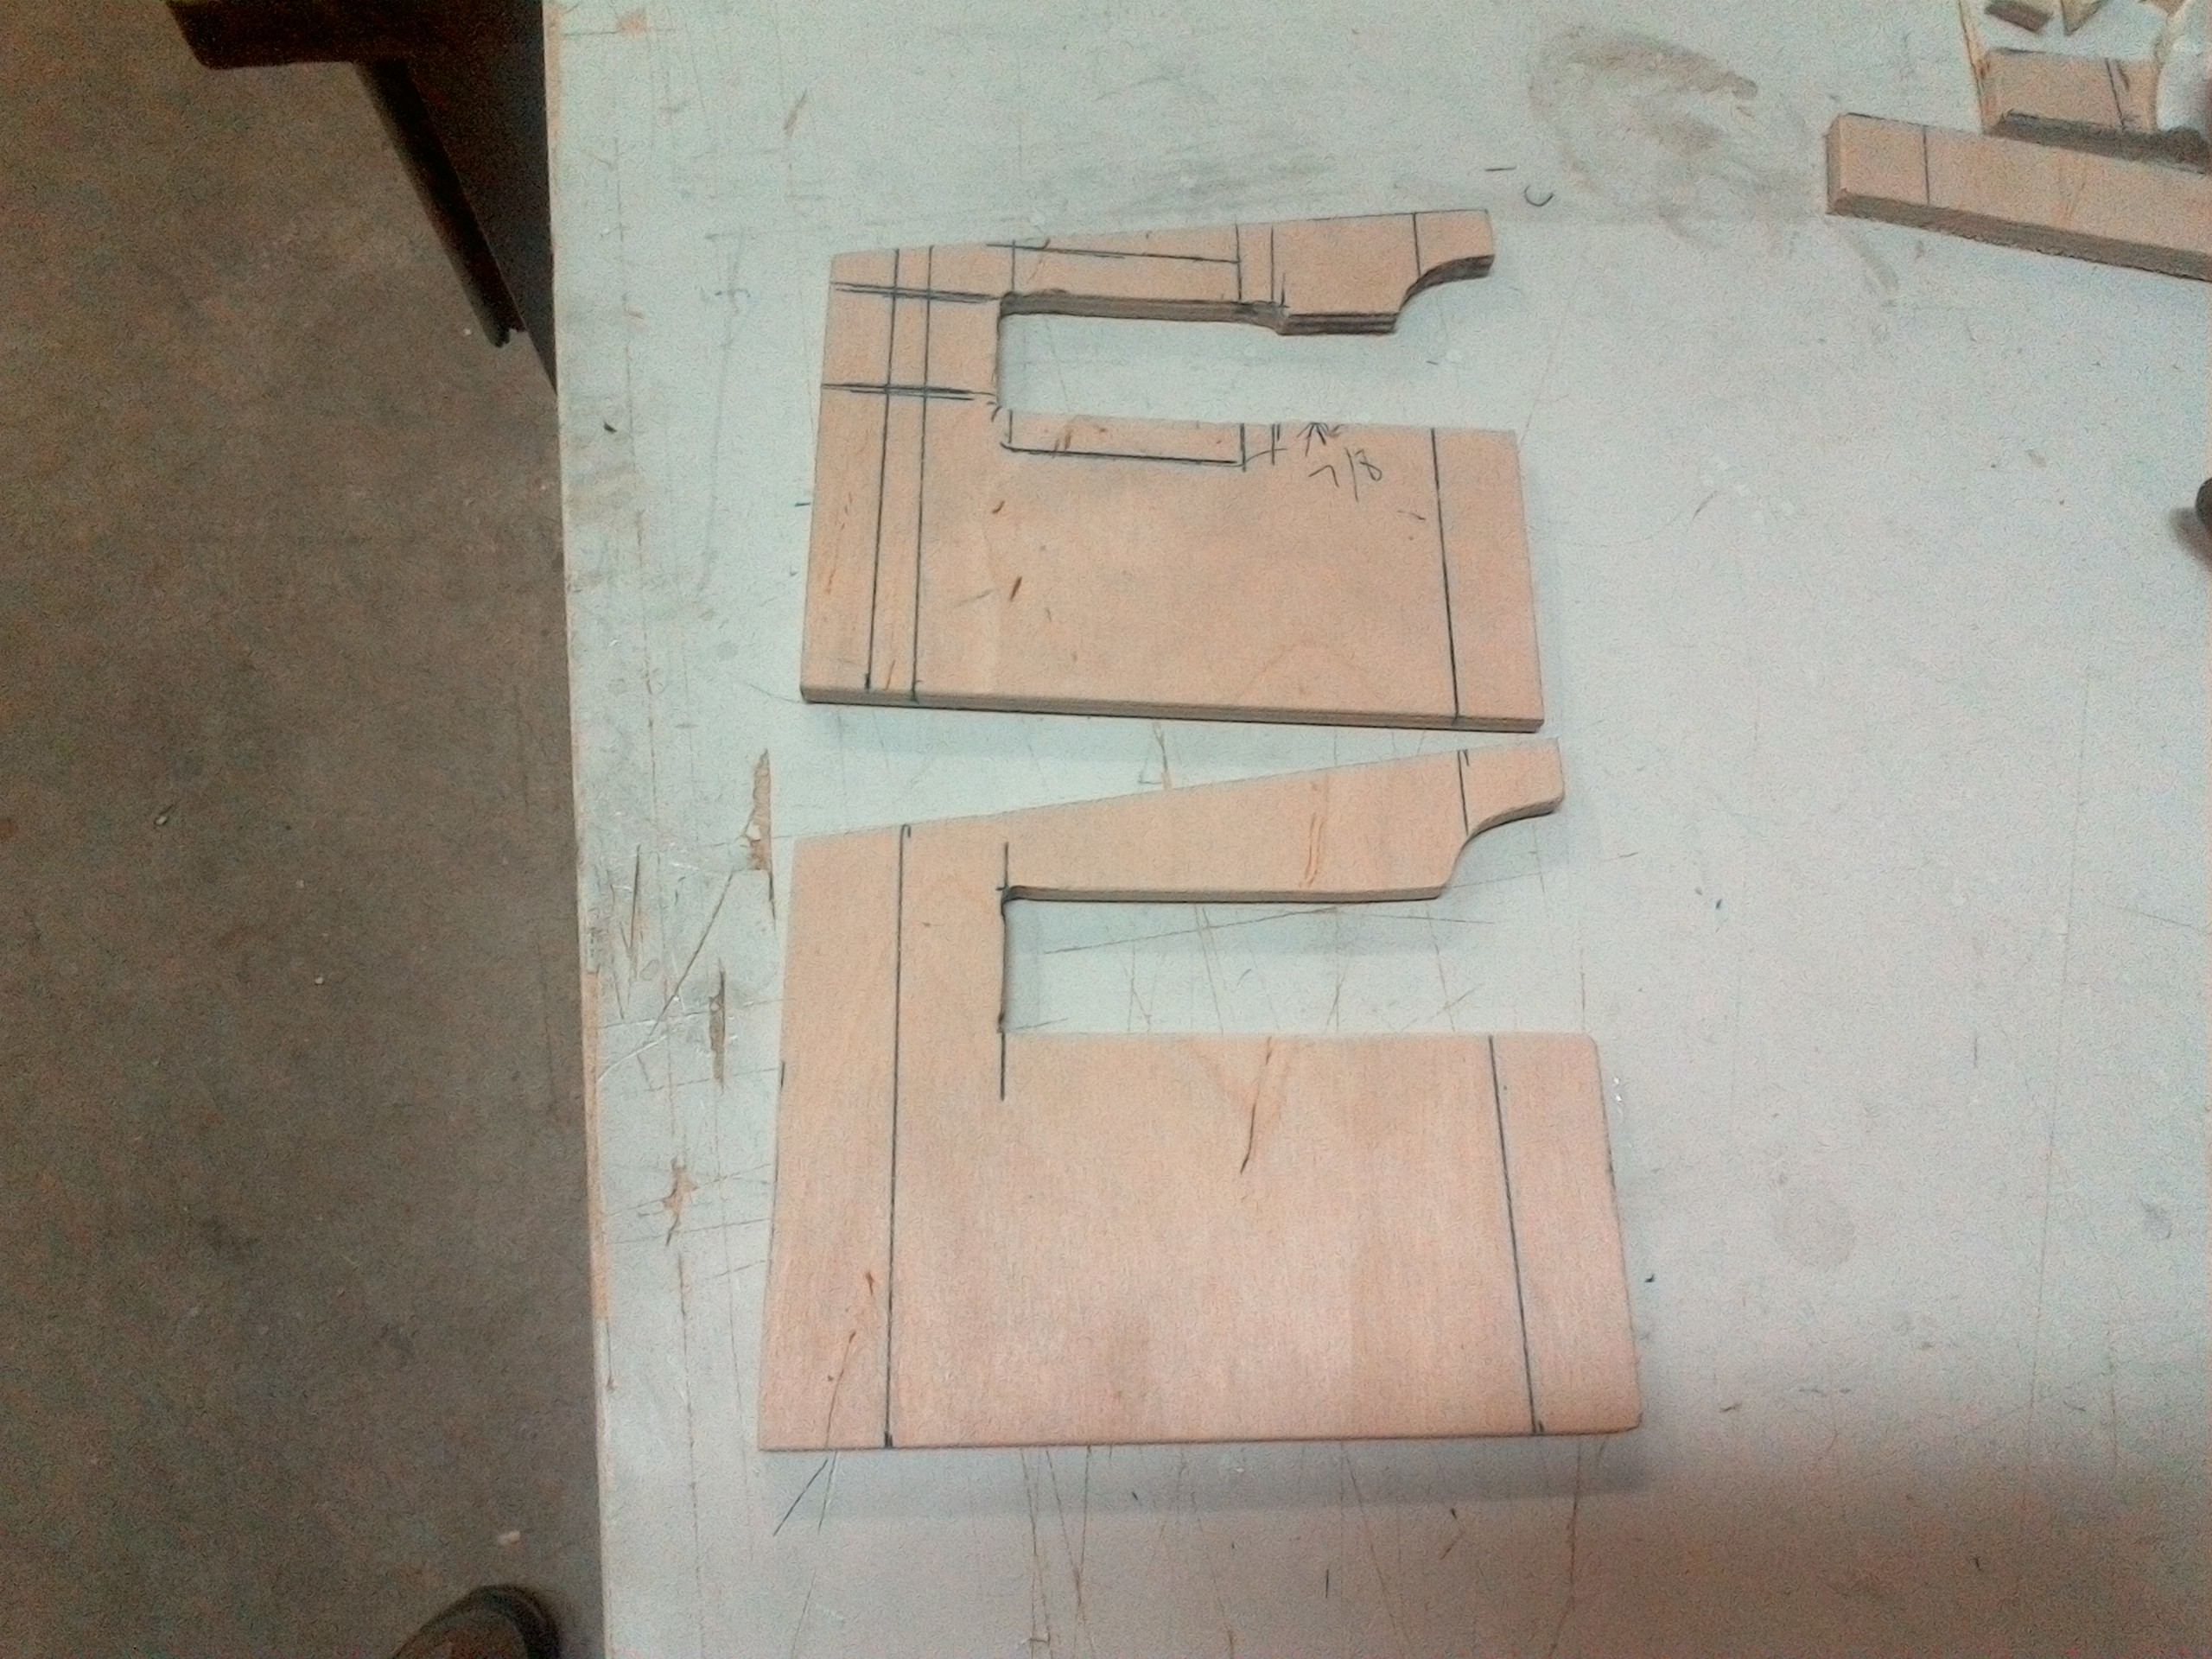


the gear mount is where I spend time making sure it's going to hold on a hard or off runway landing.I will have to add that I don't have any power tools except for my Dremel like rotory tool, anything that needs to be cut I do it by hand with my small saw, that is a reason why it takes me time to cut a part of two.
Last edited by CARS II; 02-24-2017 at 10:58 PM.
 02-04-2017, 07:48 PM
#441
I've had the retracts since 2008 I believe, the set came out of a Fei Bao T-45, ( second one that year ) these are Chinese that Fei Bao used to sell.
If I had to buy a set my choice would've been Robart 530 or 550. The ones I have are comparable to those except the nose, that one can take up to 40 to 50 punds, since it needs nose weight anyways I thought I use that one.
Anything that is used in a Reaction can be used in the Turbinator, they both have similar weights and are about the same size.
Last edited by CARS II; 02-25-2017 at 12:14 PM.
02-05-2017, 06:13 PM
#442
Second wing is on the way, this is about 4 hrs of building, less time to get here compared to the time spend on the first wing.
I already have the extra doublers and cutting patterns for the retract ribs and other small parts.

I already have the extra doublers and cutting patterns for the retract ribs and other small parts.
Last edited by CARS II; 02-06-2017 at 09:47 AM.
02-05-2017, 06:15 PM
#443
Second wing is on the way, this is about 4 hrs of building, less time to get here compared to the time spend on the first wing.
I already have the extra doublers and cutting patterns for the retract ribs and other small parts.
I need to get me some 1/2 triangular sticks for the gear plate to complete that, I wanted to keep the building going today, and decided to start the build of the left wing, after the gear plate is completed the sheeting goes on, I can do that tomorrow
So far the temperature in the garage is fine, occasionally heavy rain outside, 4 hrs, 2 coffee cups, dinner, 2 Sierra Nevada beers, more building ( 4 more hrs? Perhaps. )
Building with the 80s music


I already have the extra doublers and cutting patterns for the retract ribs and other small parts.
I need to get me some 1/2 triangular sticks for the gear plate to complete that, I wanted to keep the building going today, and decided to start the build of the left wing, after the gear plate is completed the sheeting goes on, I can do that tomorrow
So far the temperature in the garage is fine, occasionally heavy rain outside, 4 hrs, 2 coffee cups, dinner, 2 Sierra Nevada beers, more building ( 4 more hrs? Perhaps
. )Building with the 80s music
Last edited by CARS II; 02-06-2017 at 09:49 AM.
02-05-2017, 11:09 PM
#444
OK
4 hours later the left wing is at the building point as the right, I'm leaving the gear plate epoxy to cure over night,
Tomorrow after I glue the try stock wood to the gear plates then some light sanding over the ribs, after that it will be time to start sheeting the wings.


4 hours later the left wing is at the building point as the right, I'm leaving the gear plate epoxy to cure over night,
Tomorrow after I glue the try stock wood to the gear plates then some light sanding over the ribs, after that it will be time to start sheeting the wings.
Last edited by CARS II; 02-06-2017 at 09:52 AM.
02-06-2017, 06:22 PM
#447

My Feedback: (12)
Join Date: Dec 2001
Location: reisterstown, MD
Posts: 1,864
Likes: 0
Received 0 Likes
on
0 Posts
You'll be happy you beefed it up like you did. I had both of mine fail as per the plans on my std sized one on the first couple of landings and all were greasers. I then beefed mine up with better ply and carbon fiber. No issues since. My big one has a foam core wing so the gear is in differently but nice and strong from what I learned on the std sized one. You'll love how it flies. Like a huge kaos!
02-06-2017, 07:59 PM
#448
OK then.
I'm loving it already, I build a few Kaos in the past and they were very nice flyers.
I've been doing the beefing on all my build and ARF for a while now, it is really annoying to have the mains fail on a new airplane.
Thank you for info Ron
I'm loving it already, I build a few Kaos in the past and they were very nice flyers.
I've been doing the beefing on all my build and ARF for a while now, it is really annoying to have the mains fail on a new airplane.
Thank you for info Ron
Last edited by CARS II; 02-06-2017 at 08:02 PM.
02-07-2017, 10:54 PM
#449
I've been working on the small details on the wing and giving myself a few days to go over the wing drawings to make sure I'm not forgetting the small things.like the servo boxes, they're not mention on the instructions or the plans, it's something that the builder has to come up with, of how he wants it detail ( just a hole, cover, no cover, servo sticking out or not ) it takes time to think of the final product and base on the image the builder can decide how to proceed with the final looks of the part, in this case the servo mounting hole.
I'm ready to start sheeting the wings but before that again, I've been looking at the flaps and ailerons drawings to make sure that everything is in place and how I will proceed with the sheeting.
The servos mounts on the wing are going to have a frame and the servo will be covered by a 1/32 ply lid with a hole for the servo gear to stick out, only the servo arm will be visible.
Last edited by CARS II; 02-08-2017 at 09:17 AM.